Free Crochet 14cm Kawaii Low-Sew Witch Girl Plushie for Halloween

Save this Crafty Article

Talha
Author: Talha
I am a crochet designer, macramé maker and a crafter who also loves doing MATH.
Lyubov of Love Knitting
Contributor: Lyubov of Love Knitting
She is a Ukrainian crochet plushie designer and our most favorite crocheter. She became our contributor on mid 2026 through mycraftybasket.

Love-Knitting, here!

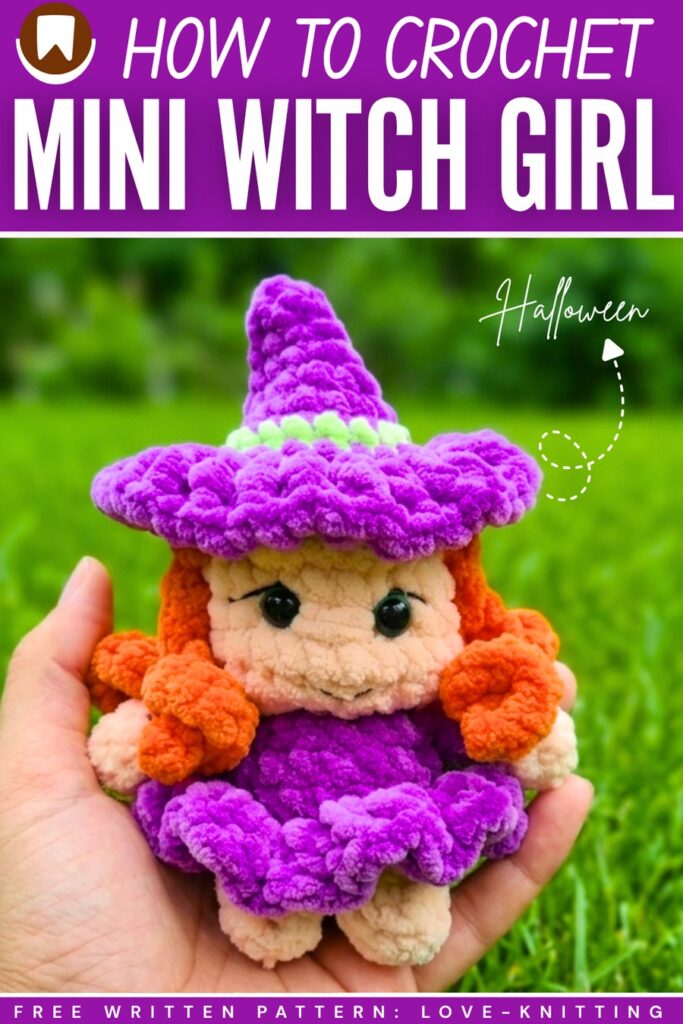
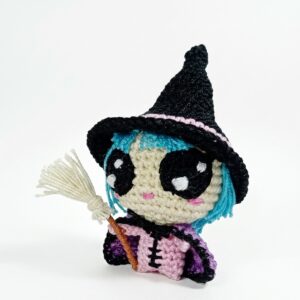
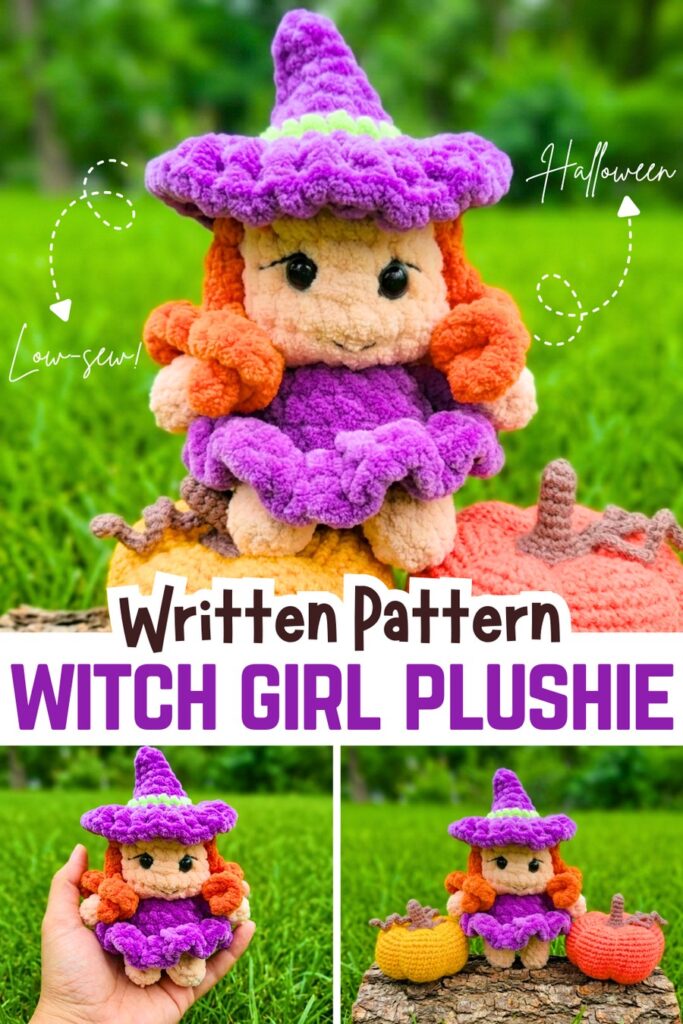
Looking for an irresistible crochet Halloween present for a little girl? Learn how to crochet this low-sew witch girl plushie wearing a CUTE ruffled skirt dress and a crochet witch hat. With the super bulky yarn, you can crochet this Halloween girl plushie within 45 minutes. It will also make a welcome Halloween decoration for party guests.

With the eyebrows, eyelashes, no-sew nose, and glitter eyes, it is definitely the cutest crochet witch girl plushie. You will also like her curly orange hair and her smile. It just measures 14 cm using the super bulky velvet yarn. So, be sure to crochet this Halloween girl plushie even if you are looking for a last-minute present!
How to Crochet Witch Girl the Cutest Halloween Doll

This project is an adorable, pocket-sized amigurumi witch doll made with super-soft plush yarn. It stands around 14 to 15 centimeters tall and uses a clever, seamless design. Instead of crocheting everything separately and sewing it together at the end, you crochet the arms and legs first.

Then, you connect the legs to build the body, crochet the arms directly into the sides as you go, and finish by shaping the head in one continuous piece. This gives you a fast, sturdy base doll that you can easily customize with clothes, hair, or hats later!

Materials

  • Yarn: Plush/chenille yarn (100g / 120m thickness) in a Skin Color and a Clothing/Body Color.
  • Crochet Hook: 4.0 mm
  • Safety Eyes: 10 mm
  • Stuffing: Fiberfill (poly-fill)
  • Tools: Yarn needle, scissors, and a stitch marker to keep track of your rows.

Abbreviations (US Terms)

  • MR: Magic Ring (an adjustable loop used to start crocheting in the round)
  • sc: Single crochet
  • inc: Increase (work 2 single crochets into the exact same stitch to grow the round)
  • dec: Decrease (crochet 2 stitches together to shrink the round; an invisible decrease looks cleanest with plush yarn)
  • BLO: Back Loops Only (crocheting only into the strand of the stitch furthest away from you)
  • st(s): Stitch(es)
  • [number]: The total number of stitches you should have at the end of that round.

Base Doll Pattern

Arms (Make 2)

Start with your Skin Color yarn. Do not stuff the arms.

  • Round 1: 6 sc into a MR [6]
  • Round 2: 6 sc [6] Change to your Clothing Color yarn in the very last stitch of this round.
  • Round 3: 6 sc [6]
  • Round 4: 6 sc [6]
  • Press the top opening of the arm flat so the stitches line up side-by-side. Crochet 3 sc directly through both layers to close the opening. Cut the yarn, fasten off, and set them aside for later.

Are you a Beginner?

In case you can’t follow the written pattern, continue with the following tutorial or the written pattern below!

Legs (Make 2)

Start with your Skin Color yarn.

  • Round 1: 6 sc into a MR [6]
  • Round 2: 6 sc [6]
  • Round 3: (1 sc, inc) repeated 3 times [9]
  • For the First Leg: Cut the yarn and fasten off.
  • For the Second Leg: Do not cut the yarn! Change to your Clothing Color yarn in the very last stitch of Round 3, and keep your hook in place to start joining the legs together for the body.

Body

Continuing with your Clothing Color yarn, right from the second leg.

  • Round 4: Crochet 9 sc all the way around the first leg, then jump over and crochet 9 sc all the way around the second leg [18] (Tip: To make sure there isn’t a loose gap between the legs, you can pull up a loop in the joint space and work it together with your next stitch).
  • Round 5: inc, 8 sc, inc, 8 sc [20]
  • Round 6: 20 sc [20]
  • Round 7: 20 sc worked into the BLO [20] (Note: This leaves the front loops untouched on the outside of the doll, giving you a perfect ledge to attach a skirt later).
  • Round 8: 4 sc, dec, 8 sc, dec, 4 sc [18]
  • Round 9 (Joining the Arms): In this round, you will securely attach the arms by crocheting through both the arm layer and the body layer at the same time:
    • 4 sc on the body
    • 3 sc joining the first arm
    • 6 sc on the body
    • 3 sc joining the second arm
    • 2 sc on the body [18 total stitches around]
  • Stuff the body firmly with fiberfill.
  • Round 10: (1 sc, dec) repeated 6 times [12] Change back to your Skin Color yarn in the last stitch. Cut and secure your clothing yarn.

Head

Continuing with your Skin Color yarn.

  • Round 11: 12 inc [24]
  • Rounds 12–16: 24 sc [24] (Repeat 24 sc for 5 rounds total) Eye Placement: Insert your 10 mm safety eyes between Rounds 14 and 15, leaving 4 empty stitches between them. Secure the backings tightly inside the head.
  • Round 17: (2 sc, dec) repeated 6 times [18]
  • Stuff the lower head and neck area firmly so the head doesn’t wobble.
  • Round 18: (1 sc, dec) repeated 6 times [12] Add your final bits of stuffing to shape the upper head firmly.

  • Round 19: 6 dec [6]
  • Cut your yarn leaving a small tail. Use a yarn needle to weave the tail through the front loops of the remaining 6 stitches, pull tight like a drawstring to close up the head neatly, and knot and hide the loose end inside the doll.

Wanna Save for Later?

Hat Pattern

The hat is worked in rounds starting from a magic ring.

  • Row 1: 6 single crochet (sc) in the magic ring.

  • Row 2: 6 sc (one in each stitch).

  • Row 3: 1 sc, increase — repeat 3 times (total: 9 sc).

  • Row 4: 2 sc, increase — repeat 3 times (total: 12 sc).

  • Row 5: 3 sc, increase — repeat 3 times (total: 15 sc).

  • Row 6: 4 sc, increase — repeat 3 times (total: 18 sc).

  • Row 7: 5 sc, increase — repeat 3 times (total: 21 sc).

  • Row 8: 6 sc, increase — repeat 3 times (total: 24 sc).

  • Brim: Work into the back loops of the previous row. Chain 3 (for height), then crochet double crochets into the back loops. Depending on your yarn tension, you can work 2 or 3 double crochets into each stitch to create the flare of the brim.

Hair Pattern

The hair is created by attaching yarn directly to the doll’s head around the perimeter where the hat will sit.

  • Method: Once the contour for the hat is marked, join the yarn with a slip stitch.

  • Creating Curls:

    • Chain a desired number of stitches (e.g., 4 to 9).

    • Working back down the chain, crochet single crochets (2 or 3 per chain stitch depending on desired curl). This will cause the hair to naturally curl.

    • Secure the curl to the head with a slip stitch, moving slightly along the marked contour, and repeat the process to create the full hairstyle.

Share on Social Media!

Save this Crafty Article

Leave a Reply

Your email address will not be published. Required fields are marked *