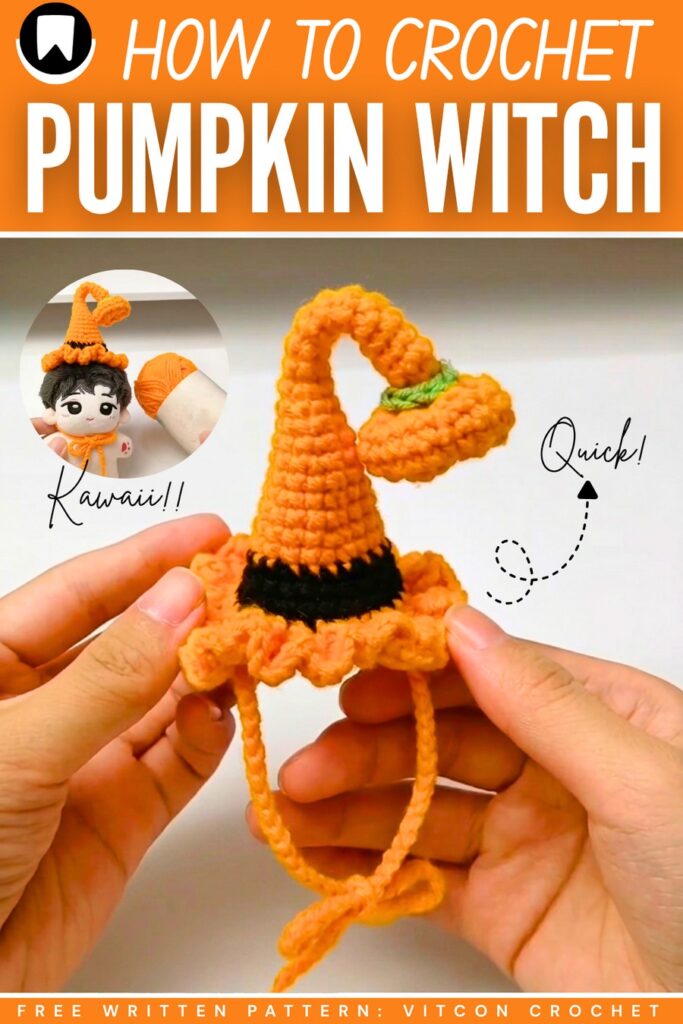
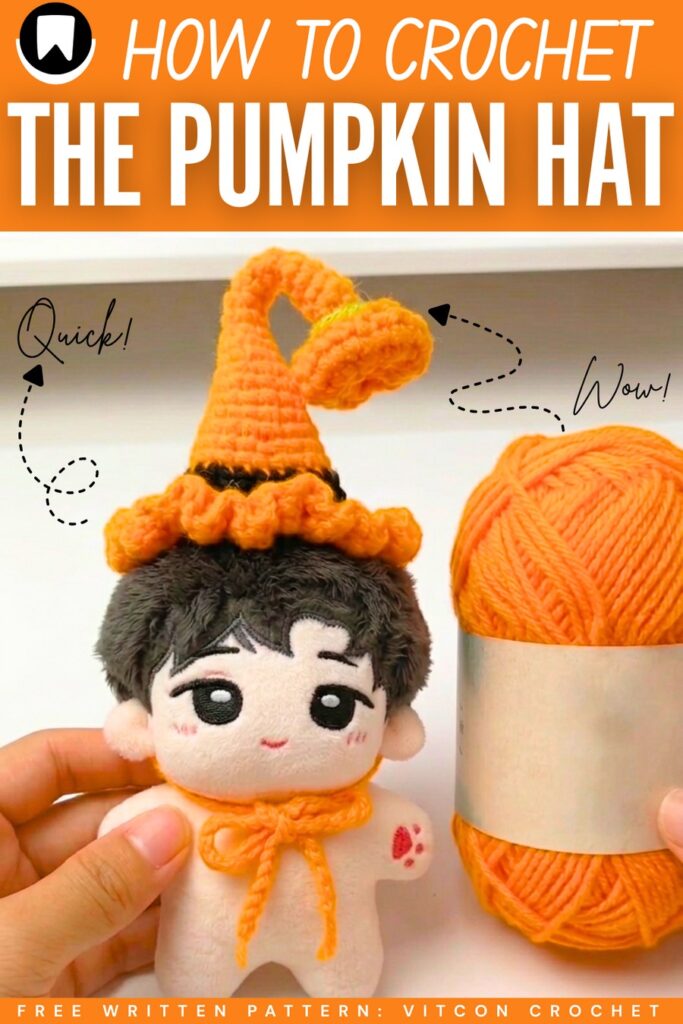
This Halloween, learn how to crochet this cute little pumpkin witch hat to dress up your favorite doll, pet, or plushie. This crochet witch hat will make your dolls look even cuter with the crochet ties that you can knot as bows. You can also crochet this pumpkin as a Halloween keychain and bag charm.
The idea is to crochet a ruffled-brim wizard hat with a curling top that has a small pumpkin amigurumi attached to its tip. This crochet witch hat will look super cute on the K-pop character dolls.
You can also crochet one for your Labubu doll or for a small crochet witch girl plushie. Crocheting this witch hat is easy, and you can make one in 30 minutes. Now, if you are ready to learn how to crochet this pumpkin witch hat, let’s move ahead below.
[ez-toc]
Crochet Witch Hat with a Stuffed Pumpkin Pattern
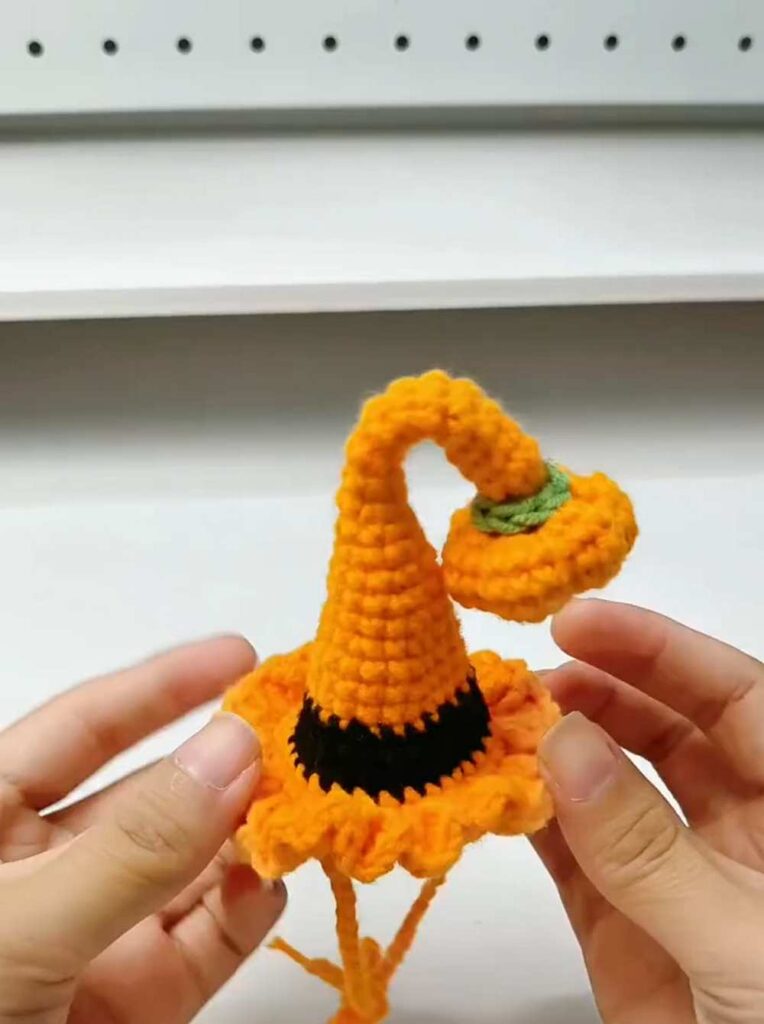
Make a tiny, magical “Wizard Hat” with a little pumpkin decoration. It is a super cute Halloween hat made just for dolls or small pets like cats or small dogs. The hat has a pointed top that you can bend into fun shapes because it has a hidden piece of wire inside.
It also has a ruffled edge that looks like a real witch’s hat, and two simple ties so you can keep it on your pet or doll. It works up very quickly and is a fun, magical project to celebrate autumn!
Materials You Will Need
- Yarn: 4-ply yarn in three colors (Main hat color like orange or purple, Black for the stripe, and a little bit of Green for the pumpkin stem).
- Crochet Hook: 2.0 mm
- Wire: A short, thin piece of craft wire (to help the hat point bend).
- Stuffing: A very tiny amount of cotton or toy stuffing for the pumpkin.
- Glue: Craft glue or hot glue (to stick the pumpkin stem on).
- Other Tools: Stitch markers, scissors, and a yarn needle.
Stitch Words (Abbreviations)
- mr = magic ring (starting loop)
- ch = chain
- sc = single crochet
- inc = increase (make 2 single crochets in the same stitch)
- dec = decrease (join 2 stitches together into one stitch)
- dc = double crochet
- sl st = slip stitch
- FLO = front loop only (put your hook only under the front side of the v-shape on top of the stitch)
How to Make the Wizard Hat
Note: Always start every round with a chain 1, and end every round with a slip stitch to the first stitch.
- Round 1: Make a magic ring. Chain 1, make 6 sc into the ring. Pull tight. (6 stitches)
- Rounds 2 to 10: 1 sc in each stitch around. (6 stitches per round) Take your piece of wire, fold it in half so it is thicker, and slide it inside the tube you just made. Crochet the next round over the wire to trap it inside.
- Round 11: [1 sc, 1 inc] repeat 3 times. (9 stitches)
- Round 12: 1 sc in each stitch around. (9 stitches)
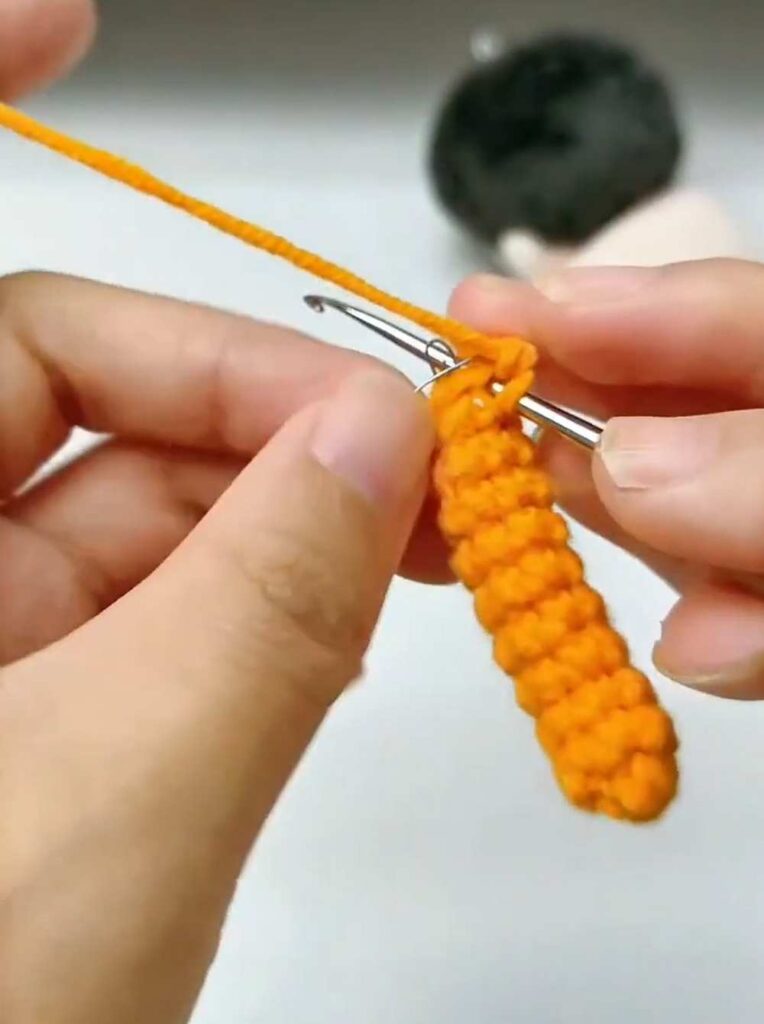
- Round 13: [1 sc, 1 inc, 1 sc] repeat 3 times. (12 stitches)
- Round 14: 1 sc in each stitch around. (12 stitches)
- Round 15: [3 sc, 1 inc] repeat 3 times. (15 stitches)
Wanna Make it Even easy to Learn?
Here is the tutorial below you can watch, instead:
- Round 16: 1 sc in each stitch around. (15 stitches)
- Round 17: [2 sc, 1 inc, 2 sc] repeat 3 times. (18 stitches)
- Round 18: 1 sc in each stitch around. (18 stitches)
- Round 19: [5 sc, 1 inc] repeat 3 times. (21 stitches)
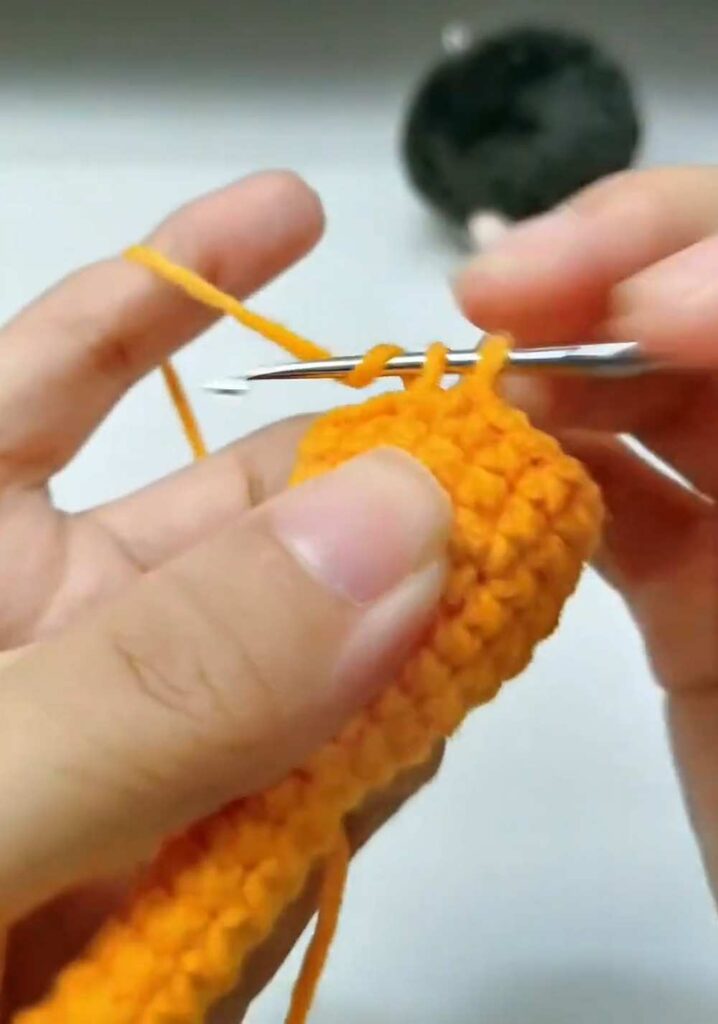
- Round 20: 1 sc in each stitch around. On the very last stitch, change your yarn color to Black. (21 stitches)
- Round 21 (Black Yarn): [3 sc, 1 inc, 3 sc] repeat 3 times. (24 stitches)
- Round 22: 1 sc in each stitch around. (24 stitches)
- Round 23: [7 sc, 1 inc] repeat 3 times. On the very last stitch, change back to your Main Color. (27 stitches)
- Round 24 (Main Color): 1 sc in each stitch around. (27 stitches)
- Round 25: [1 sc, 1 inc] repeat 13 times. 1 sc in the last stitch. (40 stitches)
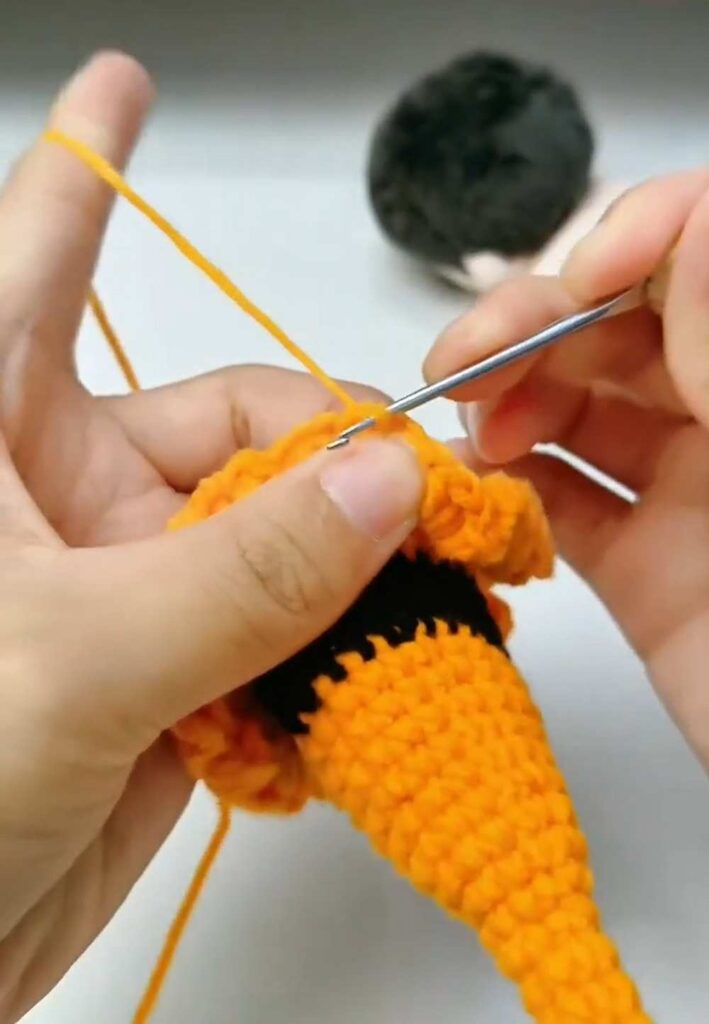
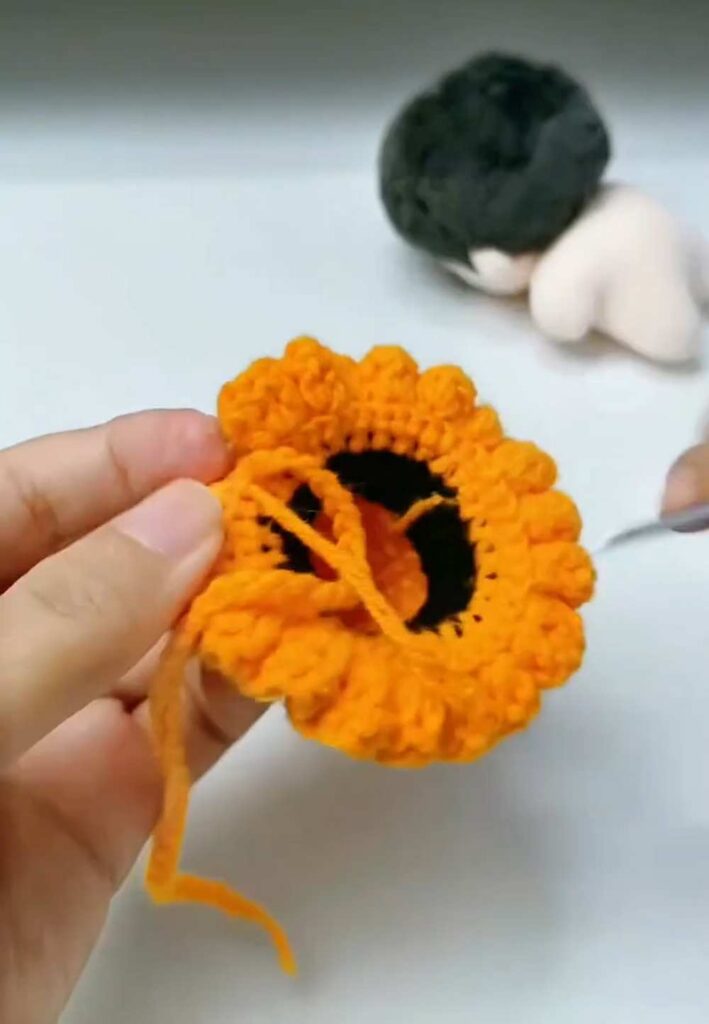
Making the Ruffled Brim: Round 26: Chain 2 (this is your starting chain for the tall stitches). Work this whole round in the FLO (front loop only). Put 3 dc into every single stitch around. Join with a sl st to the first stitch. Cut the yarn and hide the tail.
How to Make the Mini Pumpkin Decoration
- Round 1 (Main Color): Make a magic ring. Make 8 sc into the ring. Pull tight. (8 stitches)
- Round 2: Make 1 inc in every stitch. (16 stitches)
- Round 3: [1 sc, 1 inc] repeat 8 times. (24 stitches)
- Rounds 4 to 6: 1 sc in each stitch around. (24 stitches per round)
- Round 7: [1 sc, 1 dec] repeat 8 times. (16 stitches)
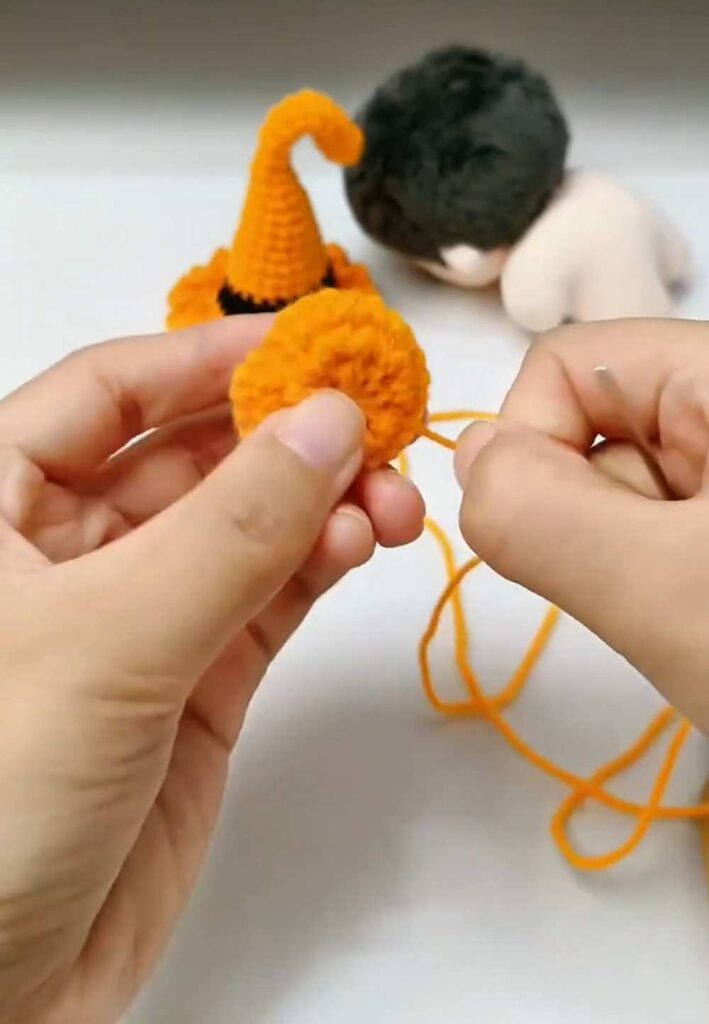
Cut the yarn, leaving a very long tail. Put a tiny bit of stuffing inside the pumpkin. Using your yarn needle, weave the yarn tail in and out of the front loops of the last round (skipping every other stitch). Pull tight to close the hole. To make the pumpkin “bumps”: take the long yarn tail on your needle and wrap it around the outside of the pumpkin from top to bottom. Pull it tight to make a groove. Do this 6 times around the pumpkin to make 6 sections. Tie a knot and hide the yarn inside.
Making the Stem: Round 1 (Green Yarn): Make a magic ring. Make 8 sc into the ring. Pull tight. Cut the yarn. Use glue to stick this little green circle onto the top of your mini pumpkin.
Putting It Together
- Glue the mini pumpkin to the brim of your wizard hat.
- Making the Ties: Attach your main color yarn to the bottom edge of the hat on one side. Chain 45. Cut the yarn. Do the exact same thing on the opposite side of the hat to make the second tie. Hide any loose yarn ends.
- Bend the top of the hat to make it look crooked and magical!
Was this tutorial helpful? Tell me in the comments
Your feedback is a great way for us to improve the crochet tutorials. So, share your thoughts on whether you tried this one or not, and highlight the weak points.
See More:

Crochet CUTEST Guest-Welcoming BOO Ghost with Bow, Hat and Pumpkin Accessories

Tester Call: How to Crochet A Candy Corn, Pumpkin & Kawii Buddy Potted Plant Plushie

Featuring: How to Crochet the Smallest Pumpkin Fall Turtle Plushie with Orange & Parrot

Pattern Tester: How to Crochet Pumpkin Ridges Face Donut Ring Plushie for Fall

How to Crochet An Amigurumi Long-Legged Kawaii Pumpkin in Shoes Buddy

How to Granny Square with Pumpkin Applique in the Middle

Tester Pattern: To Crochet Pumpkin Hello Kitty Plushie with Big Paws Buddy

Featuring: How to Crochet Tiered Unusual Texture Pumpkin Decoration (3 Sizes)

Tester Pattern: To Crochet A Grizzly Bear Presenting You A Pumpkin Plushie