Love-Knitting, here!
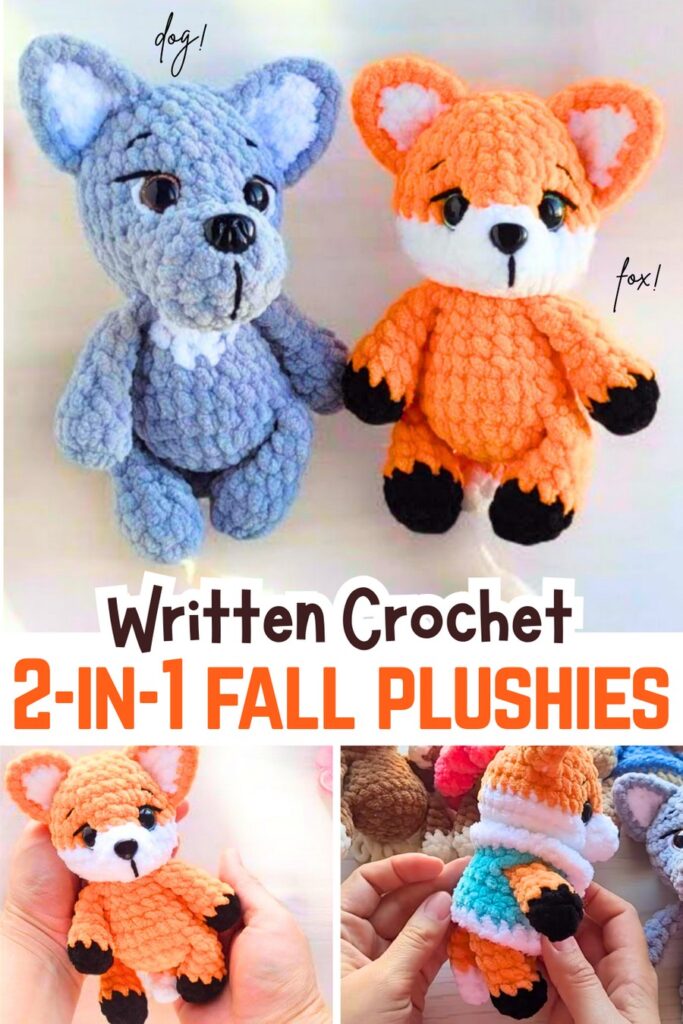
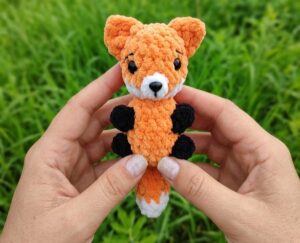
Welcome to another part of the “crochet fall plushie” series. Today, you will learn how to crochet this one-piece 16cm baby fox plush using velvet yarn, embroidery thread, and glitter eyes with a FREE written pattern and a tutorial as well. Crochet it as a fall birthday present for a little one or for Thanksgiving.
The cutest part of this crochet fox plushie is its eyelashes, eyebrows, and the white face patch. You can also use the base amigurumi plush pattern of this crochet fox plush for many other animal dolls, such as the dog, bear, and cat.
For this fall, I have already shared the two crochet fox plushie patterns. This includes the chubby fox and the fuzzy yarn fox plush. You can easily crochet this fall fox plushie within 1 hour thanks to the use of the super bulky yarn. Now, continue reading for the full crochet fox pattern for this year.
[ez-toc]
How to Crochet an Easy Baby Fox Plushie
Make a squishy crochet fox made with super bulky plush yarn! The body is designed with minimal sewing: the tail, arms, legs, and even the muzzle are seamlessly crocheted directly into the body and head as you work.
You will begin by creating all the limbs and the muzzle piece first, and then build the body from the bottom up, dropping those pieces in as you go.
Finally, you’ll crochet two separate triangular pieces for the ears, join them with a single crochet border, and sew them on for the perfect woodland creature finish!
Abbreviations (US Terms)
- ch = chain
- sc = single crochet
- inc = increase (2 sc in one stitch)
- dec = decrease (sc 2 together)
- st(s) = stitch(es)
- MR = magic ring
- FLO = front loop only
Materials Needed
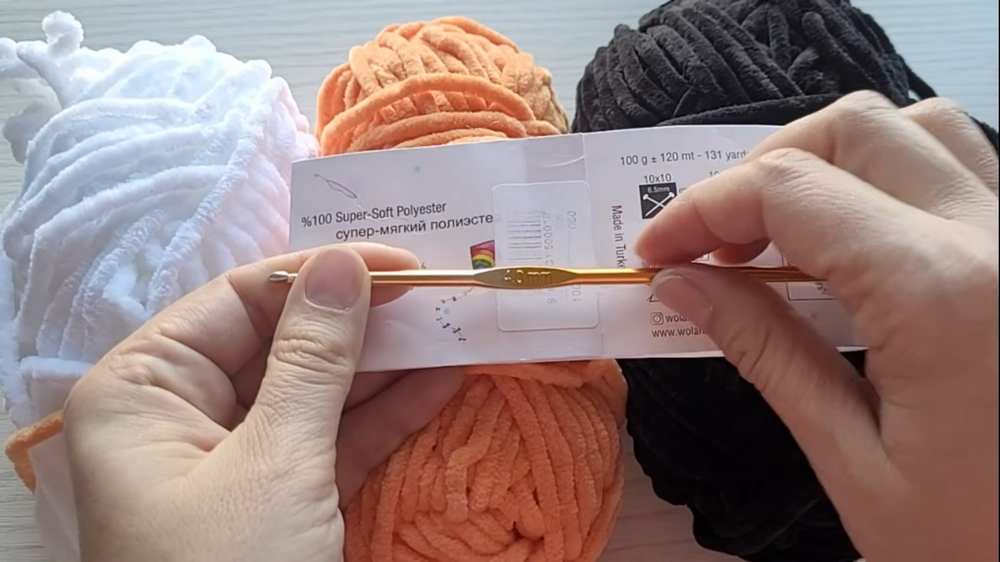
- Main Yarn: Super bulky plush/chenille yarn in Orange (Main Color – MC). (e.g., Himalaya Dolphin Baby).
- Contrast Yarn: Super bulky plush/chenille yarn in White and Black.
- Hook: 4.0 mm crochet hook.
- Eyes: 14 mm safety eyes.
- Nose: Black safety nose.
- Thread: Strong semi-cotton yarn for face sculpting, and thin black thread/yarn for embroidering lashes and eyebrows.
- Extras: Hollowfiber or toy stuffing, scissors, stitch markers, and a tapestry needle.
Pattern Instructions
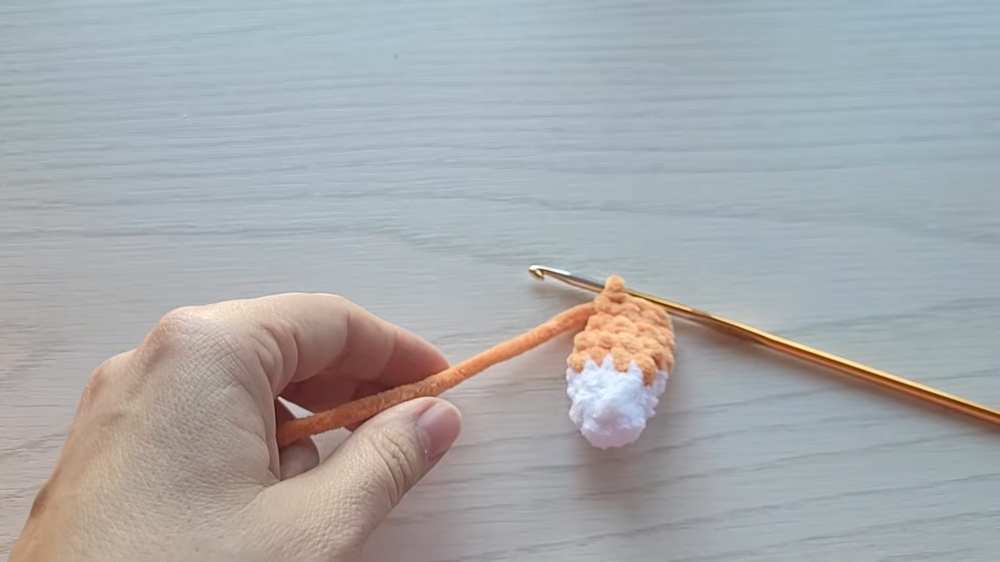
1. Tail
Start with White yarn.
- Rnd 1: 4 sc in a MR. (4)
- Rnd 2: (1 sc, inc) x 2. (6)
Are you a Beginner?
If you can’t follow the written pattern, continue with the tutorial or the pattern below!
- Rnd 3: (1 sc, inc) x 3. (9) Change to Orange (MC) in the last stitch.
- Cut the white yarn and tie the ends securely inside.
- Rnds 4 – 5: Sc in each st around for 2 rounds. (9)
- Rnd 6: (1 sc, dec) x 3. (6)
- Do not stuff the tail. Fold the opening flat.
- Rnd 7: Crochet 3 sc through both layers to close. Fasten off with a short tail (it will be crocheted into the body later).
2. Muzzle
Use White yarn.
- Rnd 1: 6 sc in a MR. (6)
- Rnd 2: (1 sc, inc) x 3. (9)
- Rnd 3: Sc in each st around. (9)
- Fasten off with a short tail (it will be crocheted in later). Insert the safety nose into the MR center or near the top of Rnd 1 before setting it aside.
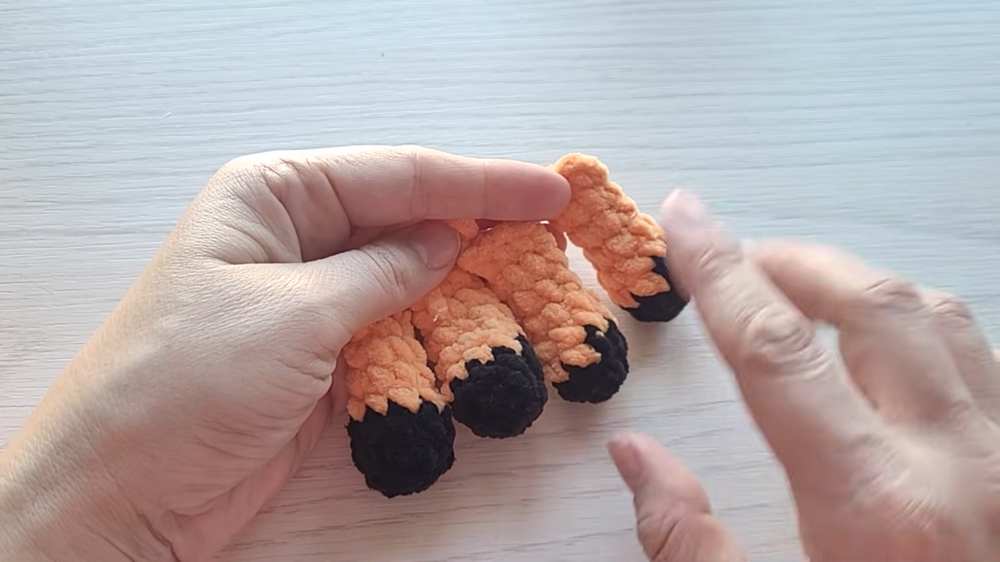
3. Legs (Make 2)
Start with Black yarn.
- Rnd 1: 6 sc in a MR. (6)
- Rnd 2: (1 sc, inc) x 3. (9)
- Rnd 3: Sc in each st around. (9) Change to Orange (MC) in the last stitch.
- Rnd 4: Sc in each st around. (9)
- Rnd 5: 4 sc, 1 dec, 3 sc. (8)
- Rnd 6: Sc in each st around. (8)
- Lightly stuff only the bottom of the foot.
- Rnd 7: (2 sc, dec) x 2. (6)
- Fold the top flat.
- Rnd 8: Crochet 3 sc through both layers to close. Fasten off with a short tail.
4. Arms (Make 2)
Start with Black yarn.
- Rnd 1: 6 sc in a MR. (6)
- Rnd 2: (2 sc, inc) x 2. (8) Change to Orange (MC) in the last stitch.
- Rnds 3 – 4: Sc in each st around for 2 rounds. (8)
- Lightly stuff only the bottom of the hand.
- Rnd 5: (2 sc, dec) x 2. (6)
- Rnds 6 – 7: Sc in each st around for 2 rounds. (6)
- Fold the top flat.
- Rnd 8: Crochet 3 sc through both layers to close. Fasten off with a short tail.
5. Body
Use Orange (MC) yarn.
- Rnd 1: 6 sc in a MR. (6)
- Rnd 2: Inc in each st around. (12)
- Rnd 3: (1 sc, inc) x 6. (18)
- Rnd 4: (2 sc, inc) x 6. (24)
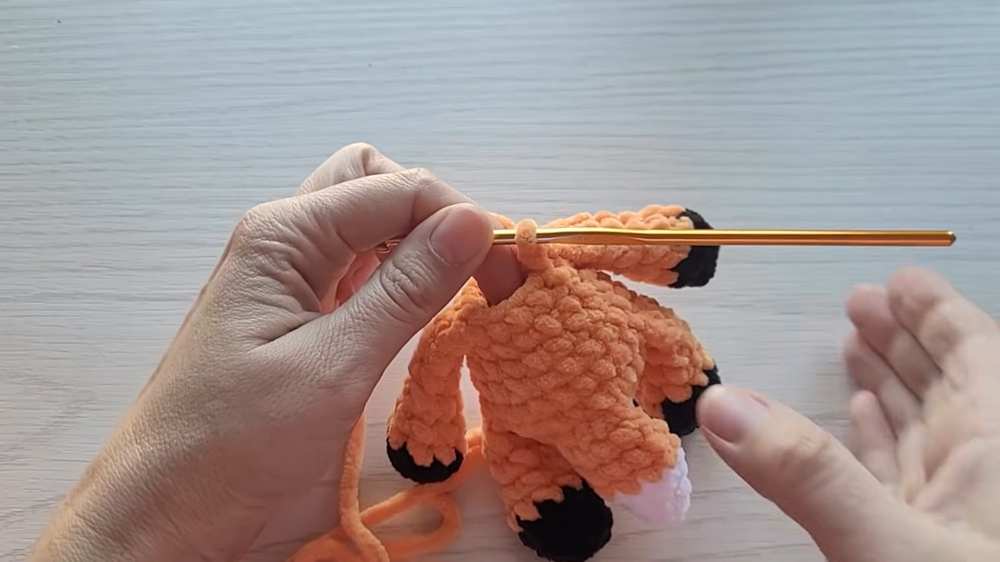
- Rnd 5 (Joining legs & tail): Note: you will hold the piece against the body and crochet through both the piece and the body stitches at the same time. 3 sc together with the Tail. 3 sc on the body. 3 sc together with the First Leg. 9 sc on the body. 3 sc together with the Second Leg. 3 sc on the body. (24)
- Rnd 6: Sc in each st around. (24)
- Rnd 7: (2 sc, dec) x 6. (18)
- Rnd 8: Sc in each st around. (18)
- Rnd 9: (4 sc, dec) x 3. (15)
- Rnd 10 (Joining arms): Note: Adjust stitch placement slightly if needed so the arms are on the sides, directly above the legs. 4 sc on the body. 3 sc together with the First Arm. 4 sc on the body. 3 sc together with the Second Arm. 1 sc on the body. (15) Begin stuffing the body firmly.
- Rnd 11: (3 sc, dec) x 3. (12) Change to White yarn in the last stitch.
6. Head
Continuing from the body with White yarn:
- Rnd 12: Inc in each st around. (24)
- Rnd 13: (3 sc, inc) x 6. (30)
- Rnd 14 (Joining muzzle): Note: Adjust so the muzzle is centered over the front of the belly. 13 sc on the head. 1 inc on the head. 4 sc together with the Muzzle. 1 inc on the head. 11 sc on the head. (32 sts)
- Rnd 15 (Going over the muzzle): 15 sc on the head. (Yarn over to create a chain/gap, then start working into the unworked stitches of the muzzle). Make 5 sc across the top of the muzzle piece. (Yarn over again to jump back). Make 13 sc on the head. (33 sts total, counting the top of the muzzle).
- Rnds 16 – 17: Sc in each st around for 2 rounds. (33)
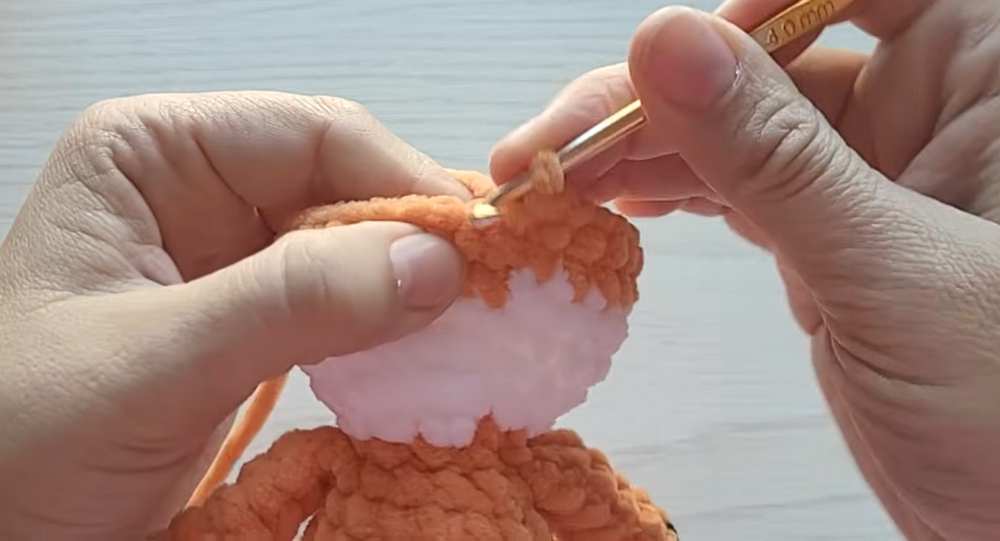
- Change to Orange (MC) at the end of Rnd 17.
- Rnd 18: (9 sc, dec) x 3. (30)
- Insert 14mm safety eyes between Rnds 16 and 17, placing them close to the sides of the muzzle.
- Rnd 19: (3 sc, dec) x 6. (24)
- Rnd 20: (2 sc, dec) x 6. (18) Stuff the head firmly, especially the neck and cheeks.
- Rnd 21: (1 sc, dec) x 6. (12)
- Rnd 22: Dec x 6. (6)
- Fasten off, weave the tail through the FLO of the remaining 6 stitches, pull to close, and hide the tail inside the head.
Eye Indentation (Sculpting): Thread a long tapestry needle with strong semi-cotton string. Go in through the bottom of the neck, up to the inner corner of the right eye, across to the outer corner of the right eye, and back down to the neck. Pull tightly to indent the eye and tie a knot. Repeat the exact same process for the left eye.
7. Ears (Make 2)
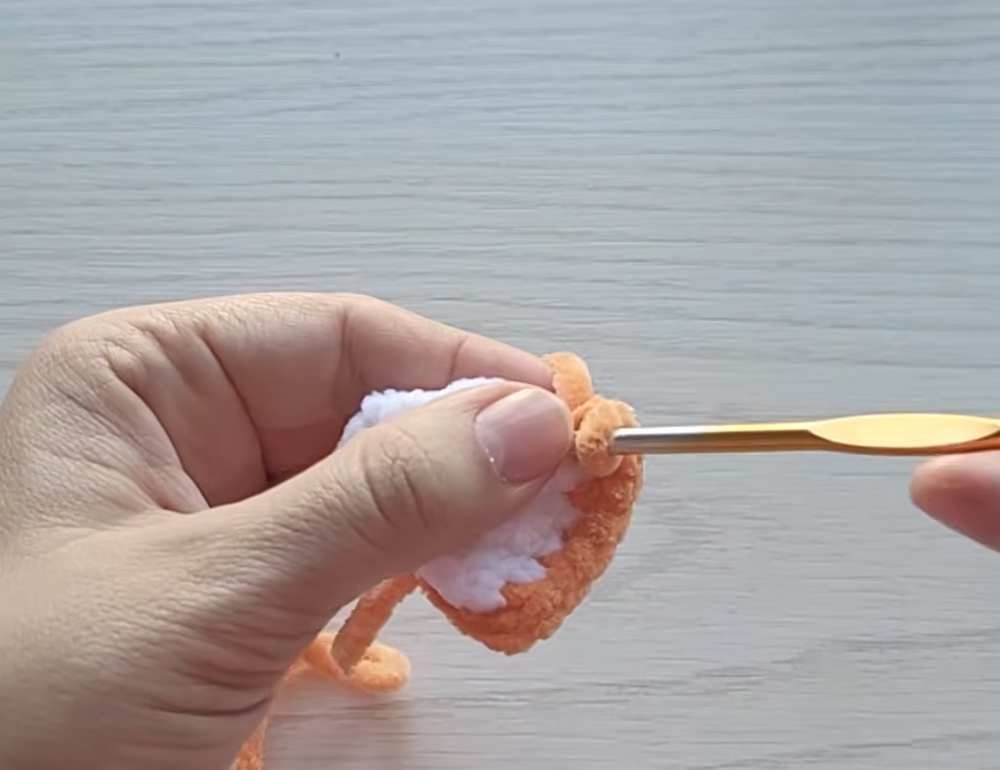
The ears are made by crocheting two flat triangles (one white, one orange) and joining them.
- Inner Ear (White):
- Row 1: 2 sc in a MR. Ch 1, turn.
- Row 2: 2 inc. (4). Ch 1, turn.
- Row 3: 1 sc, 2 inc, 1 sc. (6). Ch 1, turn.
- Row 4: 6 sc. (6). Fasten off.
- Outer Ear (Orange):
- Repeat Rows 1-4 for the white ear, but do not fasten off!
- Joining the Ear:
- Place the white triangle against the orange triangle. Working through both layers around the edges:
- Make 4 sc up the side of the triangle.
- Make 3 sc in the very top tip.
- Make 4 sc down the other side.
- Fasten off, leaving a long tail for sewing.
8. Assembly & Details
- Attach Ears: Curve the ears slightly and sew them securely to the top sides of the head.
- Face Embroidery: Take a thin black thread and embroider a straight vertical line from the bottom of the safety nose down to the bottom edge of the muzzle.
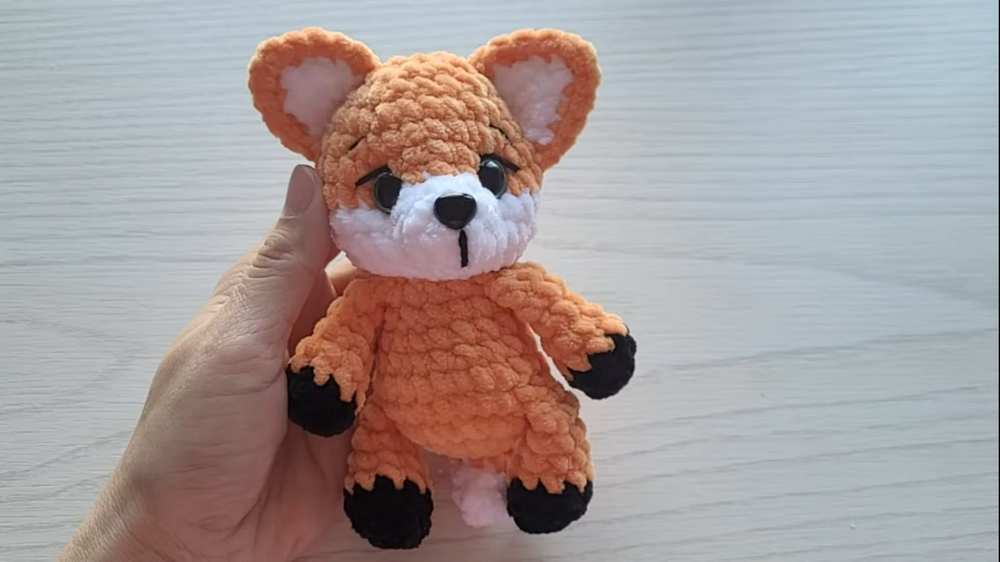
- Lashes & Brows: Embroider a small slated lash on the outer edge of each eye, and two slanted eyebrows above the eyes on the orange part of the forehead.
Share on Social Media!
See More:
Free Crochet Miniature No-Sew Fox Plushie Keychain for Fall

Featuring: How to Crochet the Smallest Pumpkin Fall Turtle Plushie with Orange & Parrot

Pattern Tester: How to Crochet Pumpkin Ridges Face Donut Ring Plushie for Fall
![[PDF Pattern] Crochet A Plush Autumn Acorn-Lover Plushie for Fall](https://criazalblog.com/wp-content/uploads/2026/09/crochet-squirrel-2-225x300.jpg)
[PDF Pattern] Crochet A Plush Autumn Acorn-Lover Plushie for Fall
Featuring: How to Crochet Pumpkin Lover Puppy Plushie for Fall Decorations
Tester Pattern: How to Crochet A Face Pumpkin Fall Wind Spinner for Playing With
Featuring: How to Crochet Interlocking 3D Pumpkin Bookmark for Fall
Tester Call: The Easiest Pumpkin-Octopus Hybrid Variation with UNIQUE Fall Pallete
Featuring: How to Crochet A Back-to-School Pumpkin Bookmark for Fall