Show support for Anjali!
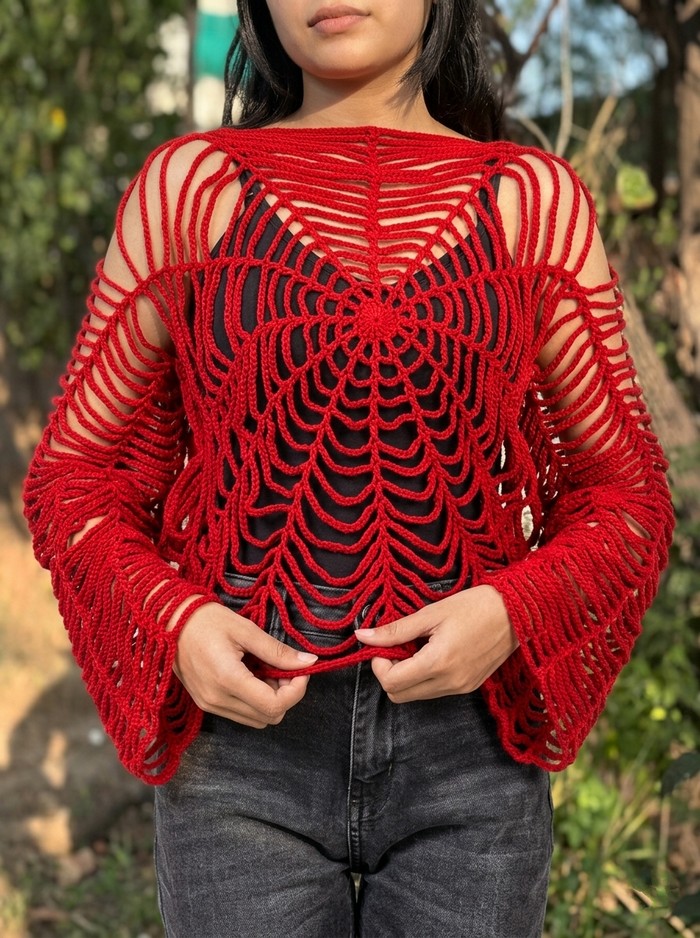
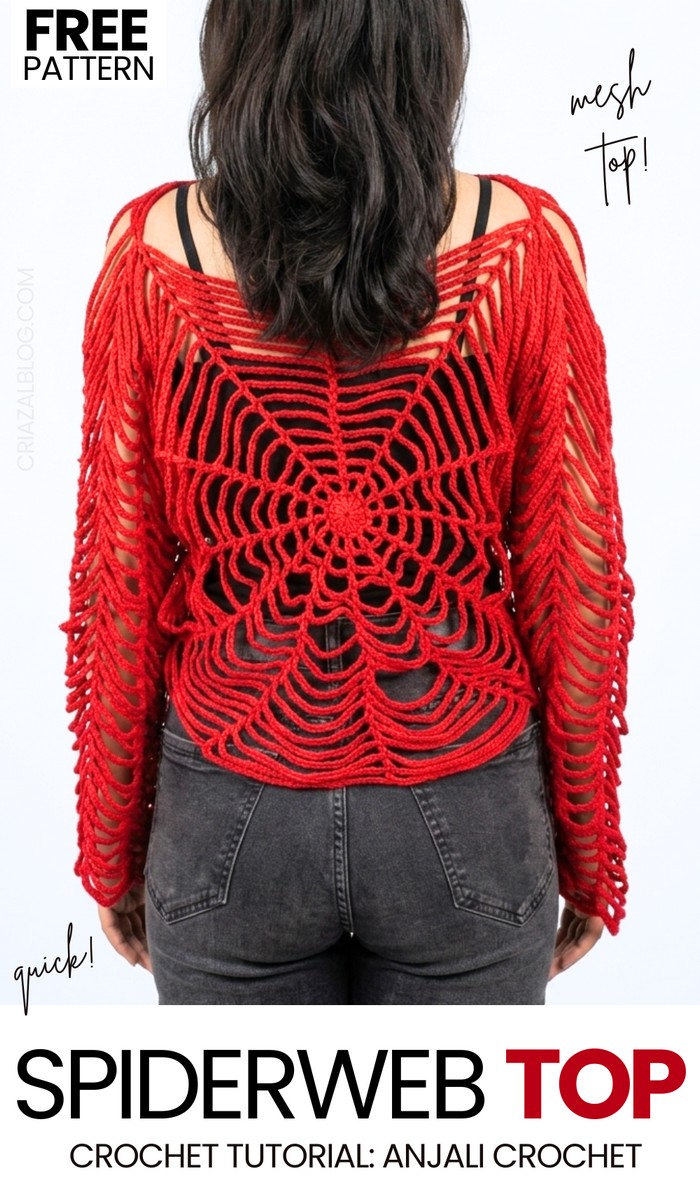
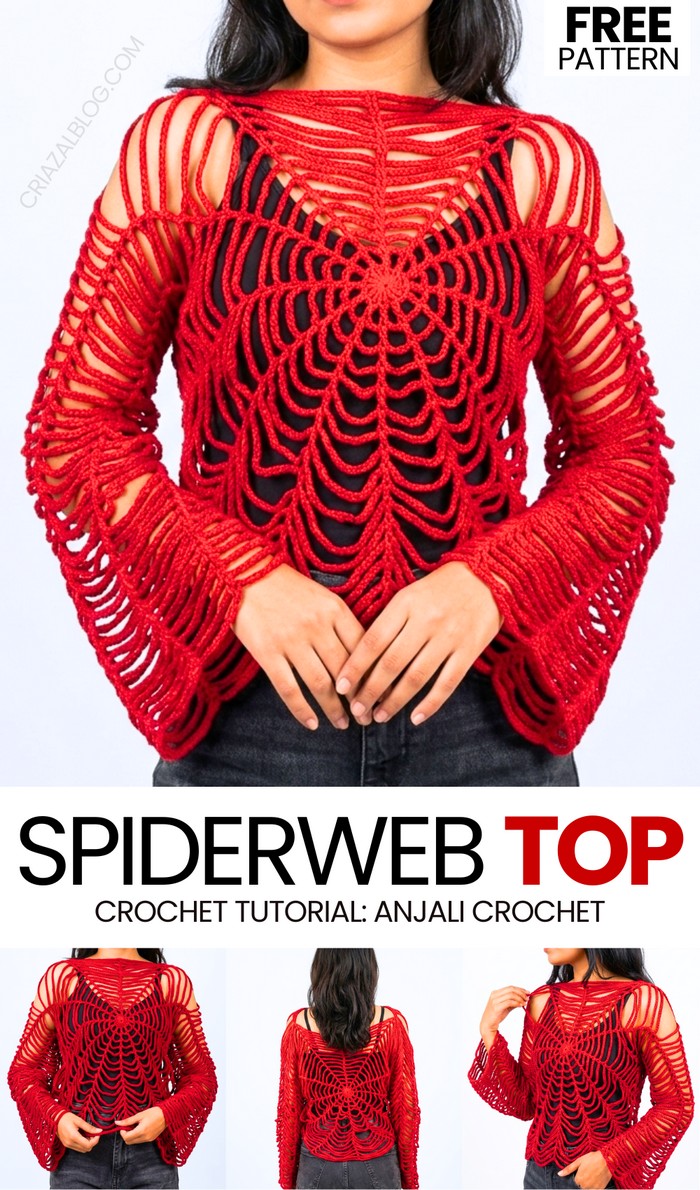
I am back with another crochet “spiderweb accessories & wearables” series. Today, learn how to crochet this beautiful red spiderweb cover-up top with bell sleeves to attend Halloween parties. You can follow both the tutorial and the written guide to crochet this spider mesh top that you can couple with the Spiderweb bandana. The pattern to crochet the spooky spider headscarf and jean charm has already been shared. You can also crochet this top with a crochet amigurumi spider attached in the middle. Can be worn over a Tank top or camisole. It is also a perfect summer top.
Choose from the black, red, purple, and red crochet cotton yarn colors to make this Halloween mesh top. This spiderweb pattern has a repetitive pattern with a proper increase formula, so even beginners can crochet this lightweight, Halloween cosplay top.
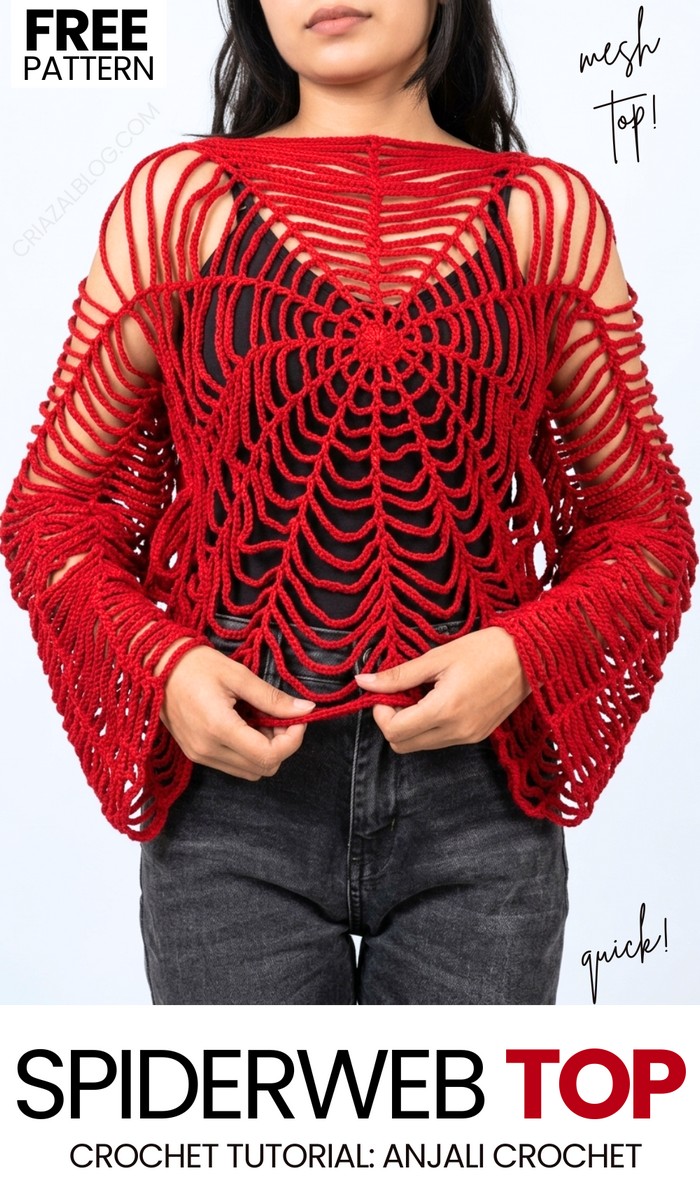
We only need double crochet and chain stitch to crochet this mesh spiderweb top. Since we are crocheting the top by joining the panels, you can also crochet it for kids by reducing the number of spiderweb rows for the front and back panels and the sleeves. You can also go with the shoulderless crochet top – the one that is much more popular. Anyway, this is the best Halloween gift for a girl, so continue reading to learn more about the project and read the full top pattern.
[ez-toc]
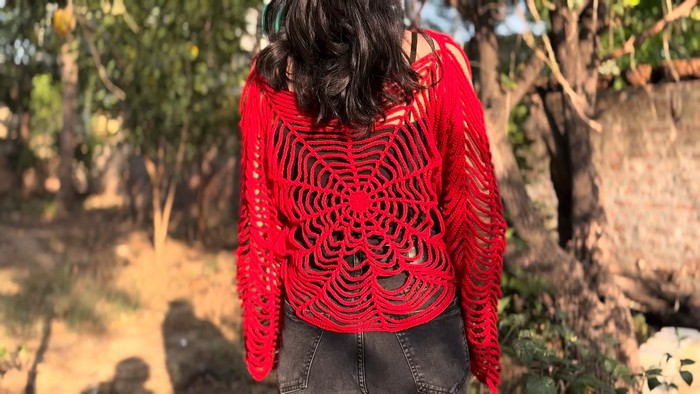
Pattern to Crochet the Spiderweb Pattern Bell Sleeve Top
Materials Needed
Yarn: Medium / Worsted Weight Yarn (Category 4) or Light Worsted Cotton/Acrylic Yarn (approx. 250–350 grams in white, black, or red).
Crochet Hook: 4.5 mm or 5.0 mm hook (or size suitable for your yarn weight).
Tapestry / Yarn Needle: For seaming and weaving in loose ends.
Scissors: For trimming yarn ends.
Measuring Tape: To check panel sizing against a favorite t-shirt or hoodie.
Stitch Markers (Optional): To mark sleeve and neck section points.
Pattern Abbreviations (US Terms)
MR: Magic Ring
ch: Chain
dc: Double Crochet
sc: Single Crochet
sl st: Slip Stitch
ch-sp: Chain Space
- st(s): Stitch(es)
Are you a Beginner? Learn Crocheting Easily!
You can learn to crochet better with the crochet top using the cotton yarn for ladies with the following tutorial, or continue to the written pattern:
Detailed Step-by-Step Pattern
Part 1: Main Spiderweb Panels (Make 2 Identical)
Note: Each round adds 2 extra chains to every chain space, causing the circular web to grow naturally outward in 12 equal sections.
Round 1:
Form a Magic Ring (MR).
ch 2 (does not count as a stitch).
Work 12 double crochets with ch 1 between each into the magic ring:
[1 dc, ch 1]repeated 12 times into the ring.Pull the yarn tail to close the center ring tightly.
sl st into the top of the very first dc to join (skipping the starting ch 2). (Total: 12 dc and 12 ch-1 spaces)
Round 2:
ch 5 (counts as 1 dc + ch-3 space).
Work 1 dc into the top of the next dc from Round 1.
ch 3, then 1 dc into the top of the next dc.
Repeat
[ch 3, 1 dc in top of next dc]around the ring.End with ch 3, then sl st into the 3rd chain of your starting ch-5 (skipping 2 chains). (Total: 12 dc and 12 ch-3 spaces)
Round 3:
ch 7 (counts as 1 dc + ch-5 space).
Work 1 dc into the top of the next dc.
Repeat
[ch 5, 1 dc in top of next dc]across all spokes.End with ch 5, then sl st into the 3rd chain of the starting chain. (Total: 12 dc and 12 ch-5 spaces)
Round 4:
ch 9 (counts as 1 dc + ch-7 space).
Work 1 dc into the top of the next dc.
Repeat
[ch 7, 1 dc in top of next dc]around.End with ch 7, then sl st into the 3rd chain of the starting chain. (Total: 12 dc and 12 ch-7 spaces)
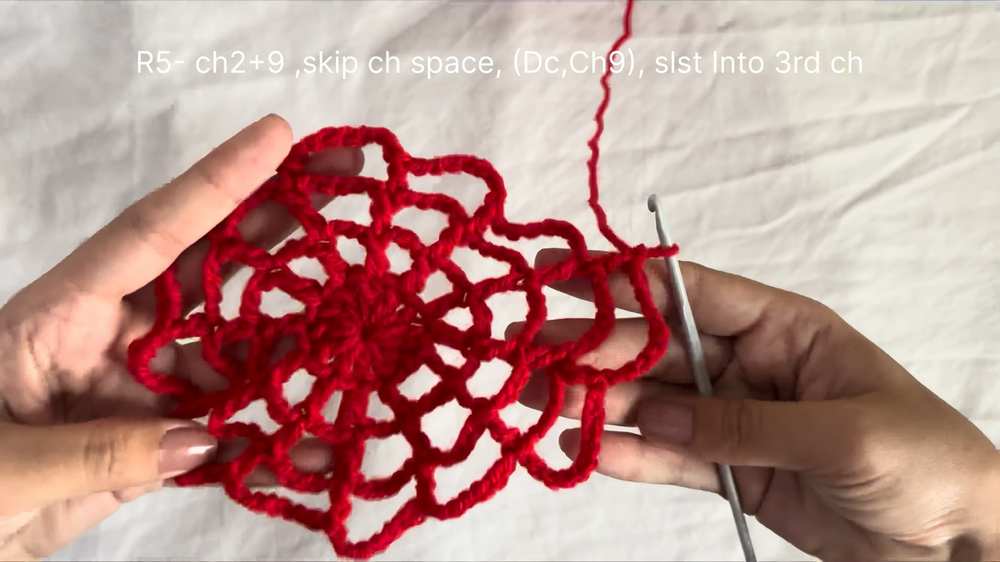
Round 5:
ch 11 (counts as 1 dc + ch-9 space).
Work 1 dc into the top of the next dc.
Repeat
[ch 9, 1 dc in top of next dc]around.End with ch 9, then sl st into the 3rd chain of the starting chain. (Total: 12 dc and 12 ch-9 spaces)
Rounds 6 to 17 (or custom length):
Continue this exact expansion rule: Add 2 chains to every chain space on each round.
Round 6: Starting ch 2 + 11 chains for space (
ch 11spaces all around).Round 7: Starting ch 2 + 13 chains for space (
ch 13spaces all around).Round 8: Starting ch 2 + 15 chains for space (
ch 15spaces all around).Round 9 to 17: Keep increasing by 2 chains per space until you reach Round 17 (where each chain space has 33 chains, or until the web panel covers your torso width when compared to an oversized t-shirt).
Fasten off after completing the final round for Panel 1.
Repeat the process to make Panel 2.
Part 2: Section Allocation & Garment Layout
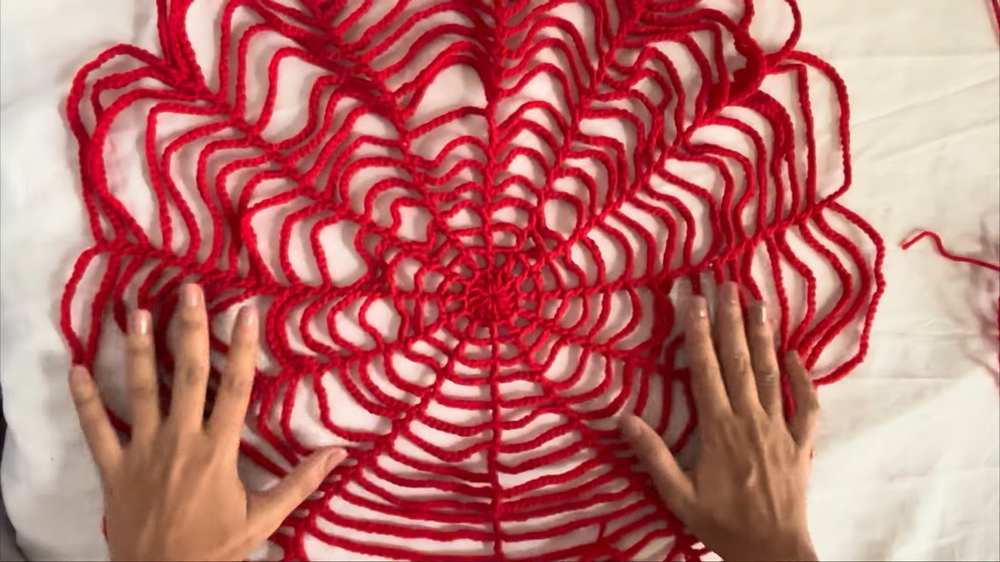
Each panel has 12 outer triangular sections/spokes. Align both panels on top of each other and divide the 12 sections as follows:
Neck Opening (Top): Use 2 top web triangles for the neck hole.
Sleeves (Upper Sides): Allocate 1.5 web triangles on each side for the armholes (1 full section + half of the adjacent section).
Side Seams (Lower Sides): Allocate 2 web triangles on each side below the arms for seaming.
Bottom Hem: Leave the remaining bottom triangles unjoined to form the pointed spiderweb hemline.
Part 3: Sleeve Construction
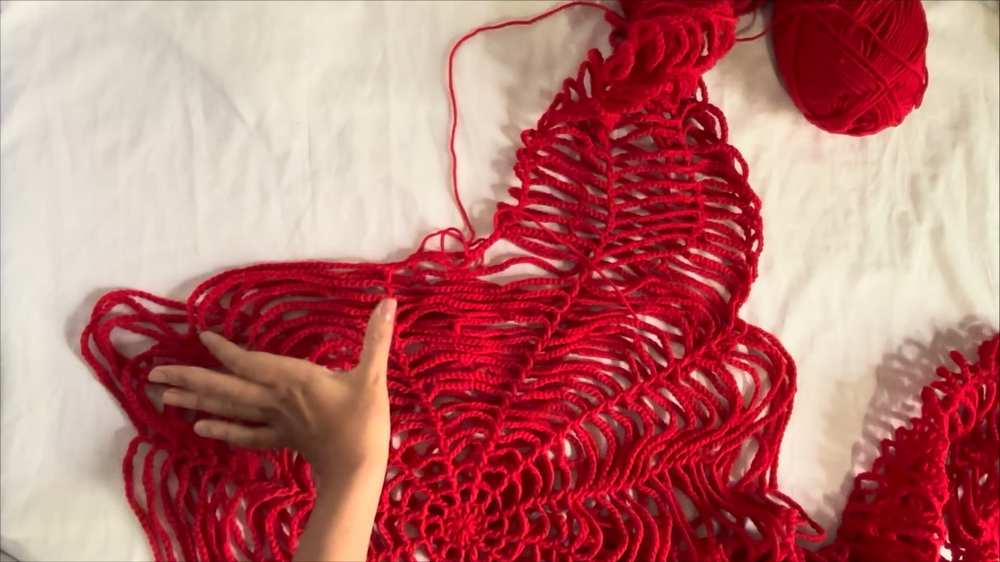
Lay front and back panels together.
Attach yarn at the bottom of the armhole join. Secure with 2 sc into the double crochet join between front and back panels.
Sleeve Round 1:
ch 16 (or approximately half of your final round’s chain count per section).
Work 1 dc into the midpoint/spoke of the first armhole section.
ch 16, 1 dc into the next spoke.
ch 16, 1 dc into the next spoke across the front panel sleeve section.
sl st into the back panel sleeve marker, then repeat
[ch 16, 1 dc]3 times across the back panel armhole.sl st to the starting stitch to close the circle (6 total ch-16 loops around the armhole).
Sleeve Continuation Rounds:
Work in continuous rounds:
[ch 16, 1 dc into the top of the previous row's dc]6 times per round.Repeat until the sleeve reaches your desired length (long sleeve, 3/4 length, or flared).
Fasten off with ch 1 and cut yarn.
Repeat on the opposite side for the second sleeve.
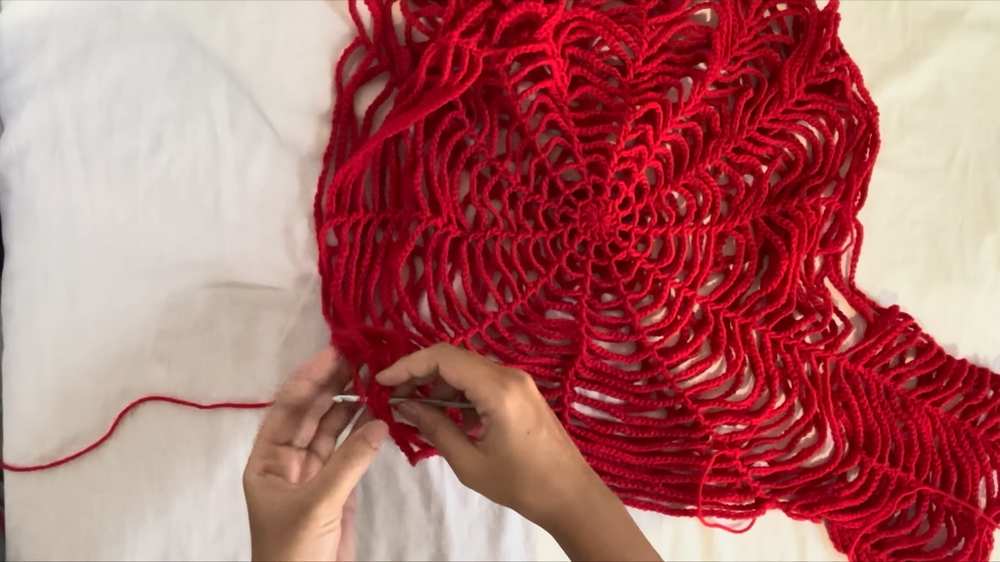
Part 4: Assembly & Side Seams
Attach yarn at the bottom of the armpit join.
Align the designated side sections of both the front and back panels.
Working through both panel loops at once, work slip stitches (sl st) evenly across the 2 side sections down to where you want the side seam to end.
Fasten off and weave in all loose ends securely using your tapestry needle.
Share on Social Media!
See More:
How to Crochet A White Mesh Spiderweb Headscarf and Waist Belt

How to Crochet A Spiderweb Red Bandana Pattern for Halloween

Pattern Tester: Flower on the Top Tribute Spooky Dumpling Plushie Pattern

How to Crochet A Santa on the Top Wind Spinner for Christmas
Ways to Crochet Stylish Summer Top for All Ages
How to Crochet Sleeveless Top for Summer
How to Crochet Lacy Summer Top with FREE PATTERNS
How to Crochet Babydoll Summer Top

Featuring: How to Crochet A Plush Blushing Flying Mr. Soul Ghost Plushie for Halloween