

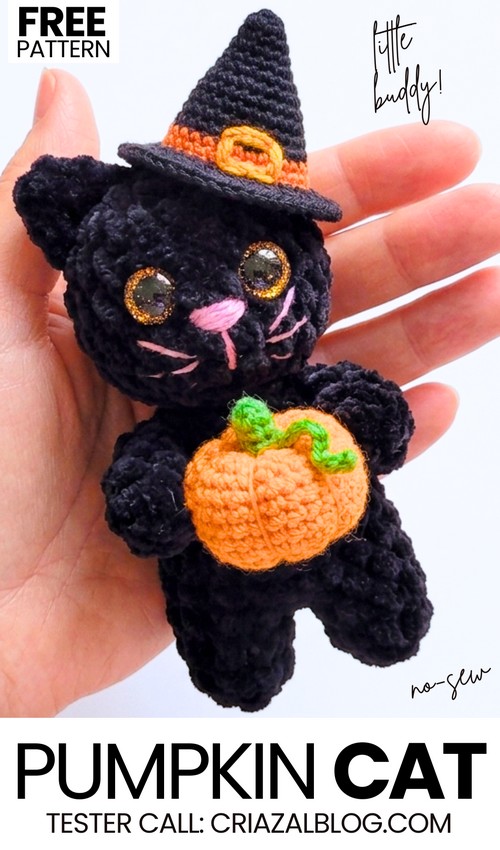
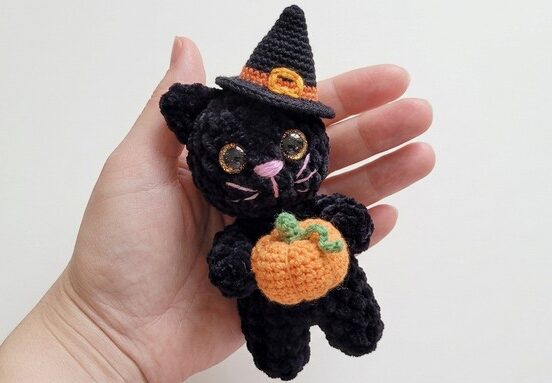
Try this free crochet cute 12cm no-sew black cat plushie holding an amigurumi pumpkin and wearing a witch hat. With the super bulky and DK yarn (for accessories), you can crochet an irresisibly cute Halloween present for a little girl as it looks so cute with its glitter eyes, embrodiery nose and whiskers and the way it holds the pumpkin. Also, we shall pose the witch hat tilted. So, you can also call it a “tilted witch hat cat amigurumi.” Crochet and hang it in front door to welcome the guests at the Halloween party and trick-or-treaters.
You can also crochet our glow-in-the-dark pumpkin amigurumi so it also becomes a night decoration. The crochet pumpkin also has an optional curly vine. You can also crochet the pumpkin with a spooky face.
You can also just crochet the tested cat plushie pattern in pink to prepare a last-minute gift for a dear one. Just crochet a small amigurumi heart with it to turn it into a croceht Valentine’s Day present. Note that, please send your feedback about whether the crochet witch hat pattern and the pumpkin pattern worked just fine for you. I hope this is the case and continue reading for the full cat and pumpkin pattern, below.
[ez-toc]
Pattern to Crochet the Halloween Cat Plushie
Skill Level: Beginner – Level 4
Materials
For the Cat: Black plush/chenille yarn (e.g., YarnArt Dolce, 100g/120m) and a 4.0 mm crochet hook.
For the Accessories: Sport or DK weight yarn (Category 2 or 3) in Black, Orange, Yellow, and Green. A 2.5 mm crochet hook to ensure tight, structure-holding stitches.
Details: 8mm glitter safety eyes (or beads), pink and black embroidery thread, polyester fiberfill stuffing, and a yarn needle.
Pattern 1: The Plush Black Kitten
Use Black plush yarn and a 4.0 mm hook.
1. Arms (Make 2)
R1: 5 sc in magic ring (5)
R2: 5 sc (5)
R3: 3 sc, dec (4)
R4: 4 sc (4)
Detail: Do not stuff the arms. Pinch the opening flat. Fasten off and set aside.
2. Legs (Make 2)
R1: 6 sc in magic ring (6)
R2-R3: 6 sc (6)
Detail: Fasten off only the first leg. Keep the second leg on the hook to transition directly into the body.
3. Body (Joined to Legs)
Joining: After finishing R3 of the second leg, chain 1. Insert your hook into any stitch of the first leg and make a single crochet. This is the first stitch of R1.
R1: 5 sc on the first leg (completing the 6 sc around it), 1 inc in the front loop of the ch 1, 6 sc around the second leg, 1 inc in the back loop of the ch 1 (16)
R2-R3: 16 sc (16)
R4: (2 sc, dec) x 4 (12)
R5: 12 sc (12)
R6: Incorporate the arms. Hold the flattened edge of an arm against the side of the body. Insert your hook through both layers of the arm AND the next stitch of the body to secure it. Repeat for the second arm on the opposite side. Work regular sc stitches for the front and back of the body (12)
R7: 6 dec (6)
Detail: Firmly stuff the body here. The plush yarn eats stuffing quickly, so pack it well to support the head.
4. Head
R8: 6 inc (12)
R9: (1 sc, inc) x 6 (18)
R10: (5 sc, inc) x 3 (21)
R11-R12: 21 sc (21)
R13: (5 sc, dec) x 3 (18)
R14: (1 sc, dec) x 6 (12)
Detail: Stuff the head firmly. Place the 8mm eyes between R12 and R13, spacing them about 3 or 4 stitches apart.
R15: 6 dec (6). Fasten off, weave the tail through the front loops of the remaining 6 stitches, and pull tight to close.
5. Ears & Tail
Ears (Make 2): Magic ring, ch 1, work 4 half-double crochets (hdc) into the ring. Pull tight, fold into a slight triangle shape, and sew to the top of the head (around R14).
Tail: Ch 6, then work 5 slip stitches back down the chain. Sew to the lower back of the body.
Face: Use pink thread to stitch a small horizontal nose between the eyes. Use black or pink thread to add two small whiskers on each cheek.
Pattern 2: The Witch Hat (17 Rounds)
Use Black and Orange sport/DK weight yarn and a 2.5 mm hook. By spreading the increases over 14 rounds, the hat gains a beautifully exaggerated, tall, pointy tip.
R1 (Black): 4 sc in magic ring (4)
R2: 4 sc (4) Adding this round gives the very tip its height.
R3: (1 sc, inc) x 2 (6)
R4: 6 sc (6)
R5: (2 sc, inc) x 2 (8)
R6: 8 sc (8)
R7: (3 sc, inc) x 2 (10)
R8: 10 sc (10)
R9: (4 sc, inc) x 2 (12)
R10: 12 sc (12)
R11: (5 sc, inc) x 2 (14)
R12: 14 sc (14)
R13: (Change to Orange for the band) (6 sc, inc) x 2 (16)
R14: 16 sc (16)
R15 (Change back to Black): Work in Front Loops Only (FLO) to create the sharp fold of the brim. (1 sc, inc) x 8 (24)
R16: Work in both loops. (2 sc, inc) x 8 (32)
R17: (3 sc, inc) x 8 (40)
- R18: (4 sc, inc) x 8 (48)
Finishing: Fasten off with an invisible join and weave in the ends. Use Yellow yarn and a needle to embroider a small square on the orange band for the buckle. Sew the hat onto the cat slightly off-center.
Pattern 3: The Detailed Pumpkin (13 Rounds)
Use Orange and Green sport/DK weight yarn and a 2.5 mm hook. Expanding to 13 rounds gives enough height to create deep, beautiful ridges when shaped.
R1 (Orange): 6 sc in magic ring (6)
R2: 6 inc (12)
R3: (1 sc, inc) x 6 (18)
R4: (2 sc, inc) x 6 (24)
R5-R10: 24 sc (24) (6 straight rounds to build height)
R11: (2 sc, dec) x 6 (18)
R12: (1 sc, dec) x 6 (12)
Detail: Stuff the pumpkin very firmly. It needs to be densely packed so it holds its shape when you cinch the ridges.
R13: 6 dec (6)
Creating the Pumpkin Ridges:
Fasten off, leaving an extra-long tail (about 15-20 inches).
Thread the tail onto a yarn needle.
Push the needle straight down through the top center hole (R13) and out through the bottom center hole (R1).
Pull the yarn tight down the outside of the sphere, wrapping it from bottom to top, and push the needle back down through the top center again.
Pull firmly to create a deep indent.
Repeat this process 5 to 6 times, spacing the wraps evenly around the sphere to create the iconic pumpkin segments. Knot securely at the bottom and hide the tail inside.
Stem and Vine (Green):
Stem:
R1: In a magic ring, sc 4.
- R2-4: 1sc in each stitch.
- Fasten off.
Vine: Ch 8. Work 2 sc into each chain starting from the 2nd chain from the hook (this forces the chain to coil into a natural curly vine). Fasten off.
Assembly: Sew or glue the stem and the curly vine to the top indentation of the pumpkin. Finally, attach the completed pumpkin to the cat’s belly, tacking the cat’s arms around it so it appears to be holding it.


