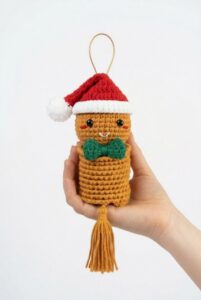
Welcome to part 3 of crocheting a holiday snail plushie variations! You have already learned to crochet a snowman snail buddy and a bauble snail buddy plushie. Today, learn how to crochet this UNIQUE Mr. Smiling Reindeer snail with an ELEGANT crochet plush treat basket shell decorated with crochet Holly leaves and berries.
This is the most detailed crochet snail holiday variation so far, and I am hoping you will love the pattern for sure. This crochet reindeer buddy has a cute smile and a red nose, and even crochet V-shaped reindeer antlers as well. You will love crocheting this treat basket snail!

Pattern to Crochet Amigurumi Plush Reindeer Snail with Treat Basket Shell
Skill Level: Intermediate
Materials & Tools List
Plush / Chenille Yarn (100 g / 120 m, e.g., Himalaya Dolphin Baby, Wolans Bunny Baby, or YarnArt Dolce):
Color A (Body): Cream, white, or light beige (approx. 20–25 g)
Color B (Heart Shell & Horns): Cherry, burgundy, red, or pink (approx. 15–20 g)
Brown Yarn: For the antlers.
DK White Yarn: For the muzzle.
Dark Green Cotton Yarn (Size 5): Two strands held together for the leaves.
Embroidery Thread / Fine Cotton Yarn: Small amount in black for embroidering the smile.
Crochet Hooks: 4.5 mm (for plush yarn and basket) and 3.5 mm – 4.0 mm (for the muzzle).
Safety Eyes or Flat-back Beads: 8 mm (2 pieces).

Stuffing: Polyester fiberfill (holofiber).
Red Craft Pom-poms: 3 small pieces for the berry cluster.
Tapestry Needle: Blunt needle with a large eye.
Scissors
Stitch Marker
Hot Glue Gun (optional, for positioning eyes, securing the heart, and attaching details).
Keychain Ring with Chain (optional).
Abbreviations (US Terms)
ch: chain
sc: single crochet
inc: increase (2 single crochet stitches in the same stitch)
dec: decrease (single crochet 2 stitches together)
sl st: slip stitch
st(s): stitch(es)
Rnd(s): round(s)
[ ]: stitch count at the end of the round
Difficult & Special Stitch Guides
Alternative Magic Ring (2-Chain Method for Plush Yarn): Plush yarn often snaps or sheds its fuzz when pulling a traditional magic ring tight. Use the 2-chain start instead: Make a slip knot and chain 2. Work all specified single crochet stitches directly into the second chain from the hook (the first chain you made). Pull the starting tail gently to close the tiny central hole.
Invisible Decrease (dec) in Plush Yarn: Insert your hook under the front loop only of the first stitch. Without yarning over, immediately insert your hook under the front loop only of the second stitch (you now have 2 front loops plus your working loop on the hook). Yarn over and pull through both front loops. Yarn over and pull through the remaining 2 loops on your hook.
Bobble Stitch / Antennae Horn (4-dc cluster with Color Change):
Changing to Color B: On the stitch right before the horn, work the single crochet until 2 loops remain on your hook. Drop Color A and draw Color B through to finish the stitch.
Making the Bobble: Yarn over with Color B, insert the hook into the next stitch, yarn over, and pull up a loop (3 loops on hook). Yarn over and pull through the first 2 loops (2 loops remain on hook). Repeat this 3 more times in the exact same stitch until you have 5 loops on your hook. Yarn over and pull through all 5 loops on your hook.
Switching back to Color A: Ch 1 using Color A to lock the cluster, pulling the tails snugly so the bobble pops outward. Continue working single crochets in Color A.
Closing an Opening (Ultimate Finish): Thread your yarn tail onto a tapestry needle. Pass the needle through the front loop only of each remaining stitch from the outside toward the inside. Pull the yarn tail firmly to draw the circle completely closed like a drawstring. Knot securely and bury the yarn tail inside the piece.
Part 1: The Body & Head (Combined)
Materials Needed: Color A plush yarn, Color B plush yarn (for horns), 4.5 mm crochet hook, stuffing, tapestry needle.
The Tail & Body
Rnd 1: Ch 2, work 6 sc into the 2nd ch from hook [6]
Rnd 2: 6 sc around [6]
Rnd 3: (2 sc, 1 inc) repeat 2 times [8]
Rnds 4–7 (4 rounds): 8 sc around [8]
Rnd 8: (3 sc, 1 inc) repeat 2 times [10]
Rnds 9–13 (5 rounds): 10 sc around [10]
Expanding for the Head & Horns
Rnd 14: 10 inc [20]
Rnds 15–17 (3 rounds): 20 sc around [20]
Rnd 18: (8 sc, 1 dec) repeat 2 times [18]
Stuffing check: Lightly stuff the neck and middle section. Keep the narrow tip of the tail flat and unstuffed so it can curve flexibly.
Rnd 19: (1 sc, 1 dec) repeat 6 times [12]
Rnd 20 (Horns / Antennae Round):
In Color A: 4 sc, then work 1 sc changing to Color B on the final pull-through (5 sc total).
In Color B: 1 bobble stitch (4-dc cluster) in the next stitch. Close and lock the bobble with Color A.
In Color A: 4 sc, then work 1 sc changing to Color B on the final pull-through (5 sc total).
In Color B: 1 bobble stitch in the next stitch. Close and lock with Color A [12].
Cut Color B yarn tails, tie them securely inside, and tuck them in.
Firmly stuff the head with fiberfill, rounding out the cheeks and top evenly.
Rnd 21: 6 dec [6]
Fasten off using the closing an opening technique.
Alternative ear:
Using thin plush yarn, make 6 single crochet in the magic ring.
Make 5sc and 1 increase in the next round.
Make 5sc and 1 decrease in the next round. Make 2! You can leave them unstuffed as well.
Part 2: Facial Details
Materials Needed: 8 mm safety eyes or flat-back beads, black embroidery thread / fine cotton yarn, hot glue gun (optional).
Eyes: Insert/glue the 8 mm eyes between Rnds 17 and 18, spaced 4 to 5 stitches apart across the front, directly centered below the antennae.
Mouth: Thread your needle with black cotton yarn. Insert through the side/back of the neck and bring it out centered below the eyes on Round 15 or 16. Embroider a playful, slightly crooked smile spanning about 2 to 3 stitches diagonally, secure, and hide inside the neck.
Part 3: The Basket
Materials Needed: Plush white yarn, 4.5 mm crochet hook.
Pattern Sequence:
Start with plush white yarn and work in a Magic Ring (MR).
Rnd 1: 6 sc into MR [6]
Rnd 2: 12 sc [12]
Rnd 3: 18 sc [18]
Rnd 4: 20 sc [20]
Rnd 5: 20 sc [20]
Rnd 6: 20 sc [20]
Rnd 7: 20 sc [20]
Basket Handle: Reattach the yarn on the middle left, make 12 chain stitches, and slip stitch at the right side of the basket.

Part 4: Antlers
Materials Needed: Brown yarn, tapestry needle, stitch marker.
Crochet as two separate pieces to start with, then join together.
First Piece
R1: MR – 6 x SC into the ring [6]
R2-R4 (3 rounds): SC in each ST around [6]
Fasten off and leave a long tail for sewing. No need to stuff. Insert a stitch marker into the 1st ST of R4.
Second Piece
R1: MR – 6 x SC into the ring [6]
R2-R4 (3 rounds): SC in each ST around [6]
Do not fasten off or cut off the yarn, as you will continue to crochet R5 to join the two pieces.
Joining the Antlers (R5–R7)
R5: INV DEC, SC in next 2 STs. Pull a short string through the next ST to use as a marker. Join the two pieces: insert your hook into the first piece (the stitch with the stitch marker) and SC. SC in next ST, INV DEC, SC in next 2 STs. Connect the first piece back to the second piece: insert your hook into the stitch you pulled the string through on the second piece and SC. SC in last ST [10].
R6: SC in next 2 STs, INV DEC, SC in next 3 STs, INV DEC, SC in last ST [8]
R7: INV DEC, SC in next 2 STs, INV DEC, SC in last 2 STs [6]
Fasten off leaving a long tail for sewing. Close the small gap between pieces using the tail left from the first piece.
Part 5: Muzzle
Materials Needed: DK White yarn, 3.5 mm – 4.0 mm crochet hook (US terms).
Foundation: Ch 6.
Rnd 1: Sc in 2nd ch from hook and next 3 ch, 3 sc in last ch. Working along underside of chain: sc in next 3 ch, 2 sc in last ch. Join with sl st to first sc [12 sts].
Rnd 2: Sc in next 4 sts, [inc] 3 times, sc in next 4 sts, [inc] 2 times [18 sts].
Rnd 3: Sc in next 4 sts, [sc 1, inc] 3 times, sc in next 4 sts, [sc 1, inc] 3 times [24 sts].
Part 6: Leaves & Berries
Materials Needed: Dark green size 5 cotton yarn (2 strands held together), 10–20 cm yarn tail for sewing, 3 small red craft pom-poms, hot glue gun.
Leaf Foundation & Construction
Hold 2 strands of dark green size 5 cotton yarn together, make a slip knot with a 10 cm tail, and work foundation ch 6.
Side 1 (Working Down the Chain Toward the Tip): Starting in 2nd chain from hook, work 1 sc, work 1 sc in next chain. First side spike: in next chain, work a triple increase (1 hdc, 1 hdc + 1-chain picot, 1 hdc all in the same chain). Indentation: work 1 sc in next chain.
The Leaf Tip: Into the last chain, work 1 sc, work 1 sc + 1-chain picot, and work 1 hdc (or 1 sc) into the same chain to turn the corner.
Side 2 (Working Back Along Opposite Side): Indentation: work 1 sc in the loop opposite the indentation. Second side spike: in next loop, work (1 hdc, 1 hdc + 1-chain picot, 1 hdc) in the same chain space. Stem section: work 1 sc in each of the remaining 2 loops. Join with 1 sl st into the very first sc made. Fasten off with a 15–20 cm tail.
Finishing Base: Thread tail onto tapestry needle, catch edge loops from Side 1 and Side 2 at the bottom, take a firm securing stitch to close the gap and create a pointed base.
Assembly & Adding the Berries
Make Additional Leaves: Crochet 2 or 3 leaves following the pattern above.
Arrange the Leaves:
Pair of 2: Place two leaves with their bases overlapping at a slight V-angle.
Cluster of 3: Place three leaves radiating outward with their stems touching in the center.
Secure the Arrangement: Sew or hot-glue the leaf bases together.
Attach the Berries:
Place a small dot of hot glue at the center base where the leaves join.
Press 3 small red craft pom-poms into the glue in a compact triangle cluster (two on bottom, one resting on top).
Mounting:
Sew or glue the completed holly cluster onto your finished project (such as a Christmas Minion’s head, an amigurumi Santa hat, a holiday wreath, or a Christmas package ribbon).
Part 7: Assembly & Finishing
Positioning the basket Shell: Place the snail body upright with the neck curving forward. Place the basket on the back: the pointed bottom tip fits snugly into the bend between the tail and neck, the front rounded lobe rests against the back of the head/neck, and the back lobe extends slightly over the tail.
Securing the basket: Run a line of hot glue along the contact between the body and the basket!
Adding Accessories: Attach the basket, muzzle, antlers, and holly-leaf berry clusters onto your snail variation as desired using hot glue or sewing. Attach a metal split ring and keychain clip directly around the base of one of the horns if desired.
Share on Social Media!

See More:
Tester Call: How to Crochet Mr. Baymax Snail in Santa Hat & Scarf with Christmas Wreath Shell Plushie
How to Crochet Plush Mr. Snow Snail with Santa Bauble Holiday Gift Plushie
Tester Call: How to Crochet Green Snail Plushie Holding A Christmas Bauble

How to Crochet Holly Christmas Coaster with Snowflake Embroidery

Tester Call: How to Crochet Green Holiday Buddy in Red Scarf Coaster for Christmas Decoration
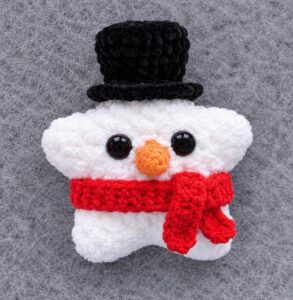
Tester Call: How to Crochet Snowman in Black Hat Star Ornament Plushie for Christmas Gifting
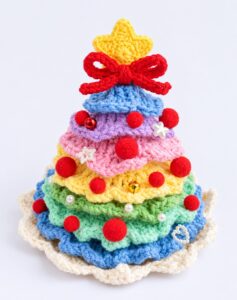
How to Crochet Knotted Bow & Star on the Top Pastel Rainbow Tiered Christmas Tree

Tester Call: How to Crochet White Holiday Bear Pluhsie for Gifting this Christmas

How to Crochet Holly Leaf & Pom Poms White Holiday Treat Sack for Christmas