Please Subscribe Hannah On YT!!!!
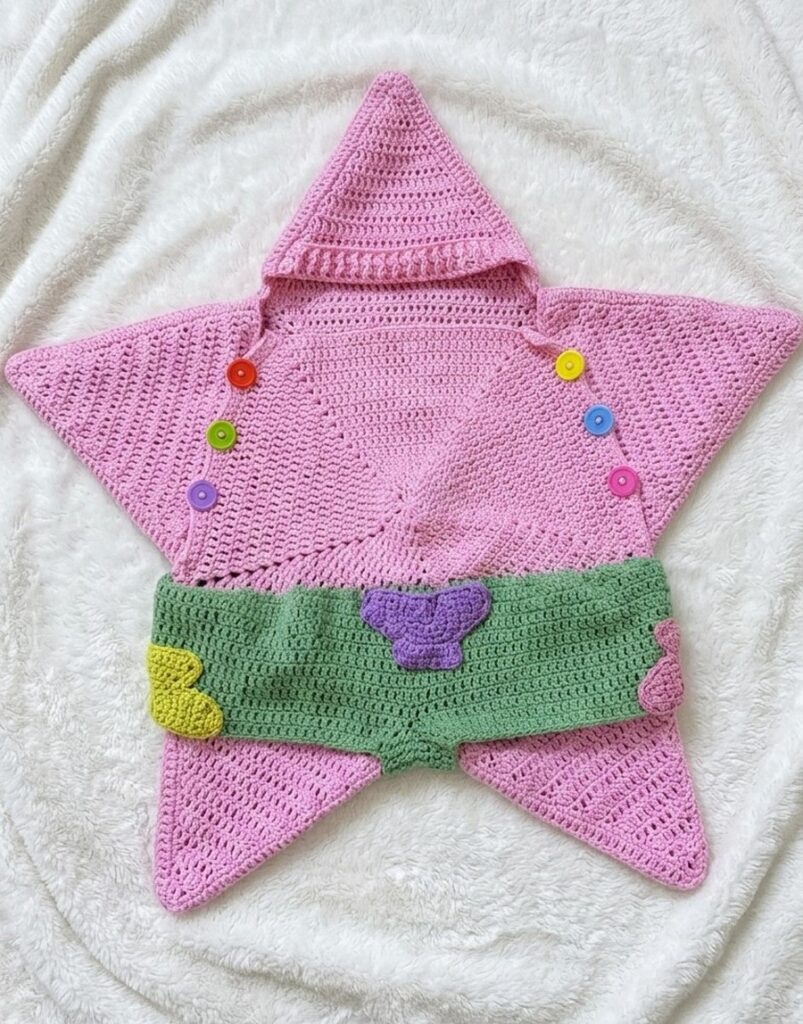
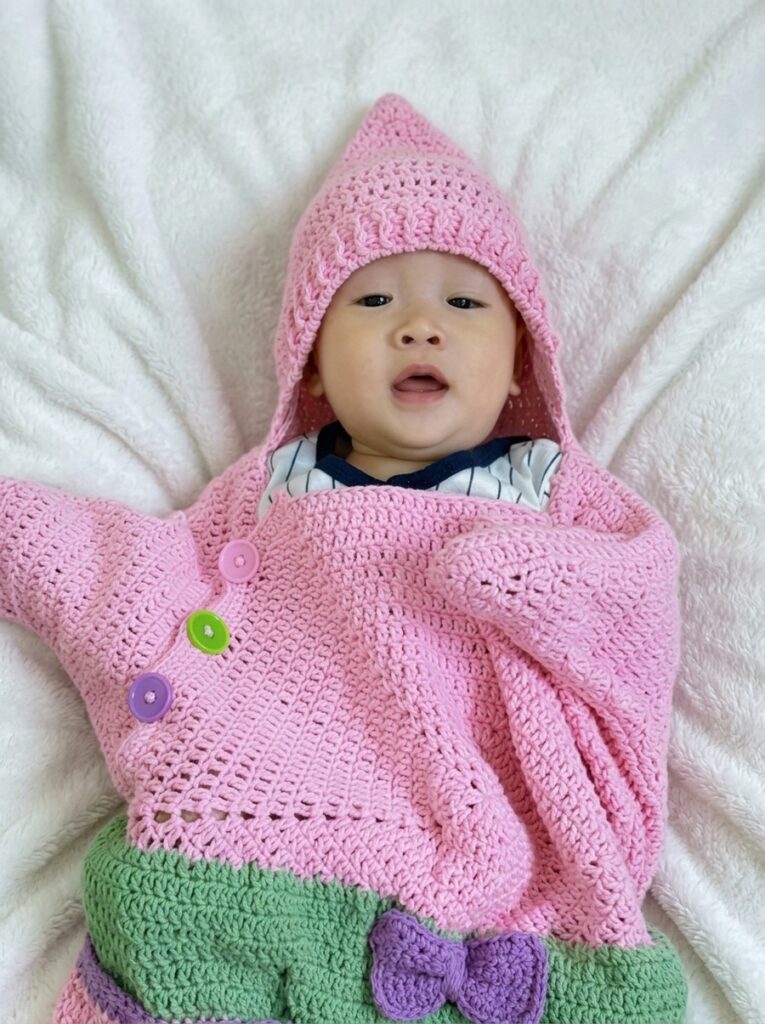
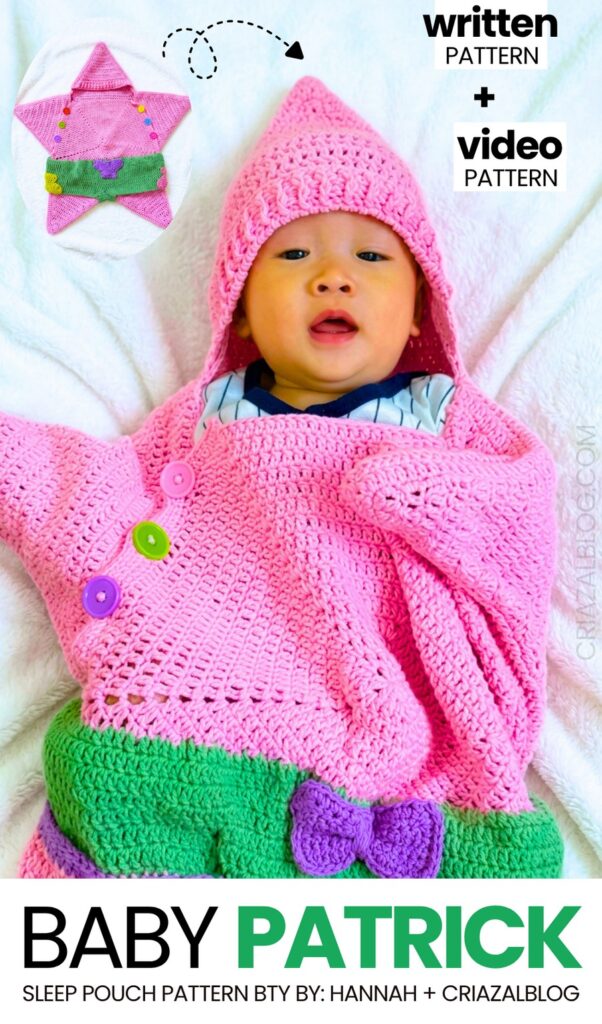
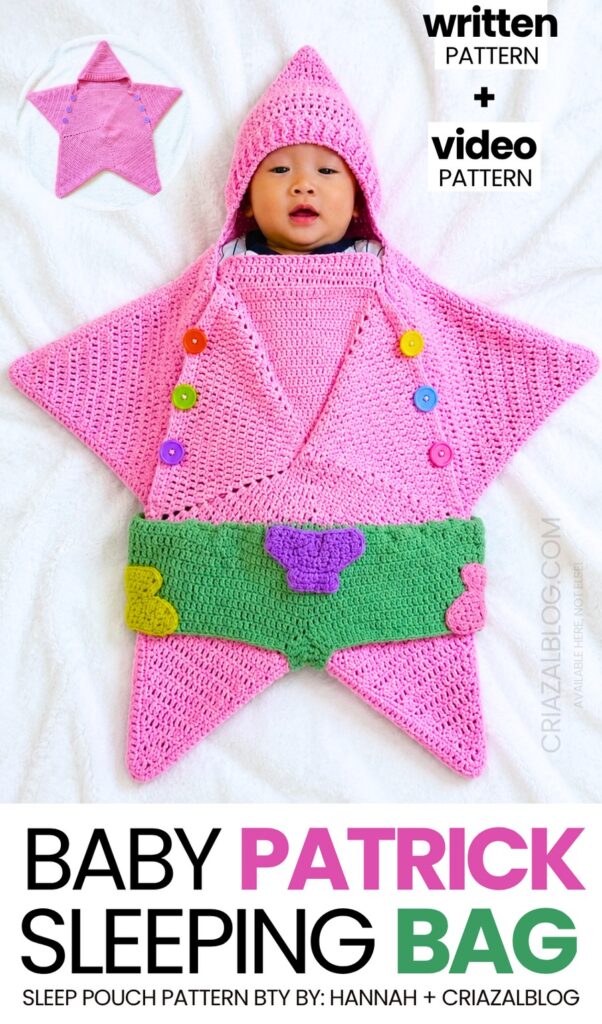
This is part two of the “making the community-favorite crochet accessories & plushies“! This time, learn how to crochet this COOL new variation of the in-trend baby sleep bag with a step-by-step tutorial and written pattern. When the baby sleeps in this crochet star pouch, they will look just like a little Patrick. Before this design, you might have only seen the crochet red or yellow star pouches, and I will definitely bring a pattern for that, too, but who can resist the charm of a cosplay star baby sleep bag? This is an upsized crochet star sleep bag with buttons in many colors.
You will also learn how to crochet the iconic Patrick star pants with mermaid tail crochet appliques. If you are looking for a Halloween costume for a newborn but also want them to stay cozier in a handmade crochet blanket & sleeping bag.
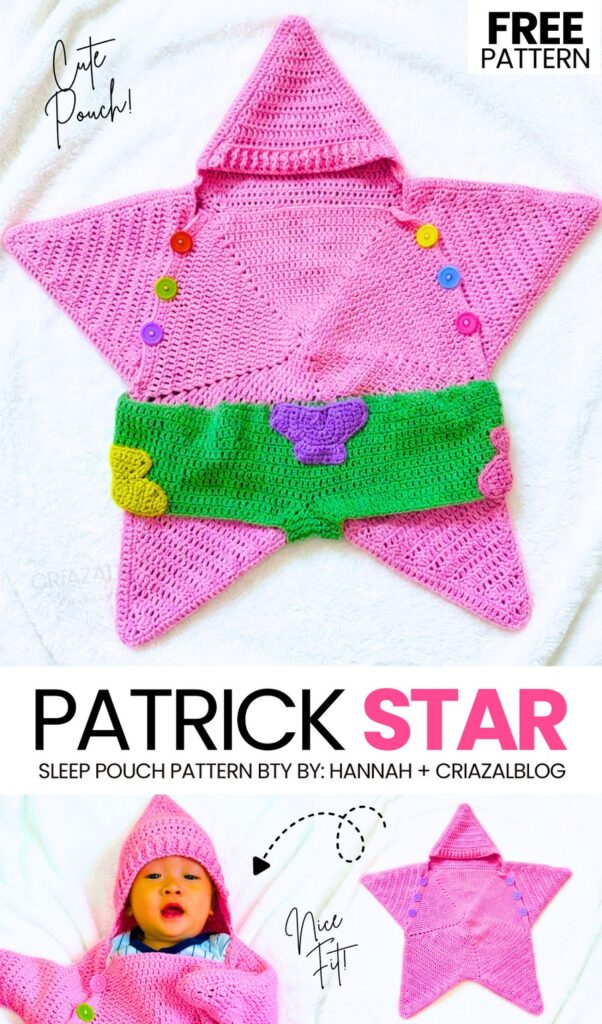
For those trying this trendy crochet star baby sleeping pouch, I have provided 2 super detailed tutorials. You will learn how to crochet the solid pentagon and Patrick Star pants, star points, and how to assemble them in the same trendy buttoned crochet star pouch. Note that I am planning to start a new series that includes just the baby sleep bags (winter is around the corner), so be sure to follow me. Now, continue reading to learn more about this crochet star pouch project!
[ez-toc]
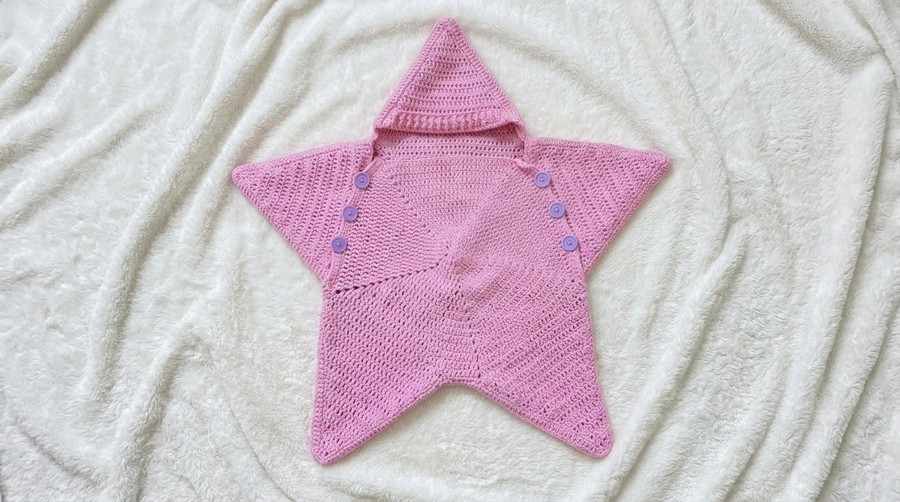
Crochet the Patrick Star Cosplay Sleeping Pouch BY HANNAH
Skill Level: Intermediate
Here is the complete crochet pattern for the Patrick Star-themed baby sleep bag.
Materials
Yarn: Milk Cotton (2.0mm thickness). Approx. 375g of the main pink color, plus smaller amounts of green and purple for the pants/decoration.
Hook: 4.0mm
Notions: 6 colorful buttons, scissors, stitch markers, yarn needle.
Sizing Logic: Uses a 6-month-old size. To adjust the size, measure the baby’s total height and divide by 2. This number should be the height of the central pentagon (Part A) from top point to bottom base.
Abbreviations
- Rnd = Round
- Row = Row
- ch = Chain
- dc = Double Crochet
- sc = Single Crochet
- sl st = Slip Stitch
- ch-sp = Chain Space
- st = Stitch
- sts = Stitches
- FPDC = Front Post Double Crochet
- BPDC = Back Post Double Crochet
- dc dec = Double Crochet Decrease
- dc2tog = Double Crochet 2 Together
- sc inc = Single Crochet Increase
- dc inc = Double Crochet Increase
- x = Repeat the previous instruction the stated number of times
- approx. = Approximately
- WS = Wrong Side
- RS = Right Side
Please show your support for Hannah!
Are you a Beginner? Learn Crocheting Easily!
You can learn to crochet the star sleep bag better with the following tutorial, or continue to the written pattern:
Part A: Central Pentagon (Make 2)
Make one for the front and one for the back.
Rnd 1: Create a magic ring, ch 4 (counts as 1 dc + ch 1). [Dc 2, ch 1] x 4. Dc 1. Sl st into the 3rd ch of the starting chain to close. (10 dc total).
Rnd 2: Ch 4, dc 1 into same space. Dc into the next 2 dc. *[Dc 1, ch 1, dc 1] in the ch-sp, dc into the next 2 dc. Repeat from * around. Sl st into the 3rd ch of start. (20 dc total).
Rnd 3: Ch 4, dc 1 into same space. Dc into the next 4 dc. *[Dc 1, ch 1, dc 1] in the ch-sp, dc into the next 4 dc. Repeat from * around. Sl st into the 3rd ch of start. (30 dc total).
Rnd 4: Ch 4, dc 1 into same space. Dc into the next 6 dc. *[Dc 1, ch 1, dc 1] in the ch-sp, dc into the next 6 dc. Repeat from * around. Sl st into the 3rd ch of start. (40 dc total).
Rnd 5: Ch 4, dc 1 into same space. Dc into the next 8 dc. *[Dc 1, ch 1, dc 1] in the ch-sp, dc into the next 8 dc. Repeat from * around. Sl st into the 3rd ch of start. (50 dc total).
Rnd 6: Ch 4, dc 1 into same space. Dc into the next 10 dc. *[Dc 1, ch 1, dc 1] in the ch-sp, dc into the next 10 dc. Repeat from * around. Sl st into the 3rd ch of start. (60 dc total).
Rnds 7–16: Continue this increase pattern. Every round adds 2 dc to each of the 5 sides.
Rnd 16 (for 6-month size): You should have 30 dc per side (not including the corner stitches). Total height should be approx. 34cm.
Finish: Fasten off for the front piece. Keep yarn attached for the back piece to begin Part B.
Part B: Star Points (Attached)
Attached directly to the edges of Part A. For the Back Piece, make 5 points. For the Front Piece, make 2 points (the bottom “legs”).
Row 1: Insert hook into a ch-sp corner. Dc into every stitch across one side of the pentagon until the next corner. (32 dc).
Row 2: Ch 2, turn. Dc dec (crochet 2 sts together), dc into every stitch until only 2 sts remain, dc dec. (30 dc).
Row 3: Ch 2, turn. Dc dec, dc across until 2 sts remain, dc dec. (28 dc).
Rows 4–15: Repeat Row 3, decreasing by 2 sts every row.
Row 16: Dc dec twice. (2 sts).
Row 17: Dc dec. Fasten off. (17 rows total).
Part C: Arm Flaps (Make 2)
These are worked separately and later attached with buttons to allow the sleep bag to open.
Row 1: Ch 34. Skip 2, dc in each ch across. (32 dc).
Row 2–17: Follow the same decrease pattern as Part B (dc dec at the start and end of every row). Fasten off.
Part D: Hood / Cap (Make 1)
Worked separately with a ribbed decorative edge.
Row 1: Ch 34. Skip 2, dc in each ch across. (32 dc).
Row 2: Ch 2, turn. Dc in first st. [Front Post DC (FPDC), Back Post DC (BPDC)] repeat across. Dc in last st. (32 sts).
Row 3: Repeat Row 2 (match posts to maintain ribbing).
Rows 4–19: Follow the same decrease pattern as Part B (dc dec at the start and end of every row) until point is finished. Fasten off.
Assembly & Finishing
Edging: Work a round of single crochet (sc) or double crochet (dc) around all finished pieces to create a clean border.
Joining: Place the front and back pieces together (wrong sides facing). Join the two bottom “leg” points and the two sides of the central pentagon using sc or slip stitch.
Hood: Attach the base of the hood to the top of the back piece.
Arms: Attach the base of the Part C points to the side edges of the back piece.
Buttons: Sew 3 buttons on each side of the Front Piece. Create corresponding buttonholes or use the gaps between stitches on the Arm Flaps (Part C) to fasten.
Decoration:
Pants: To get the Patrick Star look, crochet a simple rectangular band in green dc and sew it across the “waist” area.
Patterns: Crochet small purple “blobs” (circles or simple shapes) and sew them onto the green pants.
This pattern covers the borders, assembly, and accessory shorts for the Patrick Star-inspired baby sleep bag, continuing from the basic body shapes.
Section 1: Border for the Back Piece
Row 1:
Starting from any valley point between the star rays, attach yarn and ch 1.
sc inc (2 sc in the same stitch) at the starting corner.
Crocheting along the edge of each ray: sc inc into each stitch until you reach the tip of the ray (17 rows should yield 34 sc per side).
At the ray tip: sc inc.
Repeat the pattern around the entire star: 34 sc down the other side of the ray, sc inc in the valley, and 34 sc up the next ray side.
Join with a sl st to the first sc and ch 2.
Row 2:
dc2tog at the valley point to maintain the inner curve.
dc in each stitch up to the ray tip.
At the ray tip: (dc inc, ch 1, dc inc) in the corner stitch.
dc in each stitch down to the next valley.
Repeat around the star.
Join with a sl st and fasten off.
Section 2: The Hood Border
Fold up the bottom edge of the hood piece by approximately two rows to create a “brim” effect.
Row 1: Attach yarn at one bottom corner. Join the folded edge to the main hood by working 3 sc through both layers for the first two rows (6 sc total).
Continue working sc inc into each stitch up the side of the hood to the tip (34 sts).
At the tip corner: sc inc.
Repeat for the other side: 34 sts down, then join the folded brim with 6 sc through both layers.
Row 2: ch 2, turn. dc in each stitch until the tip corner. At the corner: (dc inc, ch 1, dc inc). dc in each stitch to the end.
Row 3: Repeat Row 2 to add height and a rounded shape to the hood. Fasten off.
Section 3: Front Piece & Arm Flap Borders
Arm Flaps (Part C)
Row 1: Attach yarn at the base of the flap. sc inc into each stitch up to the tip (34 sts). Corner: sc inc. sc inc into each stitch down the other side (34 sts).
Row 2: ch 2, turn. dc in each stitch up to the corner. Corner: (dc inc, ch 1, dc inc). dc in each stitch down to the base. Fasten off.
Main Front Chest Border (Part A)
Row 1: Attach yarn at the top edge (note: the neck area is left unworked). sc in each stitch across the top edge (32 sts). ch 1, turn.
Row 2 (Buttonholes): sc 7, (ch 3, skip 1, sc 7) repeat 3 times, sc 8 to finish.
Row 3: sc 7, (3 sc into the ch-3 space, sc 7) repeat 3 times, sc 8. Fasten off.
Section 4: Assembly
Lay the back piece flat. Place the arm flaps and front chest piece on top, aligning the outer edges.
Use a sl st or sc to join the pieces along the outer star ray edges, working through both layers.
Join from the “inside” (wrong sides facing each other) and turn right-side out once finished for a clean seam.
Sew three buttons onto the edge opposite the buttonholes.
Align the hood with the neck opening and sc it to the back piece to secure.
Section 5: Patrick’s Shorts (Green Accessory)
Waistband
Attach green yarn to the body of the bag where the star’s “legs” begin.
Row 1: ch 2. Work a round of dc into the surface of the bag, following a straight horizontal line across the front and back.
Rows 2–9: Work rounds of dc into each stitch from the previous row.
Leg Openings
To split the waistband into legs, find the center of the front and back rounds. Join them with a bridge of ch 12.
Work 3 rows of dc rounds around each leg opening to create short “cuffs.”
Purple Flower Patches (Make 3)
Row 1: Magic ring, ch 1, work 5 sc into the ring.
Row 2: 5 sc inc (10 sts).
Row 3: (sc, sc inc) repeat 5 times (15 sts).
Petals: Work off the circle to create the flower shape.
Petal Part 1: sc 5, ch 1, turn. sc 5, ch 1, turn. sc 4, ch 1, turn. sc 4, ch 1, turn. sc 3, ch 1, turn. sc 3. Fasten off.
Petal Part 2: Attach yarn and repeat the same narrowing pattern for the other petals as shown in the video.
Sew the three purple patches onto the green shorts in the traditional Patrick Star pattern.
Share on Social Media!
Wanna Crochet Something Else?
How to Crochet White & Blue Bead Decorated Mini Boot Ornament for Christmas
How to Bow and Bead Decorated Christmas Wreath Rings for Beautiful Garlands
To Welcome the Guests Crochet these Little Candle Buddies Holding Pumpkins

Crochet CUTEST Guest-Welcoming BOO Ghost with Bow, Hat and Pumpkin Accessories

How to Crochet Bunny Bat White Foldable Wings Amigurumi with Bow for Halloween
How to Crochet 4 Set Ribbed Decoration Christmas Festive Ball Ornaments

How to Crochet A Tiered Miniature Tree Decorated with Golden & White Pearls
How to Crochet Red Mouth Spooky-Cute Grey and Black Bat Amigurumi
How to Crochet the CUTEST Mini Christmas Applique Keychain (Christams House)