Show support for Lybouv!
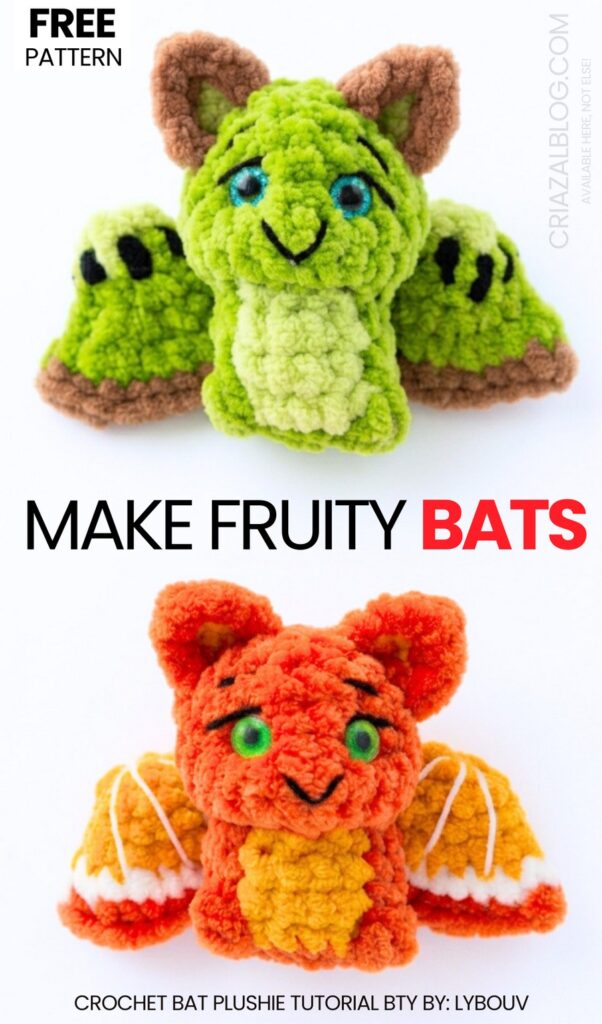
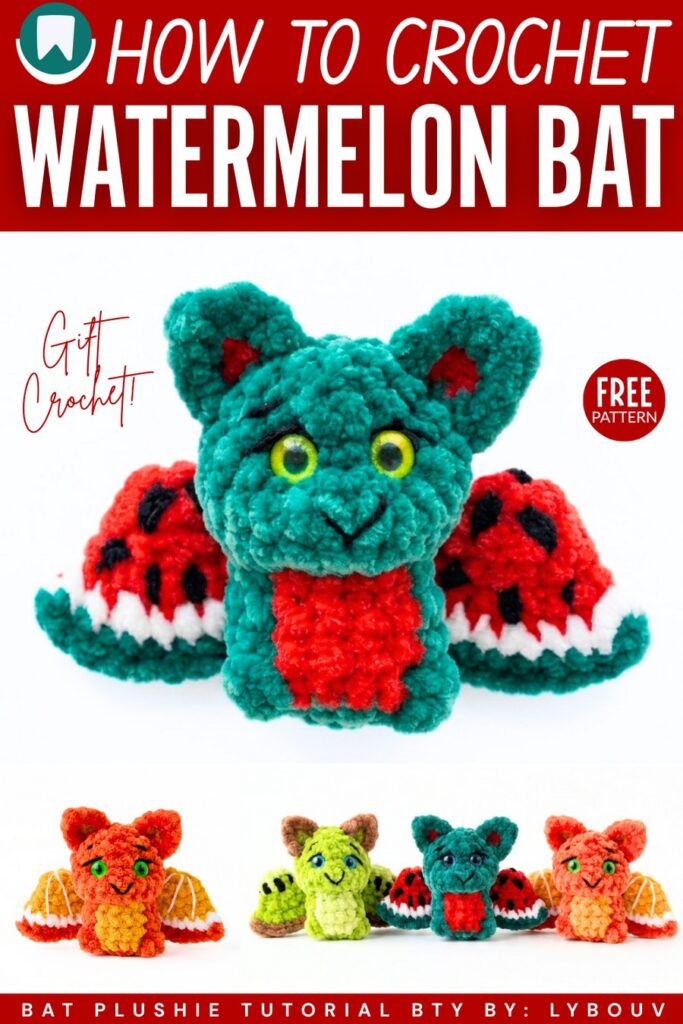
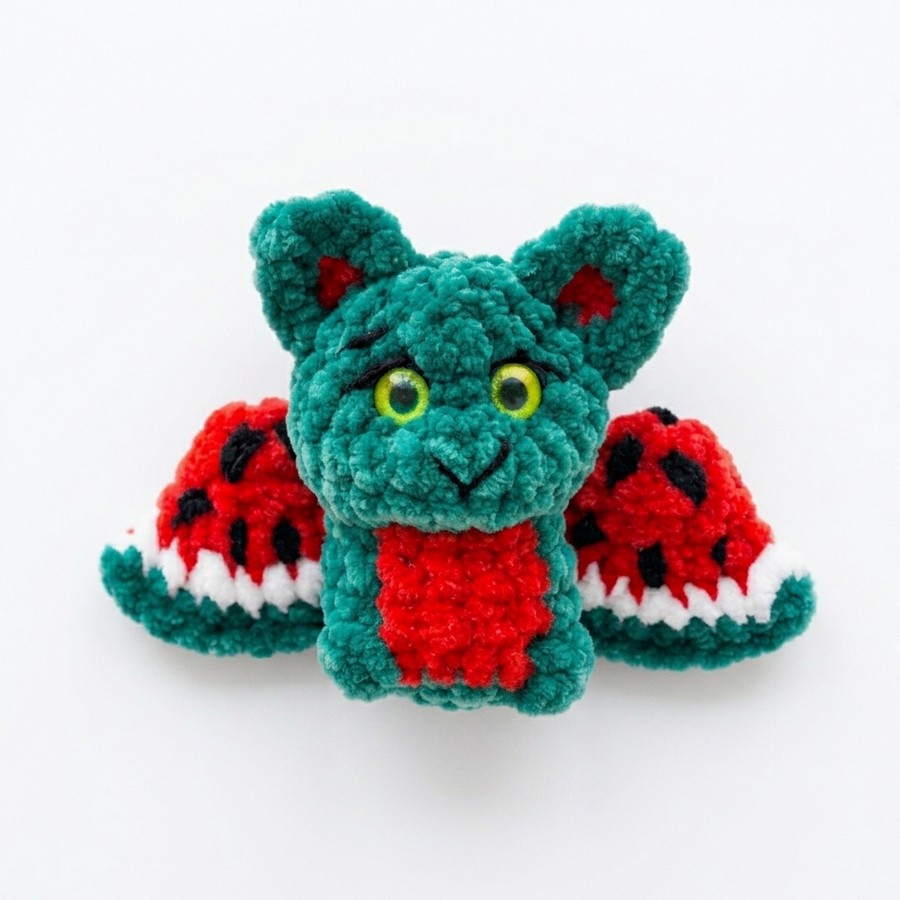
In the last tutorial, you learned how to crochet the orange slice variation of the 3 fruit bat plushies. Now, with slight embroidery additions and a new color pattern, follow this step-by-step tutorial to crochet the watermelon bat plushie without sewing, too. Again, what you would love the most is how quick, easy, and low-sew the watermelon bat plushie is. So, be sure to crochet this and the remaining 2 variations as Halloween desk buddies or last-minute bag charms & gifts for kids, too. These are designed exactly for beginners.
Note that you have already learned how to crochet the strawberry amigurumi bat, too. If not, be sure to check the bat pattern in the recommendation section below. Anyway, with the glitter eyes, these crochet no-sew sitting bat plushies with fanned wings look even more adorable.
Along with the embroidered eyebrows, eyelashes, and smile, we would also need embroidered black seeds (for the kiwi bat and watermelon bat!). Since the base and even the color pattern for crocheting all three miniature bat plushies is the same, be sure to crochet the complete set this Halloween and even during the summer.
Similar Project(s)
Pattern to Crochet the QUICK Watermelon Bat Plushies
This crochet project is a small plush watermelon bat. It looks like a piece of fruit on its belly. You start crocheting the body from the bottom and work your way up to the head in one piece.
The ears and wings are crocheted separately and then sewn onto the main body. The finished bat is about 9 centimeters tall from the ears down to the wings, making it a great size for a small plush toy or a keychain.
Pattern Abbreviations
st / sts: stitch/stitches
MR: Magic Ring
sc: Single Crochet
inc: Increase (2 sc in the same stitch)
dec: Decrease (single crochet 2 stitches together)
hdc: Half Double Crochet
dc: Double Crochet
3-dc bobble: 3 double crochet stitches in the same stitch, closed together with 1 shared top loop (creates the feet)
MC: Main Color (Green)
AC: Accent Color (Pink / Red)

Watermelon Crochet Instructions
1. Body & Head (Worked Bottom-to-Top in One Piece)
Start with Green (MC).
Round 1: In Green (MC), 8 sc in MR. (8 sts)
Round 2: In Green (MC), 8 inc [2 sc in each st around]. (16 sts)
Round 3 (Feet & Watermelon Belly Color Change):
Work 5 sc in Green (MC).
First Foot: Work a 3-dc bobble in Green (MC). On the final pull-through loop of this stitch, switch to Pink/Red (AC).
Work 4 sc in Pink/Red (AC) (creates the watermelon pulp belly). On the final pull-through loop of the 4th sc, switch back to Green (MC).
Second Foot: Work a 3-dc bobble in Green (MC).
Work 5 sc in Green (MC) to end of round. (16 sts)
Round 4:
6 sc in Green (MC) (6th sc goes into top of foot); switch to Pink/Red (AC) on last loop.
4 sc in Pink/Red (AC); switch to Green (MC) on last loop.
6 sc in Green (MC). (16 sts)
Round 5:
6 sc in Green (MC); switch to Pink/Red (AC) on last loop.
4 sc in Pink/Red (AC); switch to Green (MC) on last loop.
6 sc in Green (MC). (16 sts)
Round 6:
In Green (MC): 2 sc, 1 dec — switch to Pink/Red (AC) on the final loop of the decrease.
In Pink/Red (AC): 2 sc, 1 dec — cut the Pink/Red (AC) yarn, fasten off tail, and switch back to Green (MC).
In Green (MC): [2 sc, 1 dec] twice. (12 sts)
Round 7 (Head Base): In Green (MC), 12 inc [2 sc in each st around]. (24 sts)
Rounds 8–10 (3 Rounds): In Green (MC), 24 sc around. (24 sts)
Round 11: In Green (MC), [2 sc, 1 dec] × 6. (18 sts)
Eye Placement: If using safety eyes, insert between Rounds 9 and 10, spaced 4–5 stitches apart.
Round 12: In Green (MC), [1 sc, 1 dec] × 6. (12 sts)
Fill body and head firmly with fiberfill stuffing.
Round 13: In Green (MC), 6 dec. (6 sts)
Fasten off, leaving a tail. Thread through front loops of remaining 6 stitches, pull tight to close, and hide tail inside head.
2. Watermelon Seed & Facial Embroidery
Watermelon Seeds:
Thread needle with fine black cotton thread.
Embroider 3 to 4 small vertical “V” or straight stitches across the Pink/Red belly section between Rounds 3 and 5 to represent seeds.
Eye Sockets & Expression:
Sculpt eye sockets by pulling fine yarn through from base of neck to behind each eye.
Attach/glue 10 mm eyes into sockets.
Embroider a curved smile, eyelashes, and eyebrows using black thread.
3. Watermelon Ears (Make 2)
Inner Ear (Pink/Red Pulp):
Using Pink/Red (AC) in MR: 2 sc, 1 hdc, 2 sc.
Fasten off Pink/Red (AC).
Outer Ear Rim (Green Rind):
Attach Green (MC) yarn to the first sc of the Inner Ear.
2 sc up the side.
In central top hdc: work (1 sc, 1 hdc, 1 sc) into same stitch to make pointed tip.
2 sc down remaining side.
Fasten off, leaving long Green (MC) tail for sewing.
4. Watermelon Wings (Make 2)
Round 1: In Pink/Red (AC), 6 sc in MR. (6 sts)
Round 2: In Pink/Red (AC), [1 sc, inc] × 3. (9 sts)
Round 3: In Pink/Red (AC), [2 sc, inc] × 3. (12 sts)
Round 4: In Pink/Red (AC), [1 sc, inc] × 6. (18 sts)
On last loop of 18th stitch, switch to Green (MC). Cut Pink/Red (AC) yarn.
Round 5 (Green Border): In Green (MC), [2 sc, inc] × 6. (24 sts)
Assembly:
Fold wing circle in half.
Work 12 sc through both layers across top straight edge in Green (MC) to close into a semi-circle.
Veins & Seeds (Optional):
Embroider 3 black radial vein lines across the wing using fine thread.
5. Final Assembly
Ears: Sew ears to top of head between Rounds 11–12 using Green yarn tails.
Wings: Position wings on upper back in a curved shape and sew using black or green thread.
Share on Social Media!

See More:

Tester Call: How to Crochet Jellycat Potato Ghost Plushie for Halloween

Tester Call: How to Crochet Spooky Shell Black-&-Orange Turtle Plushie for Halloween

How to Crochet Market-Make Green Alien & Brown Outfit Character Plushie

How to Crochet Blue No-Sew Hedghog Superhero Plushie for Kids

How to Crochet An Orange, Watermelon & Strawberry Fruit Bat Plushie

Featuring: How to Crochet An Angry Storm Cloud Plushie with Eyes
Featuring: Crochet “Push & Pull” Caterpillar Fidget Pop Toy Plushie for Kids

Featuring: How to Crochet Super Bulky Yarn Rainbow Little Caterpillar Bug Plushie

Featuring: How to Crochet A Christmas Tree Turtle Plushie for Gifting