Show support for Nazanin!
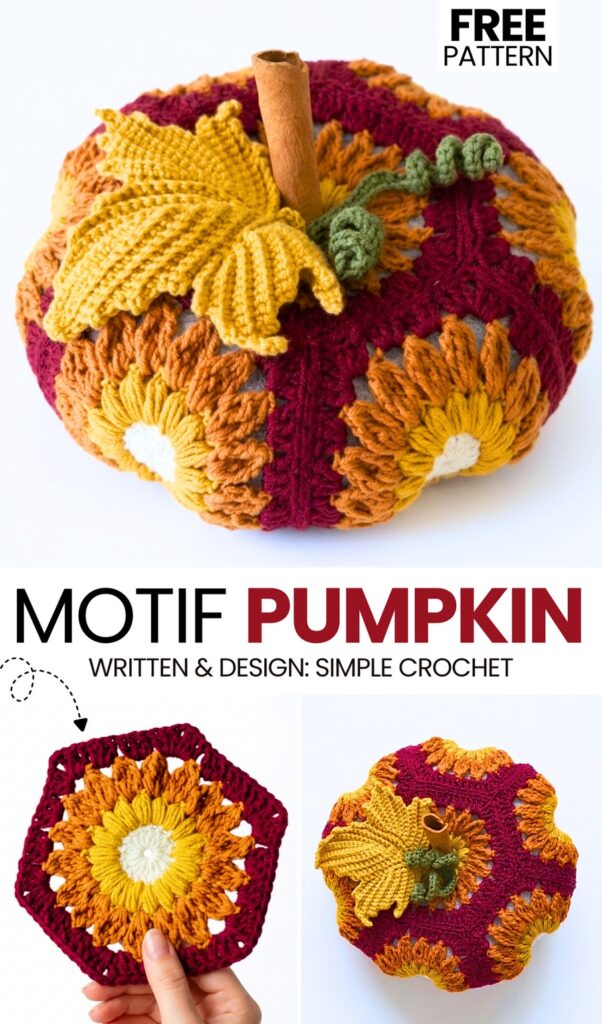
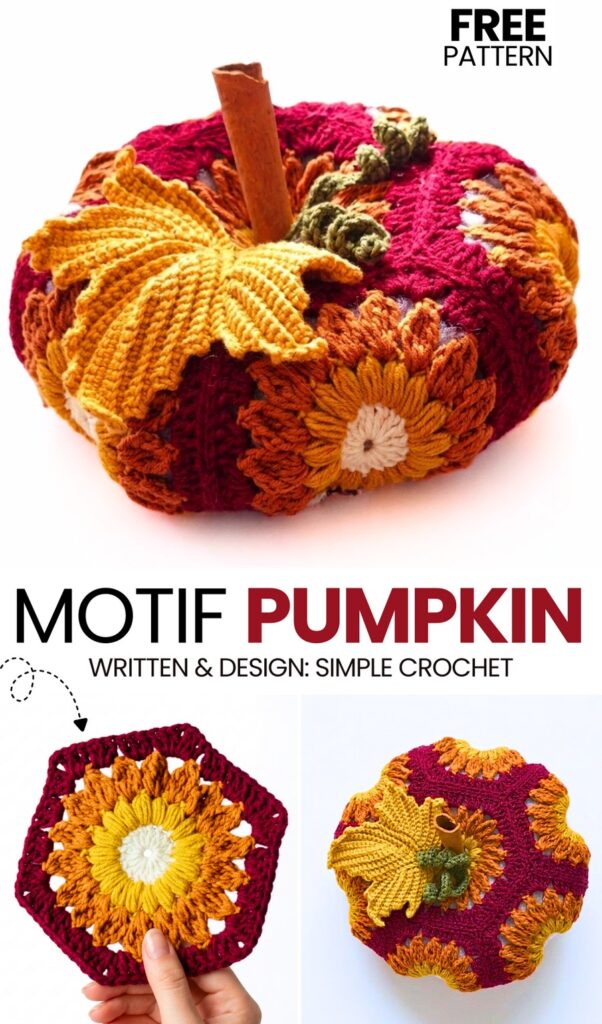
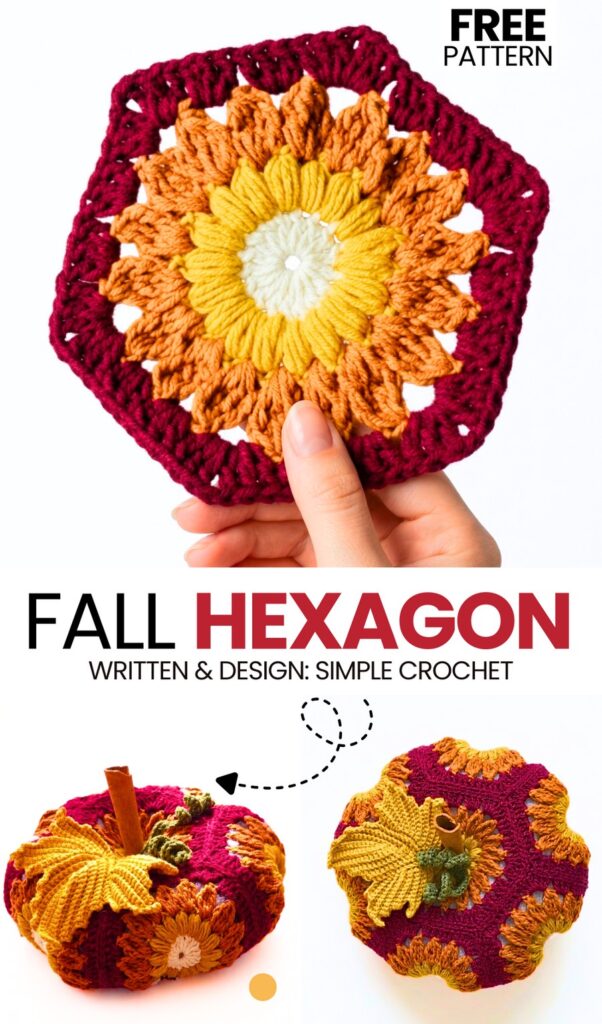
An ULTIMATE, UNIQUE way to crochet a fall-decoration pumpkin? Learn how to crochet this beautifully textured pumpkin from just 8 fallburst hexagon motifs with this step-by-step guide. So you can learn how to sew the hexagons, I have included the video tutorial as well. It is a WOW decoration for your coffee table, an addition to Thanksgiving decor alongside the turkey, and a part of cottage decor!
Despite this, the crochet pumpkin is assembled from puffy hexagon motifs; it still has the pumpkin ridges. That’s all because of how we have to assemble the motifs (6 for ridges, 2 for the top and bottom, simple!). It also has a cinnamon stem and a curly crochet vine.
You can also crochet a ribbed maple leaf for your crochet pumpkin, like the one I shared on another blog. Our hexagon motif is inspired by the viral sunburst sunflower motif but with colors such as earthy red, golden yellow, and dull orange. This makes the crochet pumpkin REALLY the BEST I have covered so far. Now, continue reading as the pattern to crochet the hexagon and assemble the pumpkin is just below!
[ez-toc]
Pattern to Crochet Fallburst Pumpkin Amigurumi
In this fun and cozy fall project, you will learn how to make a rustic pumpkin decoration. You just need some cotton yarn, a small 2.5 mm crochet hook, and some soft stuffing to give it a nice shape.
For a cozy rustic look, you will use a real cinnamon stick for the stem so your pumpkin looks beautiful and smells amazing.
Full Pumpkin Pattern
Materials Needed
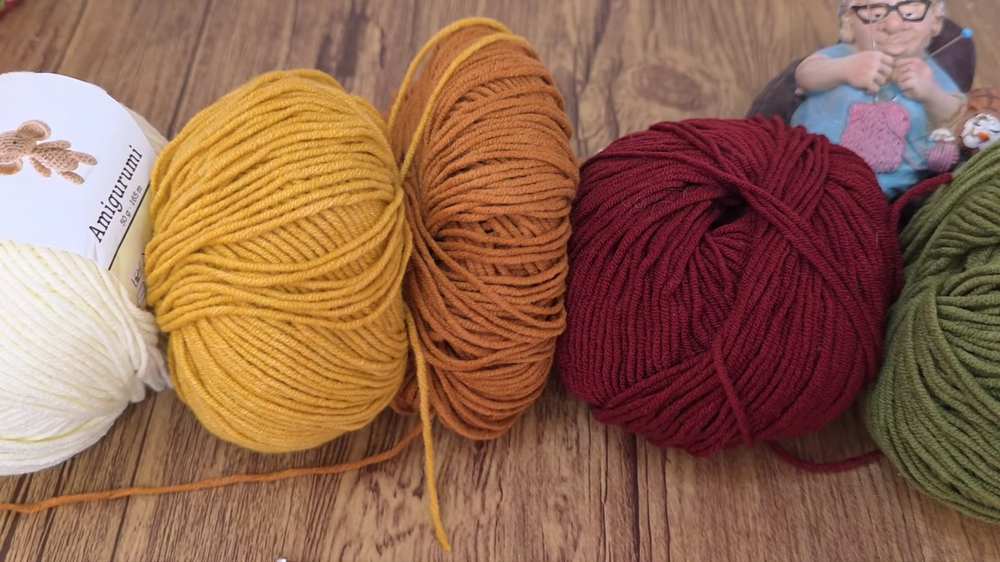
Cotton yarn in a few different colors
2.5 mm crochet hook
Fiberfill stuffing
A piece of a cinnamon stick (for the stem)
Hot glue (to attach the stem and leaves)
Yarn needle and scissors
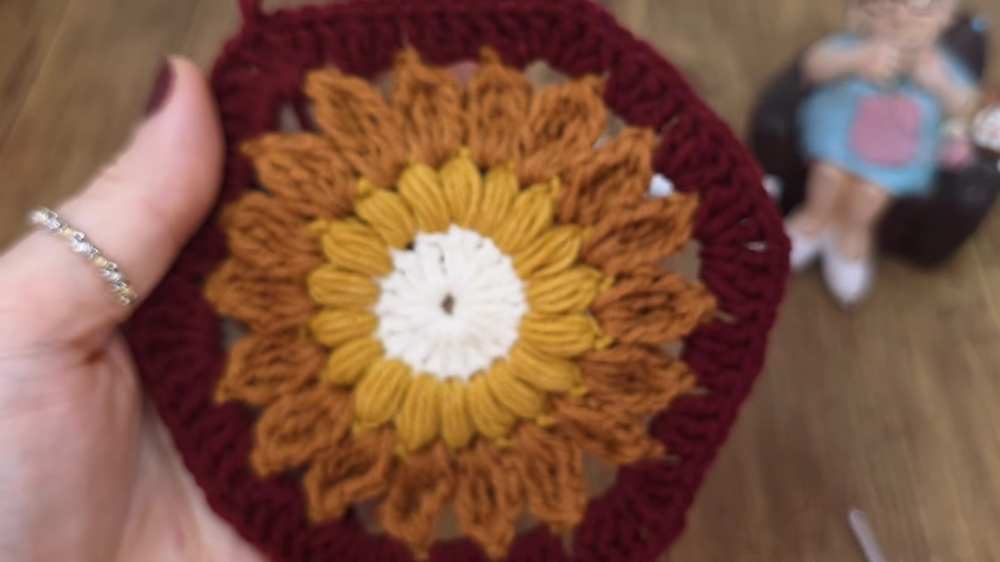
Hexagon Flower Motif (Make 8)
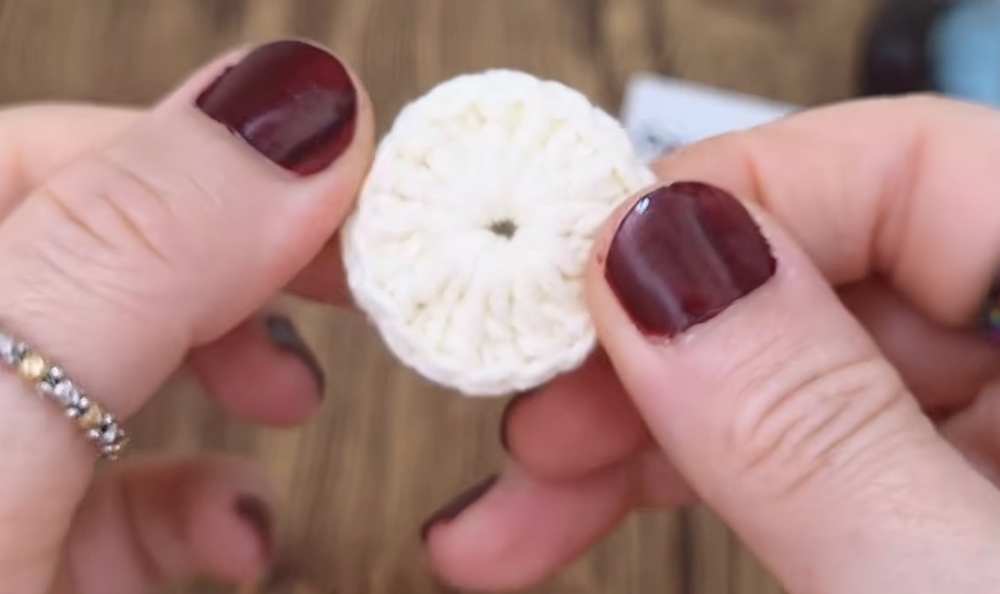
Round 1: The Center
Start with a slip knot and chain 6. Join the chains into a ring with a slip stitch (you can also use a magic ring).
Chain 3 (this counts as your first double crochet).
Crochet 17 double crochets (DC) into the center of the ring.
Are you a Beginner? Learn Crocheting Easily!
You can also learn to crochet this stuffed pumpkin as a beginner by following this tutorial:
Slip stitch to the top of your starting chain 3 to close the round. You should have 18 DC in total.
Fasten off and use your needle to weave in the tail neatly.
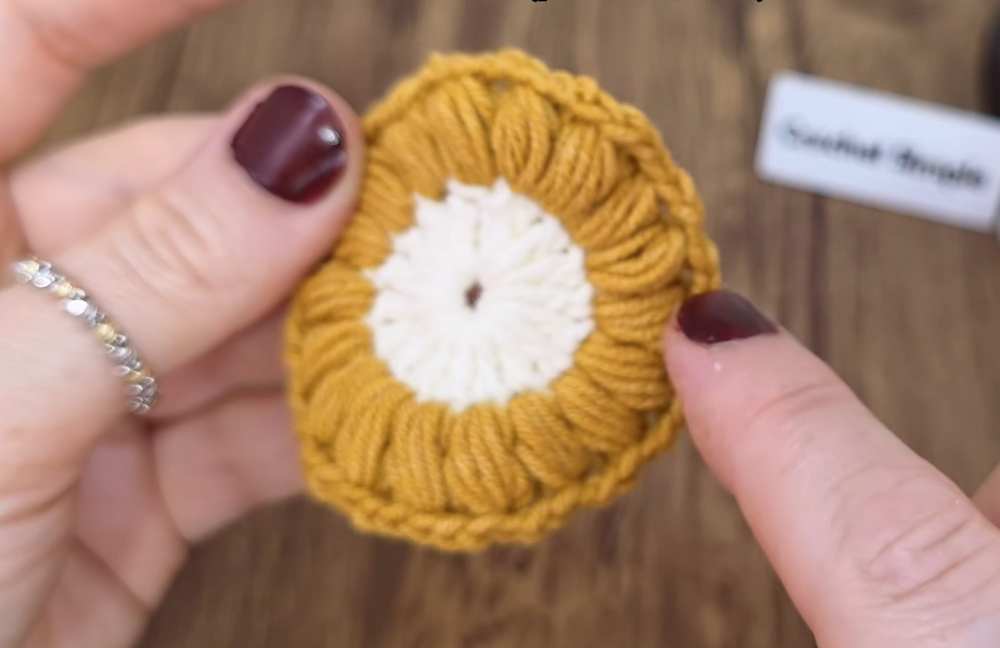
Round 2: Puff Stitches (New Color)
Attach your next color with a slip knot in any stitch.
Make a puff stitch: Yarn over, insert your hook into the stitch, and pull up a loop. Do this 4 times in the same stitch until you have 9 loops on your hook.
Yarn over and pull through all 9 loops.
Chain 1 tightly to close the puff stitch, then chain 1 more for the space.
Repeat this puff stitch and chain 1 space in every stitch around. (Total: 18 puff stitches).
Slip stitch to join, fasten off, and weave in the ends.
Round 3: Treble Clusters (New Color)
Attach your next color into any chain-1 space between the puff stitches.
Make a 4-treble crochet cluster: Yarn over twice, insert your hook into the space, pull up a loop, pull through two loops, and pull through two loops (leave the last loop on the hook). Do this 4 times in the same space, then yarn over and pull through all 5 loops on your hook.
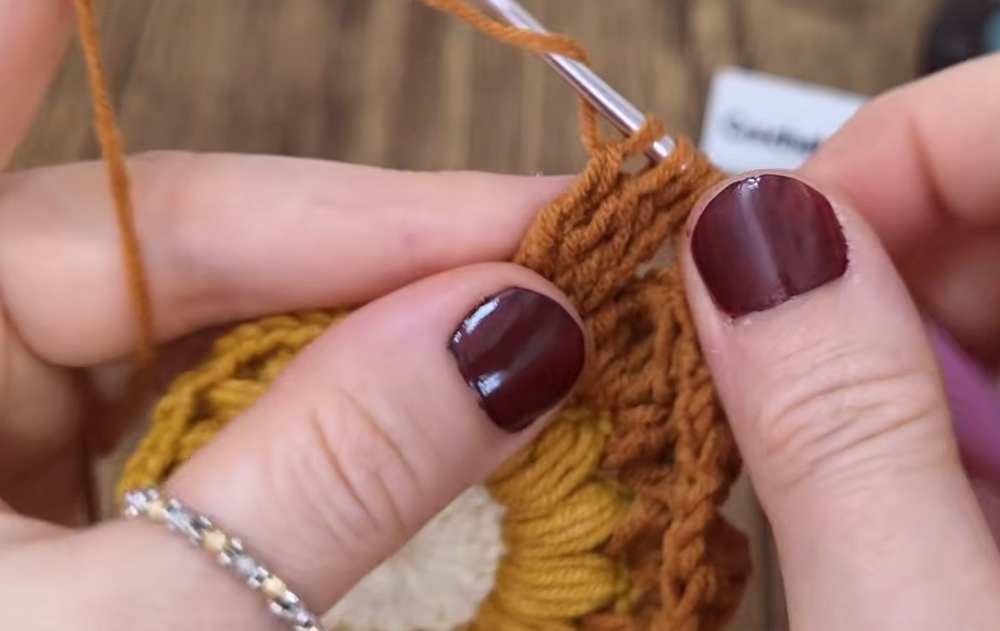
Chain 3.
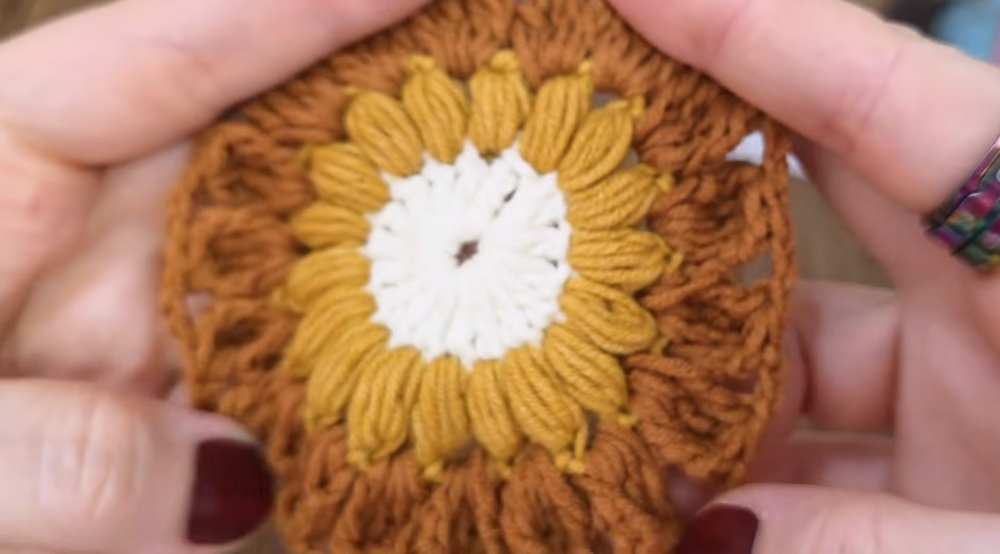
Repeat the 4-treble cluster and chain 3 in every chain-1 space all the way around. (Total: 18 clusters).
Slip stitch to join, fasten off, and weave in the ends.
Round 4: Turning it into a Hexagon (New Color)
Attach your next color in any chain-3 space.
Chain 3 (counts as first DC), and make 2 DC in the same space.
In the next space, make 3 DC.
In the third space, make your first corner: 3 DC, chain 1, 3 DC all in the same space.
In the next space, make 3 DC. In the next space, make 3 DC. In the next space, make a corner (3 DC, chain 1, 3 DC).
Repeat from * around the circle until you have 6 corners.
Slip stitch to join, fasten off, and weave in the ends.
(Repeat Rounds 1-4 until you have exactly 8 hexagon motifs).
Assembly & Shaping
Joining: Lay your motifs side-by-side and slip-stitch the edges together. Work your slip stitches into the back loops of the first motif and the back loops of the second motif to create a clean seam. Join them together into a round, ball-like shape, leaving the final two sides open.
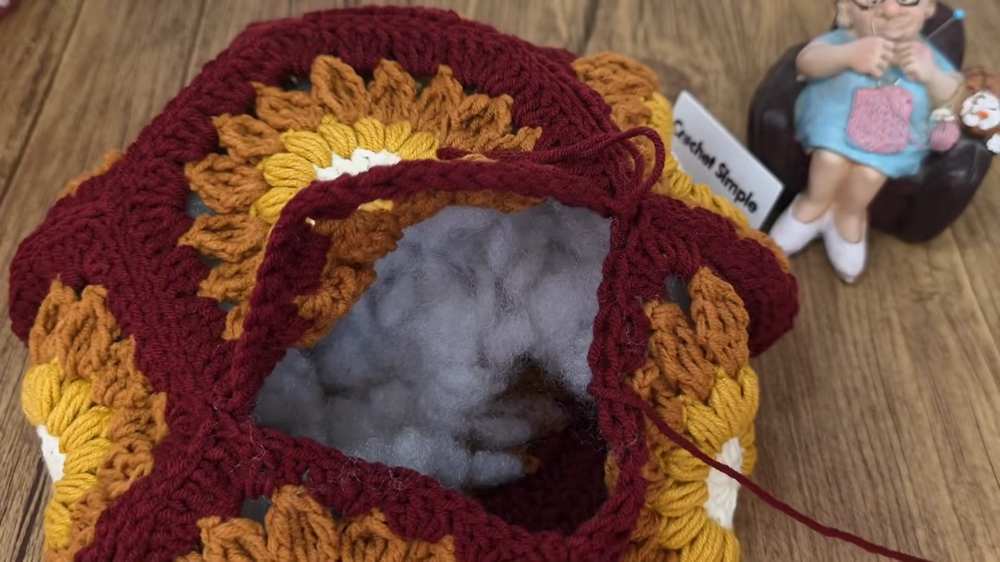
Stuffing: Fill the inside of your pumpkin with fiberfill. Do not overstuff it so much that it bursts, but give it enough filling to hold a nice shape.
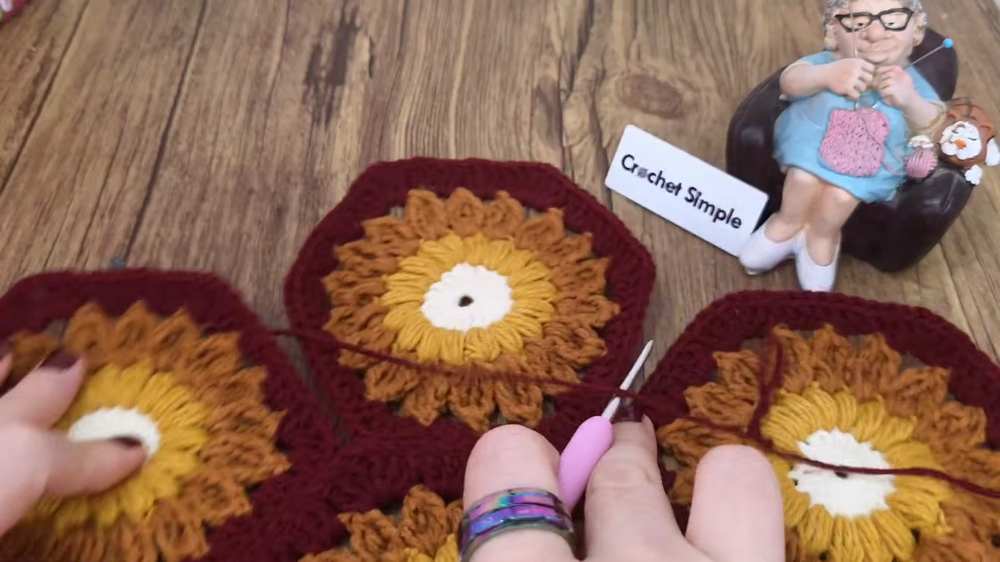
Closing: Slip stitch the remaining open edges closed and fasten off.
Indenting the Pumpkin: Thread a long piece of matching yarn onto a needle. Push the needle straight down through the top center of the pumpkin and out the bottom center. Pull the thread up the outside and go back down through the middle again. Pull it tightly so the top and bottom sink inward, giving it a classic pumpkin shape. Tie tight knots to secure it and hide the tails inside.
Adding the Stem & Vines
The Vine: Chain 15. Starting in the 3rd chain from the hook, crochet 2 Half Double Crochets (HDC) into each chain to make it curl. When you reach the last few chains, put 1 Single Crochet (SC) in each to finish it off. Fasten off.
The Stem: Apply a generous amount of hot glue to the bottom of your cinnamon stick piece and press it firmly into the center dip of the pumpkin.
Final Details: Hot glue your curly vine and a crochet leaf (or an artificial leaf) right next to the cinnamon stick.
Share on Social Media!
See More:

Crochet CUTEST Guest-Welcoming BOO Ghost with Bow, Hat and Pumpkin Accessories

Tester Call: How to Crochet A Candy Corn, Pumpkin & Kawii Buddy Potted Plant Plushie

Featuring: How to Crochet the Smallest Pumpkin Fall Turtle Plushie with Orange & Parrot

Pattern Tester: How to Crochet Pumpkin Ridges Face Donut Ring Plushie for Fall

How to Crochet An Amigurumi Long-Legged Kawaii Pumpkin in Shoes Buddy

How to Granny Square with Pumpkin Applique in the Middle

Tester Pattern: To Crochet Pumpkin Hello Kitty Plushie with Big Paws Buddy

Featuring: How to Crochet Tiered Unusual Texture Pumpkin Decoration (3 Sizes)