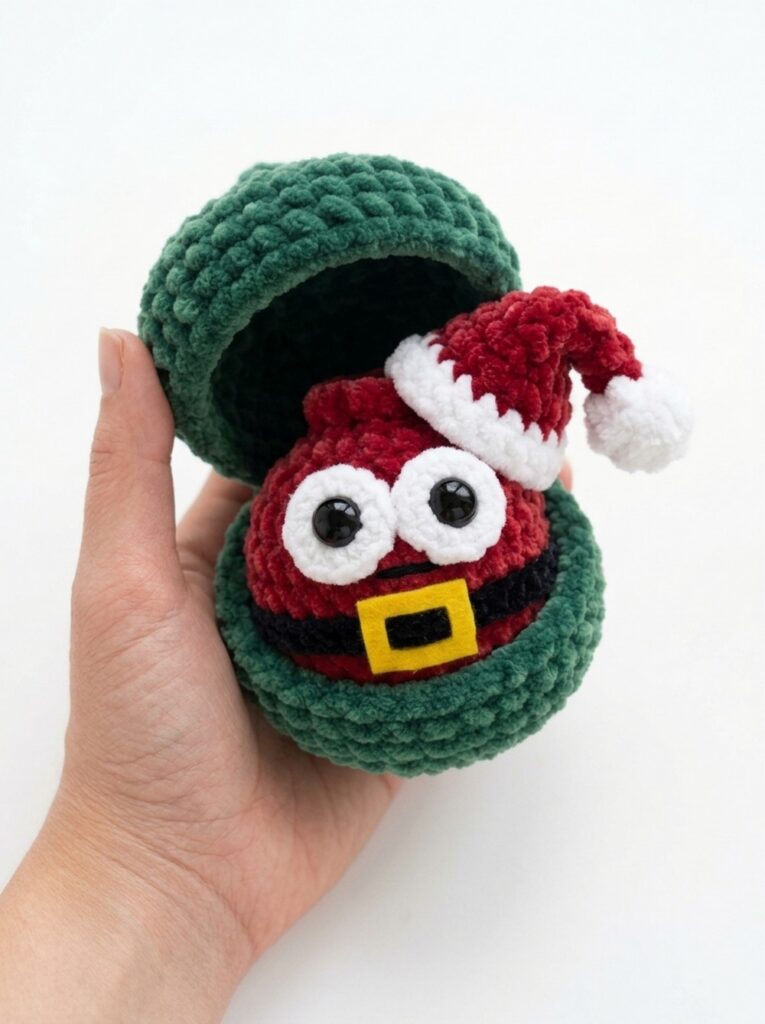
Looking for an ultimate crochet Christmas dumpling in a steamer box gift? Learn how to crochet this TOTALLY festive crochet Santa belly in a Santa hat dumpling plushie, with a crochet steamer box with lids, following a FREE written pattern. To make this crochet dumpling look cuter, I have also added those googly eyes above the crochet Santa belly belt. The crochet belt is made using sc row and yellow felt.
This makes it the ULTIMATE holiday gift you can crochet in under 45 minutes. The crochet Santa hat is optional, but I have provided the pattern for it as well.
You all liked the crochet reindeer buddy and snowman in Santa hats, and I hope you will show your love for this UNIQUE design of a Christmas bao bun plushie as well. Now, continue reading to learn more about this crochet plush red dumpling in a box project!

Pattern to Crochet the Plush Green Box Dumpling in A Box Plushie
Skill Level: Advanced Beginner
Finished Size: Santa Belly Dumpling is approximately 7 cm (2.8 in) tall/wide.
Terminology: US Crochet Terms
Materials & Tools
Plush / Chenille Yarn (Super Bulky / Category 6, ~100 g / 120 m):
Color A: Bright Red (for the Santa belly dumpling body and Santa hat)
Color B: Forest / Pine Green (for the steamer basket container)
Color C: White (for the crochet eye patches, Santa hat pom-pom, and hat brim)
Color D: Black (for the crocheted belt band around Santa’s belly)
Craft Felt & Thread (or Yellow/Gold Yarn):
Yellow / Gold Felt: Small scrap (~2.5 cm × 2 cm) for the belt buckle
Black Cotton/Semi-Cotton Yarn: For embroidering the tiny straight mouth
Red or Neutral Strong Cotton Thread: For cinching the top dumpling hole closed
Crochet Hook: 4.0 mm
Safety Eyes: 10 mm (black)
Fiberfill Stuffing
Tapestry / Yarn Needle
Stitch Marker
Scissors
Sewing Pins & Craft Glue / Sewing Needle (for the felt buckle)
Abbreviations & Symbols (US Terms)
MR: Magic Ring
ch: Chain
sc: Single crochet
inc: Increase (2 sc in the same stitch)
dec: Invisible decrease (sc 2 stitches together)
sl st: Slip stitch
BLO: Back loop only
FLO: Front loop only
st(s): Stitch(es)
( … ) × N: Repeat instructions inside parentheses N times
[N]: Total stitch count at the end of the round
Part 1: The Santa Belly Dumpling Body (With Belt)
Work in continuous spirals using Color A (Bright Red) and your 4.0 mm hook. Use a stitch marker in the first stitch of each round.
Round 1: In a MR, work 8 sc. [8]
Round 2: 8 inc. [16]
Round 3: (1 sc, inc) × 8. [24]
Round 4: (2 sc, inc) × 8. [32]
Round 5 (Switch to Color D – Black for the Belt): 32 sc around. [32]
Round 6 (Switch back to Color A – Red): 32 sc around. [32]
Rounds 7–8 (2 rounds): 32 sc around. [32]
Round 9: (2 sc, dec) × 8. [24]
Note: Pause here to make and attach the white crochet eyes before closing the body.
Part 2: Crochet Eyes (Make 2)
Using Color C (White) plush yarn and your 4.0 mm hook:
Round 1: Make 8–10 sc in a MR (use 8 sc for slightly tighter circles or 10 sc for slightly wider circles). [8–10]
Join with a sl st to the first stitch, fasten off, leaving a long tail (~15–20 cm) for sewing onto the body.
Attaching the Eyes & Eye Patches:
Insert the post of a 10 mm black safety eye directly into the center magic ring hole of each white crocheted circle.
Position both white eye circles closely side-by-side on the front of the red dumpling body directly above the black belt stripe (spanning Rounds 6 to 8, with their inner edges touching slightly in the center).
Push the safety eye posts through the red dumpling fabric between Rounds 7 and 8 (leaving roughly 5–6 stitches between the posts) and snap the safety backings firmly onto the inside.
Thread the white yarn tails onto your tapestry needle and whipstitch neatly around the outer edge of each white circle to secure them flat against the red body. Weave in the ends inside.
Part 3: Finishing the Dumpling Body & Top Ruffle
Continue working the body in Color A (Bright Red):
Round 10: (1 sc, dec) × 8. [16]
Stuffing: Add fiberfill stuffing now. Stuff softly and evenly so the dumpling stays squishy and rounded, not overly rigid.
Round 11: 8 dec. [8]
Dumpling Top Pleat / Ruffle (Round 12): Do not close the hole yet! You will first create the fluted top opening of the dumpling:
Round 12: Work into the Front Loops Only (FLO):
(inc, 1 sc) × 4. [12]
Cut the plush yarn leaving a small tail (~10 cm), make a slip stitch into the next stitch to finish the edge neatly, and tuck the tail inside the body.
Cinching the Top Hole:
Take a length of strong, thinner semi-cotton/cotton thread (matching red or neutral) and thread it onto a needle.
Carefully pass the needle through the remaining unworked Back Loops of Round 11 (located on the inside base of the top ruffle) all the way around.
Pull both ends of the thread firmly to cinch the hole completely shut beneath the ruffle.
Tie 2–3 tight knots, and use the needle to hide the thread ends inside the plush body.
Part 4: The Little Santa Hat
Work in continuous spirals using your 4.0 mm hook.
Pom-Pom (Color C – White Yarn):
R1: 4 sc in MR. [4]
R2: (sc, inc) × 2. [6]
R3: (sc, dec) × 2. [4]
Stuff the pom-pom firmly.
Note: You can either fasten off here to sew the pom-pom on at the end, or switch directly to Color A (Red) yarn in the last stitch of R3 to work continuously.
Hat Body (Color A – Red Yarn):
R4: In BLO (if you changed the color!), 4 sc. [4]
R5: 4 sc. [4]
R6: 4 sc. [4]
R7: 3 sc, inc. [5]
R8: 4 sc, inc. [6]
R9: (2 sc, inc) × 2. [8]
R10: (3 sc, inc) × 2. [10]
R11: (4 sc, inc) × 2. [12]
R12: (5 sc, inc) × 2. [14]
Brim (Switch to Color C – White Yarn):
R13: (6 sc, inc) × 2. [16]
R14: 16 sc. [16]
Finishing the Hat:
Join with a sl st, fasten off leaving a long white tail (~25 cm) for sewing the hat onto the dumpling, and weave in any other loose ends.
If you made the pom-pom separately, sew it securely to the tip of R4.
Belt
Just crochet a row of 34 sc crochet and glue it around below the eyes and mouth. You would want to use the same yarn but in black with sc in each stitch starting with the 35 chains.
Part 5: Detailed Assembly (Face, Belt Buckle & Santa Hat)
1. Embroidering the Mouth:
Thread your tapestry needle with fine black cotton yarn.
Insert the needle from the bottom/side of the dumpling and bring it out directly beneath the inner corner of one white eye patch (right above the black belt stripe, around Round 6).
Insert the needle directly beneath the inner corner of the other white eye patch to form a short, straight horizontal line centered right between the bottom of the eyes and the top of the belt.
Bring the yarn back out at your entry point, knot the ends securely, trim, and tuck the knot inside the body.
2. Making & Attaching the Yellow Belt Buckle:
Cut a small rectangle of Yellow/Gold craft felt measuring roughly 2.5 cm wide × 2 cm tall.
Fold the rectangle gently in half and snip a smaller rectangular window out of the center so you are left with a clean hollow belt buckle frame.
Center the yellow felt buckle directly over the black belt round (Round 5) right underneath the embroidered black mouth.
Secure the felt buckle onto the black stitches using a few tiny invisible whipstitches with yellow sewing thread (or a dab of fabric/craft glue), making sure the black belt shows clearly through the center hole of the buckle.
3. Attaching the Santa Hat:
Lightly stuff the lower half of the red Santa hat (Rounds 9–13) with a small pinch of fiberfill so it holds its cone shape, leaving the narrow tip (Rounds 4–8) unstuffed so it can flop gracefully to the side.
Place the hat tilted at a jaunty angle on the upper right side of the dumpling’s head, tucked right beside the top dumpling ruffle and sitting just above the right white eye patch.
Pin the white brim in place with sewing pins to check the angle and ensure the dumpling will still fit comfortably inside the steamer case.
Thread the long white yarn tail onto your tapestry needle and whipstitch all the way around the base of Round 14 (the white brim) to anchor the hat firmly onto the red dumpling head.
Take 1–2 small tacking stitches partway down the side of the red hat cone (around R6–R7) to tack the tip gently downward so the white pom-pom drapes nicely over the side. Knot off and hide the tail inside the body.
Part 6: The Steamer Basket Container
The basket consists of two identical halves (base and lid) crocheted in Color B (Forest / Pine Green) using your 4.0 mm hook and hinged together.
Halves (Make 2):
Round 1: In a MR, work 8 sc. [8]
Round 2: 8 inc. [16]
Round 3: (1 sc, inc) × 8. [24]
Round 4: (2 sc, inc) × 8. [32]
Round 5: (7 sc, inc) × 4. [36]
Round 6: In Back Loops Only (BLO): 36 sc around. [36] (This forms the sharp bottom edge/crease of the basket).
Rounds 7–8 (2 rounds): Through both loops: 36 sc around. [36]
For the 1st Half (Base): Fasten off and cut the yarn.
For the 2nd Half (Lid): Do NOT cut the working yarn.
Joining the Two Halves (The Hinge):
Align the two open halves edge-to-edge, right sides facing out.
Using the working loop from the 2nd half, join them across 4 to 5 stitches along the back rim:
Insert your hook through the BLO of the top half and the corresponding FLO of the bottom half.
Work 1 sc across each of the 4–5 pairs of loops to create a flexible hinge.
Test-fit the Santa dumpling inside to ensure the basket opens and closes cleanly over the Santa hat.
Sl st, fasten off the hinge yarn, and weave in the end inside.
Adding the Lid Handle / Strap (Optional):
Attach Color B (Green) yarn to the top center of the lid right above the hinge seam.
Chain a strip across the top of the dome (approx. 16–18 chains, or long enough to reach from the back hinge to the front center edge without pulling too tight).
Fasten/join the end of the chain to the front edge with a sc or sl st.
Ch 1, turn, and work 1 sc in each chain stitch heading back toward the starting point to create a sturdy, flat handle strap.
Join with a sl st to the starting edge, fasten off, and weave all remaining tails neatly inside the stitches.
Share on Social Media!


See More:
How to Crochet Grinch Mushy in Ruffle-Brim Santa Hat Miniature Amigurumi for Gifting
How to Crochet Mini Grinch Stingray in Santa Hat & Scarf Buddy Plushie for Gifting
Featuring: How to Crochet Amigurumi Mr. Gingerbread in Santa Hat Wind Spinner for Christmas
Tester Call: How to Crochet Mr. Baymax Snail in Santa Hat & Scarf with Christmas Wreath Shell Plushie
Tester Call: How to Crochet Iconic Googly Character Yellow Dumpling Plushie in Santa Hat
Featuring: Crochet No-Sew Holiday Fat Bird in Slouchy Santa Hat Plushie for Gifting
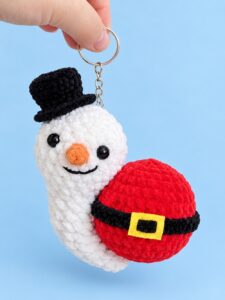
How to Crochet Plush Mr. Snow Snail with Santa Bauble Holiday Gift Plushie

Featuring: How to Crochet Funny Santa Flip-Over Coaster with Amigurumi Santa Cupcake
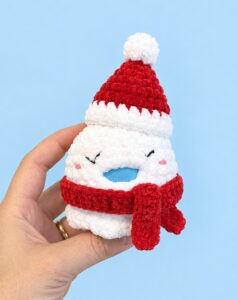
Tester Call: How to Crochet Squishy Snowball with Balloon, Santa Hat & Scarf