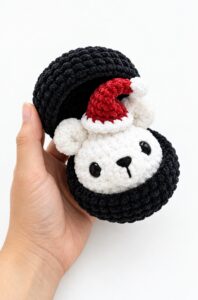
I am back with another ICONIC character crochet dumpling in a steamer basket plush. Today, learn how to crochet this oh-so-cute, iconic googly-eyed yellow dumpling plushie in a black steamer basket with a FREE written pattern.
This also wears an optional crochet slouchy Santa hat since Christmas is around the corner.
We will be crocheting a Minion dumpling plushie following this FREE pattern with the cotton yarn crochet glasses and 12mm eyes. Can be crocheted again in under 1 hour. Now, continue reading to learn more about this plush Minion buddy in a steamer basket plush!

Crochet Minion Dumpling Pattern
Skill Level: Advanced Beginner
Finished Size
Dumpling is approximately 7 cm (2.8 in) tall/wide.
Materials & Tools
Plush / Chenille Yarn (Super Bulky / Category 6, ~100 g / 120 m):
Color A (Yellow): For the dumpling body
Color B (Black): For the steamer basket container
DK / Worsted Weight Yarn:
White & Red: For the Santa hat
Grey & White: For the goggle eye piece
Black: For the goggle band, mouth embroidery, and cinching thread
Crochet Hooks:
4.0 mm (for plush yarn sections)
3.5 mm (for hat, goggle, and band)
Safety Eyes: 12 mm (black)
Fiberfill Stuffing
Tapestry / Yarn Needle
Stitch Marker
Scissors
Sewing Pins

Abbreviations (US Terms)
MR: Magic Ring (Magic Circle)
ch: Chain
sc: Single crochet
hdc: Half double crochet
inc: Increase (2 sc in the same stitch)
dec: Decrease (single crochet 2 stitches together / invisible decrease)
sl st: Slip stitch
BLO: Back loop only
FLO: Front loop only
st(s): Stitch(es)
rnd(s) / row(s): Round(s) / Row(s)
[ ]: Stitch count at the end of the round
( … ) * X: Repeat the instructions in brackets X times
Part 1: The Yellow Plush Dumpling
Work in continuous spirals using Color A (Yellow). Use a stitch marker in the first stitch of each round.
Round 1: In a MR, work 8 sc. [8]
Round 2: 8 inc. [16]
Round 3: (1 sc, inc) * 8. [24]
Round 4: (2 sc, inc) * 8. [32]
Rounds 5–8 (4 rounds): 32 sc around. [32]
Eye & Goggle Placement
Round 9: (2 sc, dec) * 8. [24]
Note: Before closing further, attach the goggle assembly. Center the assembled goggle/eye piece onto the front of the dumpling between Rounds 6 and 9. Insert the 12 mm black safety eye through the center of the white and grey goggle piece and directly through the dumpling body. Secure the safety backing firmly on the inside of the dumpling.
Round 10: (1 sc, dec) * 8. [16]
Stuffing: Add fiberfill stuffing now. Stuff softly and evenly so the dumpling stays squishy and rounded, not overly rigid.
Round 11: 8 dec. [8]
Dumpling Top Pleat / Ruffle (Round 12)
Do not close the hole yet! You will first create the fluted top opening of the dumpling.
Round 12: Work into the Front Loops Only (FLO):
(inc, 1 sc) * 4 [12]
Cut the plush yarn leaving a small tail (~10 cm), make a slip stitch into the next stitch to finish the edge neatly, and tuck the tail inside the body.
Cinching the Top Hole
Take a length of strong, thinner cotton thread (black or neutral) and thread it onto a needle.
Carefully pass the needle through the remaining unworked Back Loops of Round 11 (located on the inside base of the top ruffle) all the way around.
Pull both ends of the thread firmly to cinch the hole completely shut beneath the ruffle.
Tie 2–3 tight knots, and use the needle to hide the thread ends inside the plush body.
Embroidering the Smile
Thread your needle with fine black yarn.
Insert from the base or side of the dumpling and bring the needle out directly beneath the goggle band (about 1 round below).
Insert the needle under the center and bring it out 1 round lower in the center. Catch the black horizontal strand to pull it downward into a cute “V” / curved smile (backstitch style).
Knot the yarn ends together, trim, and pull the knot inside the body to hide it.
Part 2: The Black Steamer Basket Container
The basket consists of two identical halves (base and lid) crocheted in Color B (Black) and hinged together.
Halves (Make 2)
Round 1: In a MR, work 8 sc. [8]
Round 2: 8 inc. [16]
Round 3: (1 sc, inc) * 8. [24]
Round 4: (2 sc, inc) * 8. [32]
Round 5: (7 sc, inc) * 4. [36]
Round 6: In Back Loops Only (BLO): 36 sc around. [36] (This forms the sharp bottom edge/crease of the basket).
Rounds 7–8 (2 rounds): Through both loops: 36 sc around. [36]
For the 1st Half (Base): Fasten off and cut the yarn.
For the 2nd Half (Lid): Do NOT cut the working yarn.
Joining the Two Halves (The Hinge)
Align the two open halves edge-to-edge, right sides facing out.
Using the working loop from the 2nd half, join them across 4 to 5 stitches along the back rim:
Insert your hook through the BLO of the top half and the corresponding FLO of the bottom half.
Work 1 sc across each of the 4–5 pairs of loops to create a flexible hinge.
Test-fit the dumpling inside to ensure the basket opens and closes cleanly.
Sl st, fasten off the hinge yarn, and weave in the end inside.
Adding the Lid Handle / Strap
Attach Color B (Black) yarn to the top center of the lid right above the hinge seam.
Chain a strip across the top of the dome (approx. 16–18 chains, or long enough to reach from the back hinge to the front center edge without pulling too tight).
Fasten/join the end of the chain to the front edge with a sc / sl st.
Ch 1, turn, and work 1 sc in each chain stitch heading back toward the starting point to create a sturdy, flat handle strap.
Join with a sl st to the starting edge, fasten off, and weave all remaining tails neatly inside the stitches.
Part 3: Goggle & Accessories
1. Eye Pattern
Using white and grey yarn and a 3.5 mm hook:
Rnd 1 (White): 6 sc in MR (6)
Rnd 2 (White): inc in each st around (12)
Rnd 3 (Grey): Change to Grey yarn. (1 sc, inc) * 3, ch 1, (1 sc, inc) * 3, ch 1, join with a slip stitch.
Fasten off, leaving a tail for sewing. Insert the 12 mm black safety eye through the center of the white and grey eye piece.
2. Black Glasses Band Pattern
Using black worsted yarn and a 3.5 mm hook:
Foundation: Ch 40 (or enough chains to fit comfortably around the plush dumpling head).
Row 1: hdc in 2nd ch from hook and in each ch across (39 hdc).
Join ends together with a sl st to form a continuous band. Attach the goggle eye piece to the center of the band, then wrap the band around the dumpling.
Part 4: The Santa Hat Pattern
Using white and red DK/Worsted yarn and a 2.5 mm – 3.5 mm hook:
Rnd 1 (White): 4 sc in MR (4)
Rnd 2 (White): inc in each st around (8)
Rnd 3 (White): (2 sc, dec) * 2 (6)
Rnd 4 (Change to Red): Switch to red yarn, (1 sc, dec) * 1, dec in last 2 sts (4)
Rnd 5 (Red): (1 sc, inc) * 2 (6)
Rnd 6 (Red): sc in each st around (6)
Rnd 7 (Red): (2 sc, inc) * 2 (8)
Rnd 8 (Red): (3 sc, inc) * 2 (10)
Rnd 9 (Red): (4 sc, inc) * 2 (12)
Rnd 10 (Red): (5 sc, inc) * 2 (14)
Rnd 11 (Red): (6 sc, inc) * 2 (16)
Rnd 12 (Change to White): Switch to white yarn, (7 sc, inc) * 2 (18)
Rnd 13 (White): 17 sc, inc in last st (19)
Fasten off and weave in ends.
How to Slouch the Hat
To give the hat a slouched look:
Add Straight Rounds: After completing Rnd 13, repeat sc in each st around (19) for an extra 4 to 8 rounds without adding any increases. The extra length creates a fold that slumps over naturally at the back.
Adjust Tension/Hook: Switch to a slightly larger hook (3.5 mm or 4.0 mm) after Rnd 11 or loosen your tension so the red and white fabric hangs softly rather than staying stiff.
Final Assembly
Position and sew the black glasses band and goggle eye piece onto the front of the yellow plush dumpling, securing it with the 12 mm black safety eye right through the dumpling body.
Embroider the curved smile just beneath the goggle band using fine black yarn.
Sew or pin the Santa hat securely to the top side of the dumpling head, letting it tilt charmingly.
Place your finished minion dumpling inside its black steamer basket container and flip the lid shut.

See More:

How to Crochet Holiday & All-Year Googly Minion Buddy Two-Tone Wind Spinner for Gifting
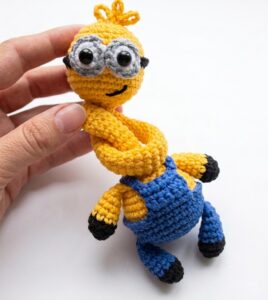
How to Crochet A Funny Minion Bag Charm Amigurumi for Kids

Tester Call: How to Crochet Santa Belly Googly-Eyed Festive Dumpling in A Green Gift Box Plush
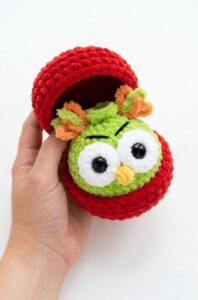
Tester Call: How to Crochet Grinch Owl Dumpling in A Christmas Box Plushie
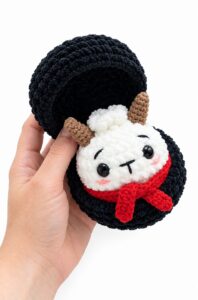
How to Crochet New Year Goat in Red Scarf Dumpling Plushie for Gifting
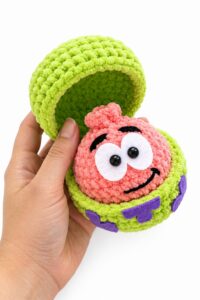
Tester Call: How to Crochet the Very First Patrik Star Dumpling Plushie for Gifting
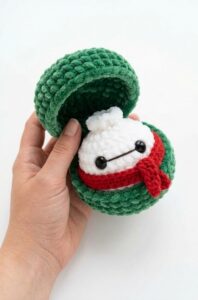
How to Crochet Baymax Dumpling Plushie for Gifting At Christmas
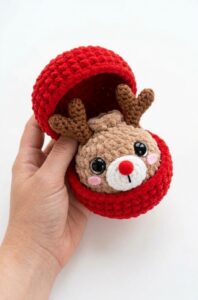
Tester Call: How to Crochet Reindeer Dumpling Plushie for Christmas Gifting
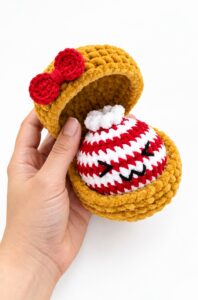
Tester Pattern: How to Crochet Peppermint Dumpling Plushie for Christams Gifting