


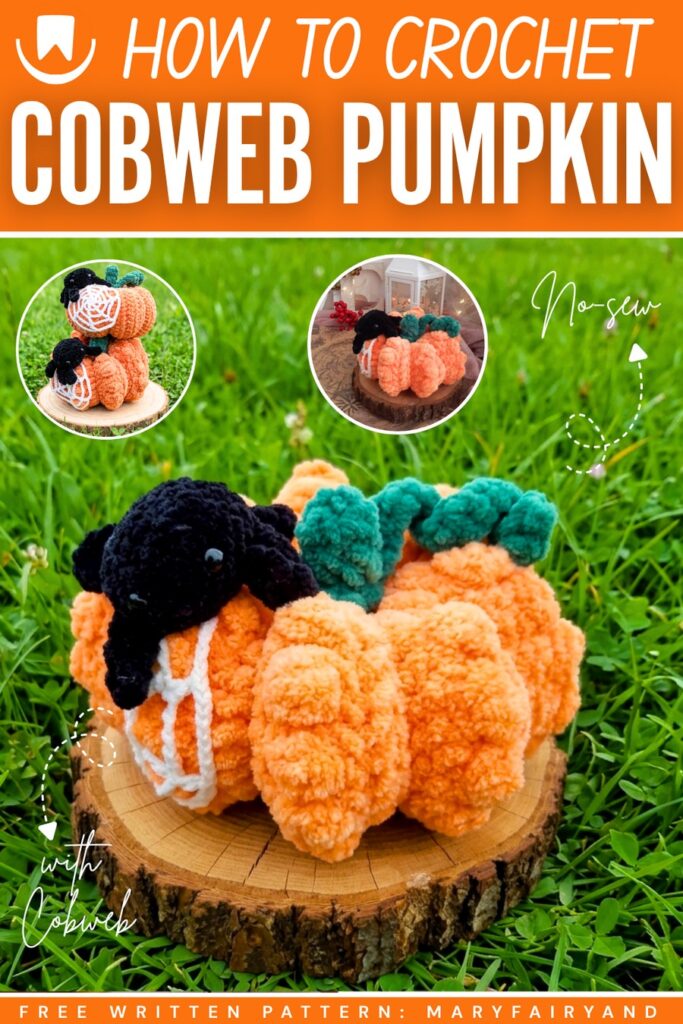
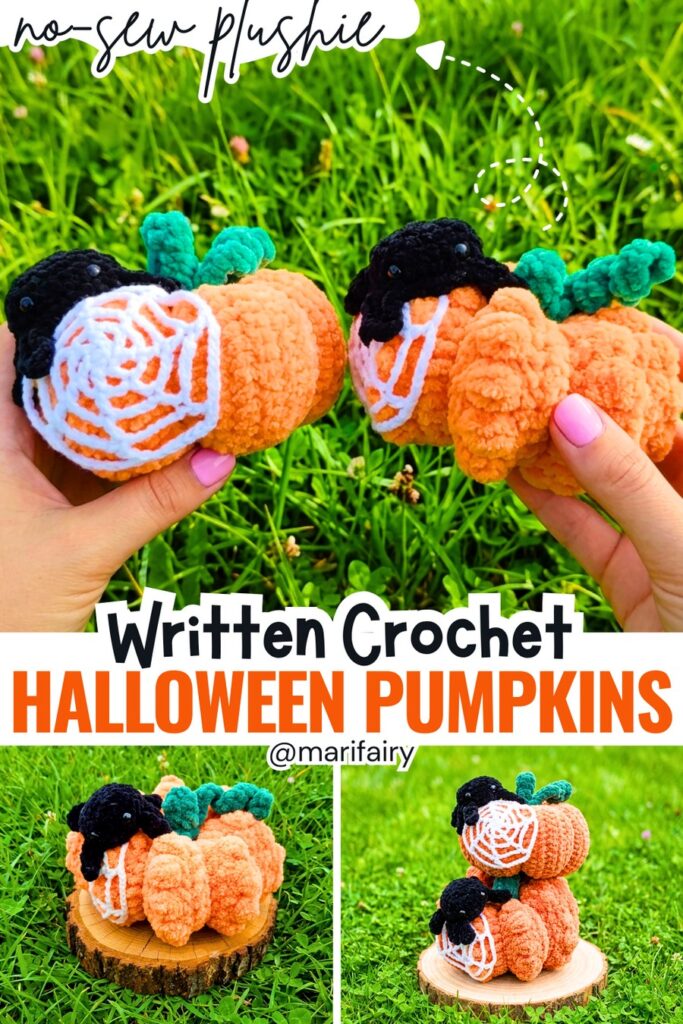
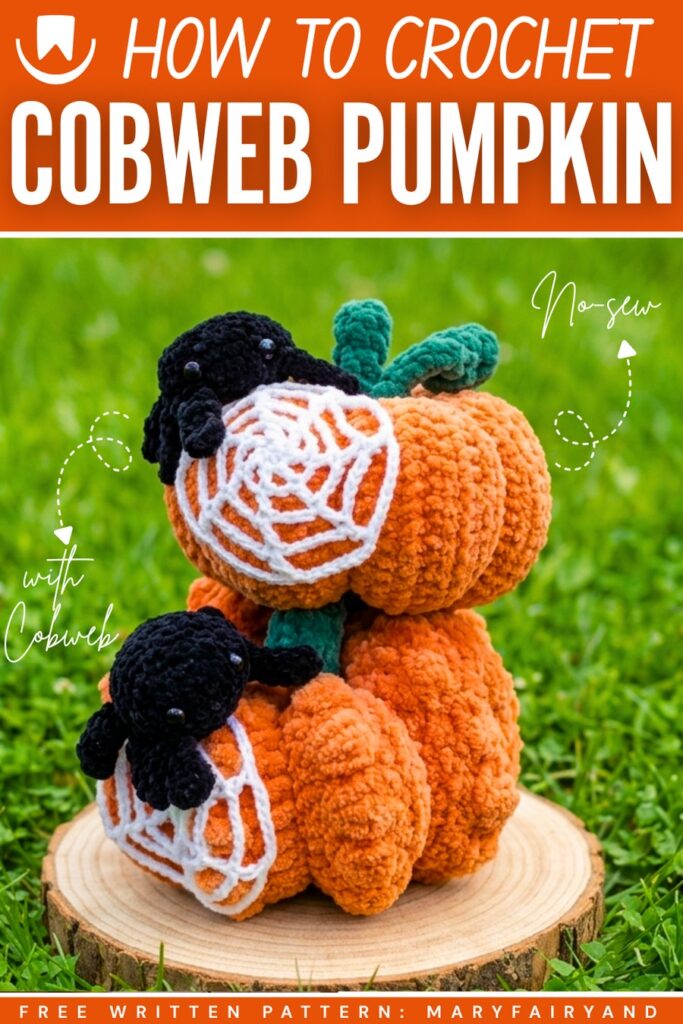
This Halloween, decorate with this crochet ELEGANT decorative pumpkin plushie that is charmed up with a no-sew crochet spider plush and a spider cobweb. Learn to crochet with a 2-in-1 pattern for both Halloween and fall. This set includes 2 variations: pumpkin with a non-textured body but ridges, and the textured pumpkin plush with beautiful bobble stitch ribbing.
You can also decorate for Thanksgiving with this crochet big pumpkin plush. You will learn to crochet both the spider and the cobweb with this same pattern.
The pumpkin plush this time, unlike the crochet ribbed fall pumpkin, is worked in the rounds. However, you can easily crochet your set within 1 hour. The spider plush is removable, so you can also crochet it separately as a fall craft fair item. Now, continue reading for the full crochet pumpkin plush pattern.
Crochet Spooky Pumpkin Plushie Decor Pattern
Learn how to crochet a cozy, plush crochet pumpkin that makes perfect autumn or Halloween decor! The pattern includes instructions for two different styles: a classic smooth pumpkin and a textured pumpkin with ribbed bobble stitches.
Both are made by crocheting a flat rectangular piece, sewing it into a tube, and cinching the ends shut to form a plump, segmented shape. To complete the spooky-cute look, the pumpkin is decorated with a curly green stem, a crocheted white spiderweb, and a tiny, round black spider perched right on top.
Abbreviations (US Terms)
- ch = chain
- sc = single crochet
- sl st = slip stitch
- dc = double crochet
- inc = increase (2 sc in one stitch)
- dec = decrease (sc 2 together)
- BLO = back loop only
- Bobble = 4-dc bobble stitch (yarn over, insert hook, pull up a loop, yarn over, pull through 2 loops – repeat 4 times in the same stitch until you have 5 loops on the hook. Yarn over and pull through all 5 loops).
- st(s) = stitch(es)
- MR = magic ring
Materials Needed
- Main Pumpkin Yarn: Super bulky plush/chenille yarn (e.g., Himalaya Dolphin Baby) in your choice of color (orange, yellow, etc.).
- Stem Yarn: Super bulky plush yarn in green or brown.
- Spider Yarn: Super bulky plush yarn in black (e.g., Wolans Bunny Baby).
- Spiderweb Yarn: Finer cotton or semi-cotton white yarn.
- Strong Thread: Semi-cotton yarn (in a color matching your pumpkin) for shaping and cinching the pumpkin segments.
- Hooks: 4.0 mm for the plush yarn, and 2.5 mm for the spiderweb.
- Extras: Hollowfiber or toy stuffing, long needle for soft toy sculpting, regular blunt tapestry needle, scissors, and 5 mm half-bead eyes for the spider (plus fabric glue).
Pattern Instructions
1. The Pumpkin Base
Note: The tutorial offers two versions. Choose your favorite!
Option A: Smooth Pumpkin
- Foundation: Ch 26.
- Row 1: Starting in the 2nd ch from the hook, sc in each ch across. (25 sts)
- Row 2 – 38 (or 40): Ch 1, turn. Working in the BLO, sc in each st across. (25 sts)
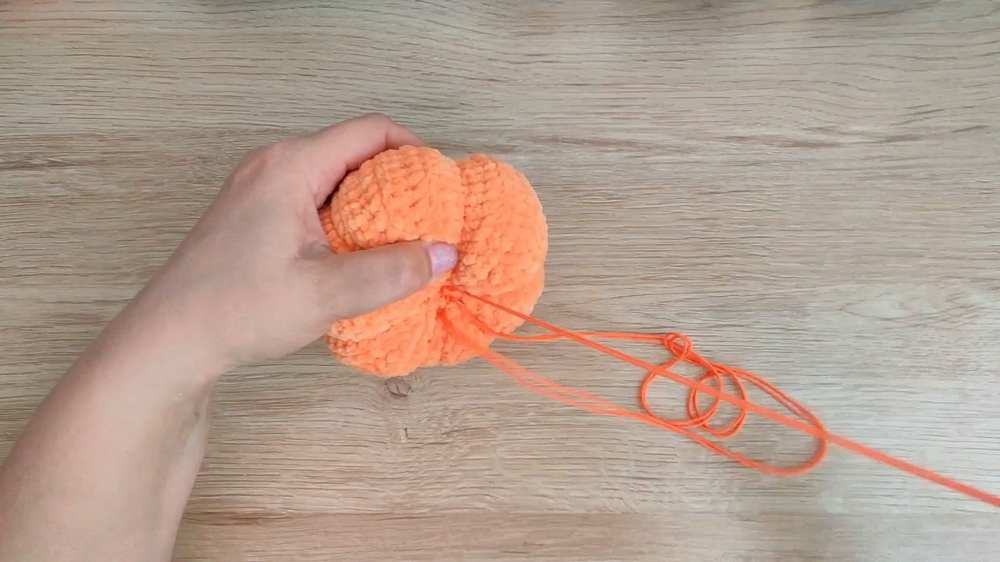
Are you a Beginner?
If you can’t follow the written pattern, continue with the tutorial or the pattern below!
- Keep crocheting until you reach 38 rows (for a 6-segment pumpkin) or 46 rows (for an 8-segment pumpkin).
- Finish: Fasten off, leaving a long tail for sewing.
Option B: Ribbed Bobble Pumpkin
- Foundation: Ch 21.
- Row 1: Starting in the 2nd ch from the hook: 4 sl st, 12 sc, 4 sl st. (20 sts)
- Row 2 & 3: Ch 1, turn. Working in the BLO: 4 sl st, 12 sc, 4 sl st.
- Row 4 (Bobble Row): Ch 1, turn. Working in the BLO: 4 sl st. Working in both loops: [1 Bobble st, ch 1, 1 sc in next st] repeat 6 times total. Working in the BLO: 4 sl st.
- Row 5: Ch 1, turn. Working in the BLO: 4 sl st. Working in both loops: 12 sc (make sure to stitch into the bobbles and the scs between them to get exactly 12 sts). Working in the BLO: 4 sl st.
- Rows 6 – 9: Repeat Row 2.
- Row 10: Repeat Row 4 (Bobble Row).
- Continue this sequence (5 rows per section) until you have 6 or 8 sections in total.
- Finish: Fasten off, leaving a long tail for sewing.
2. Assembling the Pumpkin
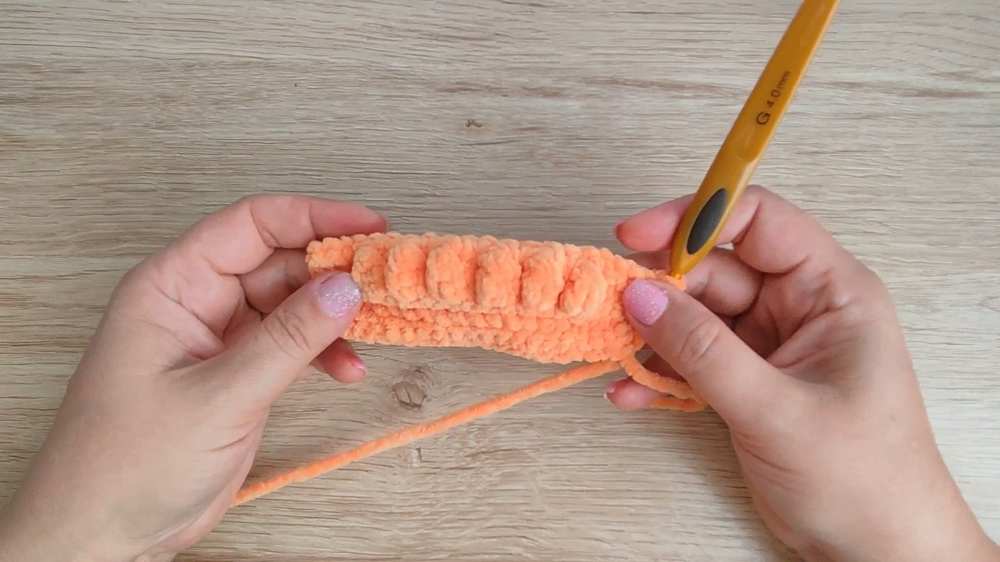
- Sew the Tube: Fold your flat piece in half so the short ends meet. Sew them together using the long tail to form a tube.
- Cinch the Bottom: Thread your long needle with the strong semi-cotton string. Weave it in and out along the edge of the bottom opening. Pull tightly to cinch the hole completely shut and tie a strong knot. (Push the knot to the inside).
- Stuff: Turn the pumpkin right-side out and stuff it firmly with hollowfiber.
- Cinch the Top: Weave the strong string around the top opening. Pull tight to close the pumpkin and tie a knot.
- Create the Segments: Thread your extra-long soft toy needle with a long piece of the strong string. Insert the needle down through the top center of the pumpkin and out the bottom center. Wrap the string around the outside of the pumpkin (following the natural lines of your rows or between the bobble sections) and pull it tight to create the deep pumpkin ridges. Repeat this 6 or 8 times depending on your sections. Tie off securely and hide the thread inside.
3. Stem & Vine
Stem Base (Bottom Cover): (Use green plush yarn)
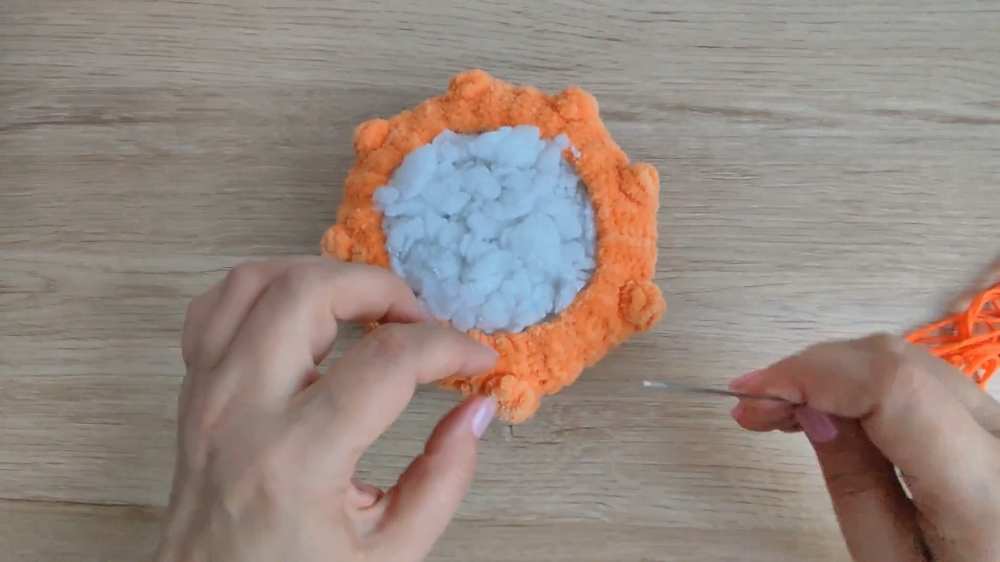
- Rnd 1: 6 sc in a MR. Sl st to join. Fasten off. (You will glue this over the bottom hole of the pumpkin to hide the cinched knot).
Top Stem & Vine:
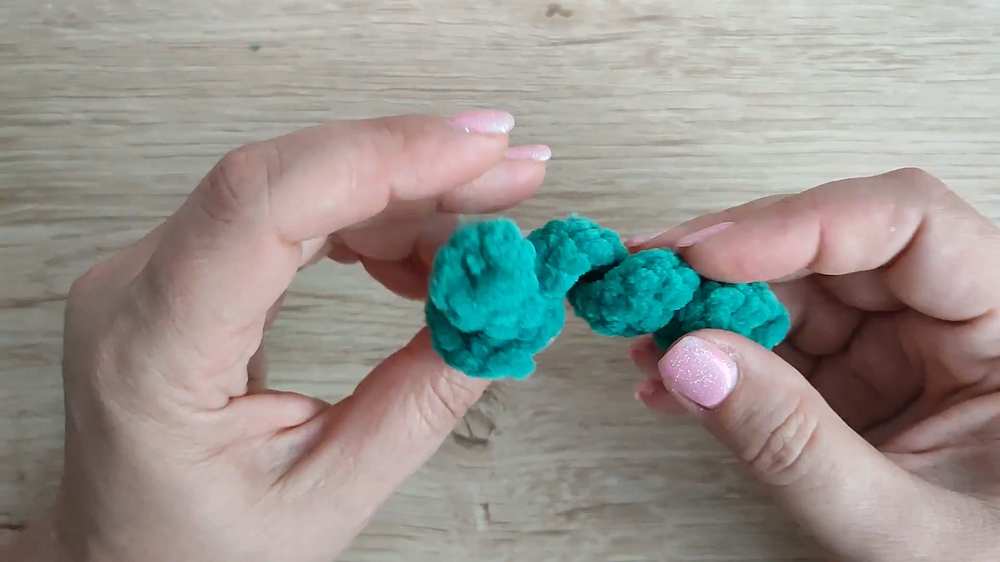
- Rnd 1: 6 sc in a MR. (6)
- Rnds 2 – 4: Sc in each st around. (6)
- Rnd 5: Inc in each st around. (12) Fasten off.
- Vine: Ch 20. Starting in the 2nd ch from the hook, sc in each ch across. The piece will naturally curl. Fasten off and tie the vine to the base of the top stem (around Rnd 5).
4. The Spider
(Use black plush yarn)
- Rnd 1: 6 sc in a MR. (6)
- Rnd 2: Inc in each st around. (12)
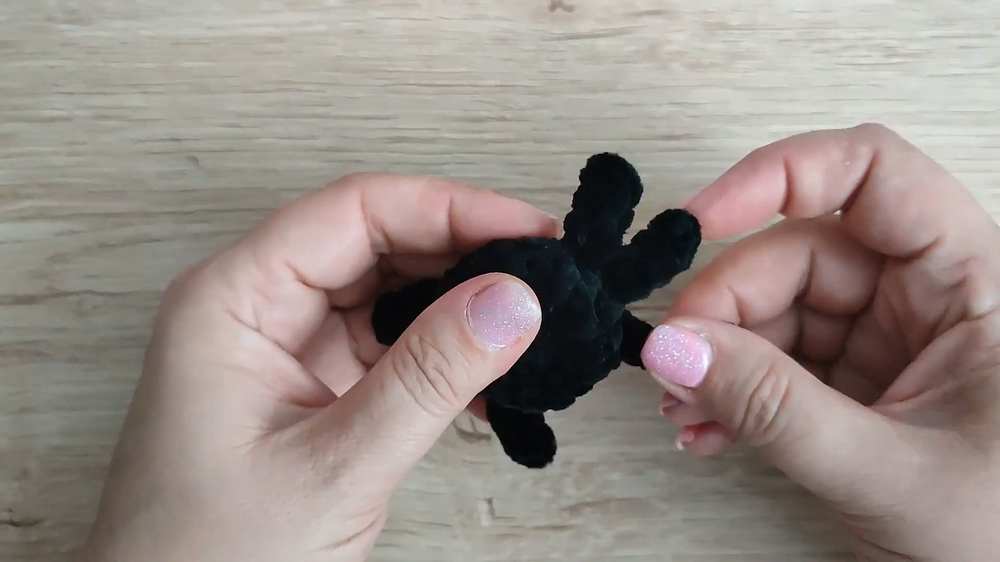
- Rnd 3 (Legs): 1 sc. [Ch 5, starting in 2nd ch from hook, make 4 sl st down the ch (Leg 1 made). 1 sc in next st on the body] repeat for a total of 3 legs. Make 4 sc along the body. [Ch 5, make 4 sl st down the ch, 1 sc in next st on the body] repeat for a total of 3 legs on the other side. 2 sc. (Note: The video makes a cute 6-legged spider!)
- Rnd 4: (1 sc, inc) repeat 6 times around. (18) Make sure to tuck the legs forward so you are stitching into the body between the legs.
- Rnd 5: Sc in each st around. (18)
- Rnd 6: (1 sc, dec) repeat 6 times around. (12) Stuff the spider lightly.
- Rnd 7: Dec 6 times. (6). Fasten off, weave the tail through the front loops of the remaining 6 stitches, and pull tight to close. Glue on the half-bead eyes.
5. The Spiderweb
(Use fine white yarn and the 2.5mm hook)
- Rnd 1: 6 sc in a MR. Sl st to first sc to join.
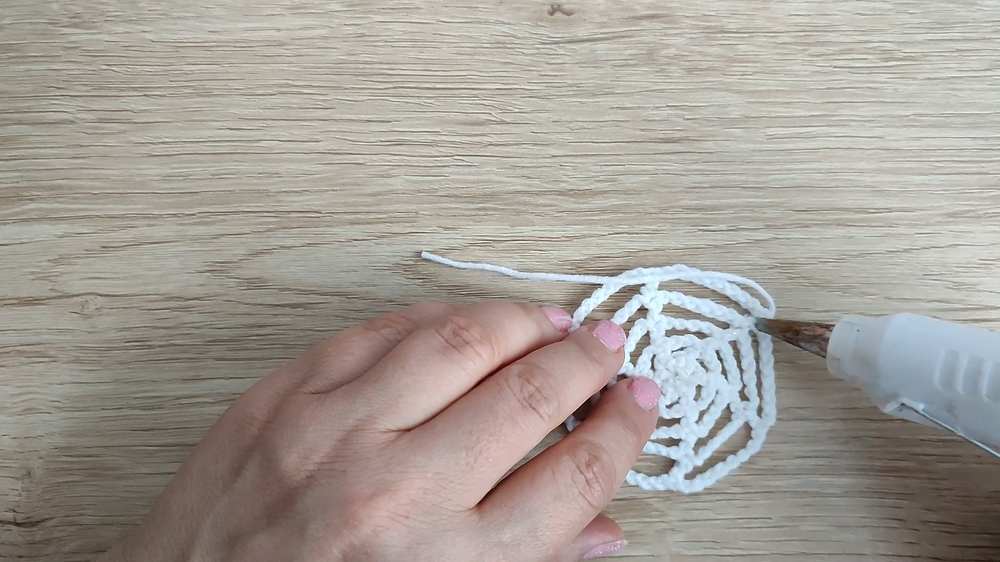
- Rnd 2: Ch 4 (counts as 1 dc + ch 2). [dc in next st, ch 2] repeat 5 times. Sl st to the 2nd ch of the starting ch-4.
- Rnd 3: Ch 6 (counts as 1 dc + ch 4). [dc in next st, ch 4] repeat 5 times. Sl st to the 2nd ch of the starting ch-6.
- Rnd 4: Ch 8 (counts as 1 dc + ch 6). [dc in next st, ch 6] repeat 5 times. Sl st to the 2nd ch of the starting ch-8.
- Rnd 5: Ch 10 (counts as 1 dc + ch 8). [dc in next st, ch 8] repeat 5 times. Sl st to the 2nd ch of the starting ch-10.
- Fasten off and hide the tails.
6. Final Decoration
- Glue the flat green base circle to the bottom of the pumpkin to hide the cinched hole.
- Drape the white spiderweb over the top of the pumpkin and glue/tack it in place.
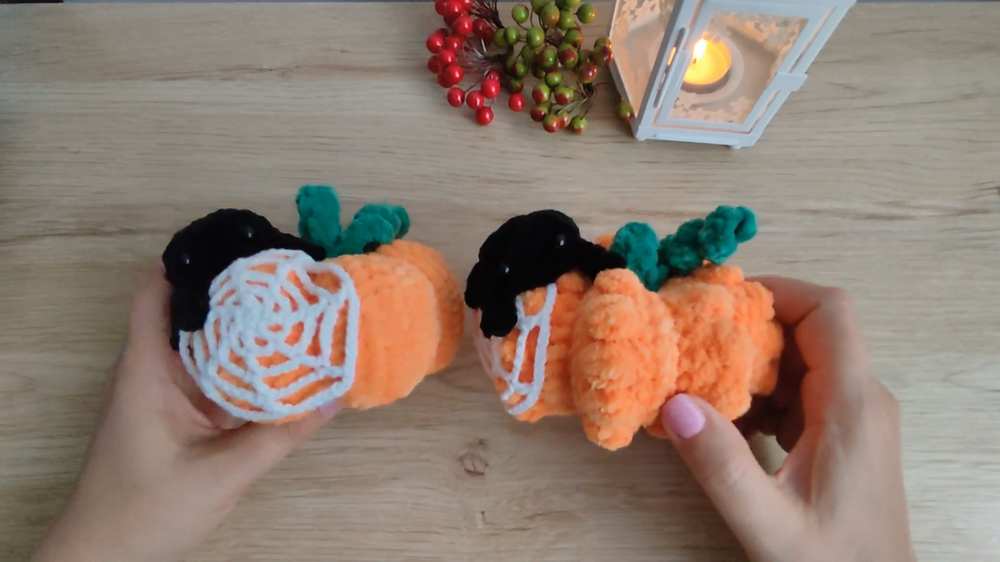
- Glue the green stem (with the vine attached) to the top center of the pumpkin, right over the middle of the web.
- Glue your little black spider onto the web!
Share to Social Media!
See More:

Crochet CUTEST Guest-Welcoming BOO Ghost with Bow, Hat and Pumpkin Accessories

Tester Call: How to Crochet A Candy Corn, Pumpkin & Kawii Buddy Potted Plant Plushie

Featuring: How to Crochet the Smallest Pumpkin Fall Turtle Plushie with Orange & Parrot

Pattern Tester: How to Crochet Pumpkin Ridges Face Donut Ring Plushie for Fall

How to Crochet An Amigurumi Long-Legged Kawaii Pumpkin in Shoes Buddy

How to Granny Square with Pumpkin Applique in the Middle

Tester Pattern: To Crochet Pumpkin Hello Kitty Plushie with Big Paws Buddy

Featuring: How to Crochet Tiered Unusual Texture Pumpkin Decoration (3 Sizes)

Tester Pattern: To Crochet A Grizzly Bear Presenting You A Pumpkin Plushie
