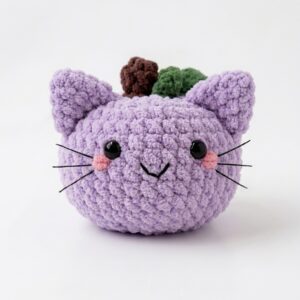
Here is one more oh-so cute and last-minute crochet Baymax Christmas gift design with a FREE written pattern. Introducing the crochet Baymax kitty cat amigurumi that you can learn to crochet by following a no-sew, 30-minute crochet pattern. This crochet holiday cat wears a small crochet Santa hat and a little crochet slip-stitch scarf. This is an easy amigurumi Christmas present made low-sew with the use of the bobble stitch for the legs and arms.
Thanks to a specially flat base, this little kitty stands upright all on its own on a shelf or desk, and its size makes it the perfect bag charm or keychain buddy.
You can also crochet your cat amigurumi after Christmas with CUTE belly colorwork and kawaii eyes and whiskers. This is a crochet chubby cat amigurumi you can crochet in under 30 minutes. Now, continue reading for learning more about this amigurumi buddy cat for all skill levels!

Pattern to Crochet the Amigurumi Miniature Baymax Cat
Skill Level: Beginner – Level 5
Materials & Tools
Yarn: 5-ply milk cotton yarn (approximately 2.0 mm thickness, such as Susan’s Family 5-ply):
Main Color (MC): White (approx. 35 g) — entire body worked in one solid color, removing the tummy patch color changes.
Contrasting Color (CC): Red (approx. 10 g, for the Santa hat and scarf).
Accent Color: Black thread or embroidery floss (for embroidering whiskers and connecting the eyes).
Pom-pom material: Small white pom-pom for the top of the hat (or fluffy white yarn).
- Crochet Hook: 2.5 mm (for the body and cat base) and 1.75 mm (for the Santa hat).
- Eyes: Two 2 mm black beads or small black safety eyes.
- Notions: Polyester fiberfill stuffing, yarn/tapestry needle, stitch marker, scissors, and optional keychain ring or lobster clasp.
Abbreviations & Terminology (US Terms)
MR: Magic Ring
ch: Chain stitch
slst: Slip stitch
sc: Single crochet
inc: Increase (work 2 single crochet stitches into the same stitch)
dec: Invisible decrease
hdc: Half double crochet
BO: Bobble stitch (5-double-crochet bobble for paws)
sk: Skip stitch
st(s): Stitch(es)
Note on Joined Rounds: This pattern is worked in joined rounds. Begin each round with a ch 1 (does not count as a stitch), and end each round by making a slst into the very first sc of that round, then pull the slip stitch snug.
Body Pattern (Solid White Baymax Cat)
All rounds are worked entirely in Main Color (White).
Round 1: In a Magic Ring, work 8 sc. Slst to the first sc to join. [8 sts]
Round 2: Ch 1, work 8 inc (2 sc into each st around). Slst to the first sc to join. [16 sts]
Round 3: Ch 1, (1 sc, 1 inc) repeat 8 times. Slst to the first sc to join. [24 sts]
Round 4: Ch 1, (1 sc, 1 inc, 1 sc) repeat 8 times. Slst to the first sc to join. [32 sts]
Round 5: Ch 1, work 1 sc in each of the 32 sts around. Slst to the first sc to join. [32 sts]
Rounds 6 & 7: Ch 1, work 1 sc in each of the 32 sts around. Slst to the first sc to join. [32 sts each round]
Round 8 (Front Paws): Ch 1, work 10 sc, work 1 BO (5-dc bobble stitch for the first paw), work 10 sc, work 1 BO (5-dc bobble stitch for the second paw), work 10 sc. Slst to the first st to join. [32 sts]
Rounds 9, 10, and 11: Ch 1, work 1 sc in each of the 32 sts around. Slst to the first st to join. [32 sts each round]
Round 12 (Back / Bottom Paws): Ch 1, work 10 sc, work 1 BO (first bottom paw), work 10 sc, work 1 BO (second bottom paw), work 10 sc. Slst to the first st to join. [32 sts]

Decreasing & Forming the Base
All remaining rounds are worked entirely in white.
Round 13: Ch 1, (2 sc, 1 dec) repeat 8 times. Slst to the first st to join. [24 sts]
Round 14: Ch 1, (1 dec, 1 sc) repeat 8 times. Slst to the first sc to join. [16 sts]
Stuffing & Closing the Flat Base
Fasten off the white yarn, leaving a tail of about 25 to 30 cm for closing.
Firmly pack polyester fiberfill through the opening, shaping the body so the sides are plump and flat at the bottom.
Thread the yarn tail onto a tapestry needle.
Insert your needle through the front loop only of every alternating stitch around the remaining 16 stitches (skip 1 stitch, pick up 1 stitch, repeat 8 times around the rim).
Pull the yarn tail tight like a drawstring to draw the edge inward into a flat circular disc.
Make a knot at the center, weave the tail deep inside the body, and snip the excess.
Ears (Make 2 Directly onto the Head)
Count down from the top center (Round 1) to the gap between Round 4 and Round 5, aligned above the left and right paws.
Insert your hook horizontally under the post of a surface stitch between Round 4 and Round 5, pull up a white yarn loop (leaving a 15 cm tail), and ch 3.
Starting in the 2nd ch from the hook: work 1 sc, then 1 hdc.
Anchor the ear by inserting the hook into the head between Round 2 and Round 3, working a slst, and fastening off.
Use a tapestry needle and tail to pass through the tip and base to keep it perky, then weave in ends.
Baymax Face Details (Beads & Thread) Eyes: Sew the two 2 mm black beads securely onto Round 5 of the face, spacing them evenly apart (about 3-4 stitches apart).
Baymax Visor Line & Whiskers: Using a strand of black sewing thread or thin embroidery floss:
Embroider a straight horizontal line connecting the two bead eyes straight across.
On each outer side of the eyes, stitch three angled whiskers spreading outward.
Crochet Santa Hat (Using Sport Yarn & 1.75 mm Hook)
Round 1 (Red): Start with a magic ring and work 5 single crochets (sc) into the ring. Pull tight to close. [5 sts]
Round 2 (Red): Work 1 increase (inc), then 4 sc. [6 sts]
Round 3 (Red): Work 1 inc, then 5 sc. [7 sts]
Round 4 (Red): Work 1 inc, then 6 sc. [8 sts]
Round 5 (Red): Work 1 inc, then 7 sc. [9 sts]
Round 6 (White): Change to white yarn. Work 1 inc, then 8 sc. Fasten off with a long tail for sewing. [10 sts]
Glue or sew a small white pom-pom to the tip of the hat, and attach the hat at a tilted angle to the top of the cat’s head between the ears.
Crochet Scarf (Using Slip Stitches)
Using the red contrasting yarn and your 2.5 mm hook, chain a length long enough to wrap comfortably around the cat’s neck (approximately 35–40 chains).
Starting from the 2nd chain from the hook, work slip stitches (slst) all the way back down the chain to create a neat, textured, flat scarf strap.
Fasten off and weave in ends. Wrap the scarf around the cat’s neck just below the face and secure with a few hidden stitches so it stays in place over the front paws.
Final Assembly If using as a keychain, attach a small jump ring and keychain clasp securely through the top of the head right behind the Santa hat.

See More:
Tester Call: How to Crochet Mr. Baymax Snail in Santa Hat & Scarf with Christmas Wreath Shell Plushie
Tester Call: How to Crochet A Plush Mr. Baymax Star Ornament and Charm for Gifting
How to Crochet Baymax Dumpling Plushie for Gifting At Christmas
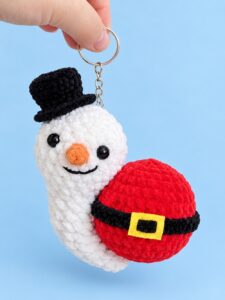
How to Crochet Plush Mr. Snow Snail with Santa Bauble Holiday Gift Plushie
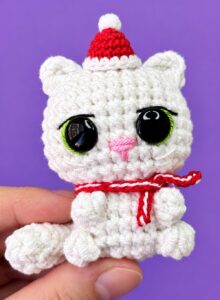
Tester Call: How to Crochet Mini Festive Hat & Striped Scarf No-Sew White Cat Amigurumi
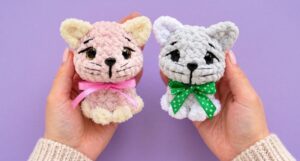
Featuring: How to Crochet Holiday Present Kitty Cat Pluhsie with Bow Ribbon
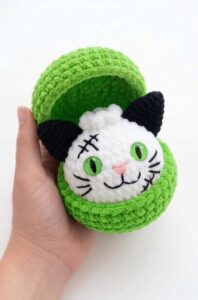
Pattern Tester: How to Crochet Cat in A Potion Box Plushie for Festivals
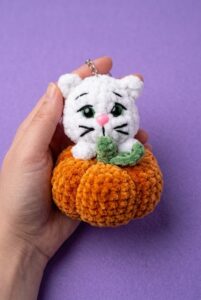
Tester Pattern: To Crochet A Witch Cat Plush Gifting You A Pumpkin Softie