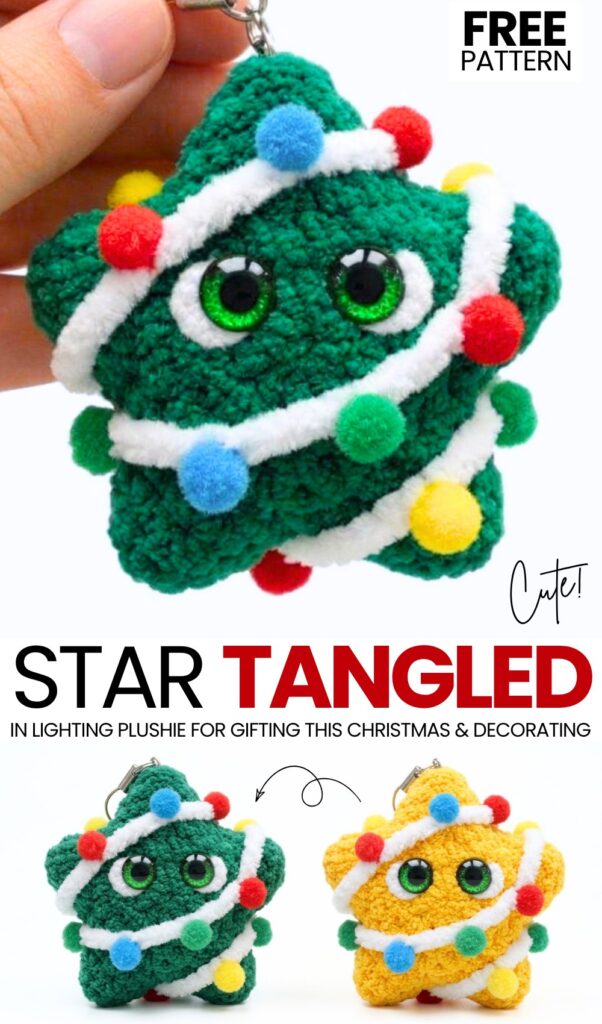
This is the 6th pattern from the “crochet Christmas smiling buddy star ornaments” series and is going to be the MOST special of all. Introducing the crochet green-eyed star tangled in Christmas lighting plushie that you can learn to crochet with a FREE written pattern, as always. Choose from the crochet Christmas tree star tangled in lighting and the yellow night star tangled in lighting plushie. We will be using the pom-pom balls in blue, red, green, and yellow to make the Christmas lights and the white plush yarn for the strings.
Working up in about an hour, this soft and squishy amigurumi star measures around 7 cm (under 3 inches) across.
We will be crocheting it from two flat star motifs crocheted in four quick rounds, sewn together, lightly stuffed, and wrapped in plush white yarn dotted with vibrant miniature pom-pom “bulbs.” It makes an adorable, beginner-friendly holiday gift, a festive backpack charm, or a Christmas tree ornament using up leftover scraps of chenille yarn.
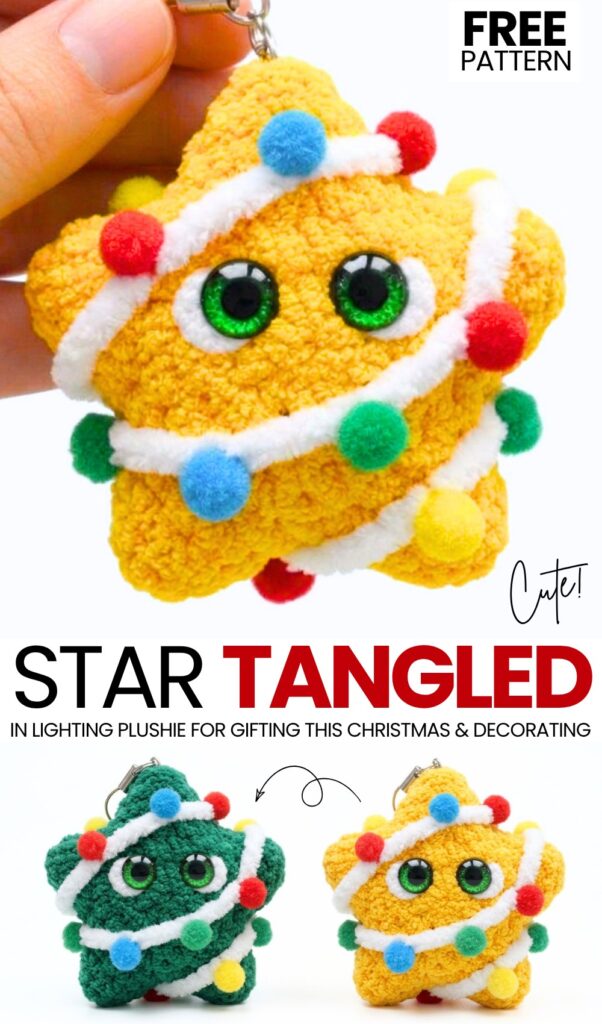
Pattern to Crochet a Christmas Lighting Mini Star Plushie for Gifting
Skill Level: Beginner – Level 5
Materials & Tools
Main Yarn: Super bulky plush / chenille yarn (100 g / 120 m; such as Himalaya Dolphin Baby, YarnArt Dolce, or equivalent) in golden yellow / warm yellow (less than 15 g needed).
Christmas Light Wire Yarn: Super bulky plush / chenille yarn in crisp white (around 60 to 80 cm length needed for wrapping).
Eye Highlight Yarn: White plush or cotton yarn (for the outer whites of the eyes).
Christmas Light Bulbs: Miniature craft pom-pom balls (approx. 8 mm to 10 mm in diameter) in red, blue, yellow, and green (about 10 to 14 pom-poms total).
Crochet Hook: 4.0 mm
Eyes: 10 mm safety eyes or flat-back glued eyes (green sparkle eyes shown in the photo).
Stuffing: Polyester fiberfill (a small handful).
Notions & Adhesives:
Tapestry/yarn needle with a large eye
Stitch marker
Scissors
Hot glue gun or strong fabric glue (for attaching pom-pom bulbs, securing the white light cord, and gluing flat-back eyes if used)
Keychain strap, lanyard cord, or metal lobster clasp with jump ring

Abbreviations & Terminology (US Crochet Terms)
MR: Magic Ring (do not pull excessively tight at first so chenille yarn does not snap)
sc: Single crochet
inc: Increase (work 2 single crochet stitches into the same stitch)
hdc: Half double crochet
dc: Double crochet
sl st: Slip stitch
st(s): Stitch(es)
R: Round
Star Panels (Make 2 Identical Pieces)
Crochet in continuous spirals for Rounds 1 to 3; place a stitch marker in the first stitch of each round to keep count.
Round 1:
Make a Magic Ring (MR).
Work 10 sc into the ring.
Gently pull the center closed.
Total stitch count: 10 sts.
Round 2:
(1 sc, inc) repeated 5 times.
Total stitch count: 15 sts.
Round 3:
(2 sc, inc) repeated 5 times.
Total stitch count: 20 sts.
Round 4 (Forming the 5 Star Points): In this round, each star point is created by working 5 stitches into one single stitch, followed by 3 slip stitches. Repeat this sequence around all 20 stitches:
Star Point 1: Into the very next stitch, work: (1 sc, 1 hdc, 1 dc, 1 hdc, 1 sc) all into that same stitch. Then, work 1 sl st into each of the next 3 sts.
Star Point 2: In the next stitch, work (1 sc, 1 hdc, 1 dc, 1 hdc, 1 sc) in one stitch. Then work 1 sl st into each of the next 3 sts.
Star Point 3: In the next stitch, work (1 sc, 1 hdc, 1 dc, 1 hdc, 1 sc) in one stitch. Then work 1 sl st into each of the next 3 sts.
Star Point 4: In the next stitch, work (1 sc, 1 hdc, 1 dc, 1 hdc, 1 sc) in one stitch. Then work 1 sl st into each of the next 3 sts.
Star Point 5: In the next stitch, work (1 sc, 1 hdc, 1 dc, 1 hdc, 1 sc) in one stitch. Then work 1 sl st into each of the next 3 sts.
Finishing the Pieces:
First Star Panel (Back): Cut the yarn leaving a short tail (around 10 cm), fasten off, and weave the tail securely onto the wrong side.
Second Star Panel (Front): Fasten off, leaving a long yarn tail (around 40 to 50 cm) for sewing the two halves together.

Creating the Face (Front Panel)
Attach and embroider the eyes onto the front panel before sewing the two halves together:
Position the Eyes:
Place the two 10 mm green sparkle eyes in the center between Rounds 2 and 3, spaced about 2 to 3 stitches apart.
If using safety eyes, snap the washers firmly onto the back before adding the white yarn border. If using flat-back eyes, glue them securely into place and allow them to dry.
White Eye Borders:
Thread a tapestry needle with white plush chenille yarn.
Insert the needle from the back of the panel right against the outer bottom edge of one eye.
Curve the white plush yarn snugly around the outer side and bottom curve of the eye, then insert the needle back through the inner bottom edge to create a crescent-shaped white eye border (as seen in the photo).
Repeat on the opposite eye so the white curves frame the outer edges symmetrically, giving the star a wide-eyed, expressive look.
Tie and knot the white yarn ends securely on the wrong (back) side and trim any excess.
Assembly & Stuffing
Align the Panels:
Place the front and back star pieces together with the wrong sides facing each other and the right sides facing outward.
Line up all 5 star points evenly.
Sew the Halves:
Thread the long yellow yarn tail left on the front panel onto your yarn needle.
Sew through both loops of the corresponding edge stitches around the perimeter of the star, matching point to point and valley to valley.
Pull the thread snug enough to close gaps, but avoid pulling too tightly so the points stay crisp and flat.
Stuff the Star:
Continue sewing until only one side/point remains open.
Insert small tufts of polyester fiberfill into each of the 5 points first (using the blunt end of your crochet hook or scissors to push stuffing into the tips), then lightly fill the center.
Do not overstuff; keep the star softly puffed so it retains its defined 5-point silhouette.
Close the Seam:
Continue sewing through the remaining open stitches until completely closed.
Fasten off securely, insert the needle into the star body, bring it out through the back, pull slightly, cut flush, and let the tail pop inside.
Adding the Tangled Christmas Lights
Wrap the White Light Cord:
Cut a piece of white super bulky plush yarn roughly 65 to 75 cm long (leaving a little extra so you can trim it cleanly at the end).
Starting at the back of the star near the top point, secure the starting end of the white yarn with a small dab of fabric glue or hot glue, tucking the raw tip neatly between the stitches.
Wrap the white yarn diagonally down across the upper portion of the front panel—passing just above the eyes—around the side, across the back, and back around the front just below the eyes.
Continue wrapping diagonally in a criss-cross, tangled pattern across the lower points and sides until the star looks playfully wrapped in a string of lights, making sure not to cover the eyes.
Tack the white yarn down at a few hidden points along the sides and back with tiny dots of glue so the cord stays securely in place without shifting.
Bring the ending tip of the white yarn to the back of the star, trim any excess, and glue the tip neatly into the plush fibers.
Attach the Pom-Pom Light Bulbs:
Lay out your red, blue, yellow, and green mini pom-poms along the path of the white yarn cord, alternating colors randomly so no two identical colors sit right next to each other.
Place a tiny dot of hot glue or fabric glue directly onto the white yarn cord (or right alongside its edge) and press each pom-pom firmly into place for a few seconds until set.
Be sure to add pom-poms along both the front and back strands of the white yarn, as well as peeking out from the edges of the star points, for a complete 3D tangled effect.
Attach the Keychain Hardware:
Open a jump ring using pliers (or thread a cord lanyard directly) and attach it through the top stitch of the highest star point.
Connect your metal lobster clasp or split ring, and your festive tangled-lights star plushie is ready to hang!
Share on Social Media!

See More:
Tester Call: How to Crochet Mr. Cookie Star with Bow & Cherry Plushie for Gifting
Tester Call: How to Crochet Snowman in Black Hat Star Ornament Plushie for Christmas Gifting
How to Crochet Knotted Bow & Star on the Top Pastel Rainbow Tiered Christmas Tree

Tester Call: How to Crochet Glitter-Eyed Reindeer Star Buddy Ornament for Gifting
Tester Call: How to Crochet Plush Grinch Star Buddy & Ornament Gift for Christmas
Tester Call: How to Crochet A Plush Mr. Baymax Star Ornament and Charm for Gifting
How to Crochet Power-Up Star Hanging for Christmas & New Year Decorations
How to Crochet Funny Festive Red Nose Reindeer Star Christmas Ornament Amigurumi
Tester Call: How to Crochet Plush Santa Hat Patrik Star Plushie for Gifting