Show support for Otakulandia!
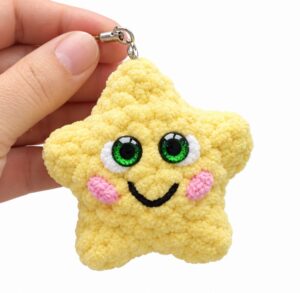
Last year, you all loved these crochet Christmas character star charms more than any other Christmas decoration, but I could not share a pattern for them! So, this year, I have decided to reshare the tutorial with the new makers, along with a FREE written crochet reindeer star pattern. These Rudolph the Red-Nosed Reindeer Ornaments are SUPER unique and customized star ornaments that you can crochet in either blue or yellow. With the googly eyes and the red stuffed nose, these are the CUTEST!
Crocheted as five-pointed stars decorated with antlers, expressive cartoon eyes, a plump red nose, and rosy cheeks, these ornaments make charming additions to your Christmas tree, festive garlands, bag charms, or personalized gift tags.
The star itself is constructed from two flat, identical crocheted star motifs sewn together around the edges (without body stuffing to keep it crisp and flat), while the antlers, dimensional stuffed nose, and appliquéd eyes are attached to the front. Now, continue reading for learning more about this crochet star decoration charm!
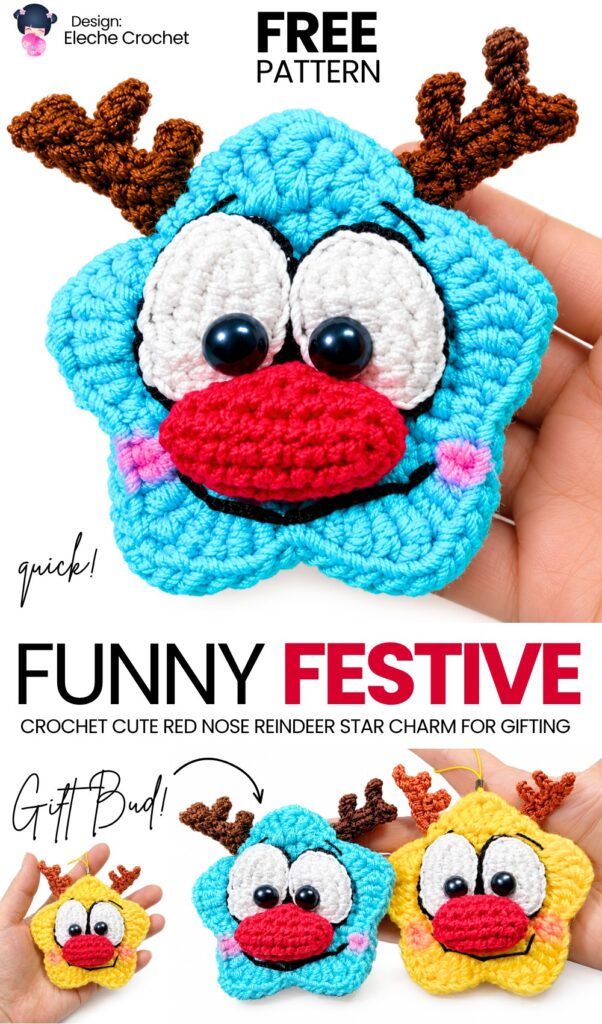
Pattern to Crochet the Funny Festive Reindeer Amigurumi Decoration
Star Diameter: Approximately 10–11 cm (~4 to 4.5 inches) across from point to point.
Gauge: Not critical for this project; maintain firm, even tension so stitches remain dense.
Materials & Tools
Yarn & Thread:
Star Base: Worsted / DK-weight acrylic or wool yarn (approx. 2.5–3.0 mm thick) in Light Blue / Aqua or Yellow (approx. 25–30 g).
Antlers: Brown cotton or acrylic thread/fine yarn (e.g., Perlé No. 5 used double-stranded, or sport-weight yarn).
Eyes: White cotton thread/fine yarn (used double-stranded).
Eye Outlines & Face Details: Black cotton embroidery floss or thin thread (single strand).
Nose: Red cotton or acrylic thread/fine yarn (used double-stranded).
Crochet Hook:
2.5 mm (used for all parts).
Notions & Accessories:
2 black round beads or half-pearls (approx. 6–8 mm) for pupils.
Fiberfill stuffing (a small pinch for the red nose only).
Yarn/tapestry needle (one blunt for yarn, one sharper with a large eye for thread).
Sewing pins.
Hot glue gun or clear craft silicone glue.
Cosmetic blush or pink pastel with a small makeup brush.
Hanging cord, ribbon, or charm lanyard.
Scissors.
Stitch Abbreviations (US Terms)
MR: Magic Ring
ch: chain
sl st: slip stitch
sc: single crochet
hdc: half double crochet
dc: double crochet
tr: treble crochet (yarn over twice)
inc: increase (2 stitches worked into the same stitch)
BLO: back loop only / outer loop
st(s): stitch(es)
(…) x N: repeat instructions inside parentheses N times
[N]: total stitch count at the end of the round/row
Crochet Pattern Instructions
1. Star Base (Make 2 Identical Pieces)
Using Light Blue or Yellow yarn and a 2.5 mm hook.
Rnd 1: In a MR, ch 2 (counts as 1st hdc), work 10 hdc into the ring. Pull the ring tight. Join with a sl st into the 2nd chain of the beginning ch-2. [11 hdc]
Rnd 2: Ch 2 (counts as 1st hdc), 1 hdc into the very same base stitch (first increase made). Work 2 hdc into each of the next 9 sts. In the final remaining st, work 1 hdc. Join with a sl st to the 2nd chain of the beginning ch-2. [21 hdc]
Rnd 3: Ch 2 (counts as 1st hdc). Work an increase pattern of (1 hdc, 2 hdc in next st) around. At the end of the round, work 2 hdc into the last stitch to complete 31 hdc total. Join with a sl st to the 2nd chain of the beginning ch-2. [31 hdc]
Rnd 4 (5 Star Points):
Ch 1.
Point 1:
1 sc in the first st.
In next st: (1 hdc + 1 dc).
In next st: (1 dc + 1 tr).
Ch 2 (forms the tip of the point).
In next st: (1 tr + 1 dc).
In next st: (1 dc + 1 hdc).
1 sc in the next st.
Points 2–5:
Repeat the exact sequence: [1 sc; (1 hdc, 1 dc) in next st; (1 dc, 1 tr) in next st; ch 2; (1 tr, 1 dc) in next st; (1 dc, 1 hdc) in next st; 1 sc in next st] 4 more times.
Join with a sl st into the first sc of the round.
Finishing the Stars:
Piece 1: Cut yarn, fasten off, and weave in all tails neatly on the wrong side.
Piece 2: Cut yarn leaving a long tail (~60–70 cm / 24–28 inches) for sewing the two stars together. Do not weave in this long tail.
2. Antlers (Make 2)
Using Brown thread (double-stranded) and a 2.5 mm hook.
Stem: Ch 8. Starting in the 2nd ch from hook, work 7 sl st down the chain. [7 sl st]
Tines / Branches:
Turn your work, ch 1.
Work 2 sl st along the side of the stem.
Branch 1: Ch 3. Starting in the 2nd ch from hook, work 2 sl st down the chain. Sl st back into the same base stitch on the main stem.
Work 2 sl st along the stem.
Branch 2: Ch 3. Starting in the 2nd ch from hook, work 2 sl st down the chain. Sl st back into the same base stitch on the main stem.
Work 2 sl st along the remaining stitches to the tip of the antler.
Fasten off, leaving a 15 cm (6-inch) tail.
Thread the top yarn tail onto a needle and weave it straight down through the center of the antler to exit at the bottom base. Tie the two tails at the base together once.
3. Eyes (Make 1 Left & 1 Right)
Using White thread (double-stranded) and a 2.5 mm hook.
Left Eye
Ch 5.
Rnd 1:
Starting in the 2nd ch from hook, work 3 sc along the chain.
In the last chain (turning corner): work 4 sc into the same chain.
Working along the underside of the foundation chain: work 3 sc.
Into the turning loop space at the end: work 3 sc. [13 sc]
Rnd 2:
4 sc along the side.
1 inc (2 sc in next st).
1 sc.
1 inc (2 sc in next st).
4 sc along the opposite side.
1 inc.
1 sc.
1 sl st into the next stitch. [16 sc]
Fasten off white thread and weave in the tail on the wrong side.
Right Eye
Ch 5.
Work as a mirrored oval using the same basic dimensions:
3 sc along the chain, 4 sc in the end chain.
3 sc along opposite side, 3 sc in the end turning space. [13 sc]
Follow with the second round to achieve the matching oval silhouette (wider at the bottom, slightly narrower at the top).
Fasten off and weave in ends.
Black Eye Borders
Attach a single strand of Black thread with a 2.5 mm hook to the edge of the eye in the outer/back loop only:
Work loose slip stitches (sl st) in each outer loop around the perimeter of the eye. Keep your tension relaxed so the eye remains flat and does not cup or curl.
Repeat for both eyes, working in opposite directions so the right side of the border faces forward on both.
Fasten off, leaving a long black tail (~30 cm / 12 inches) on each eye for sewing it to the star.
4. Big Red Nose
Using Red thread (double-stranded) and a 2.5 mm hook.
Ch 8.
Rnd 1:
Starting in the 2nd ch from hook, work 6 sc along the chain.
In the last chain: work 2 sc (inc).
Rotate to work along the opposite side of the chain: work 6 sc.
In the end turning loop: work 2 sc (inc). [16 sc]
Rnds 2–4 (3 rounds): Work 16 sc around in continuous spirals without increasing. [16 sc]
Join with a sl st to the next stitch. Fasten off, leaving a long tail (~30 cm / 12 inches) for sewing.
Assembly & Finishing
Joining the Star & Inserting Antlers:
Place the two star pieces wrong sides together with points aligned.
Insert the base of one antler between the two layers in the dip to the left of the top point; insert the other antler in the dip to the right of the top point. Use sewing pins through both layers to hold them in place.
Using the long yarn tail left on Star Piece 2 and a yarn needle, whipstitch through the matching edge loops of both stars.
When you reach each antler, stitch directly through the antler base several times to anchor it securely between the layers.
Continue sewing all the way around the remaining points and valleys. Fasten off and bury the yarn tail inside the star.
Attaching the Eyes:
Place the two white eyes side-by-side in the upper center of the front star, tilted slightly inward at the top.
Using the black border tails and a needle, stitch the eyes flat onto the front star layer along the black border line.
Attaching the Red Nose:
Position the red oval nose horizontally directly beneath the eyes, slightly overlapping the bottom edges of both eyes.
Sew along the perimeter. Just before closing the final 3–4 stitches, insert a small pinch of fiberfill stuffing to make the nose puffy and round, then finish sewing closed.
Embroidering Facial Features:
Smile: Using black thread and a needle, embroider a cheerful curved smile across the lower point below the nose. Add a small angled stitch at each corner of the mouth to form happy cheek dimples.
Eyebrows: Embroider two curved, expressive black arches directly above the eyes.
Pupils & Cheeks:
Using a hot glue gun or craft silicone glue, glue the two black beads/pearls as pupils onto the lower-inner portion of each white eye.
Dip a small makeup brush into cosmetic blush, dab off any excess onto a paper towel, and gently shade the cheeks right at the corners of the smile for a warm, festive blush.
Attach a cord or ribbon loop to the tip of the top point for hanging.
Your Rudolph Star Ornament is now complete!
Share on Social Media!

See More:
Featuring: How to Crochet No-Sew Buddy Scarf-Wearing Buddy Reindeer Plush
How to Crochet Oh-So Cute Festive Reindeer Wallet for Christams
Tester Call: How to Crochet Reindeer Dumpling Plushie for Christmas Gifting
Tester Call: How to Crochet Plush Santa Hat Patrik Star Plushie for Gifting

Tester Call: How to Crochet the Very First Patrik Star Dumpling Plushie for Gifting

Featuring: How to Crochet Layered UNIQUE Star and Snowflake on the Top Christmas Tree Keychain

Featuring: How to Crochet Star & Moon Pop-Up Festive Coaster for Gifting

How to Crochet Tiered Pink and Blue Christmas Tree with Amigurumi Star Decoration
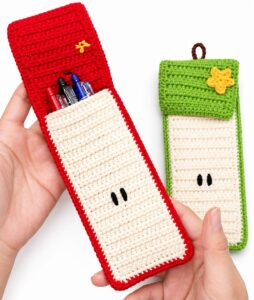
Featuring: Tutorial to Crochet An Apple and Star Mobile Pouch and Pencil Case