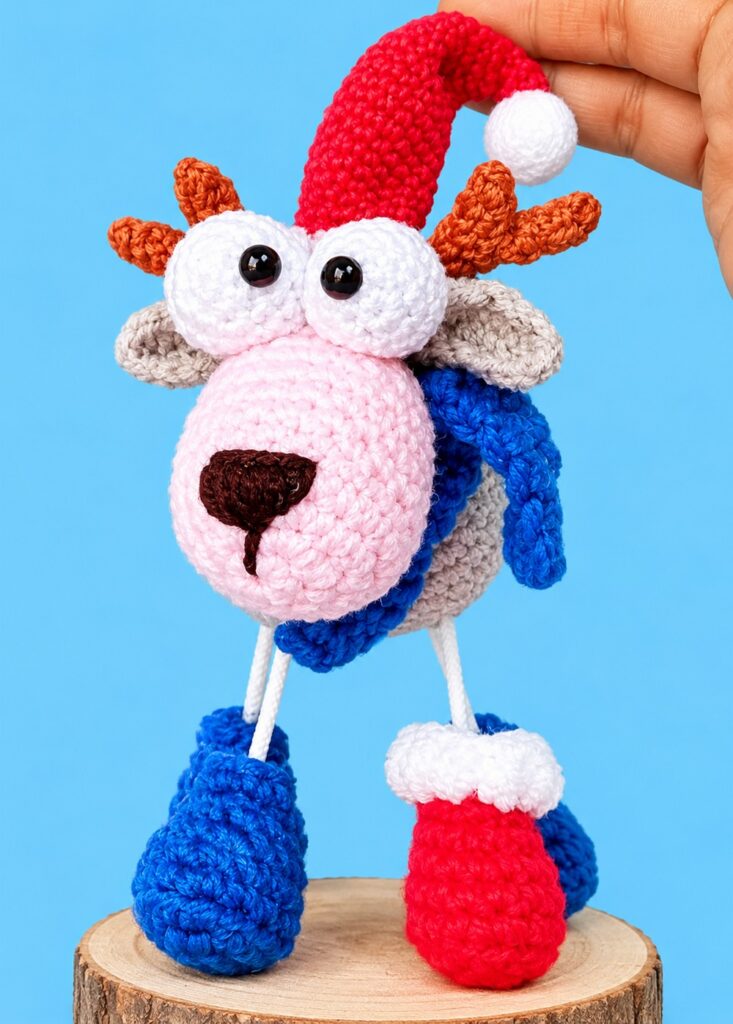
I am finally back with one more crochet amigurumi BUDDY gift pattern from the crochet crazy Christmas Presents series! Today, you will learn to crochet the Craziest reindeer buddy amigurumi on the internet with a step-by-step tutorial and a FREE written pattern as well. This Christmas reindeer is dressed in a FUNNY Santa hat in red, a crochet blue scarf, and mitten-wearing cotton-swab legs that make it stand as a table decoration and buddy as well. You can choose from a brown and grey variation.
With its oversized snout, big googly eyes, tall crooked Santa hat, tiny scarf, and mismatched boots on little cotton-swab legs, this quirky crochet reindeer buddy will for sure bring laughter out.
The pattern below will help you crochet the body, snout, antlers, ears, two-tone tail, and ruffled Santa hat, as well as putting the entire reindeer together. So, continue reading to learn more about this UNIQUE reindeer buddy amigurumi!

Pattern to Crochet a Christmas Buddy Reindeer Gift for All
Skill Level: Beginner – Level 5
Materials
Yarn:
2 mm yarn in your chosen colors (for the version shown: Gray for the body, ears, and tail top; Light Pink for the snout/face; Black for embroidering the nose and mouth; White for the tail underside; plus yarn for the pre-made eyes, boots, and scarf).
Size 5 cotton yarn in Brown (for the antlers), Red (for the Santa hat), and White (for the Santa hat brim).
Crochet Hooks:
2.55 mm hook (or 2.50 mm, used with 2 mm yarn and with two strands of size 5 cotton yarn held together for the antlers).
1.75 mm hook (or 1.50 mm, used with a single strand of size 5 cotton yarn for the Santa hat).
Embellishments and Craft Supplies:
1 small white craft pom-pom (about 1 cm in diameter, for the tip of the Santa hat).
2 black beads, 4 mm each (for the eye pupils).
4 cotton swabs (for the legs).
Polyester fiberfill stuffing.
Hot glue gun and glue sticks.
Stitch markers or pins, tapestry/yarn needles, and scissors.

Abbreviations and Stitch Guide (US Terms)
ch: chain
sl st: slip stitch
sc: single crochet
hdc: half double crochet
dc: double crochet
inc: increase (work 2 single crochets into the same stitch)
dec: invisible decrease (insert hook into the front loops only of the next 2 stitches, yarn over, pull through both front loops, yarn over, and pull through remaining 2 loops)
BLO: back loop only (work into the loop farthest away from you)
picot: chain 1, insert hook through the top front loop and side bar of the stitch just made, yarn over and pull through all loops on the hook (slip stitch) to form a small point
3-loop puff stitch: (yarn over, insert hook into stitch, yarn over and pull up a loop) 3 times in the same stitch (7 loops on hook), yarn over and pull through all loops on hook, then ch 1 or work 1 sl st to close
Are you a Beginner? Learn Crocheting Easily!
You can learn to crochet better with this funny reindeer buddy tutorial as a beginner. Or continue with the FREE written pattern below:
Part 1: Body
Yarn and Hook: Use 1 strand of 2 mm Gray yarn with a 2.55 mm hook. Work in a continuous spiral without joining rounds; use a stitch marker to mark the start of rounds as needed.
Round 1: Make a magic ring, ch 1 (securing chain, does not count as a stitch), and work 6 sc into the ring. Pull the tail tight to close. (6 sc)
Round 2: Work 1 inc in each of the 6 stitches around. (12 sc)
Round 3: (1 sc in next st, 1 inc in next st) repeat 6 times around. (18 sc)
Round 4: (1 sc in each of next 2 sts, 1 inc in next st) repeat 6 times around. (24 sc)
Round 5: (1 sc in each of next 3 sts, 1 inc in next st) repeat 6 times around. (30 sc)
Round 6: (1 sc in each of next 4 sts, 1 inc in next st) repeat 6 times around. (36 sc)
Rounds 7 to 17 (11 rounds): Work 1 sc in each stitch around. (36 sc per round)
Round 18: (1 sc in next st, 1 invisible dec) repeat 12 times around. (24 sc)
Round 19: (1 sc in next st, 1 invisible dec) repeat 8 times around. (16 sc)
Stop here and stuff the body firmly with fiberfill, shaping it nicely without overstuffing to the point of stretching the stitches.
Round 20: (1 sc in next st, 1 invisible dec) repeat 5 times, then 1 sc in the last st. (11 sc)
Round 21: Work 5 invisible decreases in a row, then 1 sc in the final st. (6 sts remaining)
Finishing: Cut the yarn leaving a sewing tail. Thread the tail onto a tapestry needle and weave in and out (zigzag) through the remaining 6 stitches, pulling tight to close the opening cleanly. Insert the needle through the center and weave the tail through the stuffing (without catching outer stitches so the surface does not dent) before trimming.
Part 2: Face and Snout
Yarn and Hook: Use 1 strand of 2 mm Light Pink yarn with a 2.55 mm hook. Work in a continuous spiral.
Round 1: Make a magic ring, ch 1 (securing chain), and work 6 sc into the ring. Pull tight to close. (6 sc)
Round 2: Work 1 inc in each of the 6 stitches around. (12 sc)
Round 3: (1 sc in next st, 1 inc in next st) repeat 6 times around. (18 sc)
Round 4: (1 sc in each of next 8 sts, 1 inc in next st) repeat 2 times around. (20 sc)
Round 5: Working in BLO (back loop only), work 1 sc in each stitch around. (20 sc)
Rounds 6 to 9 (4 rounds): Working through both loops normally, work 1 sc in each stitch around. (20 sc per round)
Round 10: (1 sc in each of next 3 sts, 1 invisible dec) repeat 4 times around. (16 sc)
Round 11: (1 sc in each of next 2 sts, 1 invisible dec) repeat 4 times around. (12 sc)
Stuff the snout firmly up to this point.
Rounds 12 to 14 (3 rounds): Work 1 sc in each stitch around. (12 sc per round)
Stuff this upper tapered neck section very firmly using scissors or tweezers to push the fiberfill in tightly, as this section will support the large eyes.
Round 15: Work 6 invisible decreases around. (6 sts remaining)
Finishing: Cut the yarn leaving a long tail for sewing the face onto the body. Weave the tail in and out around the remaining 6 stitches and pull tight to close. Flatten the tapered tip slightly with your fingers (this flatter section will hold the eyes and attach to the body), secure with a tacking stitch, and keep the long tail attached.
Part 3: Antlers (Make 2 Complete Antlers)
Yarn and Hook: Hold 2 strands of Brown size 5 cotton yarn together with a 2.55 mm hook. Each antler is made from one large branch and one small branch sewn together.
Large Branch (Make 2)
Chain 7.
Row 1: Skip 1st ch from hook, work 1 sc in each of the next 6 ch across. (6 sc)
Row 2: Turn, ch 1, work 1 sc in each of the 6 sts across. (6 sc)
Fasten off, leaving a long tail for sewing. Hide or trim the short starting tail.
Small Branch (Make 2)
Chain 4.
Row 1: Skip 1st ch from hook, work 1 sc in each of the next 3 ch across. (3 sc)
Row 2: Turn directly without chaining, work 1 sc in each of the 3 sts across. (3 sc)
Fasten off, leaving a long tail for sewing. Hide or trim the short starting tail.
Assembling Each Antler
Fold each flat strip in half lengthwise so the long edges meet, keeping the long tail on the right.
Using a tapestry needle, whip-stitch along the long edge picking up only the outer edge loops (so it stays slim and doesn’t bunch) to form a narrow tube. Secure at the end.
Place 1 small branch at an angle against the side of 1 large branch (about halfway up) and sew them firmly together at the base of the V-shape. Keep the remaining long tail for sewing the antler onto the reindeer’s head. Make sure the second antler is mirrored so the small branches face inward toward each other when worn.
Part 4: Ears (Make 2)
Yarn and Hook: Use 1 strand of 2 mm Gray yarn with a 2.55 mm hook.
Chain 6.
First Side:
Skip the first 2 ch from hook; in the 3rd ch from hook work 1 dc.
In the next ch: work 1 hdc.
In the next ch: work 1 sc.
In the final ch (first ch made): work 1 sc, ch 1, and 1 sl st into the same ch.
Opposite Side:
Working down the opposite side of the foundation chain:
Work 1 sc in the next ch.
Work 1 hdc in the next ch.
Work 1 dc in the next ch.
Ch 2, and work 1 sl st into the starting base space to close.
Fasten off, leaving a long tail for sewing. Tie the starting and ending tails together in a knot at the base, weave the long tail in a short zigzag up and back along the back edge, and pull slightly to pinch the base of the ear into a cupped shape. Tie a small securing knot to hold the pinch, keeping the tail for sewing to the head.
2. The Boots (Make 2, Use Red Yarn)
Round 1: Ch 5. Starting in the 2nd ch from the hook, 1 inc. 1 sc in next 2 chs. 3 sc in the last ch. Turn your work to crochet down the opposite side of the chain: 3 sc, 1 inc in the last st. (12 sts)
Round 2: 1 sc, 1 inc, 3 sc, 3 inc, 3 sc, 2 inc. (16 sts)
Round 3: Working in the BLO, 1 sc in each st around. (16 sts)
Rounds 4 – 5: 1 sc in each st around. (16 sts)
Round 6: 5 sc, 3 dec, 5 sc. (13 sts)
Round 7: 5 sc, 1 tr-dec (pull 3 stitches together into one decrease), 5 sc. (11 sts)
Round 8: 1 sc in each st around. (11 sts)
Round 9: 2 sc, 1 inc — repeat around to slightly flare the top of the boot. FO and leave a tail for sewing. Stuff the boots with a little polyfill.
The Eyes (Use Yellow or White Yarn)
Small Eye:
Round 1: Make a MR, work 7 sc. (7 sts)
Round 2: 1 inc, 1 sc — repeat around. (10 sts) Sl st and FO.
Large Eye:
Round 1: Make a MR, work 7 sc. (7 sts)
Round 2: 1 inc in each st around. (14 sts)
Round 3: 1 sc in each st around. (14 sts) Sl st and FO. Using your black marker, carefully outline the outer edges of both eyes to make them stand out. Sew both eyes side-by-side on the upper middle section of the tree.
Part 5: Tail
Yarn and Hook: Use 1 strand of 2 mm Gray yarn for the top piece and 1 strand of 2 mm White yarn for the underside piece, with a 2.55 mm hook.
Gray Top Piece
Chain 6.
Row 1: Skip 1st ch from hook, work 1 sc in next ch, 1 hdc in next ch, and 1 dc in each of the last 3 ch. (5 sts)
Row 2: Turn, ch 1, work 1 sc in each of the first 3 sts. In the next st (tip), work (1 sc, 1 picot, 1 sc) all in the same stitch.
Opposite Side: Working down the opposite side of the foundation chain, work 1 sc in each of the next 4 ch loops.
Work 1 sl st into the first base chain to join. Fasten off, knot the starting and ending tails together at the base, and pass the gray tail through to the top/back for sewing the finished tail to the body.
White Underside Piece
Chain 5.
Row 1: Skip 1st ch from hook, work 1 sc in next ch, 1 hdc in next ch, and 1 dc in each of the last 2 ch. (4 sts)
Row 2: Turn, ch 1, work 1 sc in each of the first 2 sts. In the next st (tip), work (1 sc, 1 sc + 1 picot, 1 sc) all in the same stitch.
Opposite Side: Working down the opposite side of the foundation chain, work 1 sc in each of the next 3 ch loops.
Work 1 sl st into the first base chain to join. Fasten off leaving a long white tail for sewing the two tail pieces together, and knot the short starting tail.
Joining the Tail Pieces
Place the Gray piece and White piece back-to-back with the right sides facing outward. Using the white tail and a tapestry needle, whip-stitch around the outer edges (catching only the facing edge loops so the stitches do not show on the outside) to join them neatly together. Weave in and trim the white tail, keeping the gray tail for attaching the tail to the body.
Part 6: Santa Hat
Yarn and Hook: Use 1 single strand of size 5 cotton yarn in Red for the hat body and White for the brim, with a 1.75 mm hook (or 1.50 mm). Work Rounds 1 through 24 in a continuous spiral.
Round 1 (Red): Make a magic ring, ch 1 (securing chain), and work 5 sc into the ring. Pull tight. (5 sc)
Rounds 2 to 4 (3 rounds): Work 1 sc in each stitch around. As the narrow tip begins to curl inward, push the right side outward so it stays right-side out. (5 sc per round)
Round 5: Work 3 increases evenly spaced around (1 sc, 1 inc, 1 sc, 1 inc, 1 inc). (8 sc)
Round 6: Work 1 sc in each stitch around. (8 sc)
Round 7: (1 sc in next st, 1 inc in next st) repeat 4 times around. (12 sc)
Rounds 8 to 11 (4 rounds): Work 1 sc in each stitch around. (12 sc per round)
Round 12: (1 sc in each of next 2 sts, 1 inc in next st) repeat 4 times around. (16 sc)
Rounds 13 to 24 (12 rounds): Work 1 sc in each stitch around. At the end of Round 24, work 1 sl st into the next stitch and fasten off the Red yarn. (16 sc per round)
Round 25 (White Puff Brim): Attach White yarn with a sl st where Red ended. Ch 2, and work a 3-loop puff stitch into the same stitch. Work 1 3-loop puff stitch into each of the remaining 15 stitches around (16 puff stitches total). Join with 1 sl st between the starting ch-2 and the first puff stitch.
Round 26 (Brim Edge): Ch 1, work 1 sc in the same stitch and 1 sc in each stitch around (16 sc). Join with 1 sl st into the first sc.
Finishing the Brim: Cut the white yarn leaving a long tail for sewing the hat to the head. Use a needle to weave the tail through the next stitch from back to front and back down into the originating stitch to create a clean invisible finish on the brim edge.
Shaping the Hat
Thread a separate strand of Red size 5 cotton yarn onto a needle and knot it securely at the tip of the hat on one side.
Work small running stitches straight down that side edge toward the middle of the red cone.
Gently pull the thread to scrunch and curve the top of the hat into a droopy bend. Secure with a stitch, weave the tail inside the hat, and trim.
Part 7: Assembly and Finishing Details
Sew Face to Body: Pin the flattened tapered end of the Light Pink face against the upper front of the Gray body, about 3 to 4 rounds down from the body’s closed top center, tilting the snout forward. Using the long pink tail, sew around the base of the neck/face securely to the body, leaving the upper section open for the eyes and hat. Weave the tail into the body and trim.
Embroider the Nose and Mouth: Thread 2 mm Black yarn onto a tapestry needle. Two rounds back from the front center of the snout, mark an inverted triangle with 3 pins. Outline the triangle and fill it in closely with vertical/angled stitches, then stitch 1 straight vertical line downward from the bottom point of the nose for the mouth. Hide the yarn end inside the snout and trim.
Attach the Eyes: Sew the 2 pre-made white eye balls side-by-side onto the upper snout (leaving about 5 rounds clear between the nose and the eyes). Stitch the inner sides of the two eyes together at the middle so they touch and tilt slightly inward. Hot-glue 1 black 4 mm bead onto the front of each eye ball (positioned close to the inner center for a funny cross-eyed expression).
Attach the Ears: Sew the pinched base of 1 Gray ear to each side of the head just behind the eyes.
Attach the Antlers: Place 1 Brown antler behind each eye (above and slightly in front of each ear), making sure the smaller branches angle inward toward each other. Sew the bases firmly to the head and weave in the ends.
Attach the Tail: Pin the tail centered at the back of the body about 6 rounds up from the back closing point, with the white underside facing upward/backward. Sew around the base and add a couple of tacking stitches so the tail perks upward. Weave in and trim the gray tail.
Attach the Boots and Cotton Swab Legs:
Take 4 cotton swabs. For each of the 4 pre-made boots (3 Blue boots and 1 mismatched Red boot with a white cuff, as shown on the gray reindeer), open a small hollow in the stuffing at the top center of the boot, place a drop of hot glue inside, and push the cotton-tipped end of 1 swab straight down to the bottom of the boot. Let the glue cool and set.
On the underside of the Gray body, place 4 pins for the legs: place the front 2 pins about 7 to 8 rounds back from the chest/neck seam with 6 stitches between them, and place the back 2 pins 6 rounds behind the front pins, also with 6 stitches between them.
At each pin, use a crochet hook to open a small tunnel into the fiberfill. Put a drop of hot glue along the upper half of each swab shaft and push each leg firmly into the body, adjusting the boots so all 4 stand flat and level. (Place the mismatched red boot in front where it is easy to see.)
Attach the Santa Hat and Pom-Pom: Position the white brim of the Santa hat snugly between the eyes, antlers, and upper body, and sew it securely around the rim using the long white tail. Weave in the end. Hot-glue the 1 cm white craft pom-pom to the curled tip of the hat.
Add the Scarf: Wrap the pre-made blue scarf around the reindeer’s neck (tucked under the ears) and tie it in a neat single knot at the front side.
Share on Social Media!


See More:
Featuring: How to Crochet Reindeer in Scarf Christmas Wind Spinner for Decoration

Tester Call: How to Crochet Glitter-Eyed Reindeer Star Buddy Ornament for Gifting

How to Crochet Mr. Reindeer Snail Buddy Holding a Treat Basket with Holly Leaves
How to Crochet Chill Pill Reindeer Buddy Christmas Ornament Amigurumi
How to Crochet Funny Festive Red Nose Reindeer Star Christmas Ornament Amigurumi
Featuring: How to Crochet No-Sew Buddy Scarf-Wearing Buddy Reindeer Plush
How to Crochet Oh-So Cute Festive Reindeer Wallet for Christams
Tester Call: How to Crochet Reindeer Dumpling Plushie for Christmas Gifting
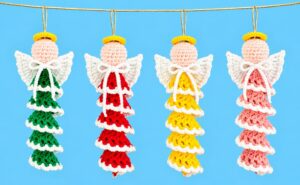
Featuring: Tutorial to Crochet Angel Buddy Wind Spinner with Red, Green, Pink and Yellow Options