How to Crochet A Kawaii Baby Goat Amigurumi for Kids

Save this Crafty Article

Talha
Author: Talha
I am a crochet designer, macramé maker and a crafter who also loves doing MATH.

Lyubov of Love Knitting
Contributor: Lyubov of Love Knitting
She is a Ukrainian crochet plushie designer and our most favorite crocheter. She became our contributor on mid 2026 through mycraftybasket.

Show support for Lybouv!

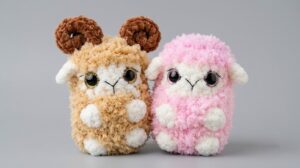
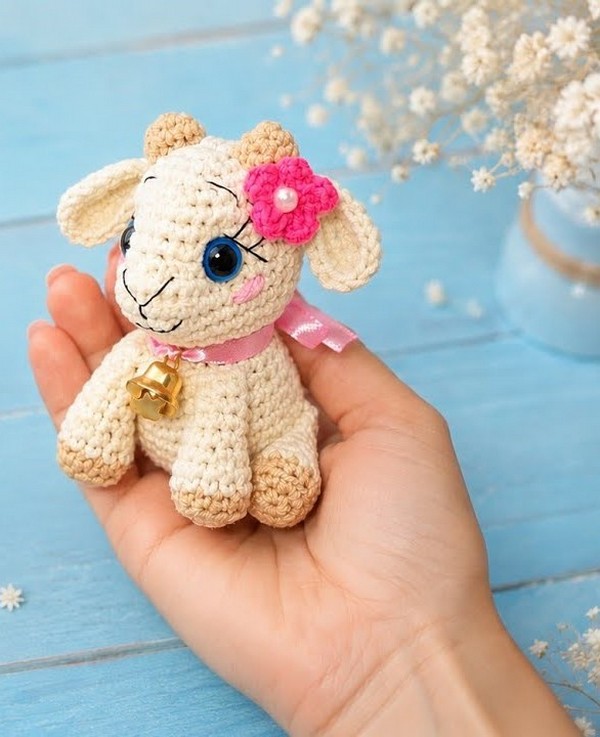
Are you looking for an absolutely irresistible crochet gift for a little girl? Well, I welcome you to another part of the “cute amigurumi for girls” series. Today, you will learn how to crochet this oh-so-cute amigurumi sitting baby goat that can sit upright on its own in that cute pose. This amigurumi goat wears a small, beaded pink flower on its head + an optional satin ribbon neck belt with a bell. Surprisingly, this is a low-sew crochet goat amigurumi that you can also make as a Christmas present.

With its long embroidered eyelashes, blush on the cheeks, eyebrows, and two-color eyes, this is without doubt the CUTEST crochet baby goat amigurumi you can gift to a little girl.
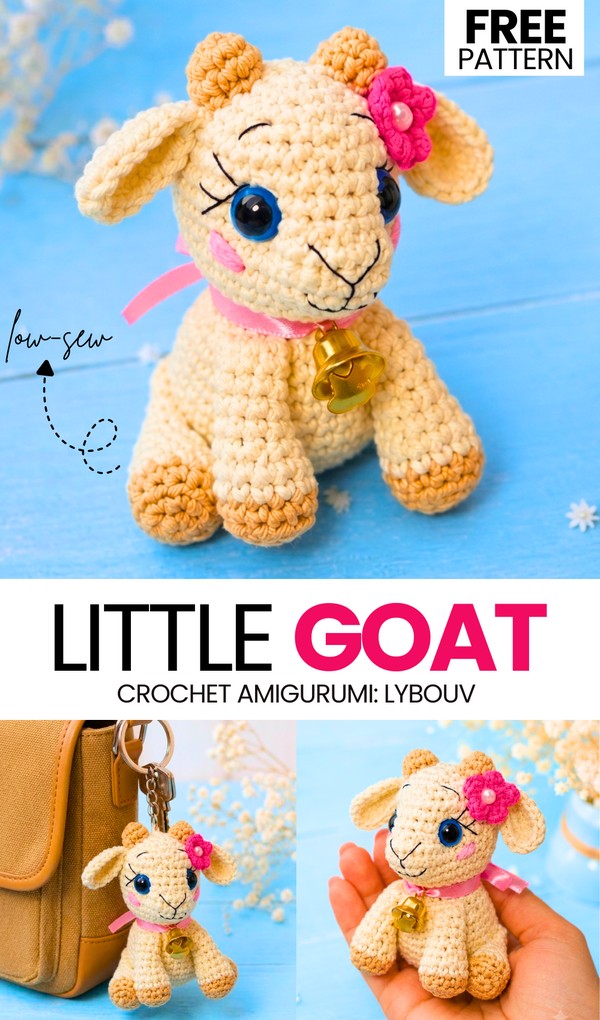
The finished crochet baby goat amigurumi toy will measure only the 9cm. You can also crochet your amigurumi goat using chenille yarn to make it even more huggable. With the super bulky yarn, you can also crochet a MOM goat plushie and complete the happy family. Anyway, customization is up to you; you can learn how to crochet this small amigurumi goat with the following step-by-step tutorial + a written pattern as well.

Pattern to Crochet A Teddy Goat Amigurumi

Skill Level: Intermediate

Materials List:

  • Semi-cotton yarn (YarnArt Jeans, 50g / 160m).
  • Main yarn color (for the body and head).
  • Additional yarn color (for the hooves/horns).
  • Crochet hook size: 2 mm.
  • Toy stuffing.
  • Plastic safety eyes (10 mm).
  • Black thread or yarn for embroidering the nose, smile, eyelashes, and eyebrows.
  • Pink yarn for embroidering the cheeks.
  • Needle for sewing.
  • Scissors.
  • Stitch marker.
  • Pins.
  • Optional: Bell, ribbon, and yarn for a small flower.
Abbreviations List:

  • MR = Magic Ring
  • sc = single crochet
  • inc = increase (2 single crochets in one stitch)
  • dec = decrease (crochet 2 stitches together)
  • hdc = half double crochet
  • dc = double crochet
  • dc-inc = double crochet increase (2 double crochets in one stitch)
  • hdc-inc = half double crochet increase (2 half double crochets in one stitch)
  • sl st = slip stitch
  • ch = chain
  • BLO = back loops only
  • R = Round or Row
  • st = stitch

Are you a Beginner? Learn Crocheting Easily!

You can learn to crochet better with this crochet baby goat amigurumi as a beginner:

Legs (Make 4):

  • Start with the Additional Color (for the hooves).
  • R1: 6 sc in MR (6).
  • R2: 6 inc (12).
  • R3: 12 sc in BLO (12).
  • Change to the Main Color in the last stitch of R3. Cut the additional color and tie knots.
  • R4: 12 sc (12).
  • R5: 12 sc (12).
  • R6: (2 sc, dec) repeat 3 times (9).
  • R7 to R8 (2 rounds): 9 sc (9).
  • Stuff the bottom part of the leg firmly so it holds its shape.
  • R9: 1 dec, 7 sc (8).
  • R10: 8 sc (8).
  • R11: Fold the top flat and close by crocheting 4 sc through both sides.
  • Note: For two legs (front legs), cut a short tail. For the other two legs (back legs), leave a long tail for sewing.

Body and Head:

  • Start with the Main Color.
  • R1: 8 sc in MR (8).
  • R2: 8 inc (16).
  • R3: (1 sc, inc) repeat 8 times (24).
  • R4: (3 sc, inc) repeat 6 times (30).
  • R5: (4 sc, inc) repeat 6 times (36).
  • R6 (Making the tail): 1 sc, ch 4. Starting in the second ch from the hook: 1 sc, 1 hdc, 1 hdc, then sl st into the base of the tail st. Continue with 35 sc around (36 sts, not counting the tail).
  • R7: 1 sc, push the tail down and crochet 1 sc into the next st, 34 sc (36).
  • R8 to R10 (3 rounds): 36 sc (36).
  • R11 (Decreases on the back): Place markers to center 6 decreases across the back (relative to the tail). The pattern does 4 dec on one side of the round and 2 dec at the end, but adjust to center them based on your tension. Example: 4 dec, 24 sc, 2 dec (30).
  • R12: 30 sc (30).
  • R13: (3 sc, dec) repeat 6 times (24).
  • R14 (Joining front legs): Mark the positions for the front legs opposite the tail. 8 sc, 4 sc through the first leg and body, 2 sc, 4 sc through the second leg and body, 6 sc (24).
  • R15: (2 sc, dec) repeat 6 times (18). Stuff the body. Keep the bottom flat so the toy can sit.
  • R16: (4 sc, dec) repeat 3 times (15).
  • R17 (Starting the head): 15 inc (30).
  • R18: (4 sc, inc) repeat 6 times (36).
  • R19: 36 sc (36).
  • R20 (Muzzle/Nose): 19 sc, 4 dc-inc (double crochet increases), 13 sc (40).
  • R21: 19 sc, 8 hdc, 13 sc (40).
  • R22: 40 sc (40).
  • R23: 19 sc, 4 dec, 13 sc (36).
  • R24 to R25 (2 rounds): 36 sc (36).
  • R26: (4 sc, dec) repeat 6 times (30).
  • Insert 10 mm safety eyes between R23 and R24, leaving 8 stitches between them.
  • R27: (3 sc, dec) repeat 6 times (24).
  • R28: (2 sc, dec) repeat 6 times (18). Stuff the head firmly.
  • R29: (1 sc, dec) repeat 6 times (12). Add remaining stuffing.
  • R30: 6 dec (6). Cut the yarn and close the hole by weaving the needle through the front loops, pull tight, and hide the tail inside.

Ears (Make 2):

  • Start with the Main Color.
  • Ch 6.
  • R1: Starting in the second ch from the hook: 4 sc. In the last ch, crochet 4 sc. Turn to work on the other side of the chain: 4 sc (12).
  • R2: 1 inc, 1 sc, 2 hdc, 4 hdc-inc, 2 hdc, 1 sc, 1 inc.
  • Sl st and cut the yarn, leaving a long tail for sewing.

Horns (Make 2):

  • Start with the Additional Color.
  • R1: 6 sc in MR (6).
  • R2: (1 sc, inc) repeat 3 times (9).
  • R3: 9 sc (9).
  • Sl st and cut the yarn, leaving a long tail for sewing. Lightly stuff the horns.

Eye Indentation (Sculpting):

  • Take a long needle with strong thread.
  • Insert the needle at the bottom of the first eye, pass it through the head to the bottom of the second eye.
  • Go up to the top of the second eye, pass it through the head to the top of the first eye.
  • Pull the threads tight to create the eye indentations. Tie knots and hide the ends inside the head.

Assembly and Details:

  • Back Legs: Pin the back legs to the sides of the lower body. Sew them securely. After sewing the top edge, pass the needle through the leg and the body a bit lower down to anchor the leg so it sits flat against the body.
  • Horns: Sew the lightly stuffed horns to the top of the head.
  • Ears: Fold the ears in half at the base and sew them to the head just below the horns.
  • Face Embroidery: Use black thread to embroider the nose (a straight horizontal line with a vertical line coming down). Embroider a small smile below the nose. Embroider eyelashes on the outer edges of the eyes and eyebrows above the eyes.
  • Cheeks: Use pink yarn to sew 3 small straight stitches below each eye.

Flower (Optional):

  • Make an MR.
  • (Ch 2, 1 dc, ch 2, sl st into MR) repeat 5 times to create 5 petals.
  • Pull the ring tight, leave a tail for sewing, and attach the flower to the head near the ear.
  • Tie a bell with a ribbon around the goat’s neck.

Save this Crafty Article

Leave a Reply

Your email address will not be published. Required fields are marked *