Author: Talha
I am a crochet designer, macramé maker and a crafter who also loves doing MATH.
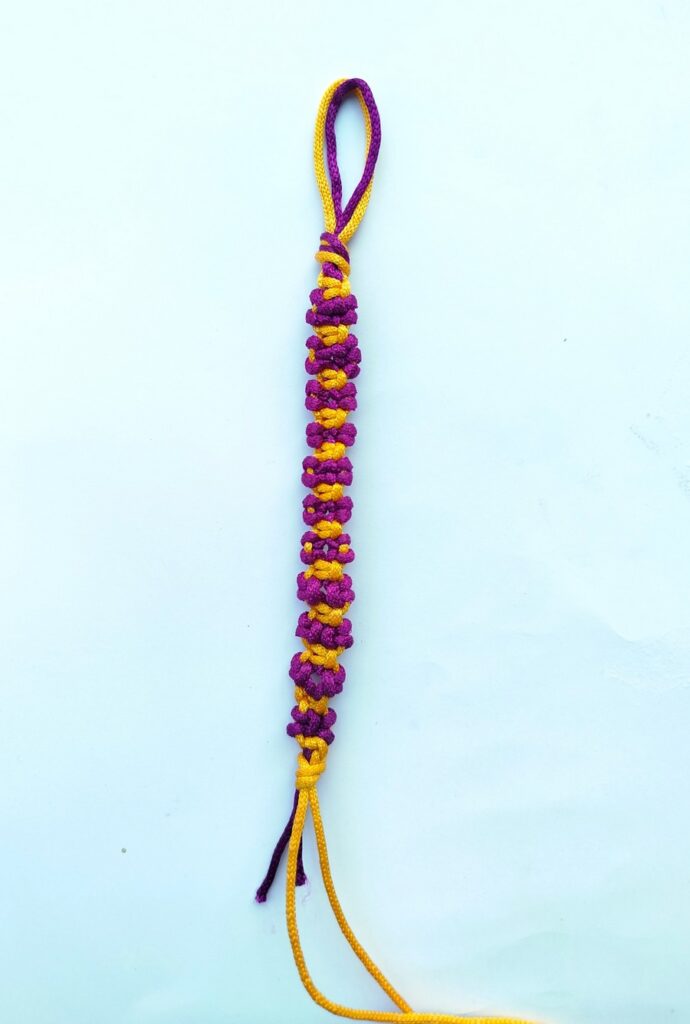
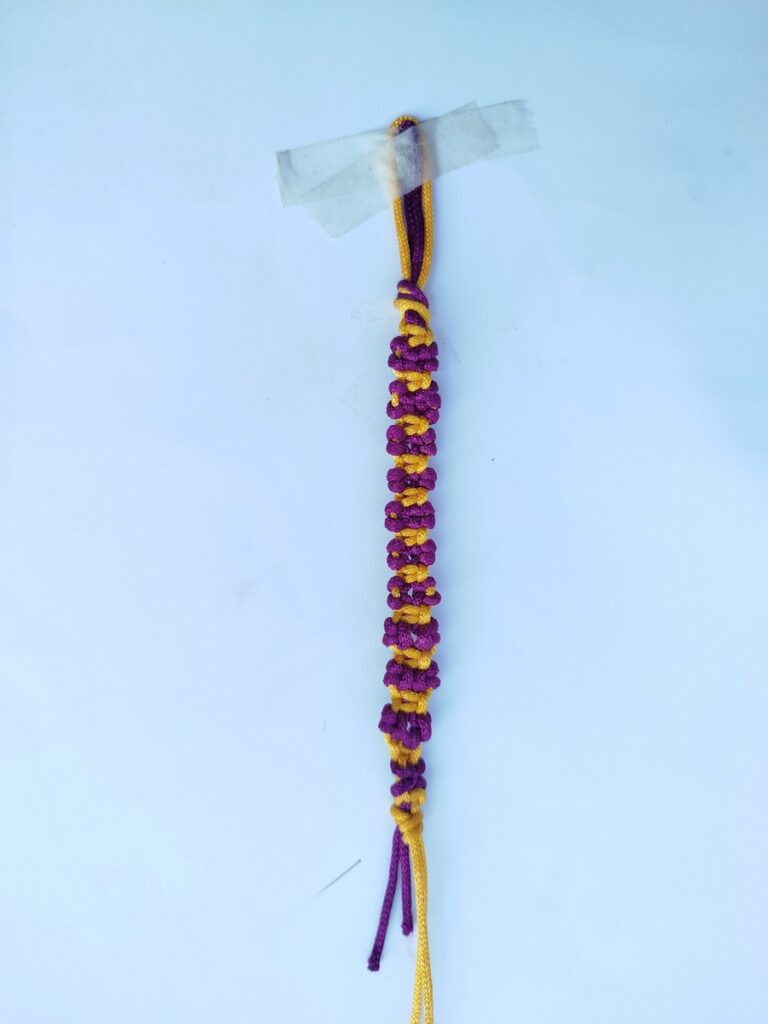
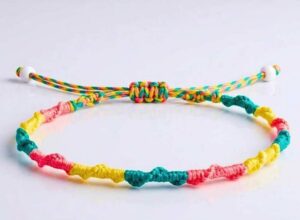
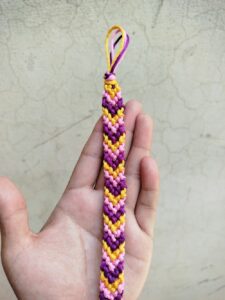
In this macramé tutorial, I will show you how to make one of my favorite 2-row repeat, striped bracelet for Friendship Day. This macramé bracelet has an alternating pattern of wide and thin stripes that looks SIMPLY ELEGANT. While my chevron candy bracelet and watermelon bracelet, are still top-ranked for their ease of making and beauty, this is perfect for gifting to girl.
Easiest 2-Row Repeat Friendship Bracelet
Mother’s Day is around the corner, so why not make one for her? Also, it works up fast unlike the chevron bracelet and I was able to make it in less than 10 minutes.
I recommend using the purple and yellow for a classical jewelry look, especially for girls. That’s why, I used the same colors in the demonstration. The pattern just requires correct understanding strand under and strand over the strand; once you learn this with me, you will thank me!
Bracelet Pattern: Quick Instructions
- Step 1: Take two strands 150 cm or less length of cords in separate colors.
- Step 2: Align them tip to tip and fold them in half. Then make a slip knot in the middle.
- Step 3: Separate the colors in the following sequence: COLOR A, COLOR B, COLOR B and COLOR A again (from left to right).
- Step 4: For the odd rows, use the middle COLOR B, COLOR B strands for knotting.
- Step 5: First, with the right strand, we make a forward hitch around the right COLOR A. Then make another forward hitch but by reversing the crossings. This means, crossover becomes cross under. The direction, however stays the same.
- Step 6: Mirror the same with the left COLOR A.
- Step 7: For every even row, we make a square knot using both the COLOR As around the middle COLOR Bs.
- That’s it!
Macramé Bracelet Pattern: Step-by-Step Instructions
Colors:
- Dark Purple (Color B)
- Yellow (Color A)
Supplies
- Macramé cord, polycherry thread or embroidery floss (I am using 1.5mm macramé cord as usual!).
- 2 colors with good contrast such as dark purple and yellow.
- Paper tape
- A clean rock, glass jar or something heavy
- Flat surface like a glass, table, etc.
Knots Needed:
- Slip Knot
- Forward Hitch
- Reversed-Crossing Forward Hitch
- Square Knot (Right Half Knot + Left Half Knot)
Cord Needed: 300 cm in total
Prep:
- From your purple and yellow macramé cord or floss skeins, cut strands of 150 each. This is the maximum amount you need for a candy bracelet of adult-sizes wrist.
- Align the yarn strands tip to tip from both end, lift them together and fold in half.
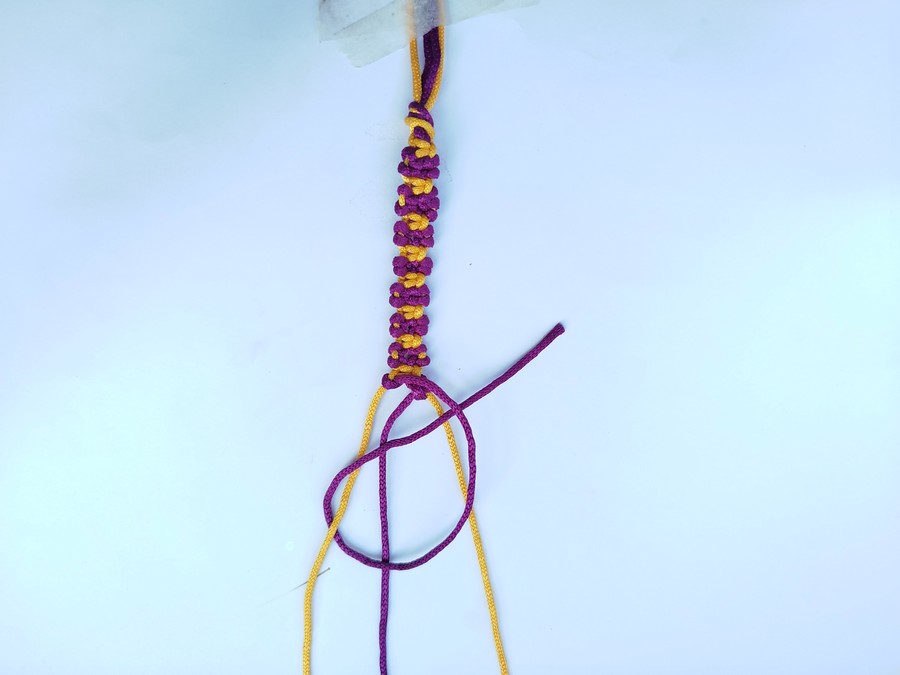
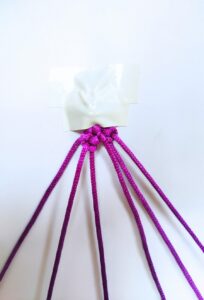
- Now, to make a slip knot, make a loop in the middle and reverse its direction so that the strand crossing is above and the loop is below.
- Pick the right strand (left one otherwise!) and pass it through the loop such that you hold the left strand (right one otherwise!) in place.
- Continue pulling until loop forms a knot.
- Also slide the knot towards the top to tighten it and reducing the length of the top loop.
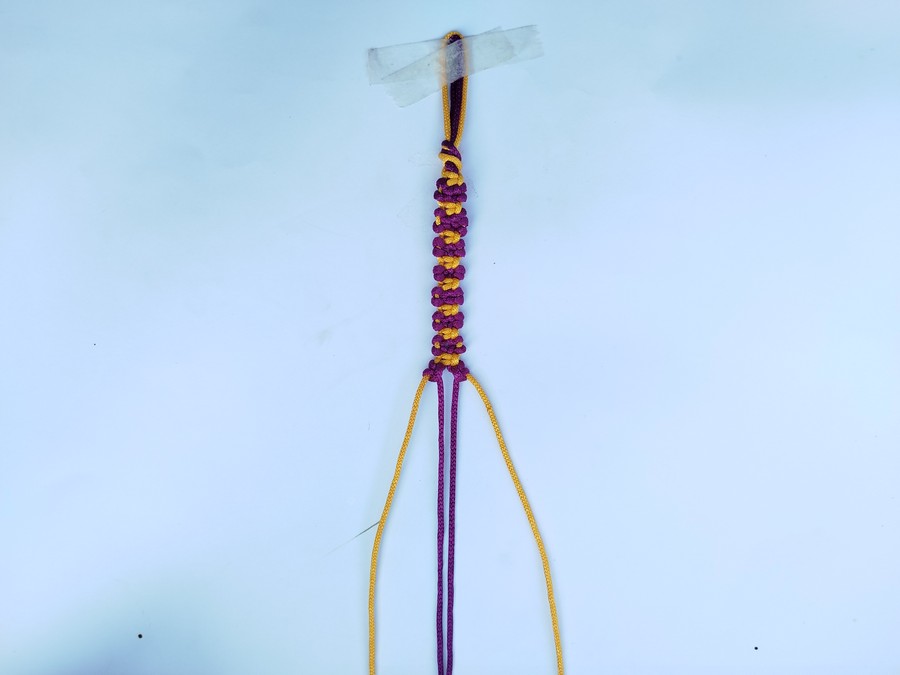
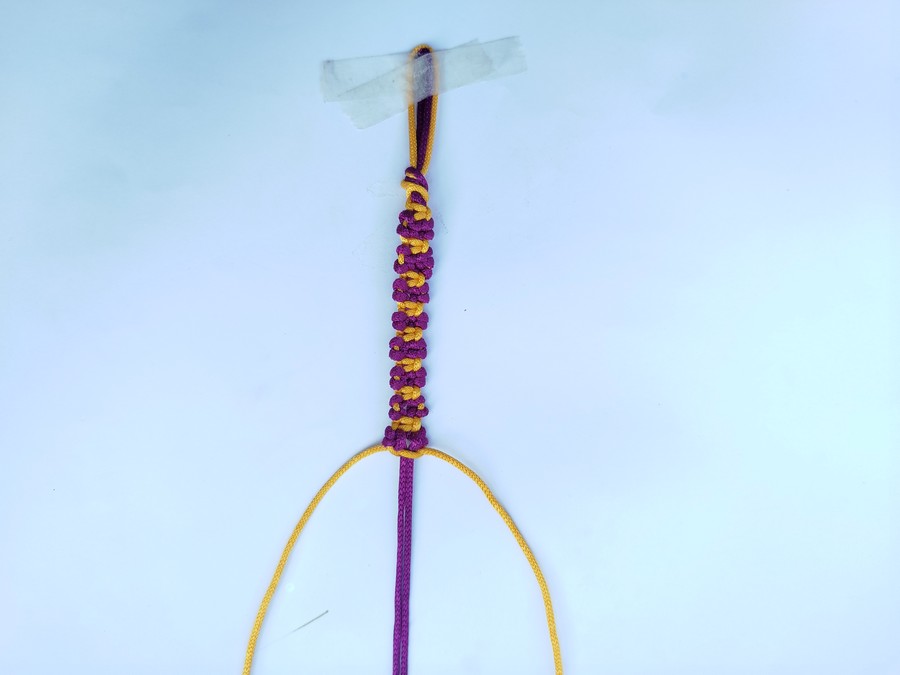
- Tape the loop to lock your work in place and arrange the strands as follows (from left to right):
- Yellow (Color A)
- Dark Purple (Color B)
- Dark Purple (Color B)
- Yellow (Color A)
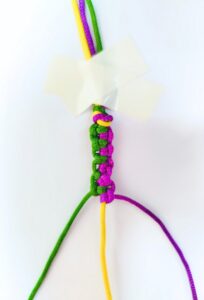
Now, let’s first weave using the purple strands in the middle around the yellow outer strands.
Step #1: Row 1 – First Forward Hitch

- Pick the right strand and make a forward hitch around the left yellow strand. To do so, first, cross the strand over the yellow yarn.
- Now, cross the strand below the yellow strand and make a complete loop by crossing the purple strand over itself.
Crossing scheme: Above (Right, yellow), Below (Left, yellow), Above (Left, purple).
- Pull the strand tightly to the right to shorten the loop and thus making a knot. This finishes our first knot. We will make a similar knot but reversing the crossing rule!
Step #2: Row 1 – First Reverse Crossing Forward Hitch
- Now, pick the same right purple strand again but this time, pass it below the same yellow strand to the right.
- Similarly, moving the strand tip to the left, pass the strand over the yellow strand and below itself instead of above.
Crossing scheme: Below (Right, yellow), Above (Left, yellow), Below (Left, purple).
- Pull the strand tightly through the loop to finish our double knot that consists of two forward hitches with opposite crossing scheme.
Step #3: Row 1 – 2nd Forward Hitch
- Take the left purple strand and cross it above the left yellow strand.
- Cross the active strand to right below the yellow strand and above itself to make a knot-able loop. Pull the strand tight to form a first forward hitch.
Crossing scheme: Below (left, yellow), Above (right, yellow), Below (right, purple).
Step #4: Row 1 – 2nd Reversed Forward Hitch
- Again, pick the left purple strand and cross it below the yellow strand to the left.
- Now, cross it to the right, above the yellow strand and then below itself to make a knot-able loop.
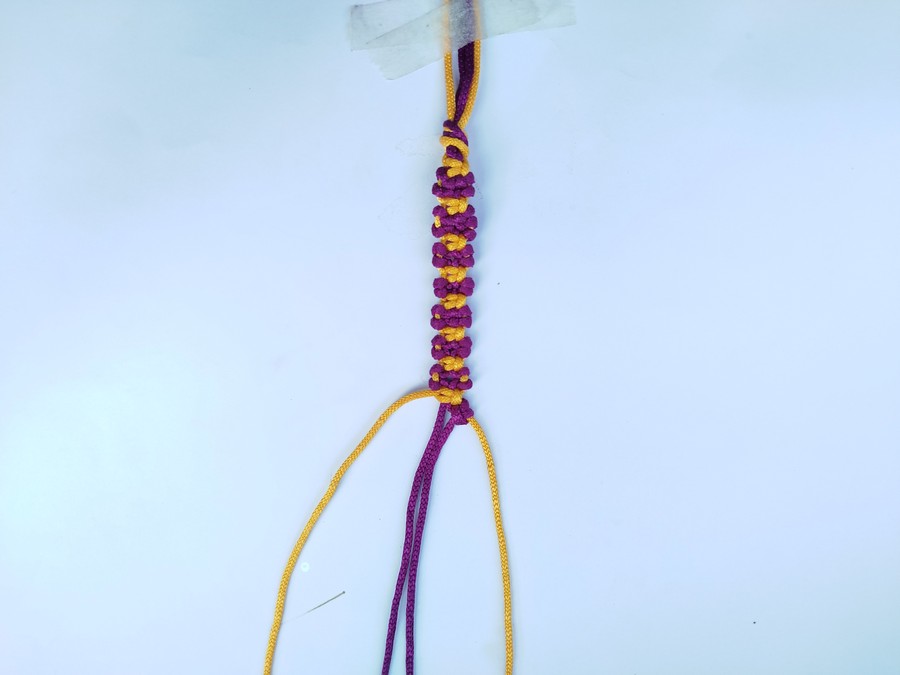
- Pull the strand tighten through the loop to make the 2nd knot of our double knot. This brings us on the completion of purple row.
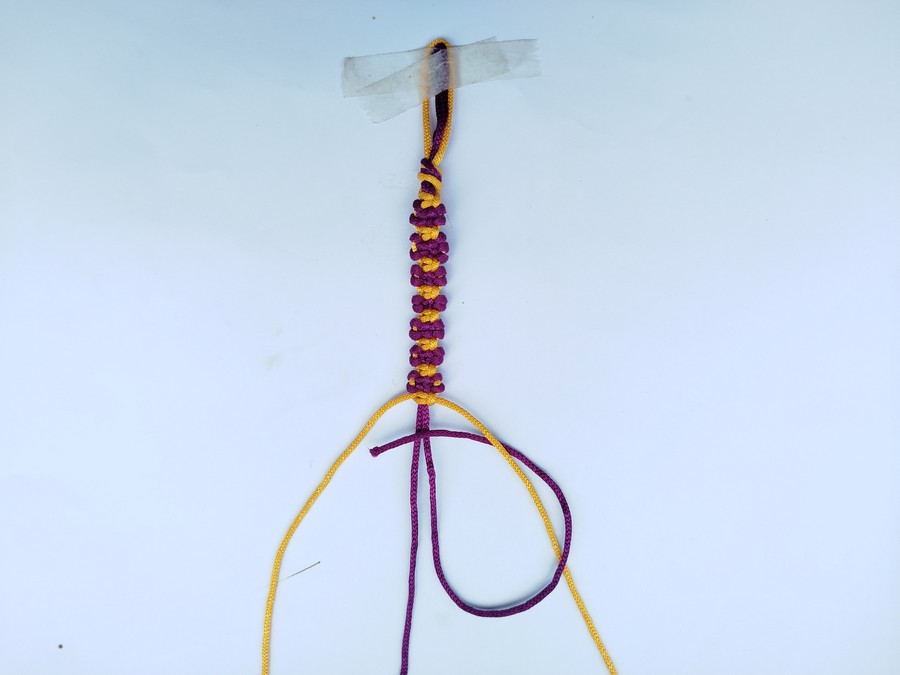
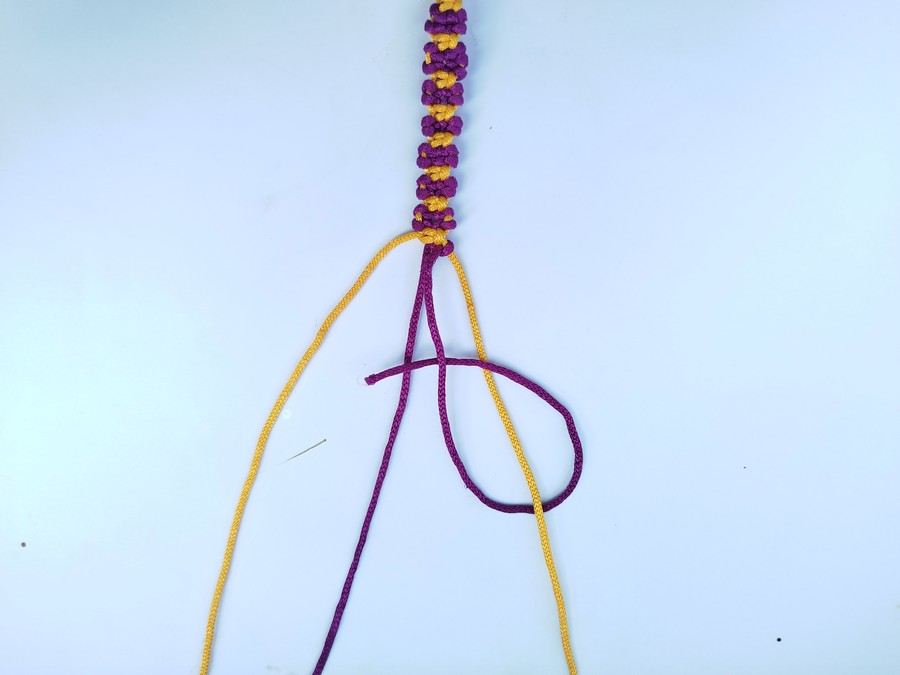
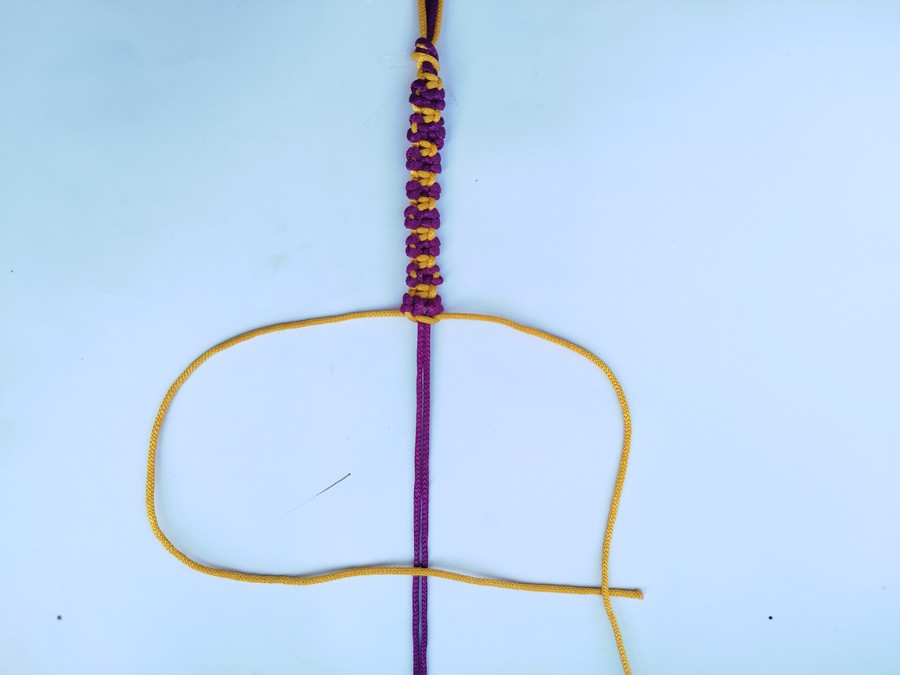
Step #5: Row 2 – Half Square Knot
Note: Before this step, Lock the middle purple strands tight with some heavy object or tape so that they are just touching each other. We shall first work with the yellow strands (outer ones!) only.
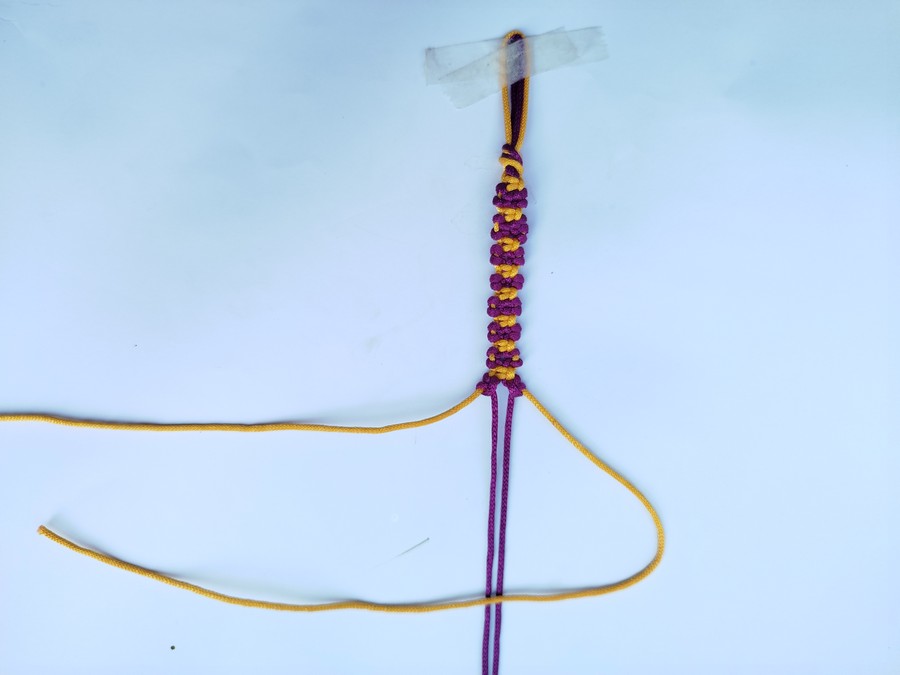
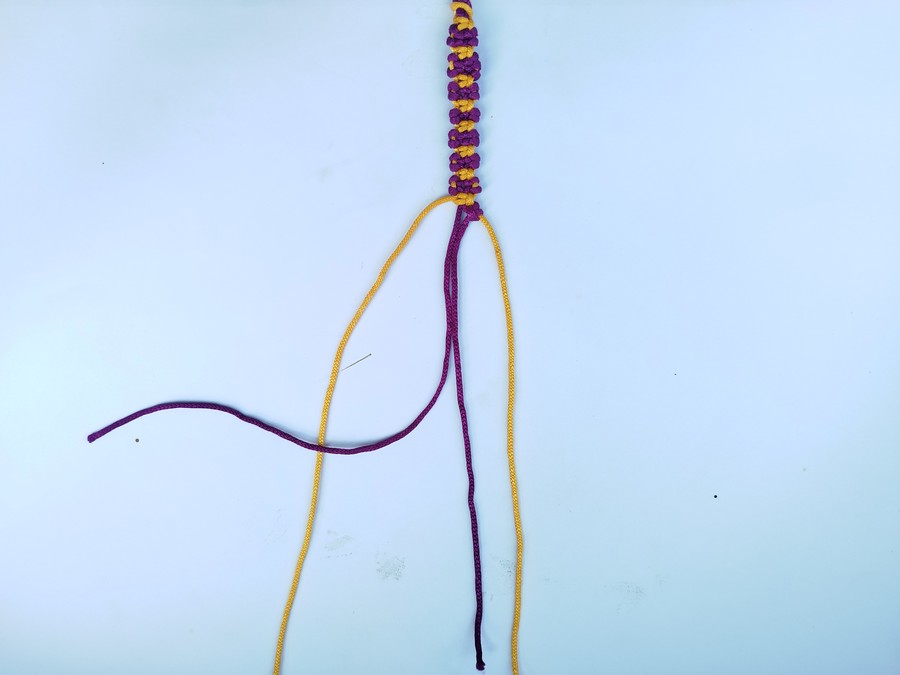
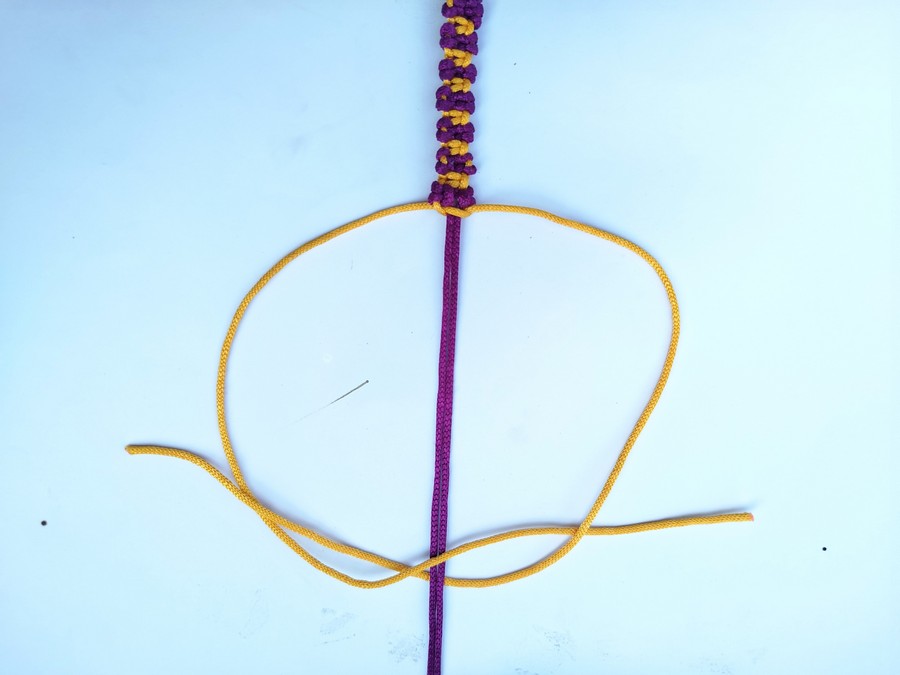
- Now, hold the right yellow strand and cross it over both the purple strands in the middle.
- Afterwards, hold the right left strand and cross it below both the purple strands in the middle to the right.
- Pass the strand through the right loop and cross it over the strand of the right yellow loop. Now, you have interlocked the cord, you can make a knot. To do so:
- Pull both the interlocked strand to its direction, shortening the loop and pulling tight when knot is formed. This makes the first half knot. Now, for the other one, we shall reverse its direction.
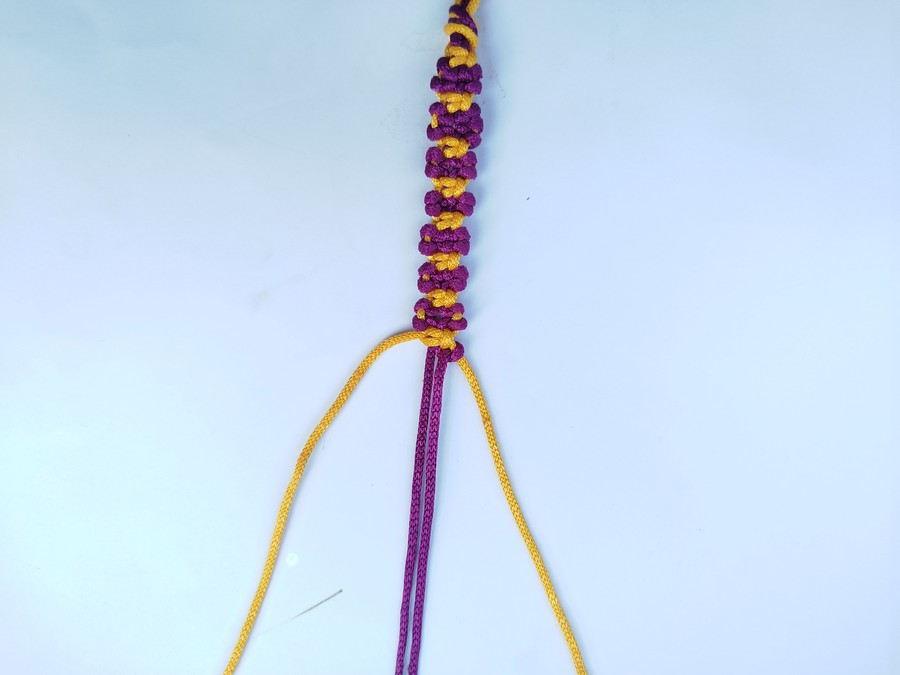
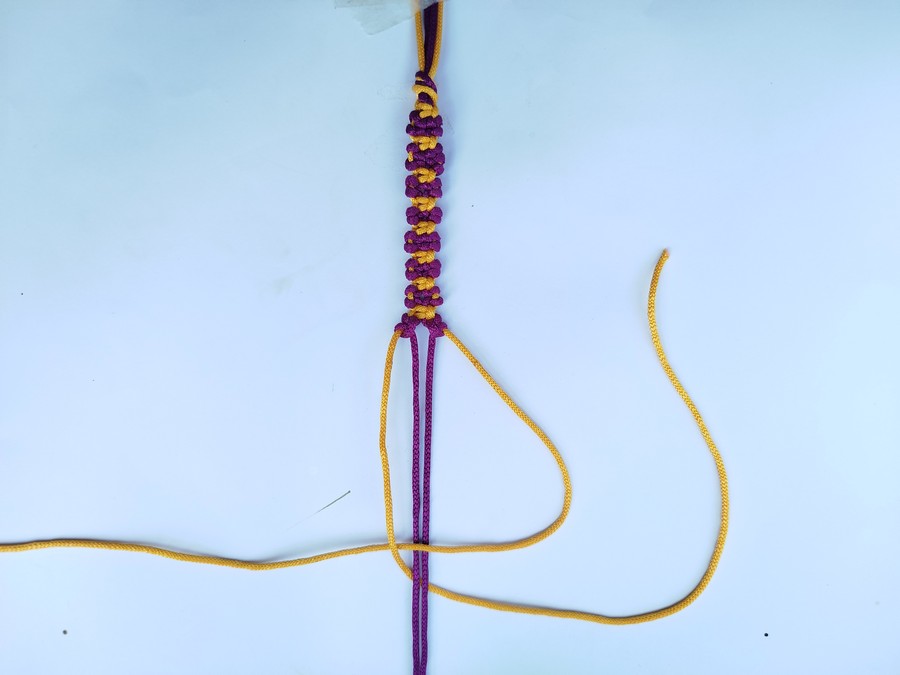
Step #6: Row 2 – Full Square Knot
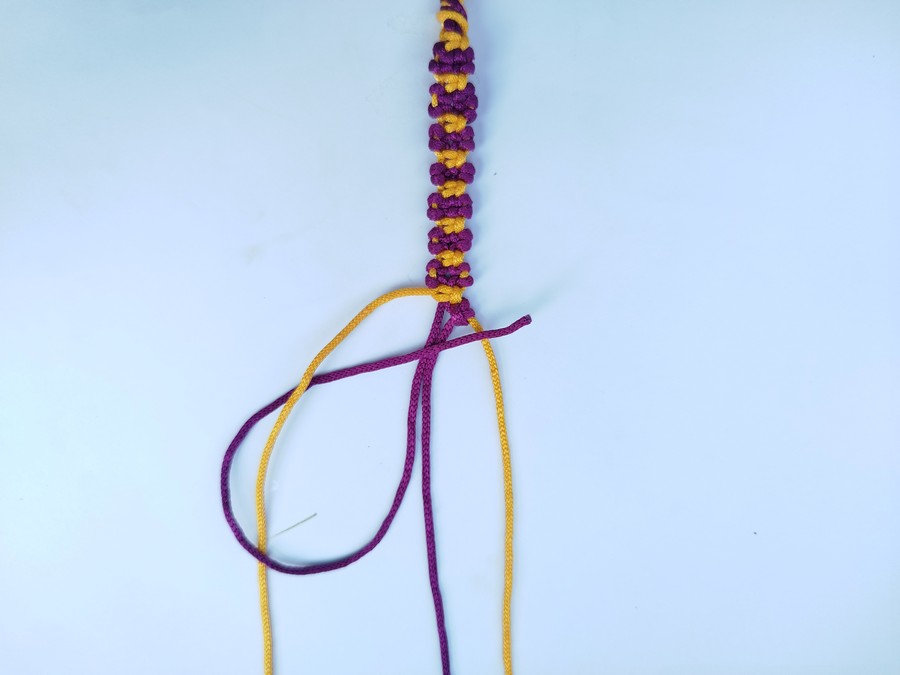
- Instead of the right strand, pick up the left strand and pass it over both the middle strands that are stretched straight.
- Make sure that the other strand is not under this strand.

- Take the other strand, crossing it over the first yellow strand, cross it below the middle purple strands.
- Pass the 2nd yellow strand through the left loop and cross it over its strand to the right making an interlock.
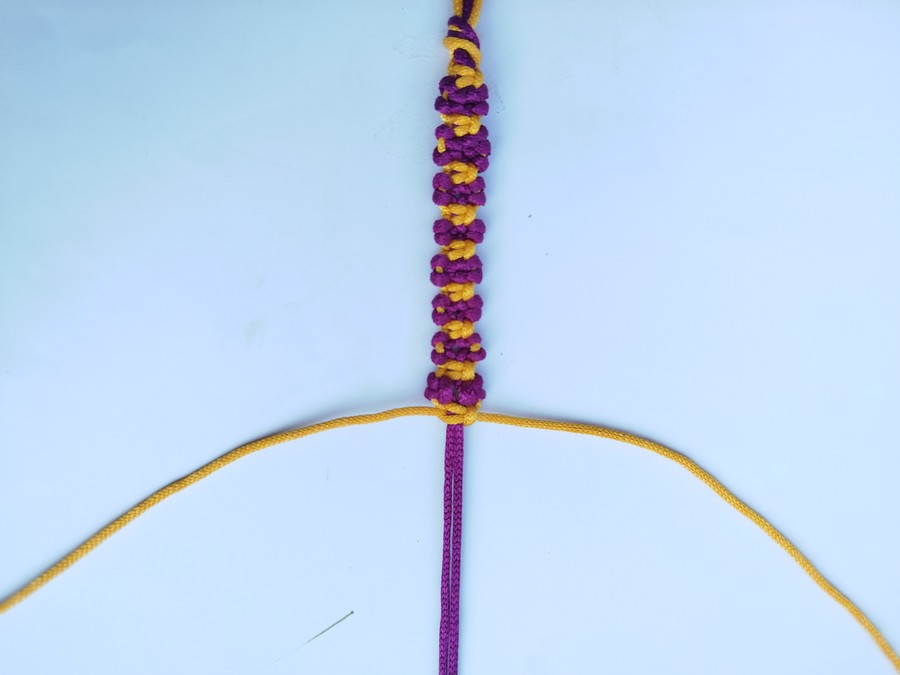
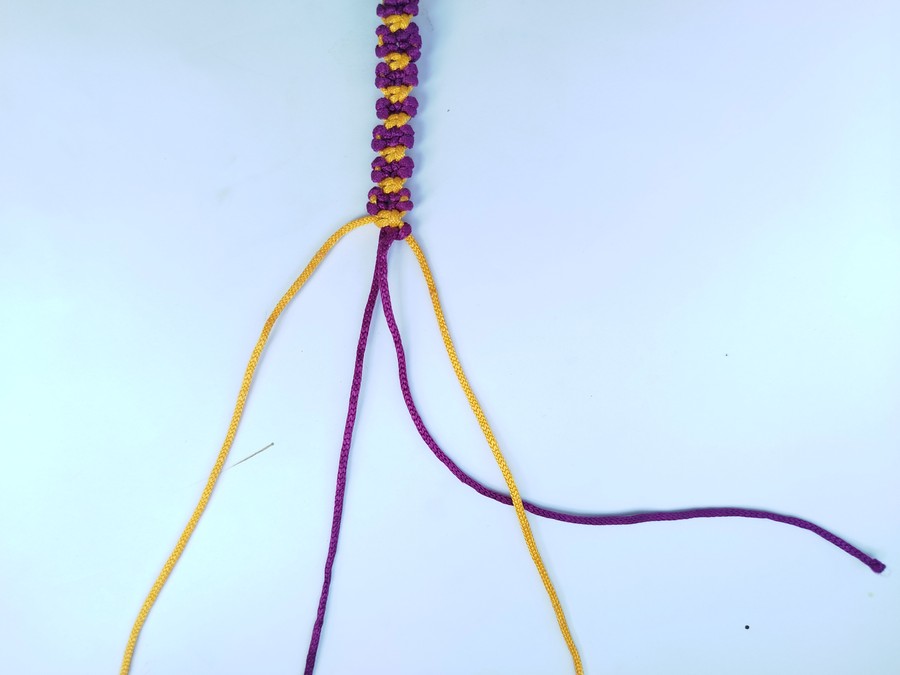
- Now, just pull the knot tight to make a square knot in the middle. This will let us finish the 2nd row and going towards a 2-row repeat pattern.
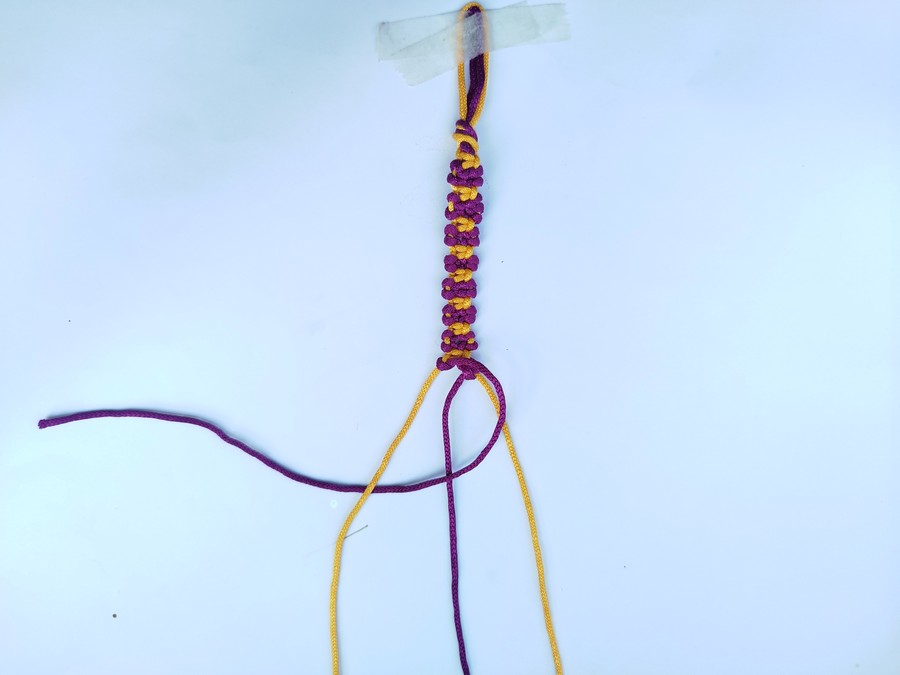
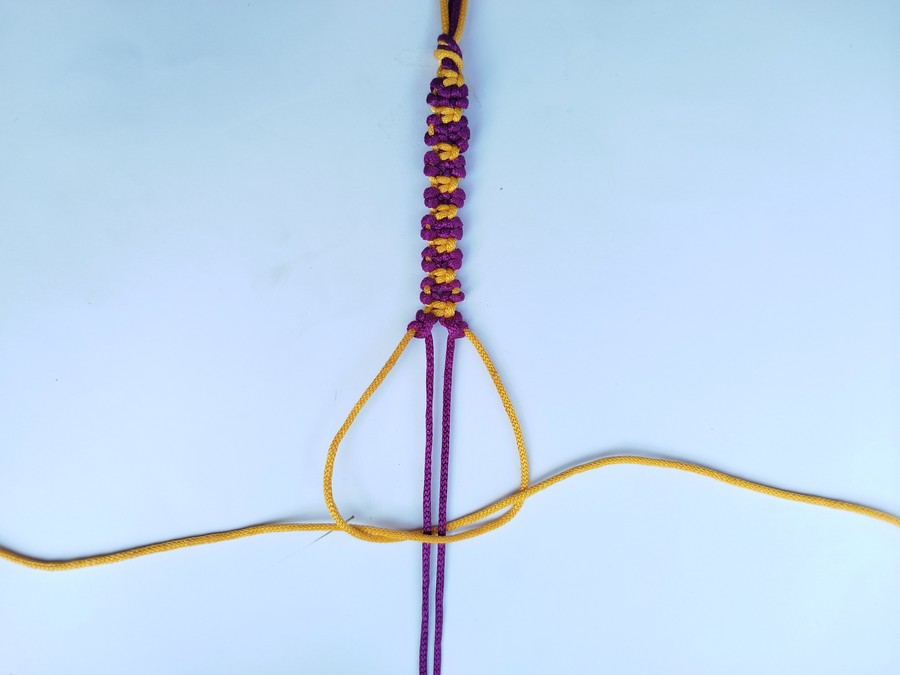
Repeat Pattern
Continue repeating the following pattern until you feel like your wrist will feel comfortable with that length:
- For every odd row such as the 3rd one, repeat the step #1 through step #4 as we after every 2nd row, our strand arrangement will reset automatically just as I shown you above.
- For every even row such as the 4th one, repeat the step #5 through step #6 using the yellow strands.
And that’s how you will want to make this beautiful 2-row repeat bracelet pattern as a beginner!
Was this tutorial helpful? Tell me in the comments
Your feedback is a great way for us to improve my crochet tutorials. So, share your thoughts on whether you tried this one or not, and highlight the weak points.
See More:
How to DIY 9-Knot Repeat Infinity Loop Pattern Bracelet for Friendship Day
How to DIY 2-Row Repeat Zipper Pattern Bracelet in 4 Steps
How to Make Staircase Spiral Friendship Bracelet in 3 Steps
How to Make A Macramé 4-Strand Chevron Bracelet
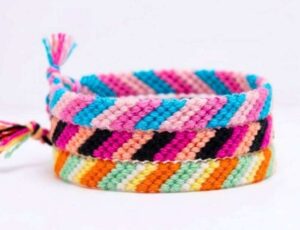
How to Make A Candy Striped Macramé Bracelet for Friendship Day
How to Make Macramé Square Knot Bracelet for Friendship Day
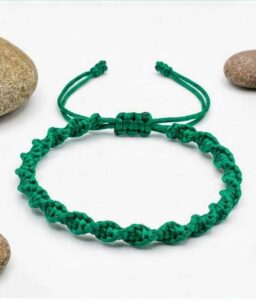
How to Make A Spiral Bracelet with Macramé
How to Make Watermelon Macramé Bracelet from Easy Square Knot Bracelet
How to Make Macramé Candy Chevron Bracelet for Friendship Day
Wanna Crochet Something Else?