Author: Talha
I am a crochet designer, macramé maker and a crafter who also loves doing MATH.
Last time, I showed you how to knot a chevron bracelet using 6 strands and 3 colors of yarn. However, you can also make a chevron bracelet using just 4 strands and 2 colors of yarn and that’s what I will teach you in this macramé tutorial. This bracelet pattern can be used to make a macramé heart bracelet using pink and red yarn.
In any way, it is a quicker chevron bracelet and you can easily make for an adult in less than 30 minutes. This time, I have used green and purple color (I regret using thick yarn!).
Macramé 4-Strand Chevron Bracelet
And based on my experience, I recommend you to use a thin yarn to make this bracelet as otherwise, you would have a kind of distorted and pixelated chevron bracelet. With the thin yarn, it would look much elegant at closeup. Now, continue reading as I am gonna teach you making this bracelet step-by-step.
![]()
Quick Making of 4-Strand Chevron Bracelet
Step #1: Slip knot two yarn strands of the same length in different colors that are folded in half before.
Step #2: After securing the work on the table, separate and arrange the yarn strands on the left, containing each color.
Step #3: Mirror the left-side color rule to the right. i.e., COLOR A, B goes to B, A. The two outer strands will be working strands for each chevron row, and you see, both will have the same colors.
Step #4: Make a double knot around the middle left strand of the right with the right extreme strand.
Step #5: Make a double knot around the middle right strand of the left with the left extreme strand.
Step #6: Both the extreme strands will now be in the middle. With the left strand again, make a double knot around the right middle strand. This finishes the first row of chevron.
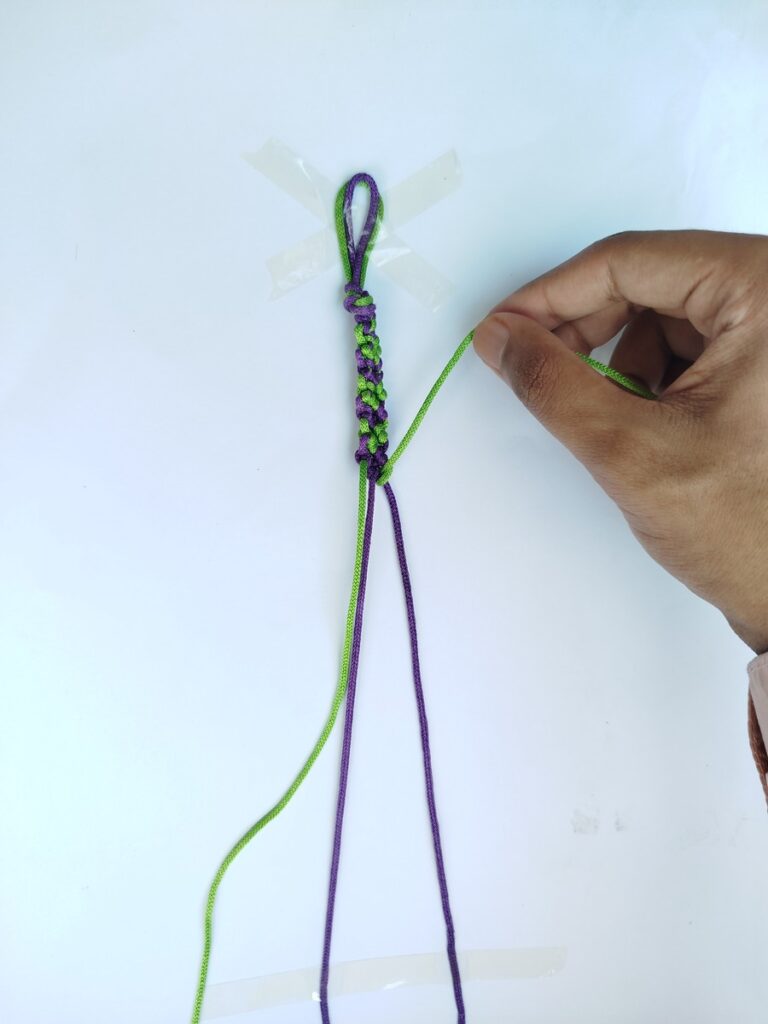
Step #7: Repeat row 1 with whatever the color is on the right. For example, in row 2, we have color B on the outside now. Just make another row, so the arrangement normalizes, and keep on repeating that over and over.
Candy 4-Strand Chevron Bracelet Pattern: Step-by-Step Instructions
Colors:
- Purple (Color A)
- Green (Color B)
Knots Needed:
- Slip Knot
- Backward Hitch & Forward Hitch Both
- Braid
Supplies Needed
- Any yarn: Such as Embroidery floss or macramé cord (I am using the macramé cord of 2.5mm thickness this time.
- Colors: 2 colors with good contrast
- Paper tape: Can be transparent or the recommended, paper tape.
- Flat surface such as table to tape the work over
Preparation
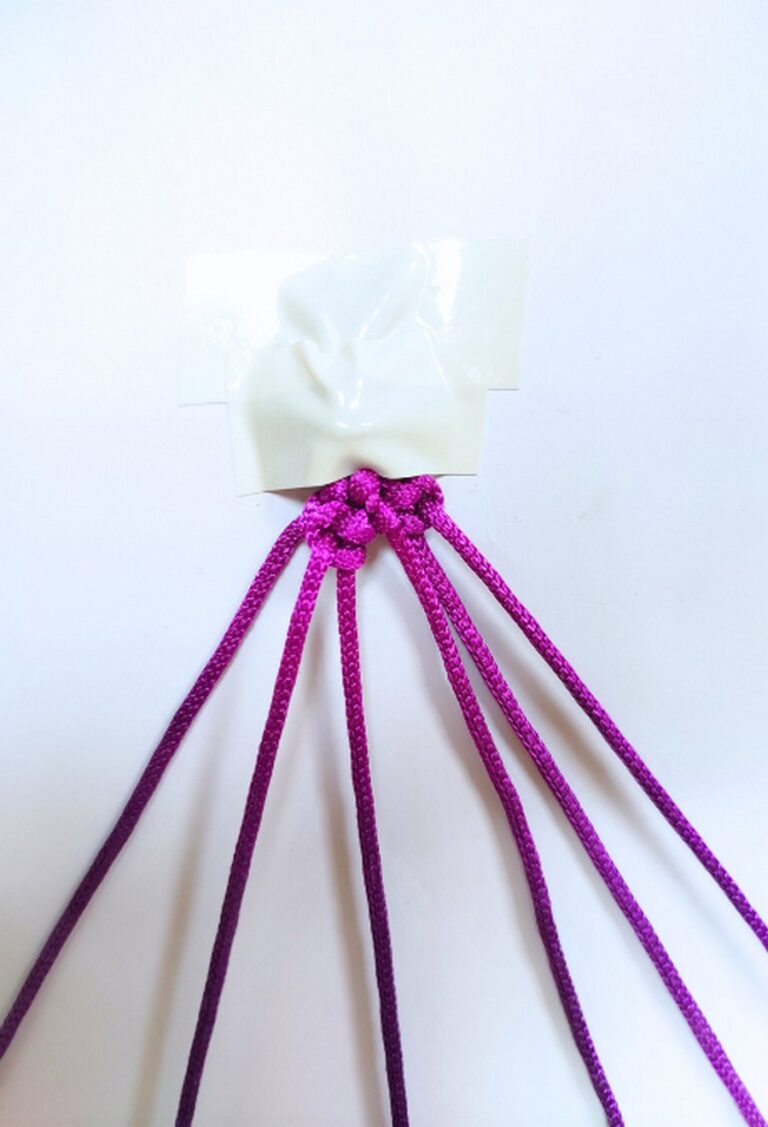
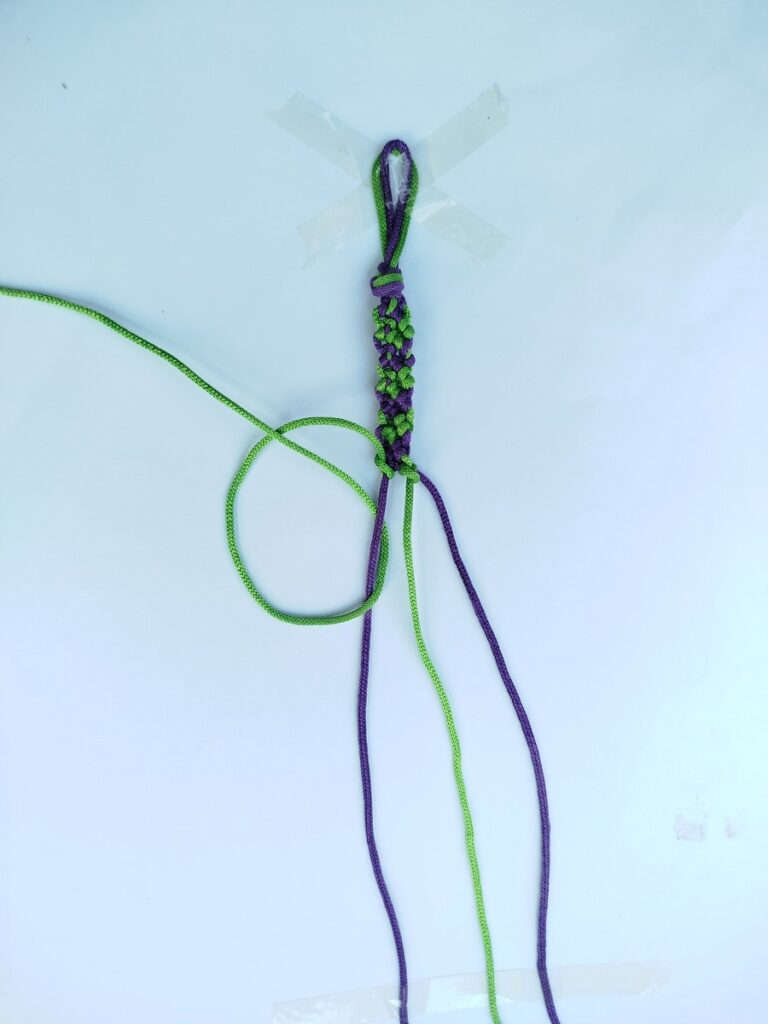
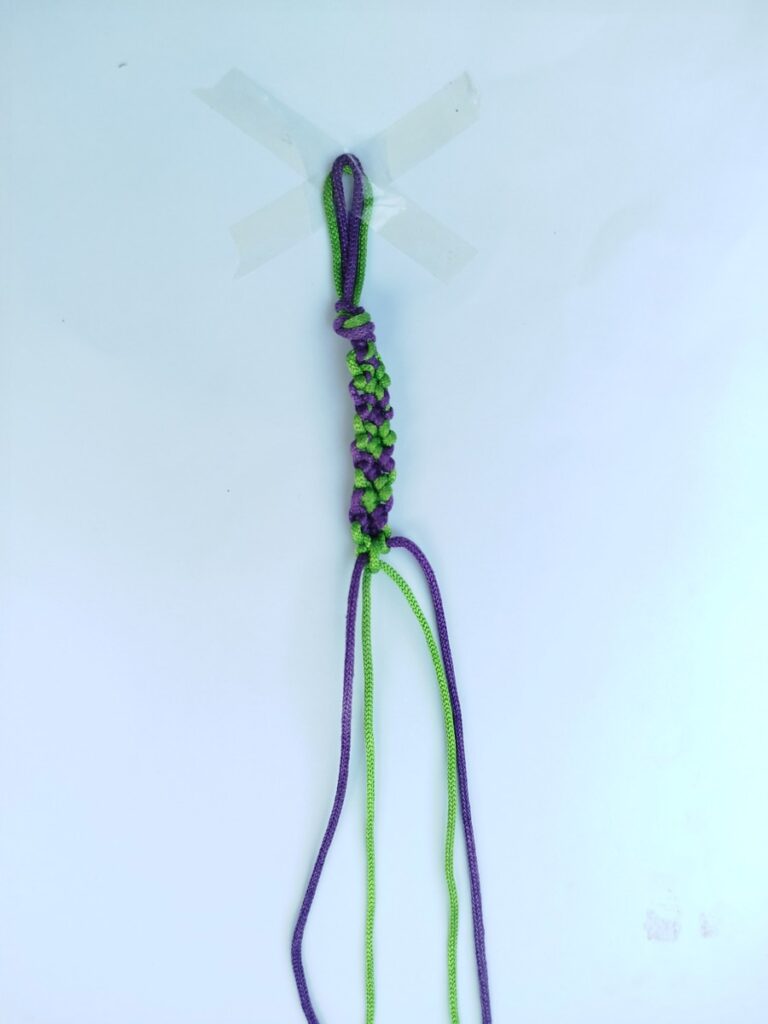
Step #1: First you will take, 2 strands of 2 colors, 180 cm each and fold them in half separately. Align them and make a slip knot in the middle and try to keep the loop height as less as possible. Then, cut a strip of tape and place the knot over the top of the table by applying it over in cross shape.
Step #2: Now, separate the 4 strands and arrange them from one color to the 2nd on one side at angle and mirror this arrangement to the other side!
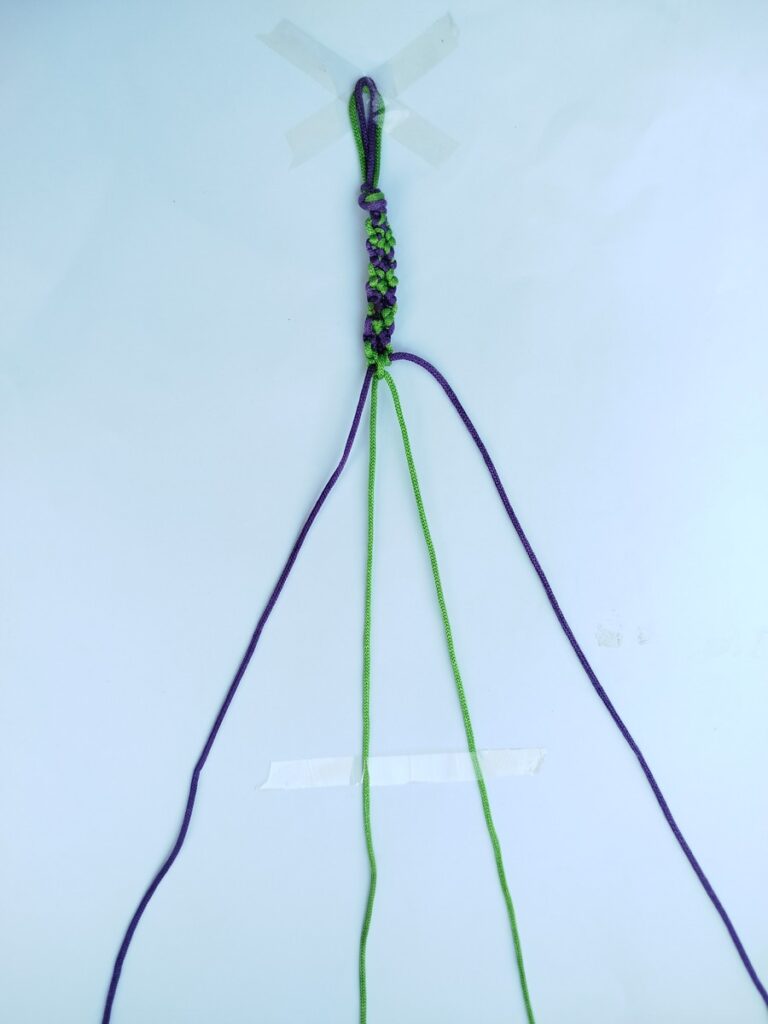
Tip: If you are a beginner, you can also tape middle two strands as they will be our passive strands – around which we make a knot! However, you will have to face the hassle of changing the tape positions after every row!
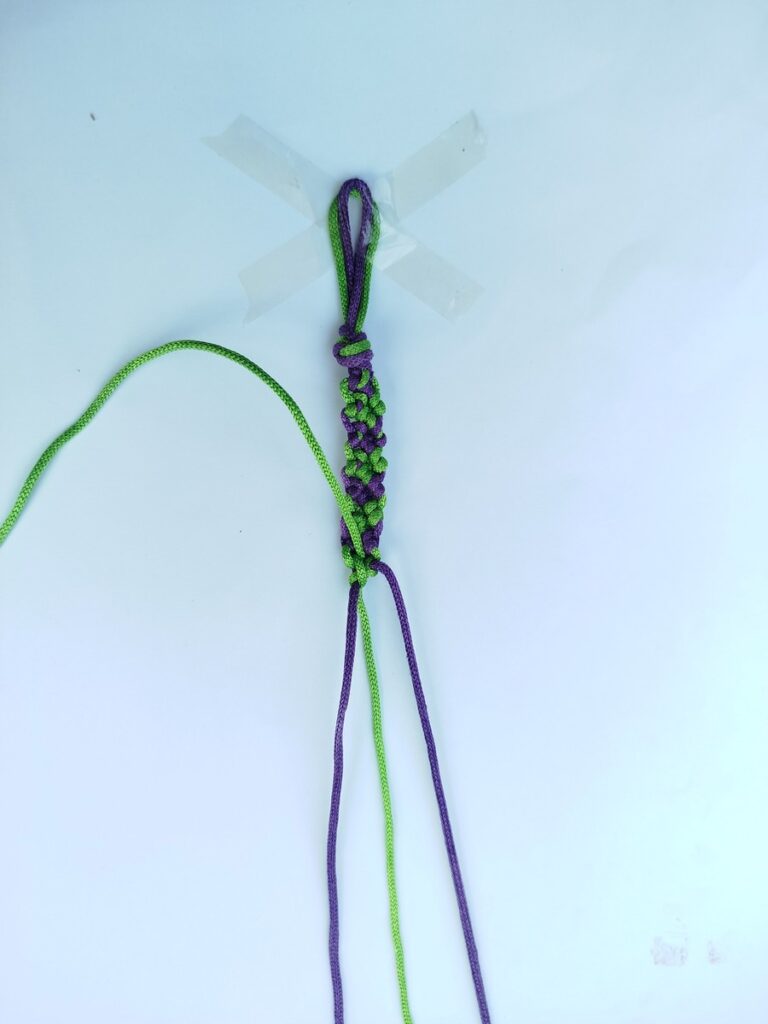
Step #1: Chevron Set 1 (Backward Hitches)
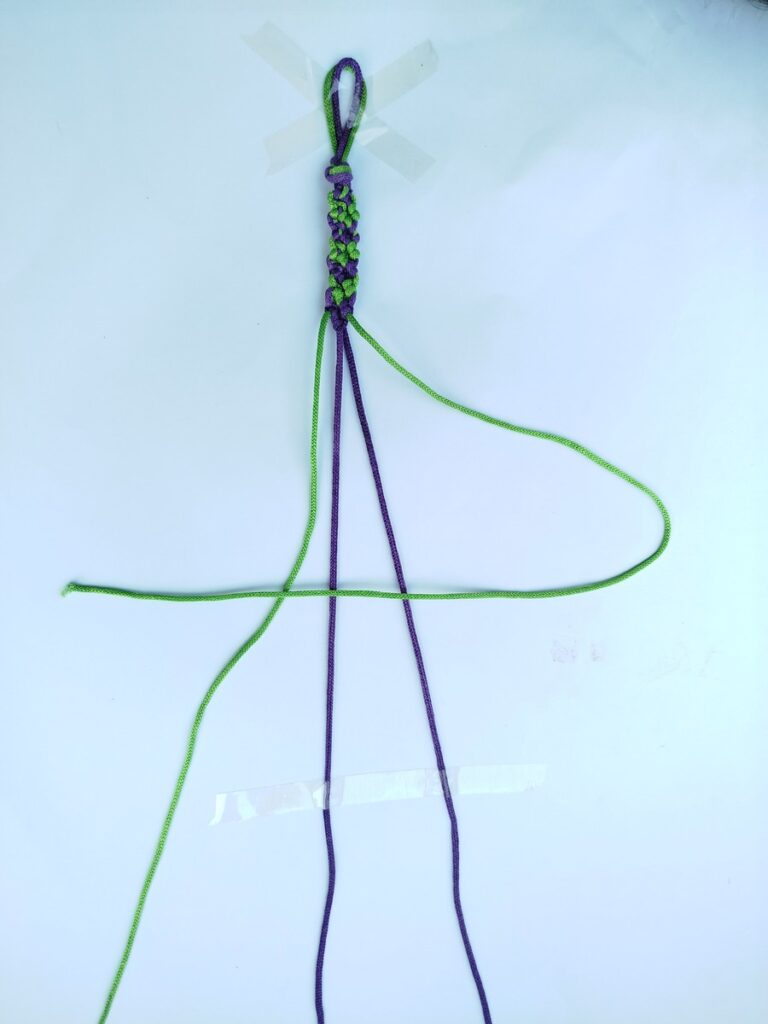
- Take the right green strand (which is at the extreme and is the active color), move its tip to the left and cross it over all the strands like this!
- From left to right, cross this strand below the right purple below.
- Cross it over itself so that the loop gets shortened.
- Continue pulling this loop to the right and until the loop is small to be knotted. Just pull tight holding the purple strand in place.
- Place this strand between the two purple strands. This completes our first backward hitch.
- Make another similar knot to finish one knot set called the double knot.
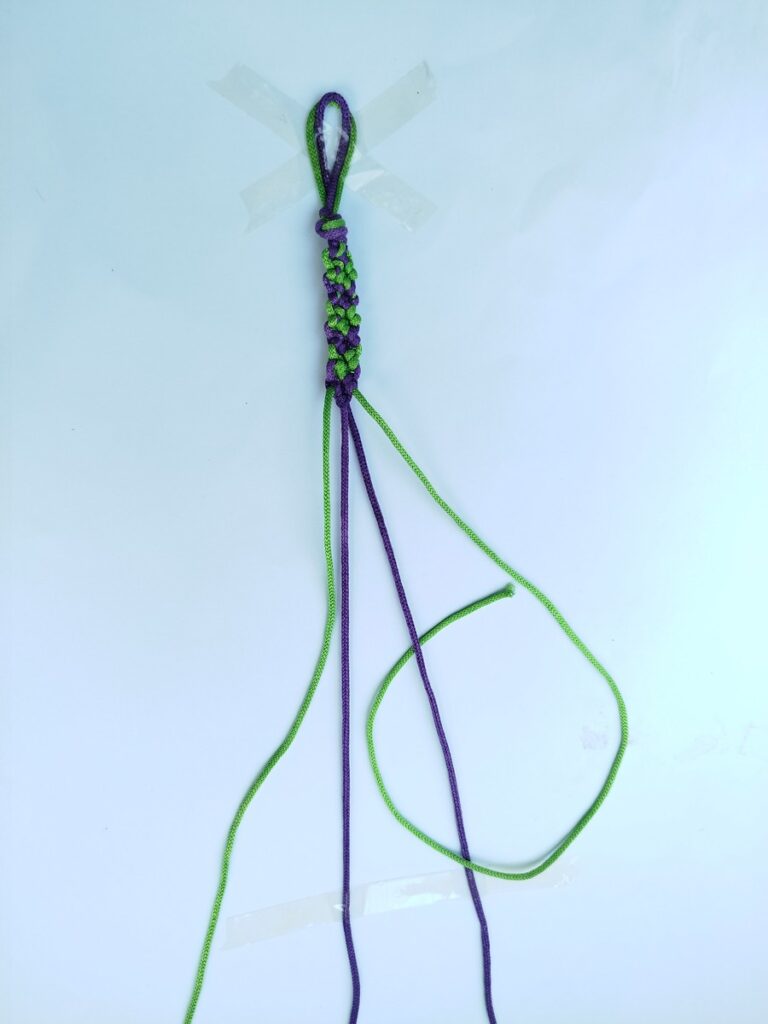
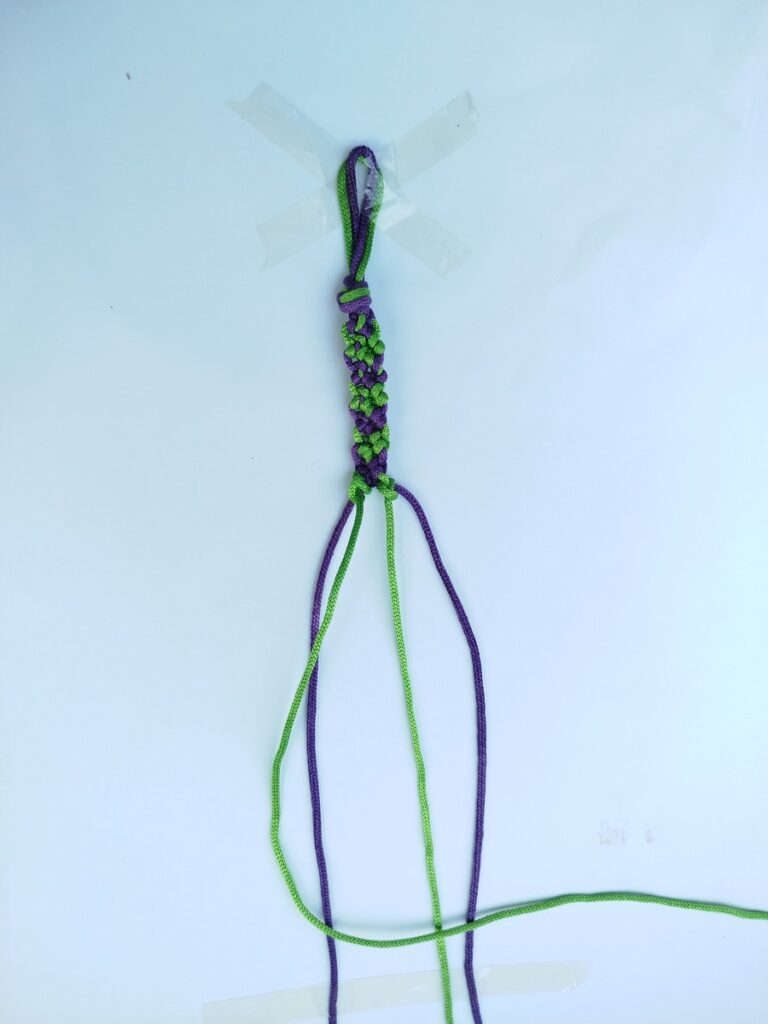
Step #2: Chevron Set 2 (Forward Hitches)
- Now, take the left green strand (which is at the extreme and is the active color), move its tip to the right and cross it over all the strands like this!
- From right to left, cross this strand below the left purple below and over itself. This makes a tangle to be knotted.
- Just pull tight to make first forward hitch.
- Make another forward hitch and you will notice that both the green strands tend to stay in the middle of purple strands. That’s what we need.
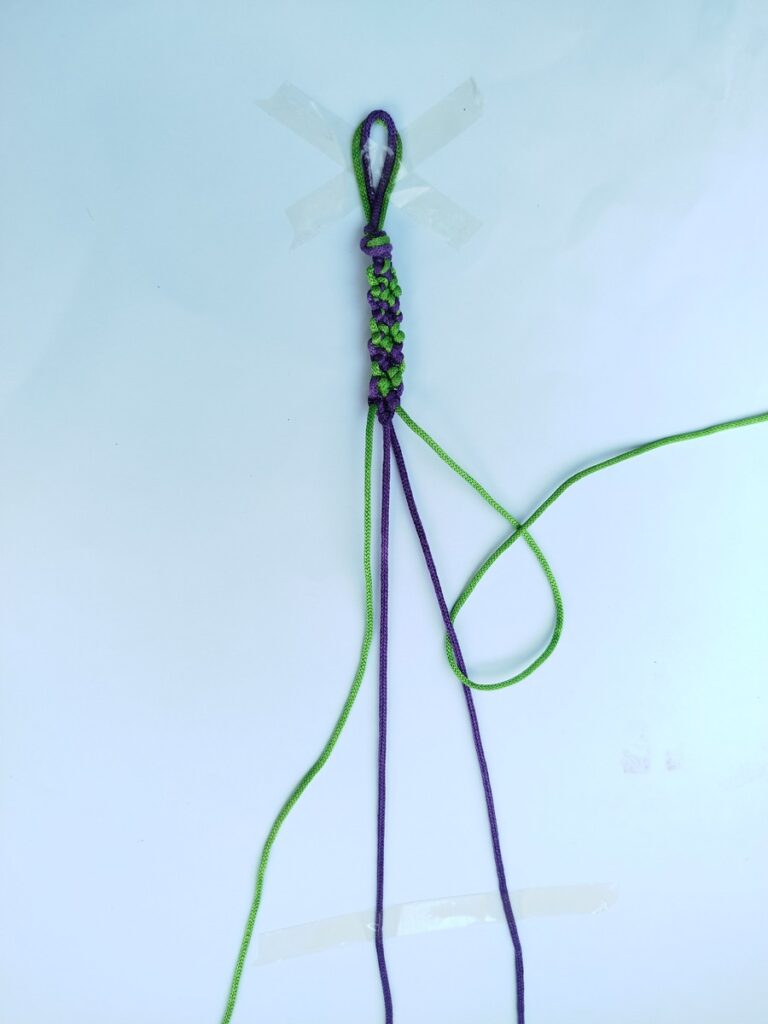
Step #3: Chevron Set 3 (Forward Hitches)
- Again, pick the left green strand move its tip to the right and cross it over all the strands like this! Now, we want to make knot around its neighbor, green strand to make a corner at the bottom.
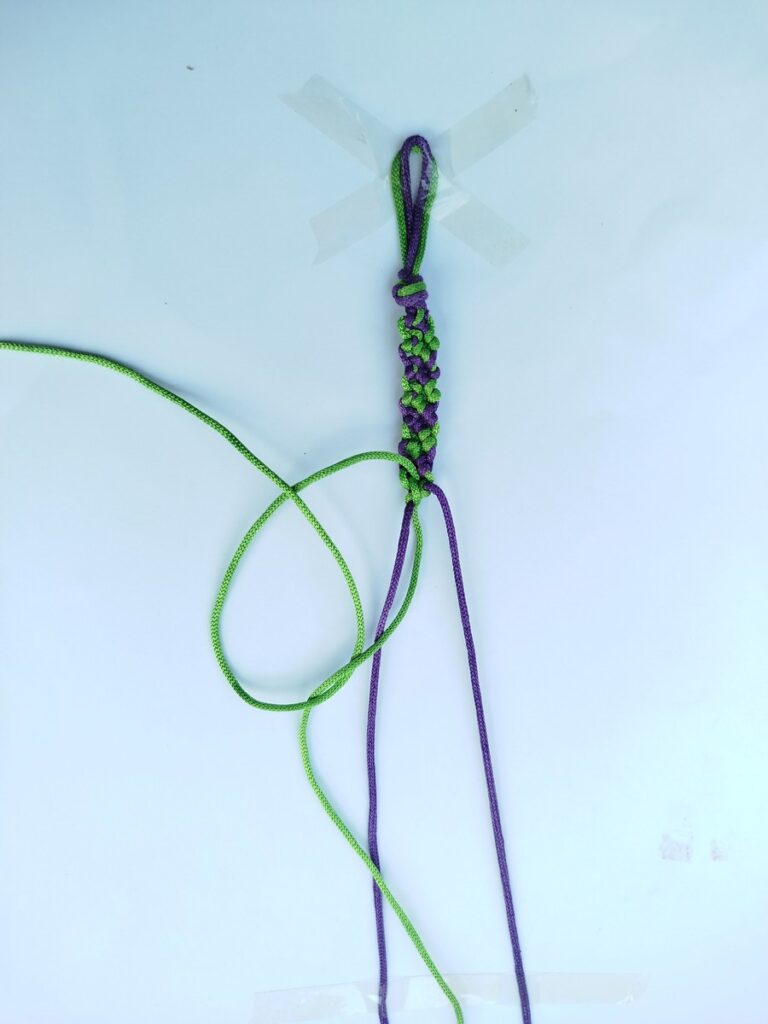
- Pass it first over the right green strand, the below and then over itself.
- Continue pulling to make another forward hitch.
- You are required another forward hitch around the green and that’s what I did above. Then just tape the middle green strands so you can freely work with the purple strands.
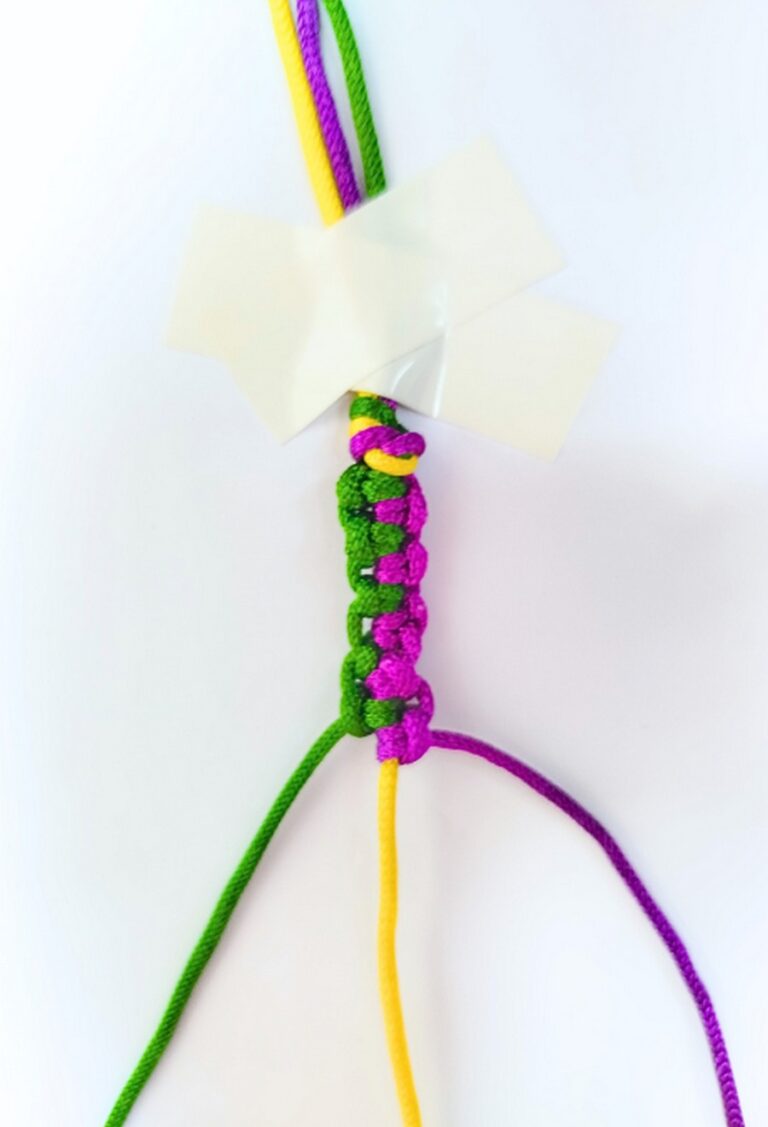
Row 2 Pattern!
Now, you have a different arrangement, to make the even row, you will have to work with the purple strand as follows:
- Make a double knot around the right green strand with right purple yarn.
- Make double knot around the left green strand with the left purple strand.
- Make a double knot around the right of the middle purple strands with the left.
![]()
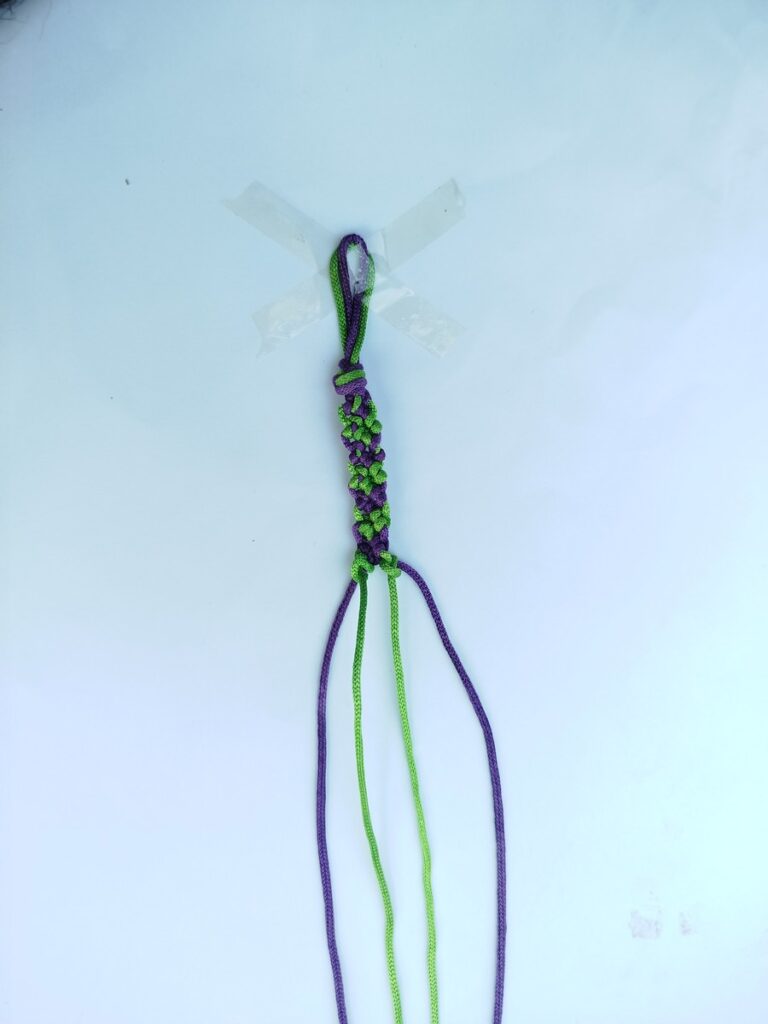
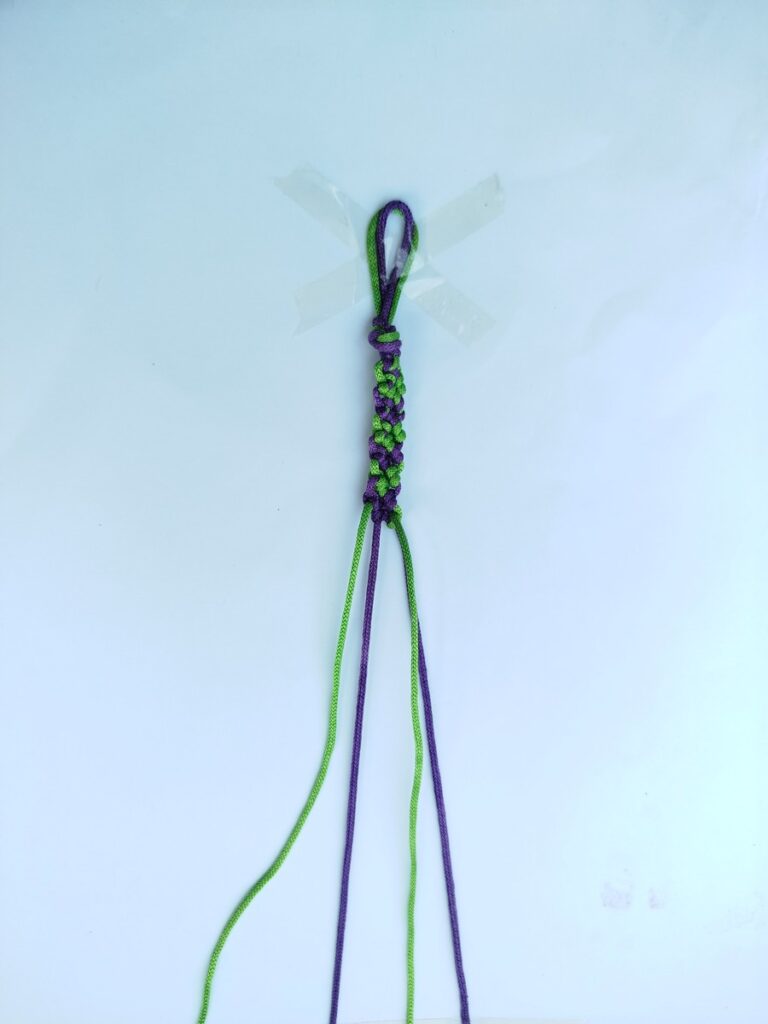
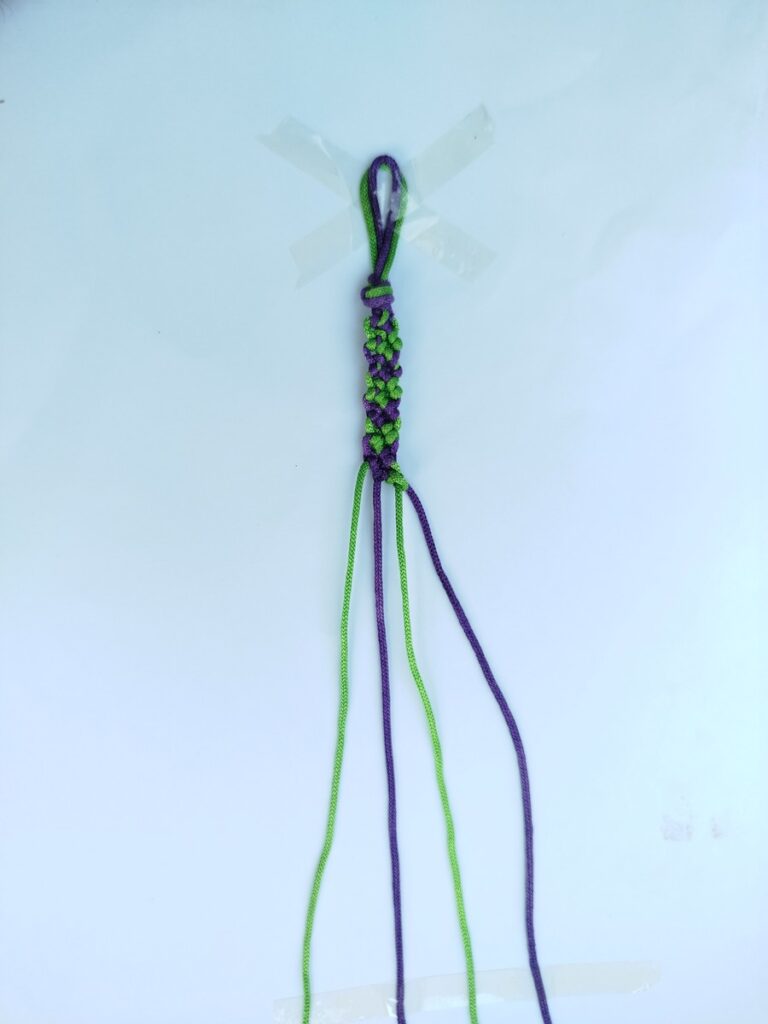
Repeat Pattern
After the row 2, the arrangement comes back as before the first row. This means, this bracelet is a two row repeat pattern. So, follow that.
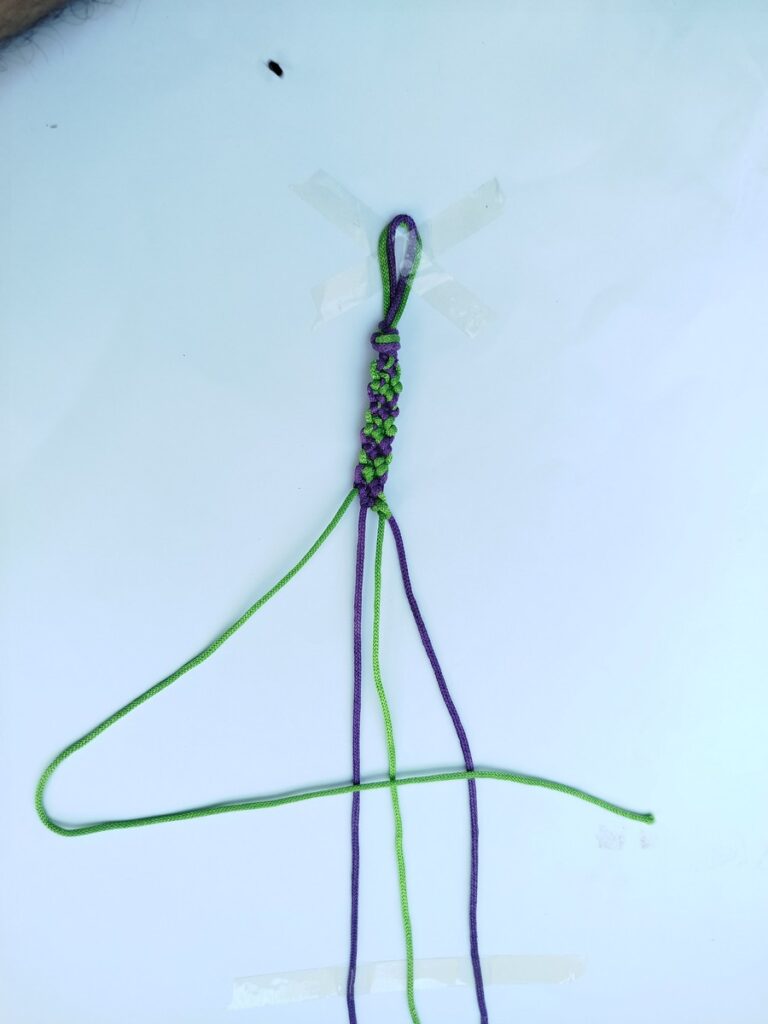
Final Knot!
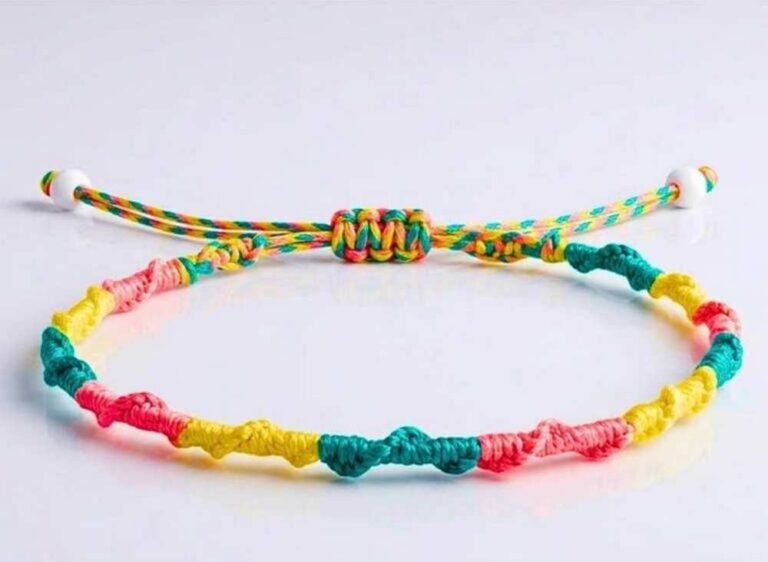
Leave about 4 inches and make a knot or you can first braid the 4strands like me and then make a knot to finish the tassel! And that’s how you will make a chevron bracelet! Gift to a friend or make for yourself!
Was this tutorial helpful? Tell me in the comments
Your feedback is a great way for us to improve my crochet tutorials. So, share your thoughts on whether you tried this one or not, and highlight the weak points.