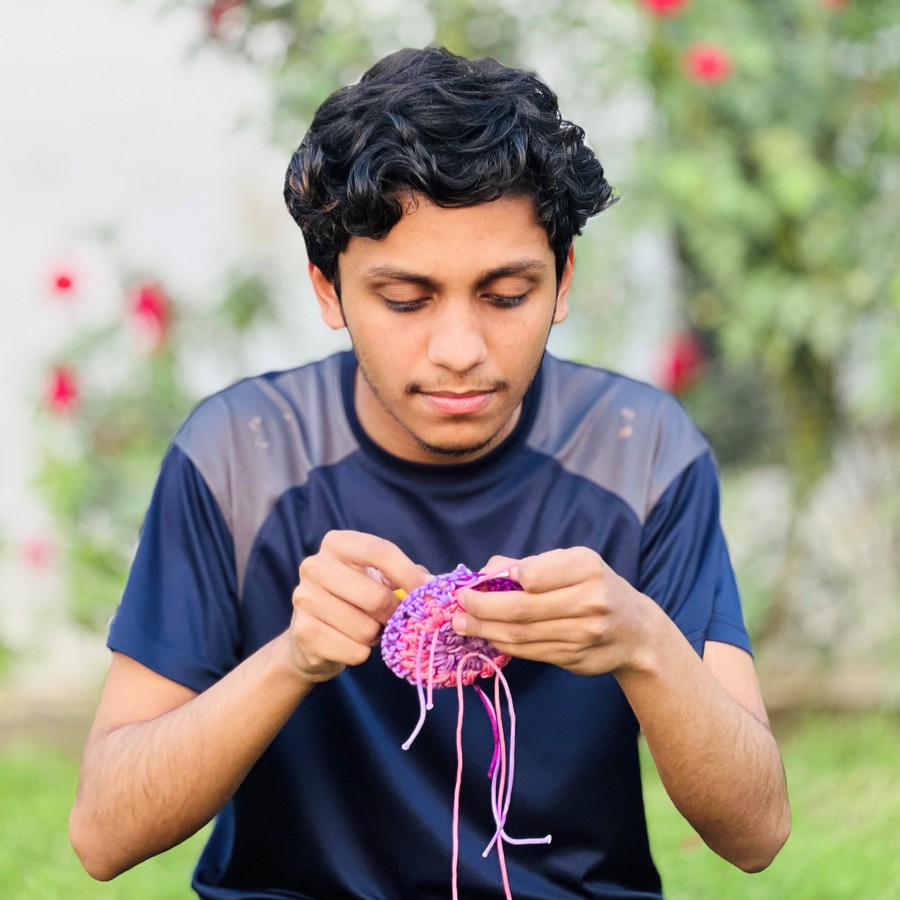
Author: Talha
I am a crochet designer, macramé maker and a crafter who also loves doing MATH.
Today, learn how to DIY this beautiful two-color bracelet with a lovely zipper pattern in just 5 steps. This is one of the most recommended Friendship bracelet patterns for beginners, as it works up quickly and only requires 3 strands of yarn and a 2-row repeat. You can make this bracelet for your LOVED one within 10 minutes.
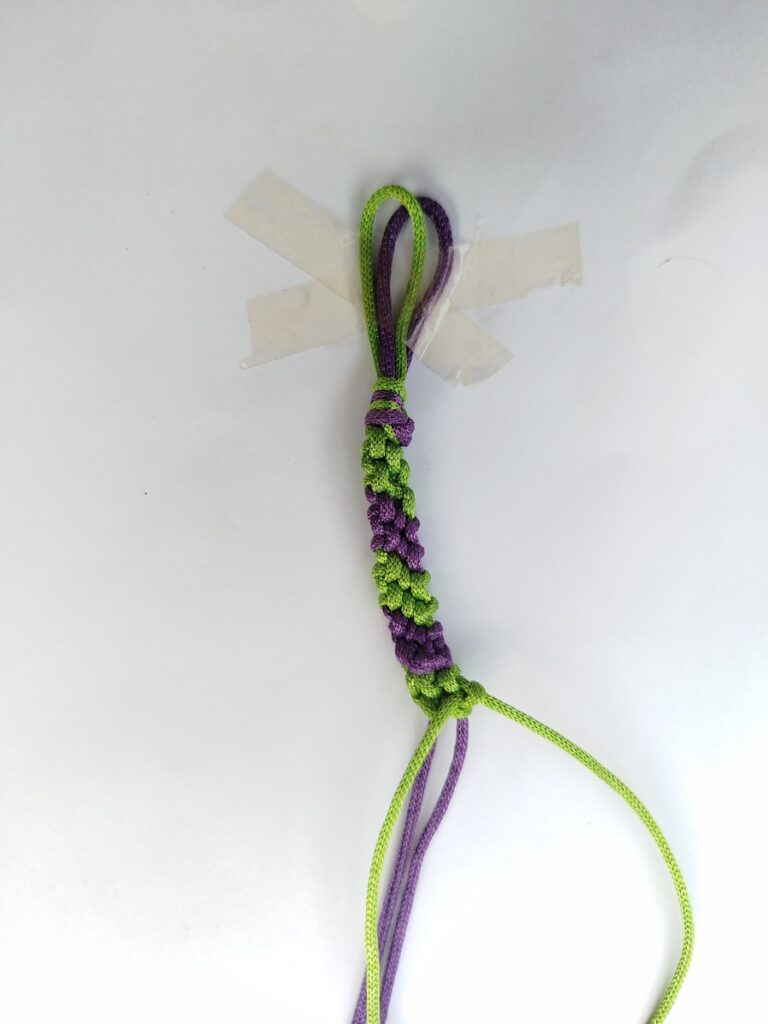
I have made this zipper bracelet for myself in purple and green. In the demonstration, I will also use a 3rd color so you can learn how to make it easily. However, it only requires 2 colors of yarn. It looks so elegant when coupled with white, such as red, blue, or black.
This bracelet pattern is easy, as you only have to repeat the forward-backward and backward-forward knots around the middle strand. Soon, I will also provide you with a chart pattern, so you can learn to make it even more quickly. Now, let me teach you how I made the zipper bracelet, and you can make one too.
About the Zipper Bracelet for Beginners
The difficulty level of the bracelet also depends on the number of strands you are working with at a time and how quickly the pattern repeats. As for the zipper bracelet, aka zig-zag two-color bracelet, it only requires 2 active strands and 4 knots until you repeat the pattern.
That makes it one of the last-minute bracelets, just like the square knot bracelet and the Chinese staircase. So, don’t get intimidated, I will show you how to make this bracelet for Friendship Day in November!
How to Make a Zipper Bracelet for Beginners
- Step #1: Cut 3 strings of yarn, 2 of which will be in the same color. One of those 2 must be 1/2 the length of the other 2. Make an overhand knot at the top of these strings after lining them up tip-to-tip.
- Step #2: Tape the work on the table and separate the colors and arrange them as AAB. The middle one will be the base of the zipper bracelet. Tape the middle yarn in place, as it will always be the base yarn.
- Step #3: With color B, make a backward-forward knot (backward hitch + forward hitch).
- Step #4: With color A, make a forward-backward knot ( forward hitch + backward hitch).
- Step #5: Repeat these two knots using the corresponding yarn colors until you are ready to finish a zipper bracelet. Remove the tape and just braid the bottom strands.
DIY Zipper Pattern Macrame Bracelet: Step-by-Step Instructions
Colors:
- Green (Color A)
- Yellow (Color B)
- Purple (Color C)
Knots Needed:
- Forward Hitch
- Backward Hitch
- Slip Knot
- Overhand Knot
Recommended Supplies
- Yarn: You can use Embroidery floss, cotton yarn, or macramé cord (I will be using the 1.5 mm macramé cord – the same one I use for my crochet patterns)
- Colors: 2 colors with good contrast
- Tape: I recommend using the paper tape.
- A flat surface, such as a table, to tape the work over.
Preparation of the Work
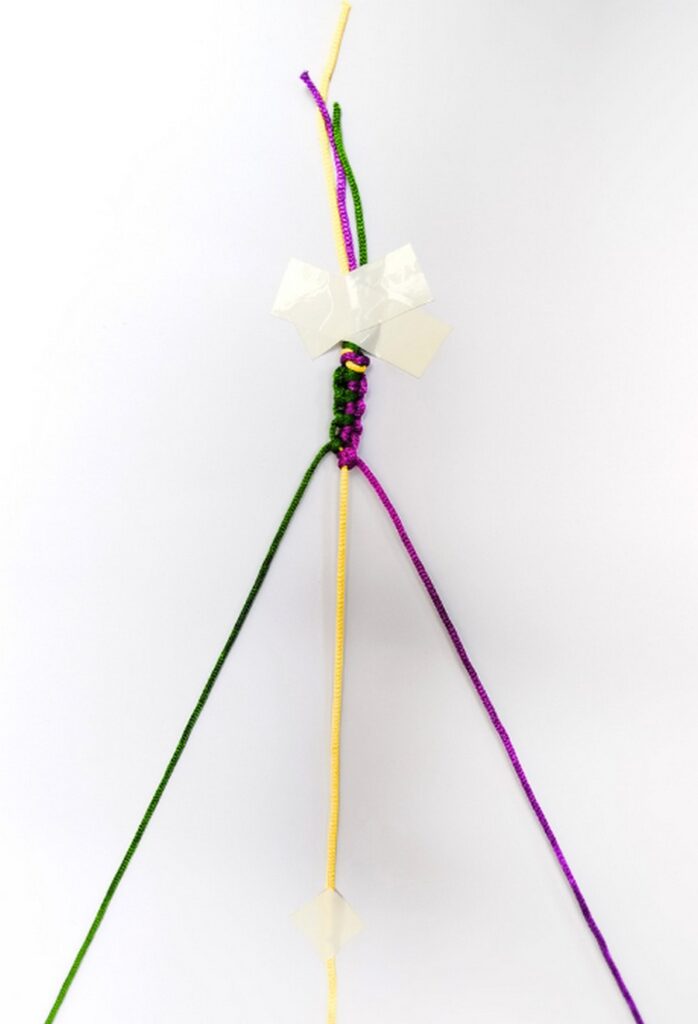
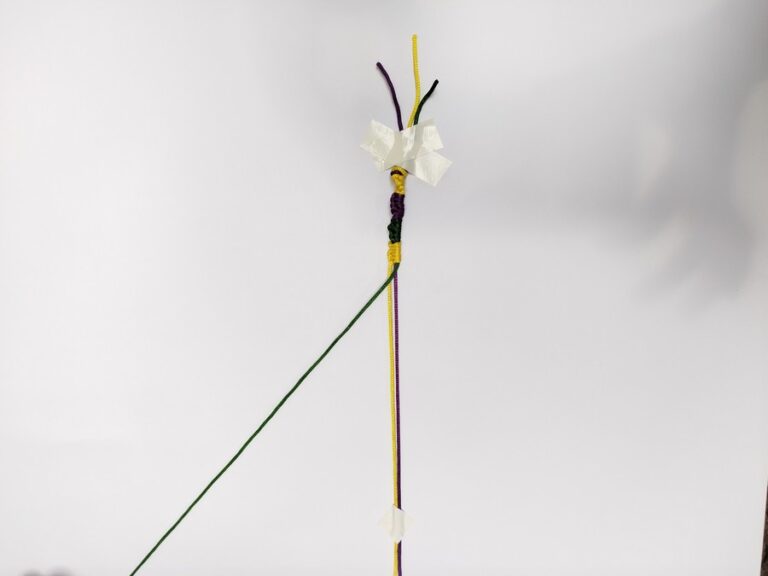
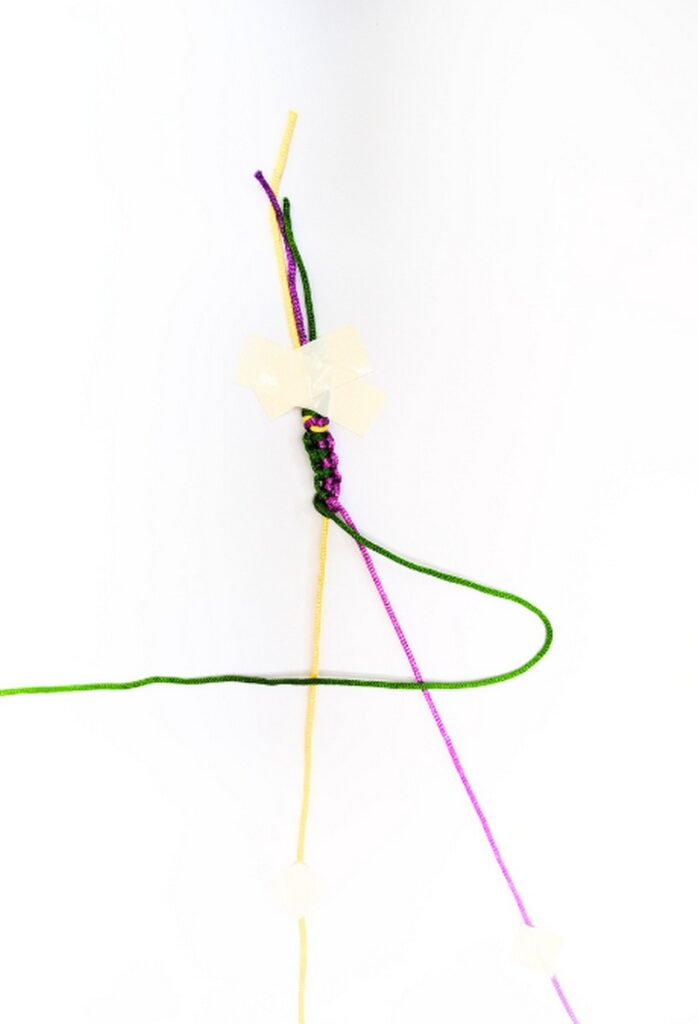
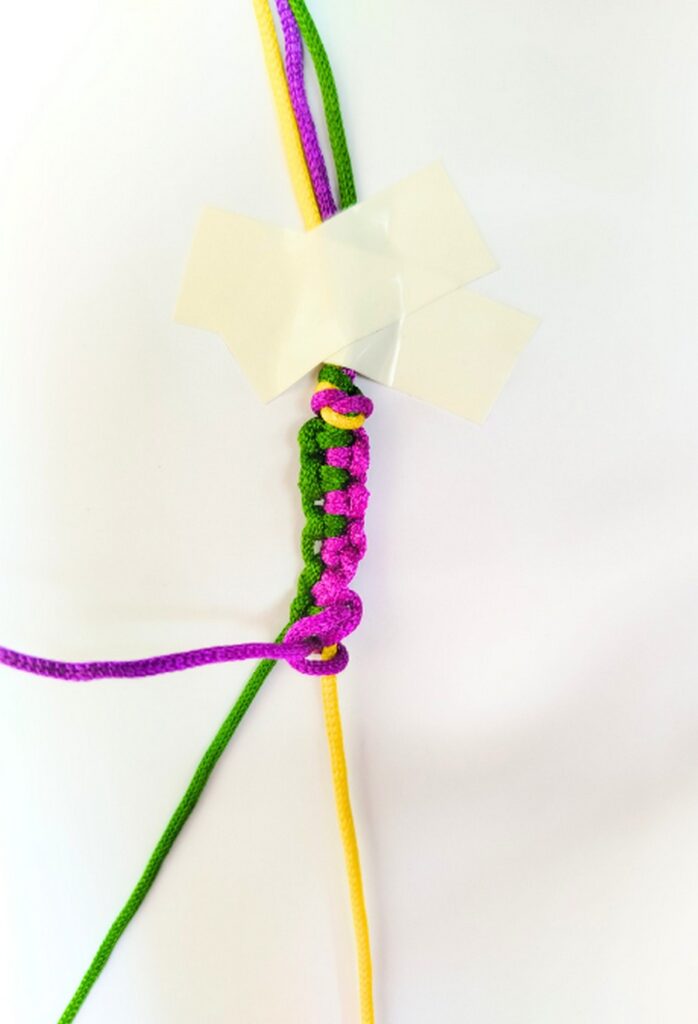
Cut two 42-inch strands COLOR A & COLOR B in two separate colors (otherwise, you won’t see the beautiful zipper pattern). Also, cut 26 inches strand in COLOR C or any of the colors. Then, line up the strands coinciding with the top tips of all and make an overhand knot 4cm away from the top.
Cut 2 tape strips and secure the work onto the table by making a cross, so when you pull the work, the strands don’t slide through. Line the strands as ABC, or if you are working with 2 colors, as AAB. Tape the middle strand straight in place.
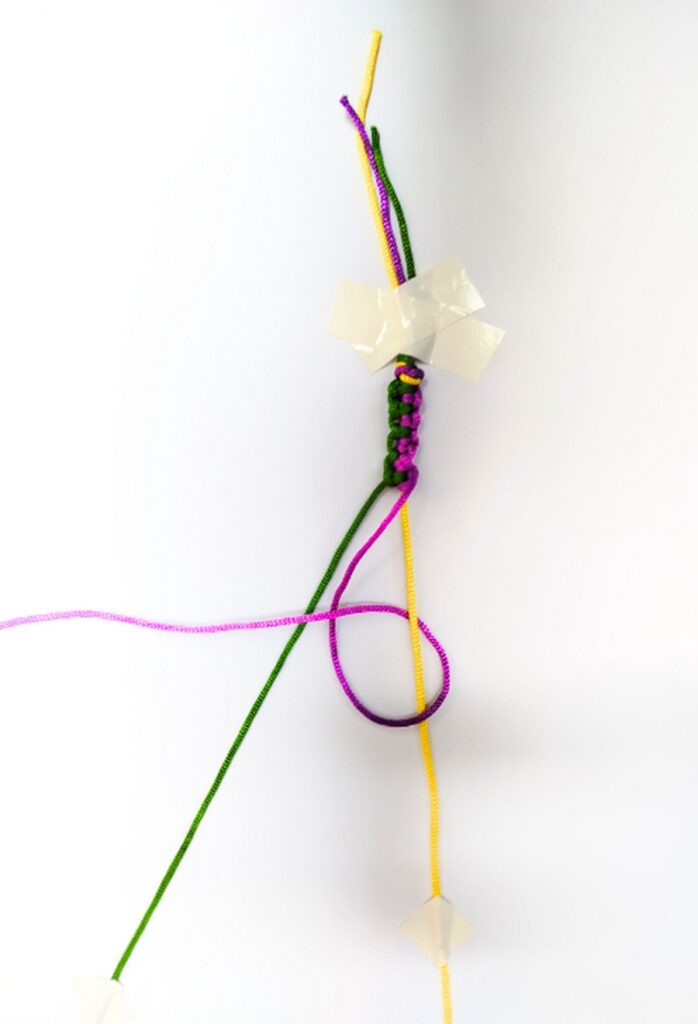
Step #1: Forward Hitch
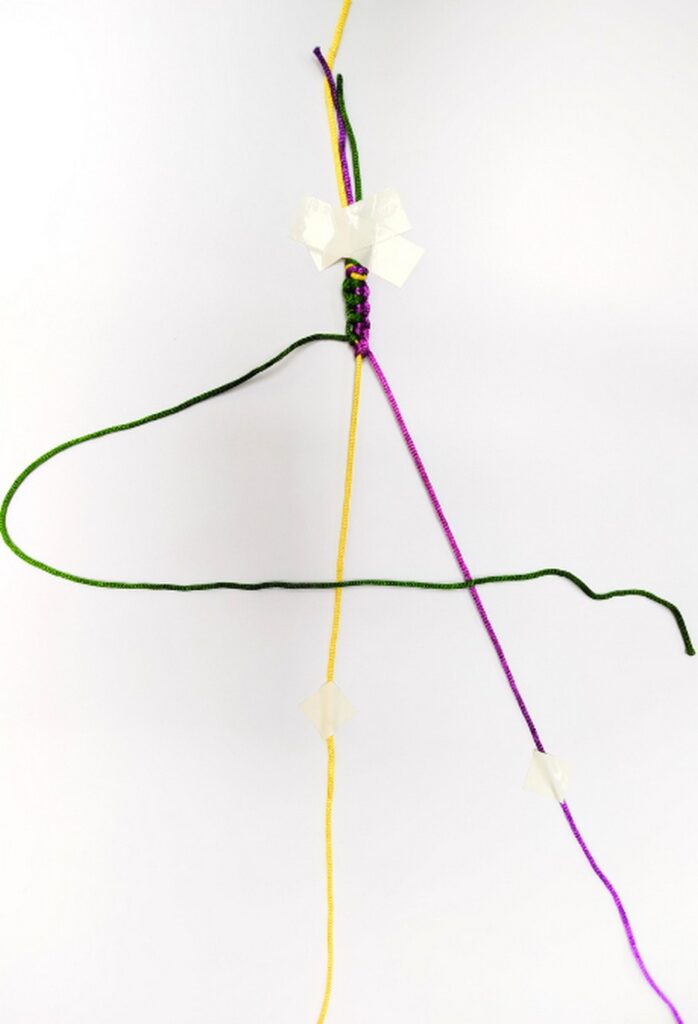
- Pick up the COLOR A (green) and cross it over the COLOR B or the middle taped strand to the right, such that on the left, you leave a U-shaped loop.
- Now, pick up the tip of the COLOR A (green) and cross it below the middle color to the right. Then, on the left, pass it over itself, too. With this, you will have made a tangle that can be knotted by pulling and is called the Forward Hitch Tangle.
- Now, pull the yarn tight to make a knot just below the Overhand Knot, or in my case, the previous green knot!
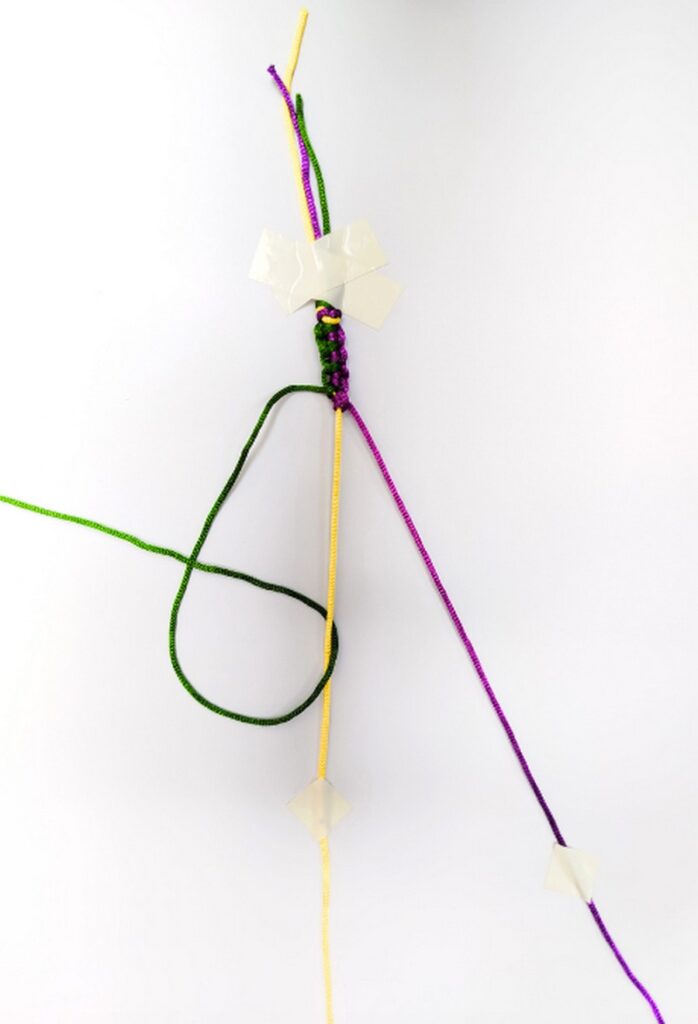
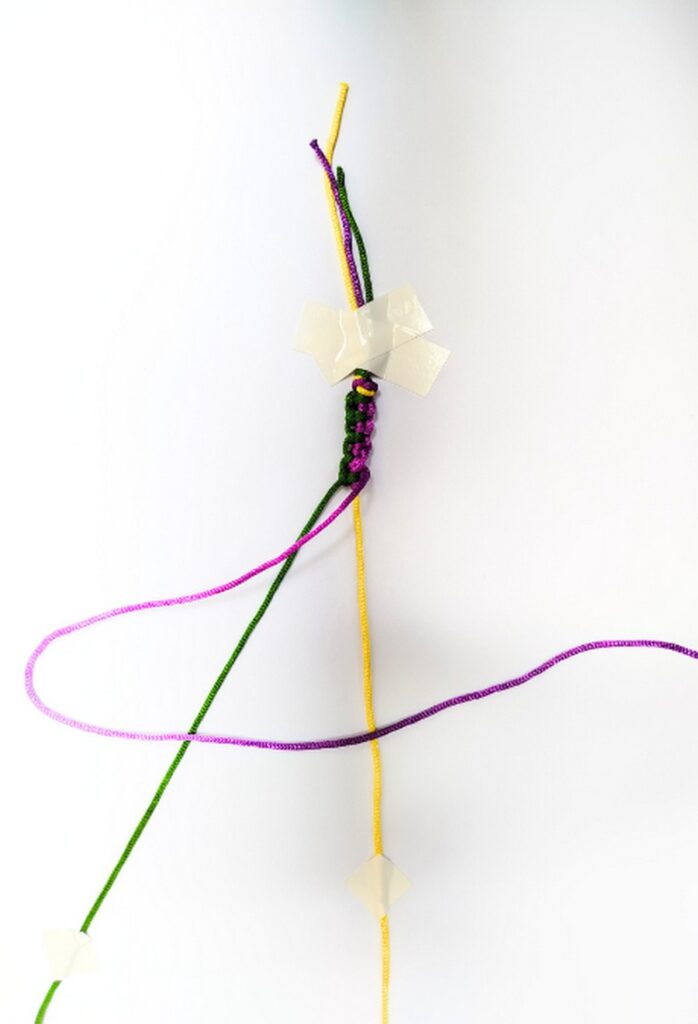
Step #2: Backward Hitch
- Pick up the COLOR A (green) again and cross it over COLOR B or the middle taped strand to the left, such that on the right, you leave a U-shaped loop.
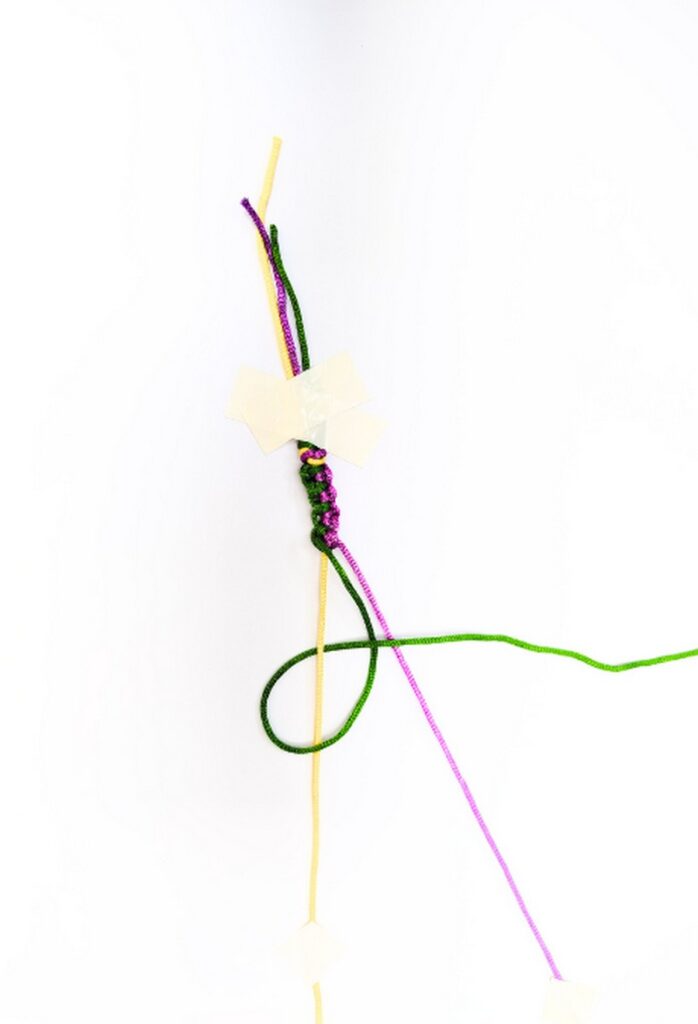
- Again, pick up the tip of the COLOR A (green) and cross it below the middle color to the left. Then, on the right, pass it over itself, too. This makes a backward hinge tangle!
- Continue pulling the strand towards you until it is that small.
- Now, push the yellow strand towards you and pull the green strand tight to make another hitch.
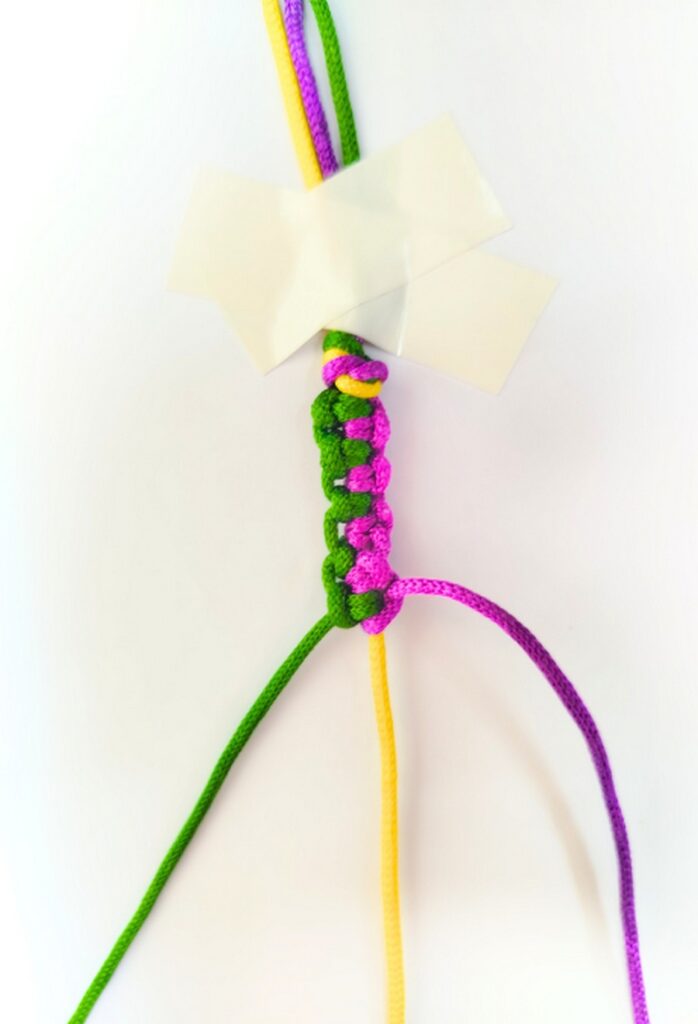
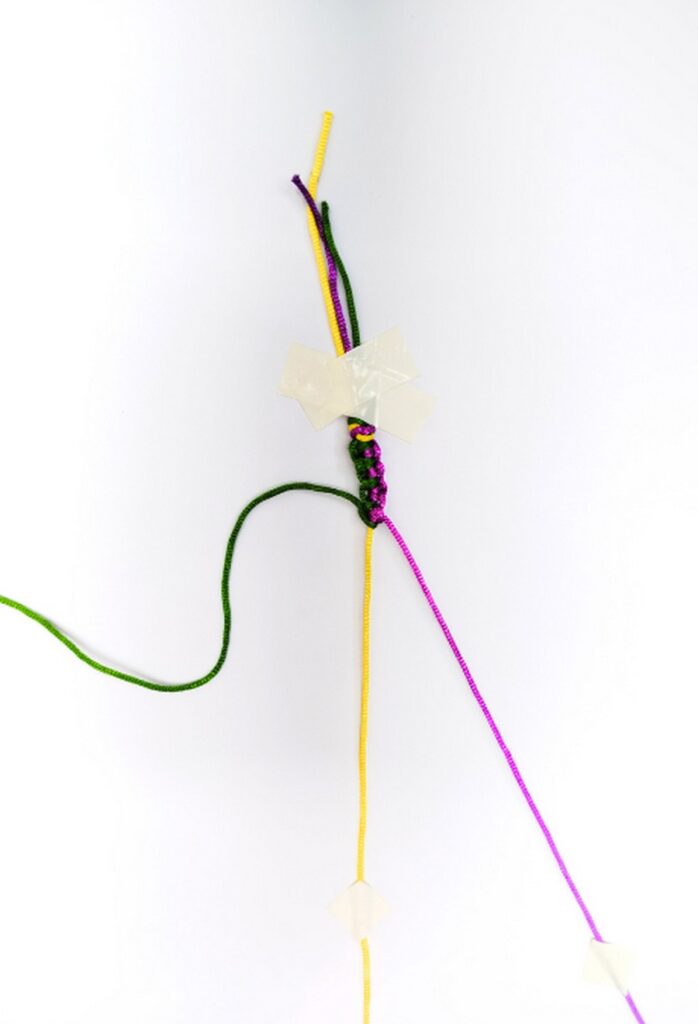
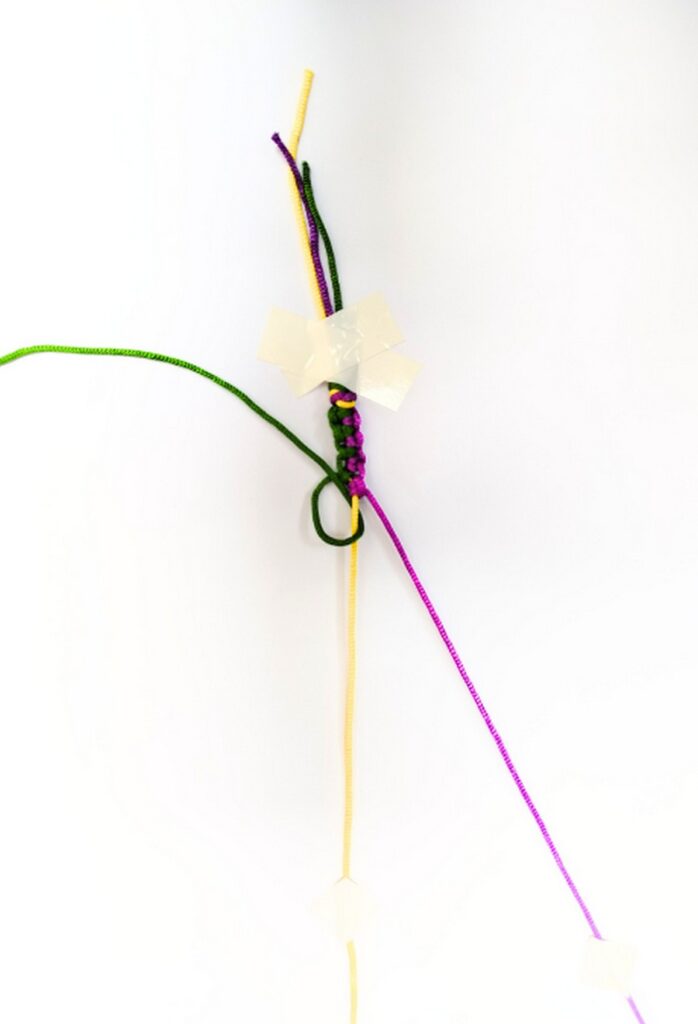
Step #3: Backward Hitch
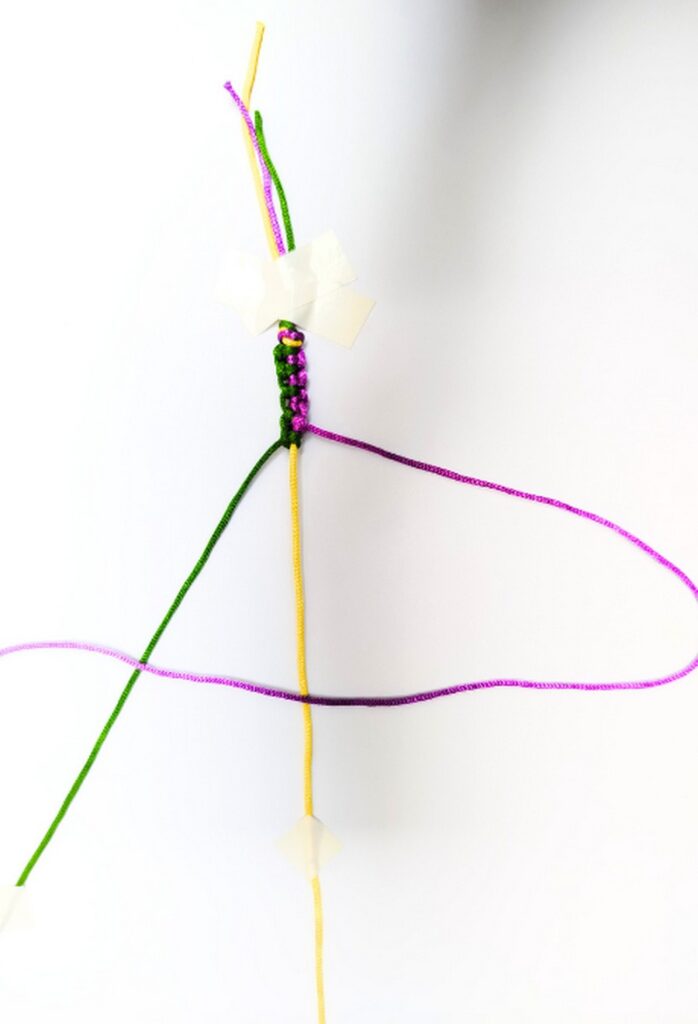
- Remove the tape from the purple strand and attach it to the green one. Now, it will be our active strand. Just Pick up the COLOR B (green) or COLOR C if you have, and cross it over COLOR B or the middle taped strand to the left, such that on the right, you leave a U-shaped loop.
- Again, pick up the tip of the COLOR C or B (purple) and cross it below the middle color to the left. Then, on the right, pass it over itself, too. This makes a forward hitch tangle!
- Now, push the yellow strand towards you and pull the purple strand tight to make another hitch.
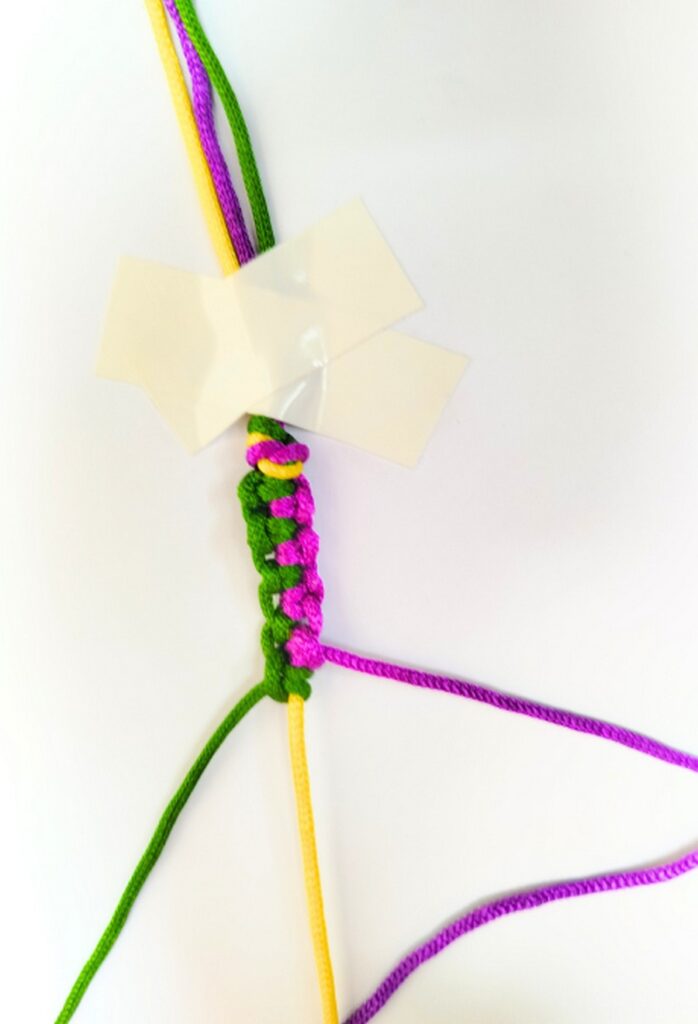
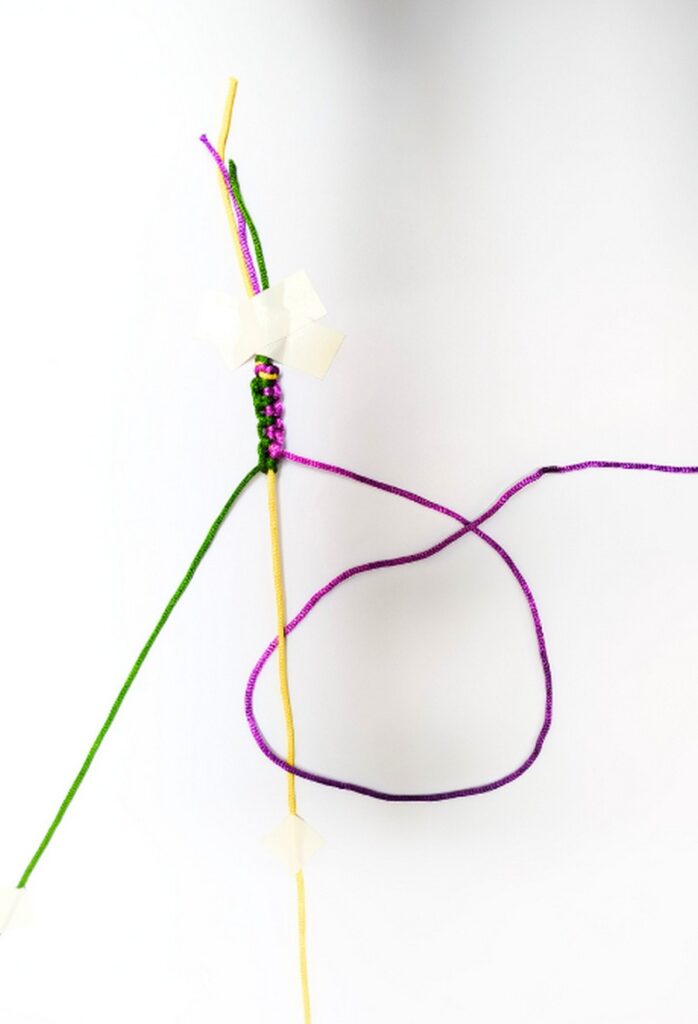
Step #4: Forward Hitch
- Pick up the COLOR C (purple) again and cross it over the COLOR B or the middle taped strand to the right, such that on the left, you leave a U-shaped loop.
- Now, cross it below the middle color to the right. Then, on the left, pass it over itself, too. With this, you will have made a tangle that can be knotted by pulling and is called the Forward Hitch Tangle.
- Pull tight to make a knot!
- Now, repeat the knot pattern from the beginningng . To finish it off, I recommend braiding the excess and making a slip knot for securing the bracelet around the wrist.
Was this macramé tutorial helpful? Tell me in the comments
Your feedback is a great way for us to improve my macramé and crochet tutorials. So, share your thoughts on whether you tried this one or not, and highlight the weak points.