Please show your support for Hannah!
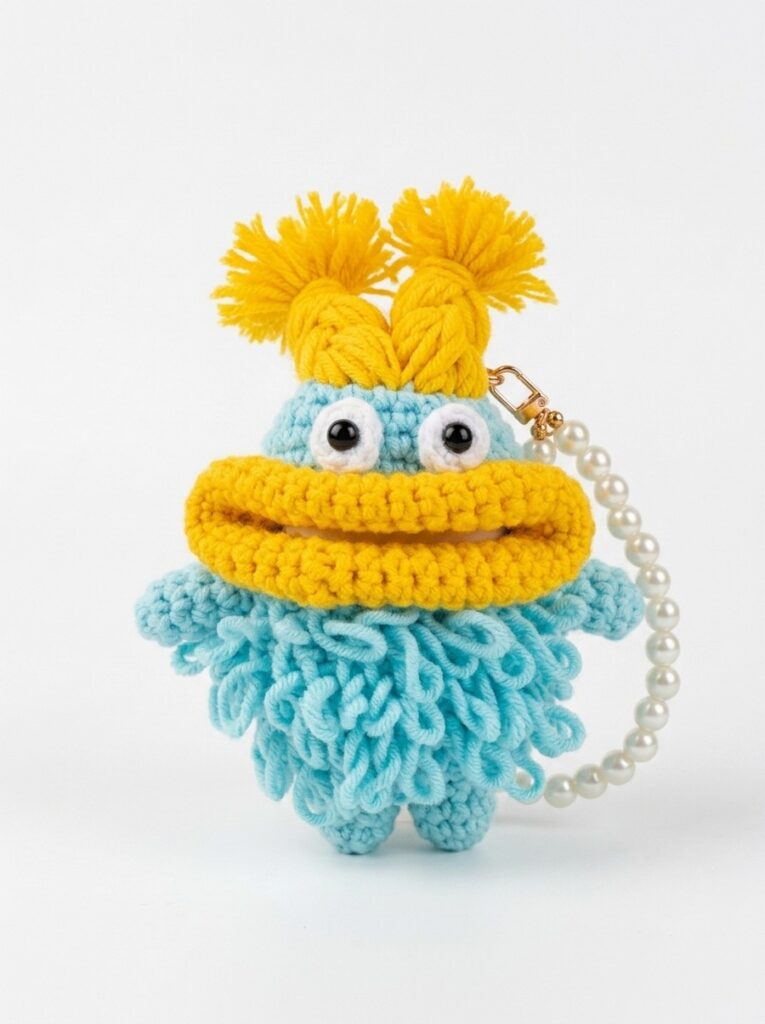
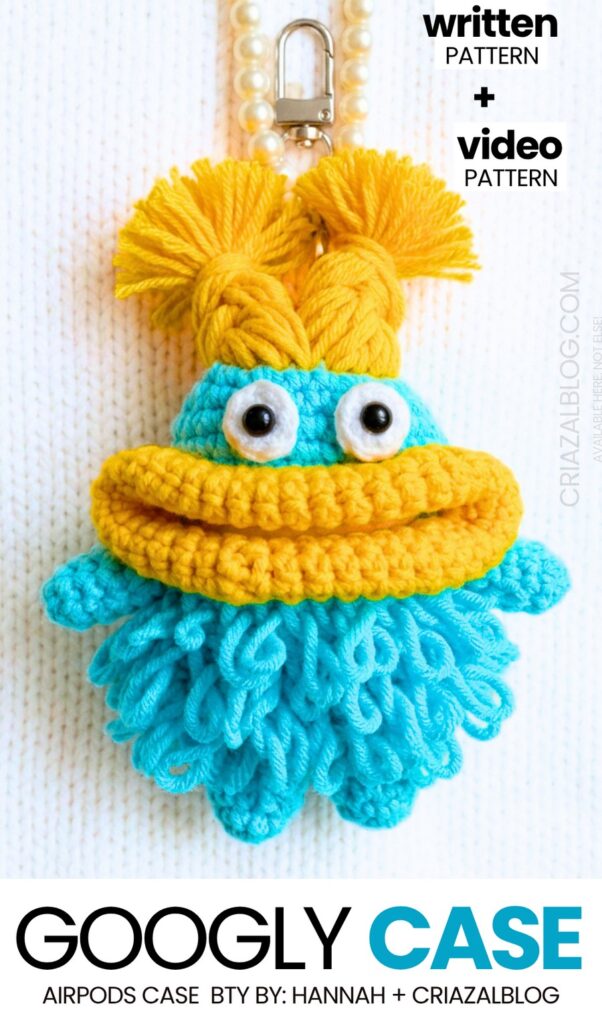
Are you looking for an anti-stress crochet AirPods case that becomes your buddy instead of just a pouch? Learn how to crochet this funny googly-eyed character amigurumi AirPods case with a step-by-step tutorial and a written pattern as well. This is a blue & white wacky exaggerated-lipped crochet monster with braided hair and a crochet loopy body that is so soft to hold. So, once you have stuffed this crochet googly-eyed monster AirPods case, you can make it your ultimate buddy and stress softie. Then, use it as a keychain, desk buddy, or a bag charm.
You can also crochet your googly-eyed character AirPods case in black and red, blue and red, shades of pink, shades of orange, and even green and pink. I will also try to bring a pattern to crochet the keyholder variation of this crochet anti-stress fidget monster AirPods case.
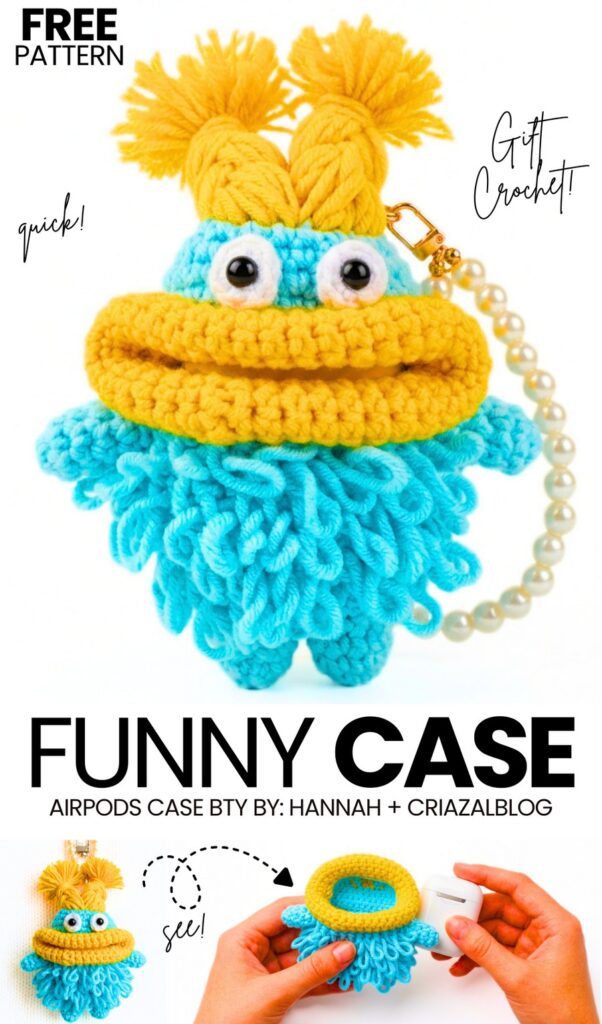
It is also an irresistible present to exchange among couples and friends. While you are gifting one, you can also hide a crochet loopy character AirPods case, a treat along with a message as well. Or if you are going to gift someone a brand-new AirPods set, be sure to use this crochet monster case as a purse or cover, and it would definitely make a surprise and bring smiles. Now, if you have up until now made your mind to crochet this amigurumi Monster AirPods case, continue reading!
[ez-toc]
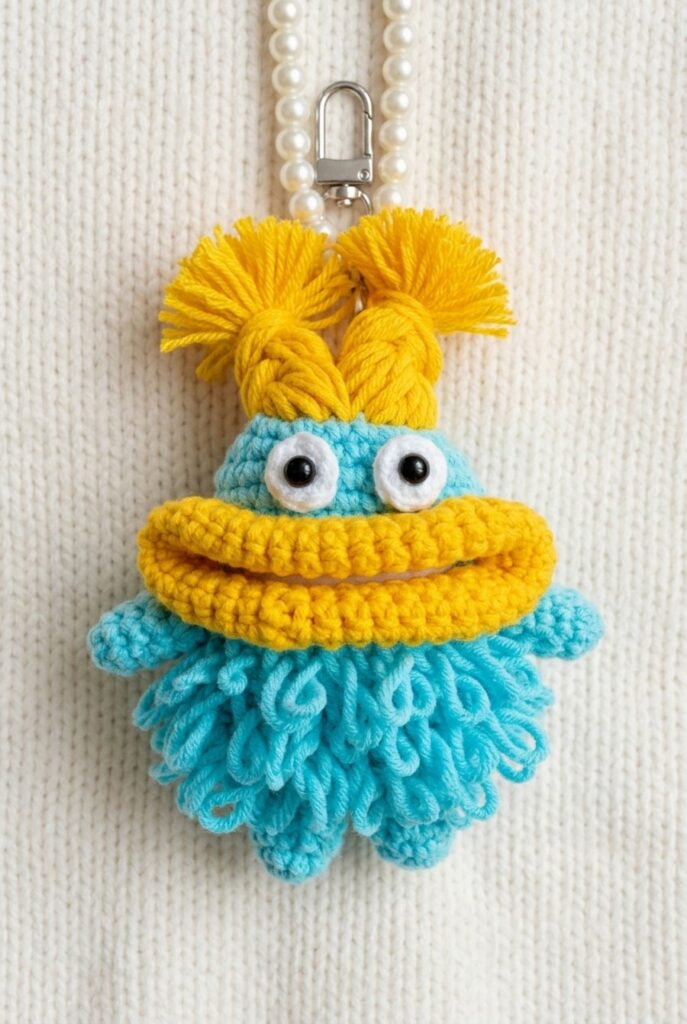
Pattern to Crochet the Monster Big-Lipped AirPods Case
This project is a crochet cover for AirPods. It looks like a blue monster. It has big yellow lips and yellow hair. The body has many loops to make it look fuzzy. You can put your AirPods inside the mouth. It is a fun and cute way to protect your headphones.
Materials Needed
Yarn: Milk Cotton yarn in light blue, yellow, and white.
Crochet Hook: 2.5mm or 3.0mm.
Eyes: Two small black plastic safety eyes or beads.
Tools: Scissors, yarn needle, stitch markers, and a hot glue gun.
Optional: A pearl bead strap for a keychain.
Are you a Beginner? Learn Crocheting Easily!
You can learn to crochet this funny AirPods monster case better with the following tutorial, or continue to the written pattern:
Crochet Pattern
1. The Body (Blue Yarn)
The body is worked from the bottom up in an oval shape to fit the AirPod case.
Foundation: Chain 9.
Round 1: Start in the second chain from the hook. Crochet 7 SC. In the last chain, crochet 3 SC (this turns the corner). Continue on the other side of the chain: 6 SC, and 2 SC in the last stitch. (Total: 18 stitches).
Round 2: Increase in the first stitch, 6 SC, Increase in the next 3 stitches, 6 SC, Increase in the last 2 stitches. (Total: 24 stitches).
Round 3: SC in each stitch around.
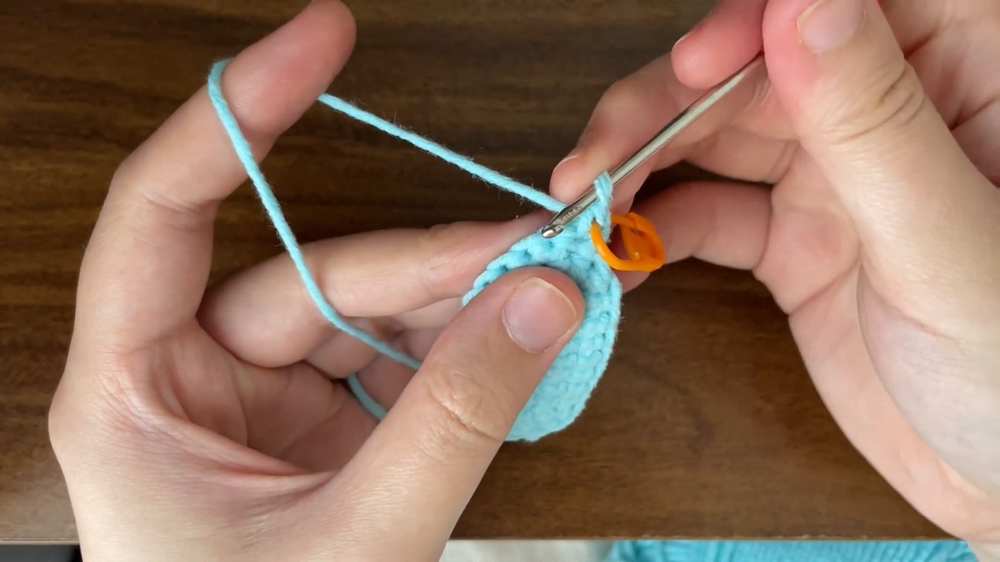
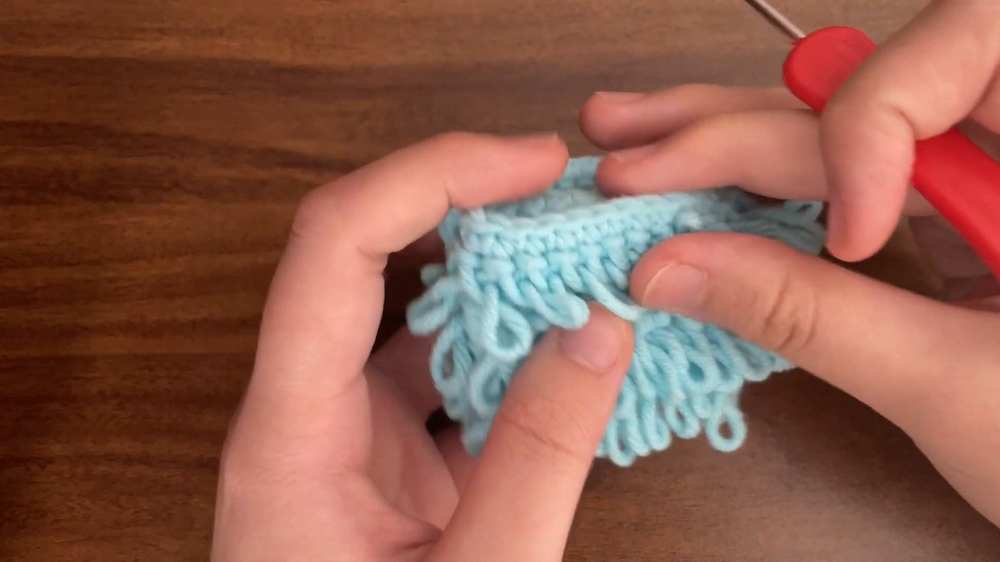
Round 4 (Texture Round): Work the Loop Stitch in every stitch around. To do this, wrap the yarn around your finger to create a loop before pulling the yarn through to finish the SC.
Round 5: Work a standard SC in each stitch around.
Round 6 (Texture Round): Work another round of Loop Stitches in every stitch.
Round 7: Work a standard SC in each stitch around.
Round 8 (Texture Round): Work another round of Loop Stitches.
Round 9: SC in each stitch around.
2. The Mouth Opening
This creates the hole where the AirPods go in and out.
Round 10: Crochet 12 SC. Then, Chain 12. Skip the remaining 12 stitches of the previous round and join with a slip stitch to the first SC of this round. This creates a large slit.
Round 11: SC in the 12 stitches from the previous round, then SC 12 times into the Chain-12 space. (Total: 24 stitches).
Round 12-14: SC in each stitch around for three rows to finish the “head” part.
Round 15 (Closing): Decrease around until the hole is small, then sew it closed with a yarn needle.
3. The Big Lips (Yellow Yarn)
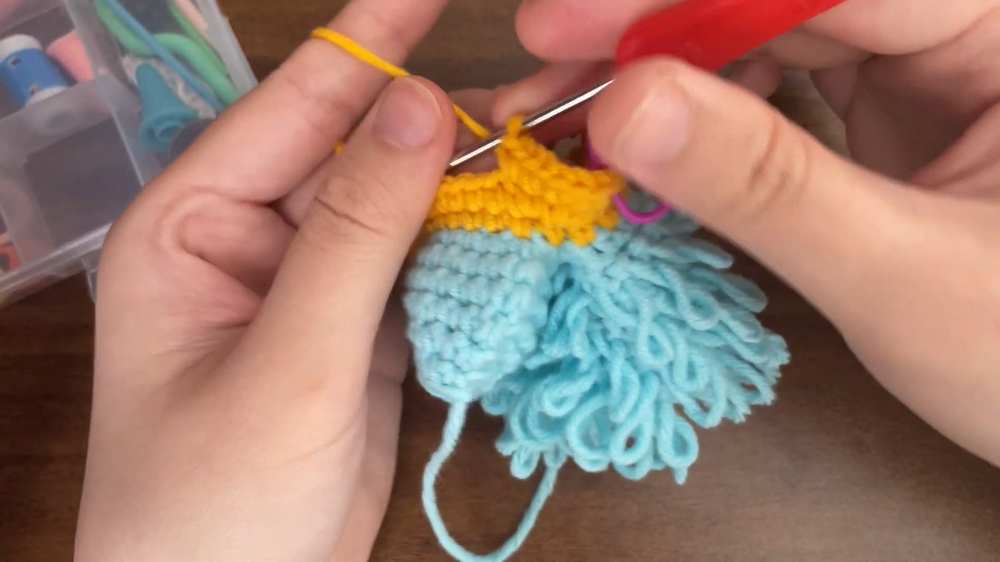
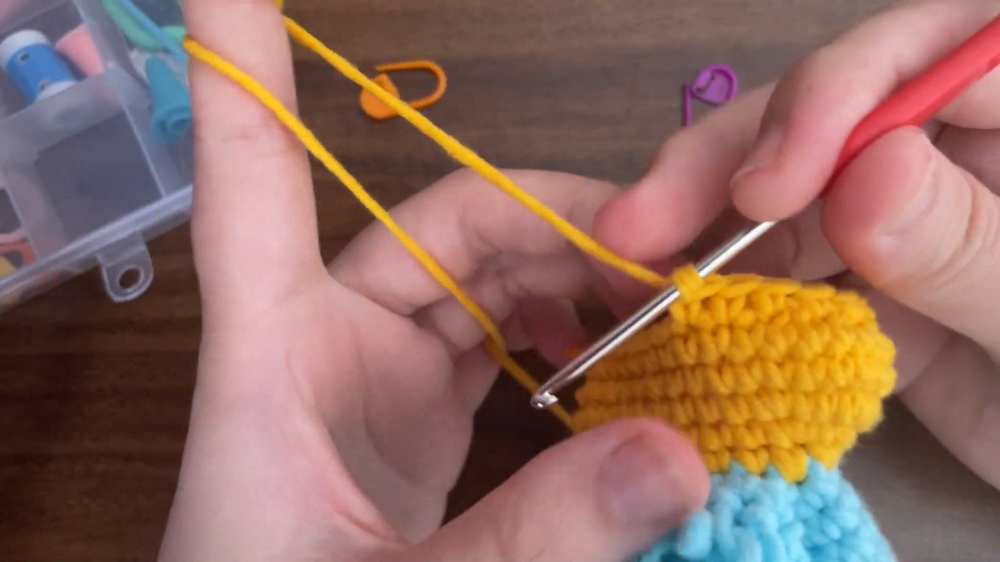
Attach the yellow yarn to the side of the mouth slit.
Round 1: Crochet 24 SC evenly all the way around the opening (12 on top, 12 on bottom).
Round 2: Crochet 2 SC in every stitch around (Increase in every stitch). (Total: 48 stitches). This makes the lips look very thick and pouty.
- Round 3: SC in each stitch around. Fasten off and weave in the ends.
4. The Eyes (White Yarn – Make 2)
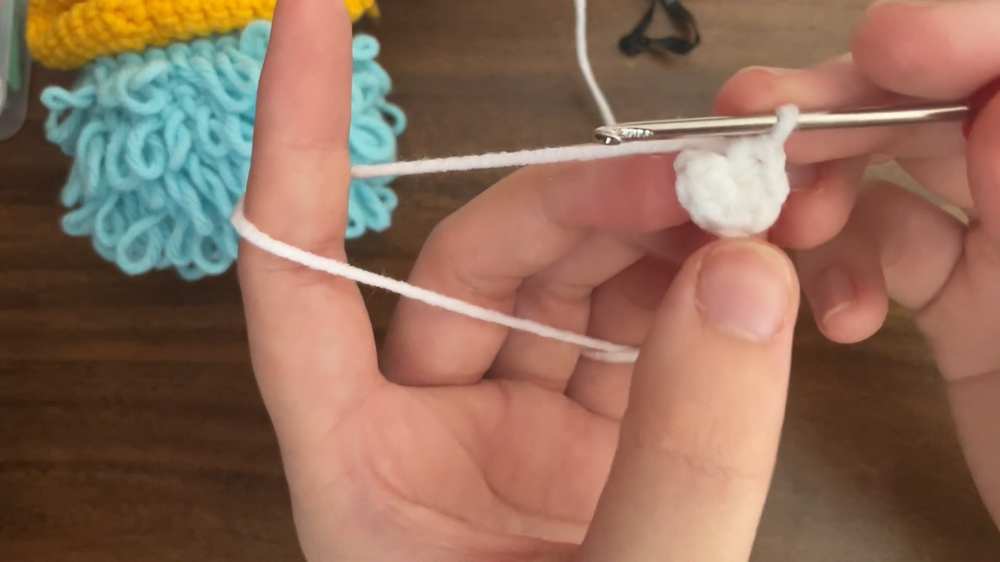
Round 1: Magic Ring, 6 SC inside.
Round 2: 2 SC in each stitch around. (Total: 12 stitches).
Finishing: Fasten off. Glue or sew a black bead or safety eye into the center of the white circle. Glue the finished eyes onto the blue “head” above the yellow lips.
5. The Hair (Yellow Yarn)
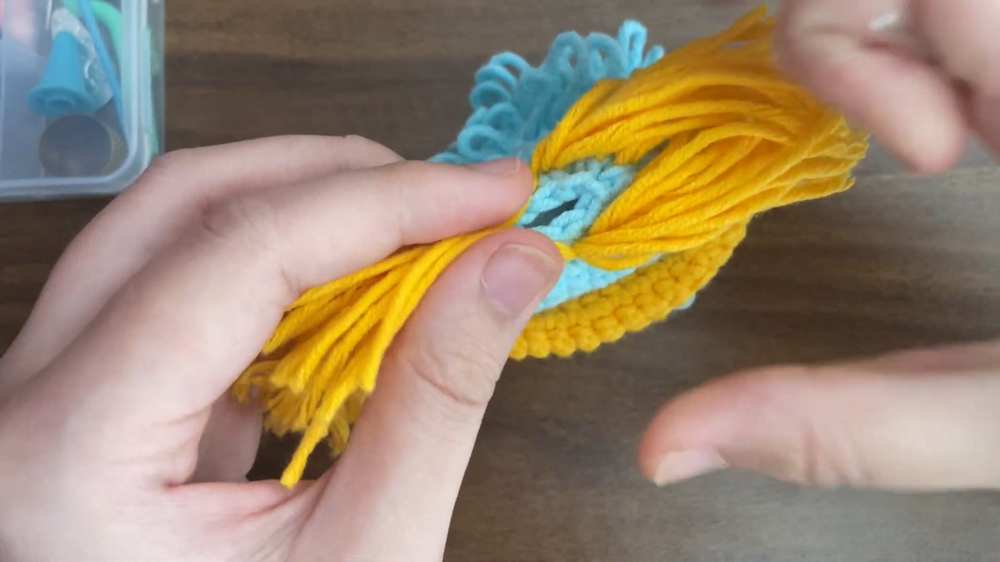
Strands: Cut about 20 to 30 pieces of yellow yarn, each 25cm long.
Attachment: Use your hook to pull the center of a yarn strand through a stitch on top of the head. Pull the ends through the loop to secure it (fringe style). Do this for all strands in a cluster on top.
Styling: Divide the yarn into two sections. Braid each section and tie the ends with a small piece of yarn to create two ponytails. Trim the ends so they are neat.
6. The Limbs (Blue Yarn)
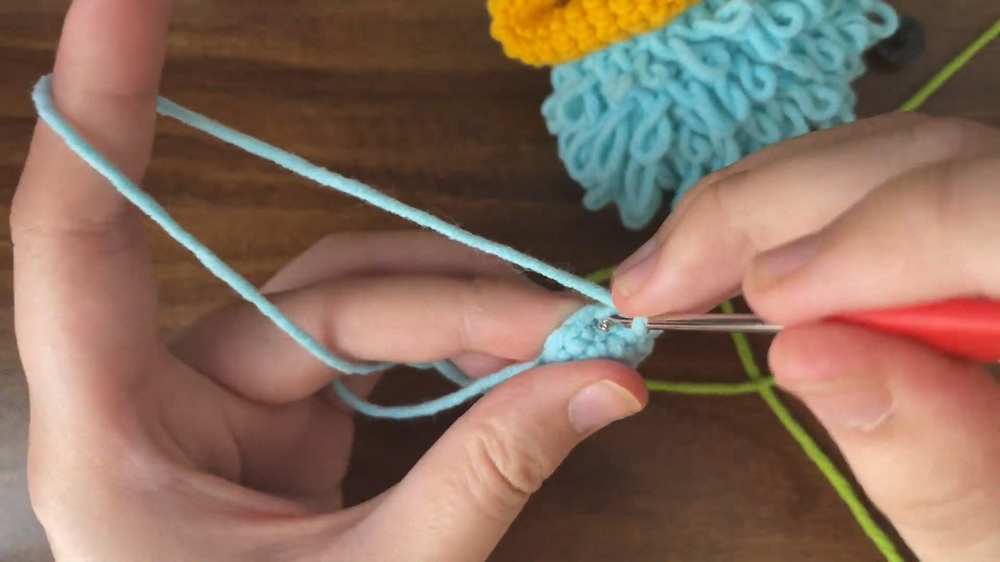
Legs (Make 2): Magic Ring, 8 SC. Crochet 4 rounds of 8 SC. Fasten off and sew to the bottom of the body, making sure not to block the charging port hole.
Arms (Make 2): Magic Ring, 7 SC. Crochet 3 rounds of 7 SC. Fasten off and sew to the sides of the body under the lips.
7. Final Assembly
Ensure the charging port hole is clear at the bottom of the body (you can leave a small gap in Round 1).
Glue the eyes firmly.
Attach a pearl strap or keychain loop to the side of the head if desired.
Share on Social Media!
See More:

Wanna Crochet Something Else?

Crochet CUTEST Guest-Welcoming BOO Ghost with Bow, Hat and Pumpkin Accessories

How to Crochet Bunny Bat White Foldable Wings Amigurumi with Bow for Halloween
How to Crochet 4 Set Ribbed Decoration Christmas Festive Ball Ornaments

How to Crochet A Tiered Miniature Tree Decorated with Golden & White Pearls
How to Crochet Red Mouth Spooky-Cute Grey and Black Bat Amigurumi
How to Crochet the CUTEST Mini Christmas Applique Keychain (Christams House)