

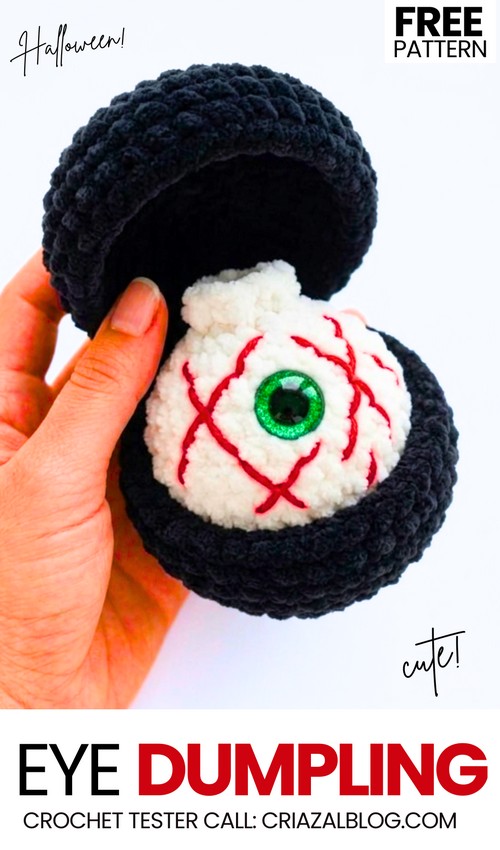
In today’s crochet pattern tester call for Halloween, I am sharing another “crochet Halloween dumpling in a steamer” pattern. Introducing the crochet eyeball dumpling in a basket plush, with the easiest design of all the crochet spooky dumpling patterns I have shared so far. You have already learned how to crochet the dumpling plush with the red horns and the ghost plush variant, too. Crochet this dumpling plush as a surprise present for a little one, as the basket can also be closed. You can crochet this eyeball plush in less than 30 minutes.
Luckily, no additional crochet patterns, unlike the previous dumpling variations, are needed. Also, you only require one 12mm safety eye to make the pupil of the crochet eye.
This crochet eyeball features the same red vein embroidery all around. You can also crochet it with the red horns and a witch hat to complete the set of dumpling plushies without having to crochet the 3 ones. Next, I am gonna share a free pattern for crocheting the pumpkin dumpling. For now, let’s head to the complete step-by-step crochet pattern to make this NEW variation of spooky crochet plushies.
[ez-toc]
Pattern to Crochet a Creepy Eyeball in a Clam Case Plushie
Skill Level: Beginner-Friendly (with some easy embroidery)
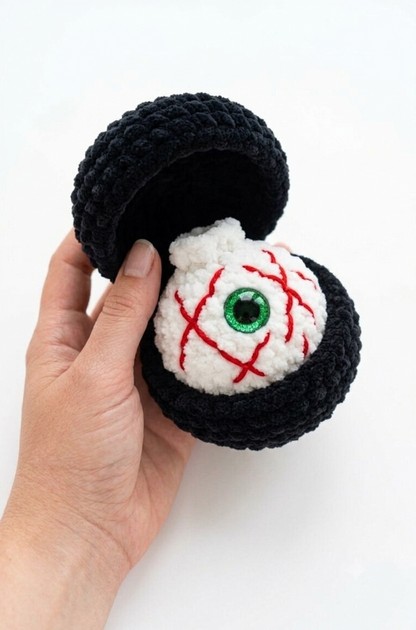
This pattern adapts the “dumpling and basket” design into a spooky, realistic eyeball secured within a deep-black “clam” case. It is approximately seven centimeters big. It is easy to make for beginners, since you only need the basic sphere pattern.
Materials List:
Plush yarn (100g / 120m) in:
White (for the eyeball).
Jet Black (for the case).
Semi-cotton yarn (like YarnArt Jeans) in:
Vibrant Red (for the blood vessels).
White (for closing the top hole and making eye details).
Crochet hook size: 4 mm.
Toy stuffing.
Plastic safety eye: 1 (12 mm), in a bright color like green. (Note: Only one is needed).
Yarn needle for sewing/weaving in ends.
Scissors.
Abbreviations List:
MR = Magic Ring
sc = single crochet
inc = increase (2 single crochets in one stitch)
dec = decrease (crochet 2 stitches together)
sl st = slip stitch
ch = chain
BLO = back loops only
FLO = front loops only
R = Round
Are you a Beginner? Learn Crocheting Easily!
This pattern is a fantastic way to practice creating a spherical object and a simple, two-part hinge box. Let’s get started.
Pattern Details
I. Eyeball Pattern (White Plush Yarn)
The eyeball is a basic sphere.
R1: With white plush yarn, make 8 sc in MR (8).
R2: 8 inc (16).
R3: (1 sc, inc) repeat 8 times (24).
R4: (2 sc, inc) repeat 8 times (32).
R5 to R8 (4 rounds): 32 sc (32).
Inserting the Iris/Pupil: Take your (12 mm) plastic safety eye (green/blue). Insert it centrally on the front of the sphere, between R7 and R8. Make sure it is positioned where a pupil should be. Secure it tightly with the washer. (You are only placing one safety eye).
R9: (2 sc, dec) repeat 8 times (24).
R10: (1 sc, dec) repeat 8 times (16).
Stuffing: Stuff the eyeball with toy stuffing. Make it firm but not too tight, ensuring a smooth, round shape.
R11: 8 dec (8).
Cut the white plush yarn and finish with a sl st.
Creating the optic nerve stump (formerly the “skirt” ruffle): R12: Working in FLO only, (inc, 1 sc) repeat all the way around until the end of the round. Cut the yarn and finish with a sl st.
II. Closing the Hole & Eyeball Top Details
We must close the small top opening of the sphere.
Closing: Take a piece of white semi-cotton yarn on a needle. Weave it through the remaining unworked back loops of R11. Pull the ends very tightly to close the hole, tie a knot, and hide the threads inside.
III. Blood Vessel Embroidery (Vibrant Red Yarn)
This is the key detail that transforms it into a realistic eyeball!
Take a long piece of Vibrant Red semi-cotton yarn on a needle.
Insert the needle anywhere into the stuffing (the “side” of the sphere).
Bring the needle out near the edge of the R4 increase round.
You will embroider irregular, branching veins that start from the base of the sphere (near R1/R2) and radiate outwards towards the safety eye, like spokes. Make them wavy and natural, not perfectly straight.
Technique: Use small backstitches or long straight stitches. Aim to cover the upper and sides of the white sphere that will be visible when the case is open.
Tip: When running your needle under the stitches, make small branching veins. Reference image_0.png for inspiration on the density.
Hide all remaining thread ends inside the toy.
IV. Black Clam Case Pattern (Make 2 Parts, Jet Black Plush Yarn)
This will create two deep-black halves that form a sphere when closed.
R1: With jet black plush yarn, make 8 sc in MR (8).
R2: 8 inc (16).
R3: (1 sc, inc) repeat 8 times (24).
R4: (2 sc, inc) repeat 8 times (32).
R5: (7 sc, inc) repeat 4 times (36).
R6: Working in BLO (Back Loops Only), 36 sc (36). (This creates the defined edge seen in image_0.png).
R7 to R8 (2 rounds): 36 sc (36).
First part (Top Lid): On Round 8, finish with a sl st, cut the yarn, and hide the end. This is one complete, deep half-sphere.
Second part (Bottom Base): Complete Rounds 1 through 8. Do NOT cut the yarn.
V. Connecting the Case and creating the Hinge
We are now going to connect the two parts.
Alignment: Lay the bottom base and the top lid adjacent to each other, like an open book.
Connection: Insert your hook through one back loop of the rim of the Top Lid, and the front loop of the adjacent stitch on the Bottom Base.
Create a single crochet stitch (sc).
Repeat this for 5 or 6 adjacent stitches along the straight edges to create a strong hinge.
Finish off, cut the yarn, and weave in all remaining black plush ends neatly inside.
VI. Finishing Touches (Optional, based on image_0.png)
You may choose to add a tiny detail with white semi-cotton yarn on the needle around the safety eye (pupil) to mimic the original white yarn ring if you desire, but it is not necessary as the large green iris should cover it. Ensure no stuffing is visible. The internal texture of your case should be black plush yarn, and the eyeball should sit inside as pictured.


