Note: Pattern testing for this pattern is complete!
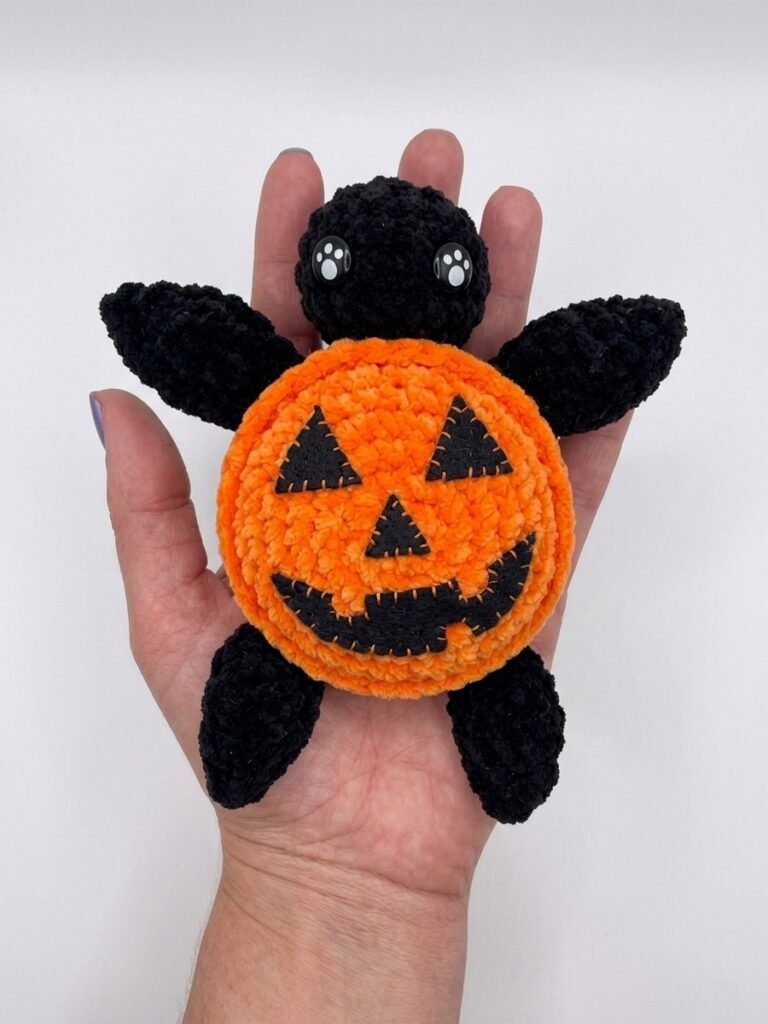
Lucky me, this week, I will be able to share 3 crochet tester patterns, and this one is going to be the 2nd one. So, test this crochet UNIQUE Halloween turtle plushie pattern. This is the familiar crochet small sea turtle plushie, but the body parts are crocheted in black with the kawaii safety eyes and an orange jack-o-lantern pumpkin shell. I have also provided a printable template to better cut the jack-o-lantern face. You can thank me later, as the pattern is super simple for beginners.
We will crochet the flippers using the same crochet round-fold method. And about the crochet black turtle head, this is just a crochet sphere plushie pattern spanning only 7 rounds.
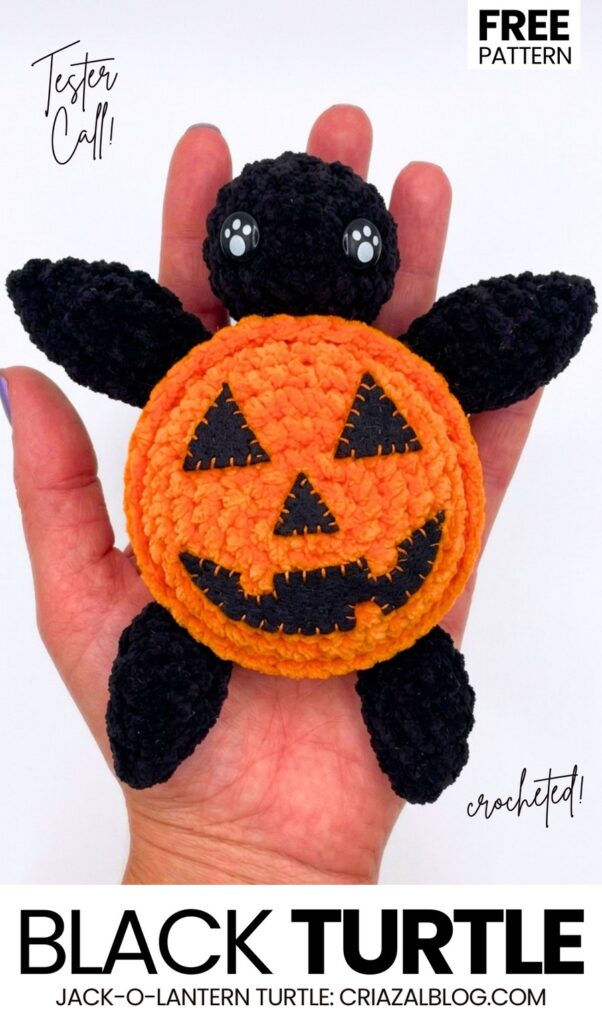
You can also crochet your turtle plushie as the pumpkin pie turtle plushie by crocheting ruffles around the shell. You can make this crochet turtle in keychain-size by crocheting one using the amigurumi yarn. I would also recommend using the thin plush yarn if you want to retain its softness and fuzzy finish. Now, you can continue reading to learn more about this crochet Halloween turtle plush project!
Pattern to Crochet the Spooky Turtle Plushie for Halloween
Here is the complete pattern, which is a variation of the classic no-sew turtle but with the Spooky Jack-o’-Lantern Pumpkin Turtle:
Materials You’ll Need
- Approx 75g of chenille yarn in Black (Body Color) and Orange (Shell Color).
- 4.5mm crochet hook.
- Tapestry Needle.
- Polyfil or preferred stuffing.
- 12mm safety eyes.
- Stitch Marker.
- Black felt sheet.
- Orange embroidery thread.

Abbreviations
- SC – single crochet
- SC INC – single crochet increase
- HDC – Half Double Crochet
- DC – Double Crochet
- INV DEC – Invisible decrease
Crochet Turtle Pattern
Fins (make 4)
- Round 1: In a magic circle, HDC 8. Slip stitch to the first stitch and chain one.
- Round 2: HDC INC in each around (16). Slip stitch to the first stitch and chain one.
- Fold the circle in half and HDC twice through both halves in the first touching stitches. HDC together the next 6 stitches. HDC twice in the last one (10).
Turtle Head
- Round 1: In a magic circle, SC 8.
- Round 2: SC INC in each around (16).
- Round 3: SC in the first, SC INC in the next. Repeat around (24).
- Rounds 4-5: SC in each around (24).
- Round 6: SC in first, INV DEC in the next (16).
- Attach the safety eyes between rows 4 and 5, 7 stitches apart.
- Round 7: INV DEC in each around (8).
- Round 8: SC in each around (8).
- Fasten off and weave the end in.
Crochet Turtle Body
- Round 1: In a magic circle, SC 8.
- Round 2: SC INC in each around (16).
- Round 3: SC in the first, SC INC in the next. Repeat around (24).
- Round 4: SC in the first two stitches, SC INC in the next. Repeat around (32).
- Rounds 5-7: SC in each around (32).
- Round 8: In the front loop only SC in each around (32). Change to Black (Body color) here.
- Round 9: In the back loop only (of round 7!), SC in the next two. Attach the first fin through the next two stitches. SC in the next 7. Attach the second fin in the next two stitches. SC in the next. Attach the head going through the next 4 stitches using slip stitches. SC in the next. Attach the third fin stitches in the next two. SC in the next 7. Attach the fin in the next two. Finish the round with the last two sc.
- Round 10: SC in the first 14. Attach the bottom half of the turtles neck with a SC in the remaining 4 stitches. SC in the remaining 14 stitches.
- Round 11: SC in the first two, INV DEC in the next. Repeat around (24).
- Begin to stuff here. Before you stuff the body, make sure the head and neck have enough stuffing. Continue to stuff as you close.
- Round 12: SC in the first, INV DEC in the next. Repeat around (16).
- Round 13: INV DEC in each around (8).
- Sew the remaining hole closed. Fasten off and weave in the ends.
Assembly & Finishing Details
- The line from the HDCs faces towards the back of the turtle.
- Flip the fin up so that the top now touches the shell. You will be attaching in the two circled stitches.
- On the right side you attach the second to last stitch first. On the left you attach the stitch at the very end of the fin, and then the second.
- Go through the fin and then through the shell. SC as you normally would. Repeat through the second stitch.
- The SC should be under the fin.
- You will attach the fins using SC as you go around. You use the first two stitches on each fin to attach to the body. Each fin takes two stitches on the round to attach. The rounded part of the fin should be facing the tail. When you begin, the first fin you are attaching is the right back one.
- When you attach, you want to make sure that the single crochets are underneath the fin, because those stitches will be used on the next round. An easy way to double check is to see if the fin is touching the shell as you single crochet. You should see the SC in an unbroken row beneath the fin.
- To attach go through the fin and then the body. Pull through both and single crochet as normal. On the right side you attach through the second stitch and then the first stitch. On the left side you attach through the first stitch and then the second one.
- Felt Pieces: Download the template and cut out 2 triangles for eyes, 1 small triangle for the nose, and a jagged mouth from the black felt sheet.
- Appliqué Attachment: Position the felt pieces onto the flat top of the orange pumpkin shell. Using orange embroidery thread, hand-sew around the border of each felt piece with a decorative whipstitch/blanket stitch to mirror the handmade stitched look.
Share on Social Media!
See More:

Featuring: How to Crochet A Plush Blushing Flying Mr. Soul Ghost Plushie for Halloween

How to Crochet Bunny Bat White Foldable Wings Amigurumi with Bow for Halloween
Tester Call: How to Crochet A Spooky Flowers Red Horns Potted Buddy Plushie for Halloween
Tester Call: How to Crochet A Red & Black Spooky Turtle Plushie for Halloween
Tester Call: How to Crochet REALLY Spooky Witch Halloween Treat Plushie
Featuring: How to Crochet the Skeleton Wind Spinner With Stripes of Halloween Colors
Tester Pattern: How to Crochet A Cape-Wearing Red Buddy Plushie for Halloween
Tester Pattern: How to Crochet An Tug & Pull Witch Egg Halloween Plushie Toy
Featuring: Crochet SPOOKY-CUTE Black & White Ghost Plushie for Halloween