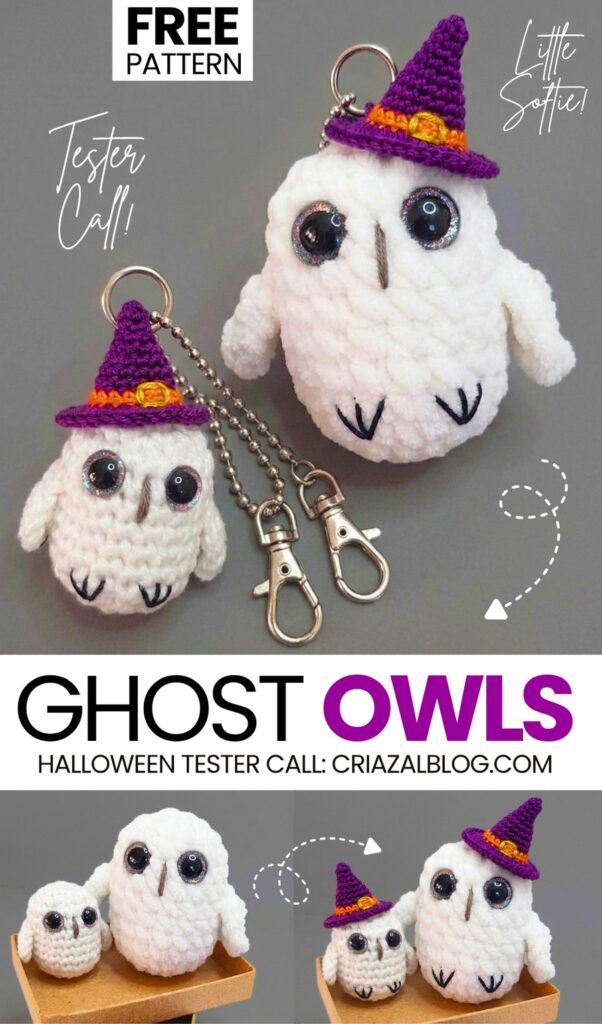
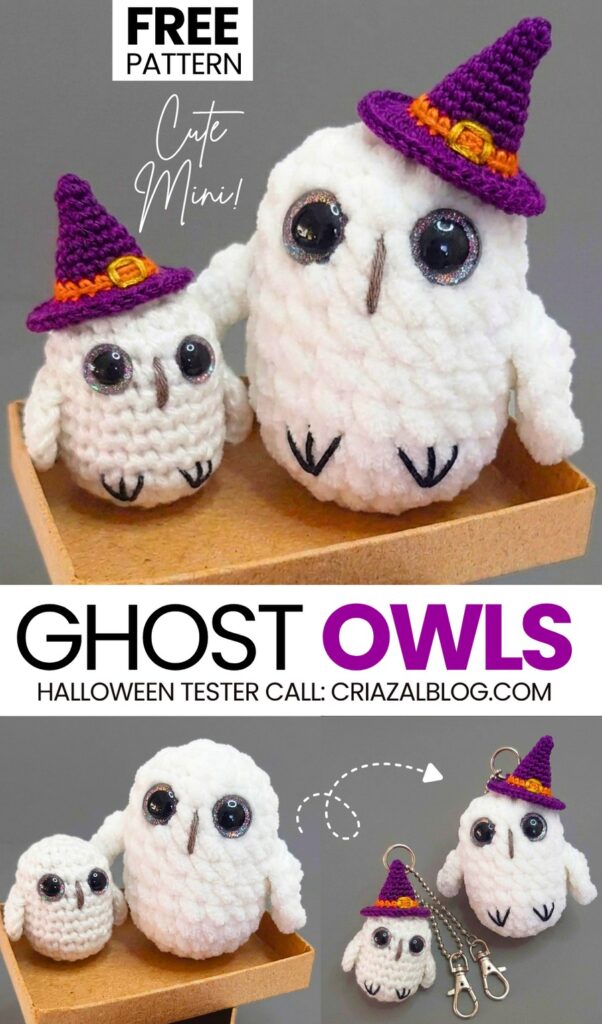
This week, I am back with another “beginner-friendly but cute” crochet Halloween tester plushie. Today, make this oh-so cute set of amigurumi and plushie witch ghost owl keychains! With the worsted yarn version, you will end up with a 4cm crochet amigurumi owl, and with the plush yarn, a 7cm plush owl. You can crochet both as keychains for both Halloween and fall. You can also crochet a small red and yellow scarf for them!
[ez-toc]
Free Crochet Witch Hat Owl Plushies Pattern
Size
Worsted Yarn: ~1.5 inches (4 cm)
Plush Yarn: ~2.5 inches (7 cm)
Materials
Yarn: White (main body & wings), Purple (hat main), Orange (hat band), Yellow (buckle embroidery), and Dark Gray/Black (beak & feet embroidery).
Crochet Hook: Size US C-2 / 2.75 mm hook for worsted yarn OR Size US 7 / 4.5 mm hook for plush yarn.
Safety Eyes: Two black safety eyes (with glitter backings/washers as shown in the image).
Tools & Supplies: Stitch markers, tapestry needle, polyfill stuffing, keychain hardware/keyrings.
Abbreviations
ch: chain
mr: magic ring
sc: single crochet
hdc: half double crochet
dc: double crochet
inc: increase
dec: invisible decrease
FLO: front loops only
sl st: slip stitch
Body (worked in continuous rounds in White)
Note: Stuff as you crochet. If using plush yarn for Round 1, ch 2 and make 6 sc in the 2nd ch from the hook.
Round 1: Start 6 sc in a magic ring. (6)
Round 2: [6 inc]. (12)
Round 3: [1 inc in the next st, 1 sc] x6. (18)
Rounds 4–10: [1 sc in all st]. (18)
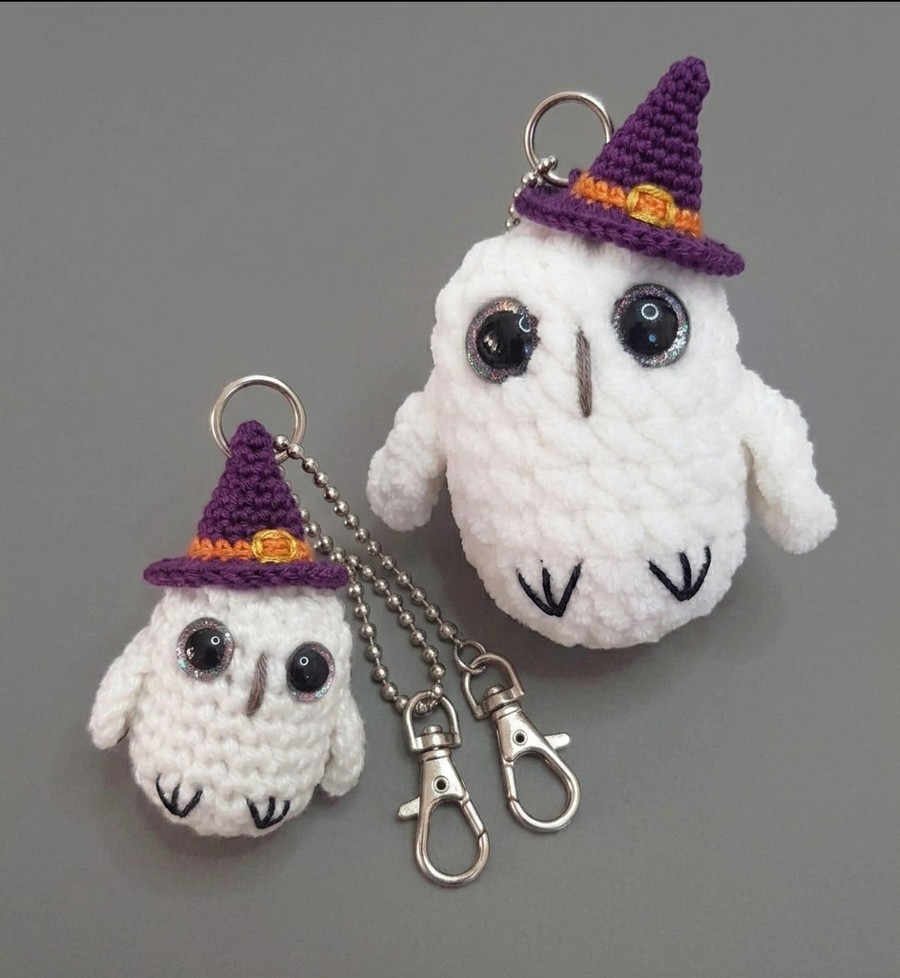
Insert safety eyes between Rounds 8 and 9 (or 9 and 10 depending on placement preference), spaced approximately 2–3 stitches apart.
Embroidered Details (Beak & Feet)
Beak: Using dark gray or black embroidery thread/yarn, make a simple straight vertical stitch centered directly between the eyes.
Feet: Using black yarn/thread, embroider two small V-shaped feet (with three small claws per foot, or two angled side-by-side stitches) near the bottom (around Rounds 3–4 from the base).
Attach safety eye backings after completing embroideries.
Round 11: [1 dec, 1 sc] x6. (12)
Round 12: [6 dec]. (6)
Cut yarn, weave through remaining loops to close the body, and fasten off.
Wings (Make 2 in White)
Row 1: ch 5. (5)
Row 2: Starting in the 2nd ch from the hook: 1 HDC, 1 DC, 1 DC, 1 HDC. (4)
Cut yarn leaving a long tail for sewing. Sew wings vertically to the sides of the owl body.
Witch Hat
Use Purple and Orange yarn with a 2.5 mm hook.
R1 (Purple): 4 sc in magic ring. (4)
R2: 4 sc. (4)
R3: (1 sc, inc) x 2. (6)
R4: 6 sc. (6)
R5: (2 sc, inc) x 2. (8)
R6: 8 sc. (8)
R7: (3 sc, inc) x 2. (10)
R8: 10 sc. (10)
R9: (4 sc, inc) x 2. (12)
R10: 12 sc. (12)
R11: (5 sc, inc) x 2. (14)
R12: 14 sc. (14)
R13 (Change to Orange for band): (6 sc, inc) x 2. (16)
R14: 16 sc. (16)
R15 (Change back to Purple): Work FLO: (1 sc, inc) x 8. (24)
R16: Work in both loops: (2 sc, inc) x 8. (32)
R17: (3 sc, inc) x 8. (40)
R18: (4 sc, inc) x 8. (48)
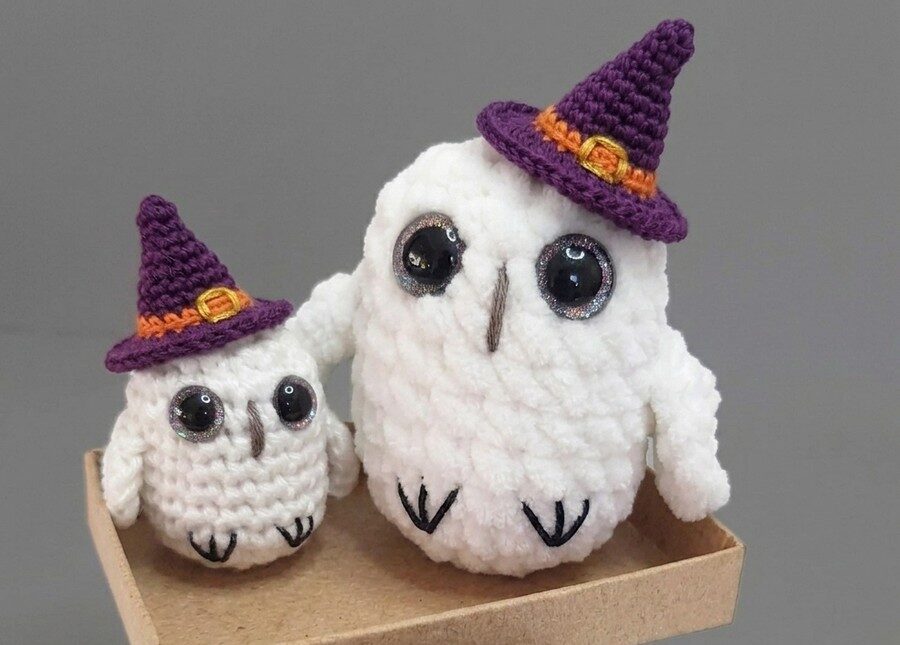
Fasten off with an invisible join and weave in ends. Using Yellow yarn, embroider a small square buckle over the orange band.
Assembly
Attach keychains securely through the top center of the witch hat if making a keychain.
Sew the hat onto the top of the owl’s head, slightly tilted to one side.
Share on Social Media!