Show support for Otakulandia!
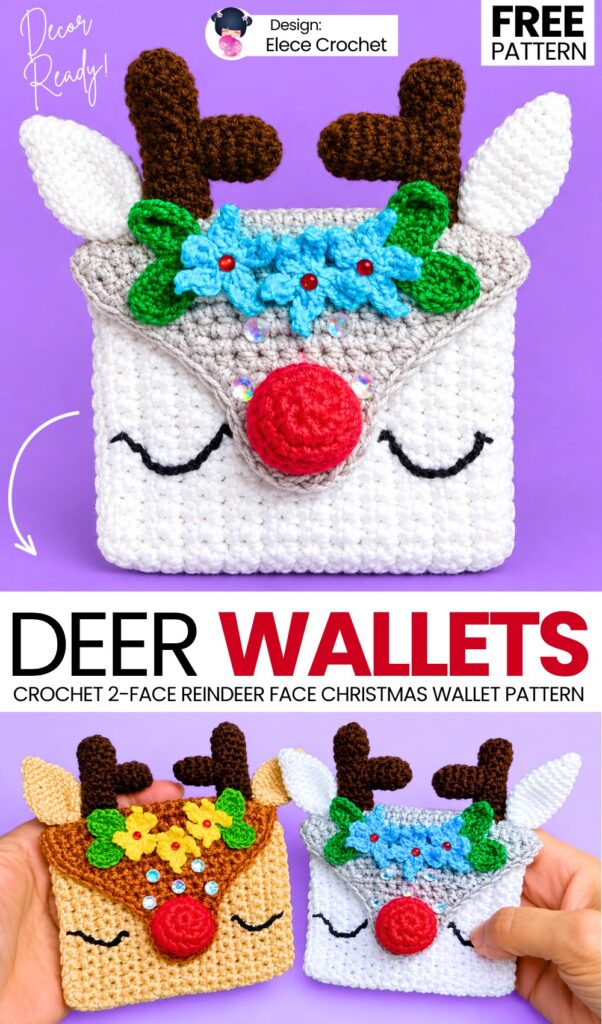
This crochet reindeer pouch is a functional holiday make designed in an envelope style that you can crochet in minutes. It is sized to hold folded banknotes (such as Euros, Dollars, or Pounds), coins, credit/gift cards, or small wrapped surprises. Whether used as a Secret Santa (amigo invisible) presentation pouch, a stocking stuffer, or a keepsake coin purse, it makes a holiday gift that is as charming as it is practical.
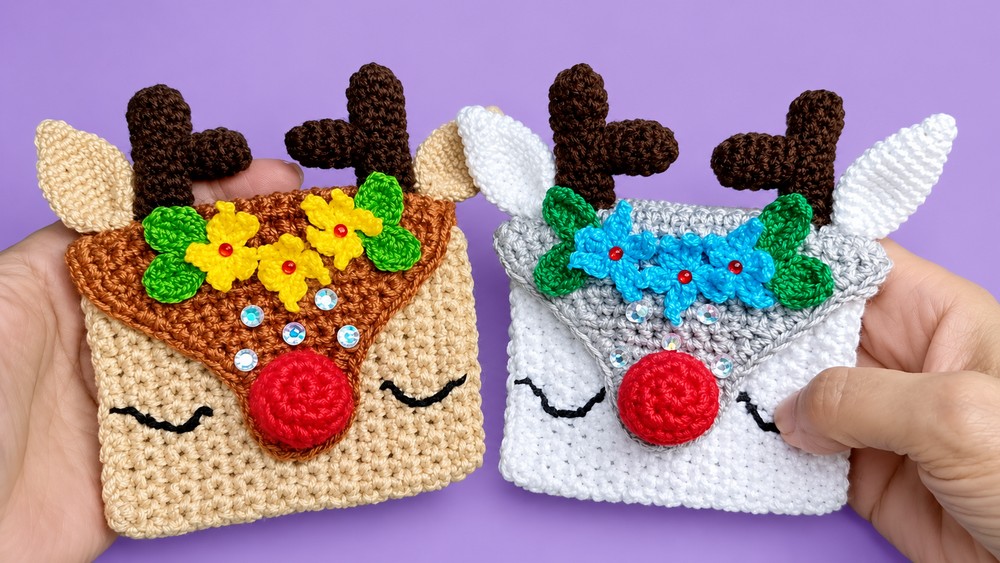
Learn how to crochet this UNIQUE crochet this reindeer pouch in white or brown following both a FREE written pattern and the video tutorial.
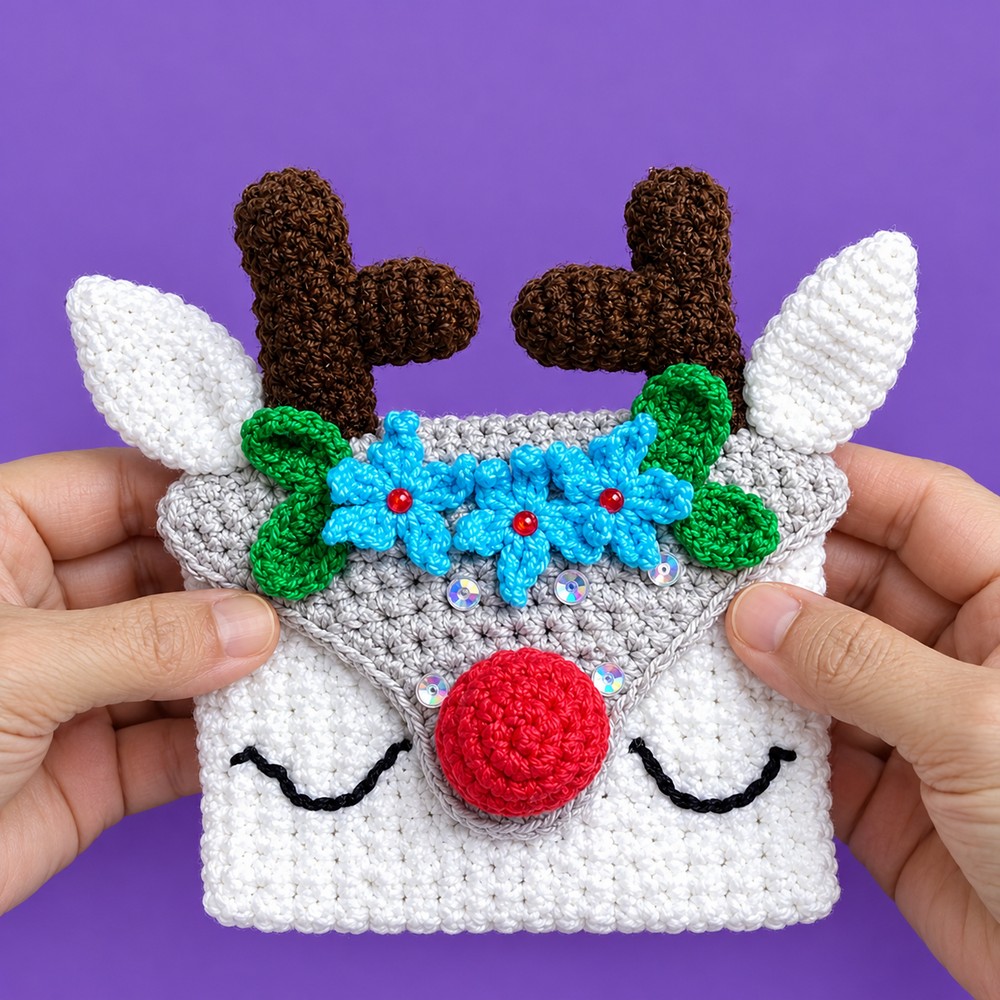
It features a textured body, a tapered flap that secures around a 3D stuffed red nose “button” via a chain loop, and festive accents including branching antlers, curved ears, sleeping embroidered eyes, leafy sprigs, and delicate floral clusters embellished with crystal gems.
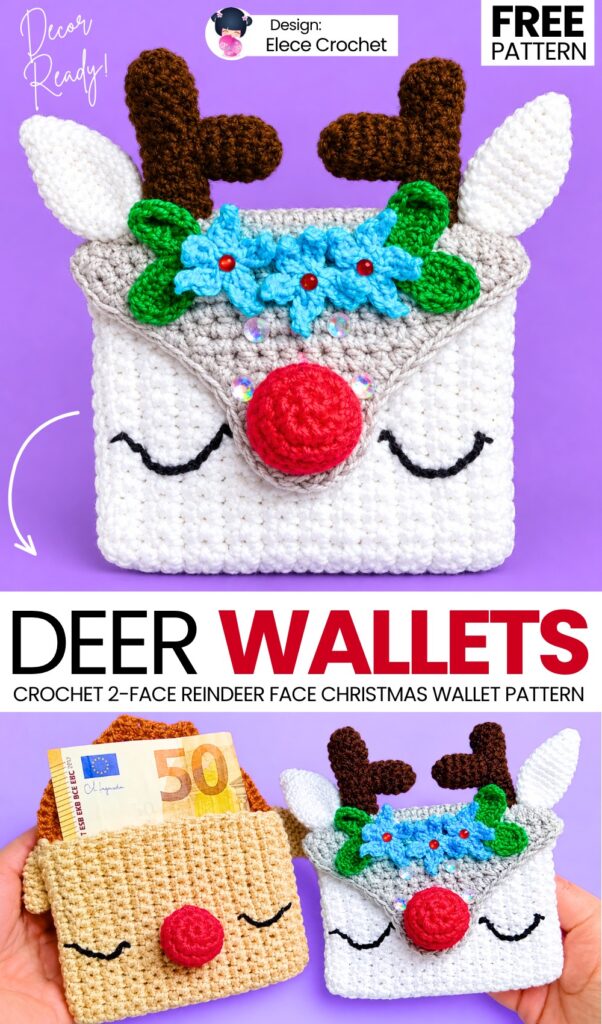
Pattern to Crochet: White & Brown Reindeer Wallet for Christmas
Intermediate (requires basic row/round crochet, invisible decreases, working flat and in the round, sewing pieces together, and simple surface embroidery).
Materials & Tools
Cotton Yarn / Thread (Size No. 5):
Main Color (MC): White or Light Cream/Beige (approx. 40–50 g) – worked holding 2 strands together.
Contrast Color (CC): Heather Grey, Taupe, or Light Brown (approx. 20–25 g) – worked holding 2 strands together.
Red: Small amount for the nose – worked holding 2 strands together.
Green: Small amount for leaves – worked with 1 strand.
Flower Color: Light Turquoise/Blue or Pastel Yellow – worked with 1 strand.
Black Embroidery Thread / Fine Yarn: For the sleeping eyes and eyelashes.
Antler Yarn: Fine DK or 4-ply yarn in Dark Brown (approx. 10–15 g).
Crochet Hooks:
2.55 mm (or 2.5 mm / 2.75 mm): For pouch body, flap, nose, and antlers.
1.75 mm: For the ears, flowers, and leaves.
Tapestry / Yarn Needle & Embroidery Needle.
Polyester Fiberfill / Stuffing (a small pinch for the nose).
Sewing Pins (for positioning parts symmetrically).
Small Crystal Rhinestones / Flatback Beads: For flower centers and sparkle.
Hot Glue Gun or Fabric Glue (optional, for affixing gems/flowers).
Scissors.
(Optional): Small piece of cotton lining fabric.
Abbreviations (US Terms)
ch: chain
sc: single crochet
hdc: half double crochet
sl st: slip stitch
inc: increase (work 2 sc in the same stitch)
dec / inv dec: single crochet decrease / invisible decrease
sc2tog: single crochet 2 stitches together
MR: magic ring
st(s): stitch(es)
[ … ]: repeat instructions inside brackets the indicated number of times
( … ): stitch count at the end of the row/round
Are you a Beginner? Learn Crocheting Easily!
You can learn to crochet better with this crochet set of reindeer wallet tutorial. Or continue to the written pattern below!
Pattern Instructions
1. Main Purse Body (Pocket Base)
Hook: 2.55 mm
Yarn: Main Color (MC – White or Beige), holding 2 strands together.
Worked flat in turned rows.
Foundation Chain: Ch 31.
Row 1: Starting in the 2nd ch from hook, work 1 sc in each ch across. Turn. (30 sc)
Rows 2–22 (21 rows): Ch 1, turn. Work 1 sc in each st across. (30 sc)
Row 23 (Top Lip Edging): Ch 1, turn. Work 30 sl st loosely across each stitch (this creates a clean, reinforced front lip for the coin pouch). (30 sl st)
Fasten off leaving a moderate yarn tail. Do not weave it in yet, as it will be secured during assembly.
2. Flap & Muzzle (Decreasing Triangle)
Hook: 2.55 mm
Yarn: Contrast Color (CC – Grey or Light Brown), holding 2 strands together.
The flap is worked directly onto the side edge of the upper back rows of the main body (where each row edge corresponds to 1 stitch).
Row 1: Join CC at the upper side edge where the flap begins. Work 22 sc evenly across the 22 row ends. Turn. (22 sc)
Rows 2–5 (4 rows): Ch 1, turn. Work 1 sc in each st across. (22 sc)
Flap Decrease Rows:
(Note: To create smooth diagonal edges, do not make a turning chain at the beginning of decrease rows; simply skip the first stitch or slip into the second, and end each row with an sc2tog.)
Row 6: Turn (no ch-1). Skip first st, work 18 sc, sc2tog over the last 2 sts. Turn. (20 sts)
Row 7: Turn (no ch-1). Skip first st, work 16 sc, sc2tog over the last 2 sts. Turn. (18 sts)
Row 8: Turn (no ch-1). Skip first st, work 14 sc, sc2tog over the last 2 sts. Turn. (16 sts)
Row 9: Turn (no ch-1). Skip first st, work 12 sc, sc2tog over the last 2 sts. Turn. (14 sts)
Row 10: Turn (no ch-1). Skip first st, work 10 sc, sc2tog over the last 2 sts. Turn. (12 sts)
Row 11: Turn (no ch-1). Skip first st, work 8 sc, sc2tog over the last 2 sts. Turn. (10 sts)
Row 12: Turn (no ch-1). Skip first st, work 6 sc, sc2tog over the last 2 sts. Turn. (8 sts)
Row 13: Turn (no ch-1). Skip first st, work 4 sc, sc2tog over the last 2 sts. Turn. (6 sts)
Closure Loop:
At the narrow tip of Row 13, ch 10.
Sl st into the opposite corner stitch of the tip to form the button loop. Fasten off and weave in ends.
3. Assembling the Pocket & Flap Border
Side Seams: Fold the main white/cream body in half with wrong sides facing inside so the Row 23 slip-stitch edge forms the front rim of the pouch and the flap extends from the back.
Thread a tapestry needle with MC. Whipstitch or mattress stitch both lateral edges closed from the fold up to the opening. Reinforce the top corners with 2–3 tight overcast stitches. Weave in ends.
Flap Edging:
Using 2 strands of CC and the 2.55 mm hook, join yarn at the back right corner where the flap meets the body.
Work sc evenly down the right angled edge of the flap (approx. 13 sc).
Work 10 sc directly over/around the ch-10 loop to cover and thicken it.
Work sc evenly up the left angled edge back to the body (approx. 13 sc).
Sl st into the first st, fasten off, and weave in ends.
4. Red Nose Button
Hook: 2.55 mm
Yarn: Red, holding 2 strands together.
Worked in continuous spiral rounds (do not join rounds).
Rnd 1: MR, 7 sc into ring. Pull ring closed. (7)
Rnd 2: Inc in each of the 7 sts around. (14)
Rnds 3–5 (3 rounds): 1 sc in each st around. (14)
Rnd 6: [2 sc, inv dec] 3 times, ending with 1 sc. (10)
Sl st into next st. Fasten off leaving a long tail (approx. 25 cm / 10 in) for sewing.
Firmly pack the nose with a small ball of fiberfill so it becomes a solid round sphere.
5. Antlers (Make 2)
Hook: 2.55 mm
Yarn: Dark Brown.
Each antler consists of a Short Branch and a Long Branch sewn together. Do not stuff.
Short Branch (Make 2):
Rnd 1: MR, 9 sc into ring. (9)
Rnds 2–4 (3 rounds): 1 sc in each st around in a spiral. (9)
Sl st in next st. Fasten off leaving a sewing tail.
Long Branch (Make 2):
Rnd 1: MR, 9 sc into ring. (9)
Rnds 2–9 (8 rounds): 1 sc in each st around in a spiral. (9)
Sl st in next st. Fasten off leaving a long tail for sewing to the purse.
Joining the Branches:
Position the open base of the Short Branch against the side of the Long Branch between Rounds 5 and 8.
Using a tapestry needle, whipstitch around the circumference to join them securely into an L/Y-shaped antler. Repeat for the second antler.
6. Ears (Make 2)
Hook: 1.75 mm
Yarn: White/Cream (MC), 1 strand.
Worked in continuous spiral rounds. Do not stuff.
Rnd 1: MR, 6 sc into ring. (6)
Rnd 2: Inc in 1st st, 5 sc. (7)
Rnd 3: 1 sc in each st around. (7)
Rnd 4: Inc in each st around. (13)
Rnd 5: 1 sc in each st around. (13)
Rnd 6: 6 sc, inc in next st, 6 sc. (14)
Rnds 7–11 (5 rounds): 1 sc in each st around. (14)
Rnd 12: Inv dec, 5 sc, inv dec, 5 sc. (12)
Rnd 13: Inv dec, 4 sc, inv dec, 4 sc. (10)
Sl st into next st. Fasten off leaving a sewing tail.
Shaping the Ear: Flatten the piece. Fold/pinch the open bottom edge in half lengthwise. Sew 2–3 stitches through the folded base to create a cupped, realistic deer ear shape.
7. Flowers (Make 3)
Hook: 1.75 mm
Yarn: Light Blue or Yellow, 1 strand.
Into a Magic Ring, work 5 petals:
Petal: [Ch 4; in 2nd ch from hook work 1 sl st; in next ch work 1 sc; in next ch work 1 hdc; sl st into the central magic ring].
Repeat [ … ] a total of 5 times to create 5 pointed petals.
Pull the center tail tightly to close the ring. Sl st to the base of the first petal to join. Fasten off leaving a tail for sewing.
8. Leaves (Make 4)
Hook: 1.75 mm
Yarn: Green, 1 strand.
Foundation Chain: Ch 5.
Round:
Starting in the 2nd ch from hook: 1 sc, 1 sc, 1 hdc.
In the last chain st (the tip): work 3 hdc.
Rotate to work along the opposite side of the chain loops: 1 hdc, 1 sc, 1 sc.
Sl st into the very first sc to join.
Fasten off leaving a tail for sewing.
Assembly & Finishing Details
Attach the Red Nose:
Close the flap and place the ch-10 loop flat against the front of the pouch.
Mark the spot where the loop sits naturally (approximately 4 rows up from the bottom edge, centered horizontally).
Pin the stuffed red nose in place.
Insert your fingers inside the pouch to ensure you only catch the front layer. Sew around the base of the nose securely using the yarn tail. Fasten off on the inside.
Test the button closure: the loop should slip snugly over the nose.
Embroider Sleeping Eyes:
Use pins to mark two symmetrical curved lines on either side of the nose (about 5 stitches outward from the nose base).
Thread an embroidery needle with 2 strands of black thread/yarn.
Stitch a gentle upward arc (sleeping eye) approximately 4–5 stitches wide. Add a small downward diagonal flick at the outer corner for an eyelash. Repeat on the other side.
Attach Antlers & Ears:
Antlers: Place the base of each antler behind the upper back edge of the flap, approximately 3 stitches in from the corners, pointing upward with the short branches angled inward. Sew firmly in place.
Ears: Position the pinched base of each ear immediately to the outside of the antlers at the top corners, angled slightly outward and tilted forward. Sew securely into the flap edge.
Attach Flowers & Leaves:
Arrange the 3 flowers horizontally along the top base of the flap triangle (one in the center, one on the left, one on the right).
Place 2 green leaves pointing outward under the left flower, and 2 green leaves pointing outward under the right flower.
Stitch or hot-glue each flower and leaf in place.
Gems & Sparkle:
Glue or stitch a small sparkling crystal bead into the center of each of the 3 flowers.
Optionally, add 3 small rhinestones along the flap below the flowers to complete the festive reindeer look.
Weave in any remaining yarn tails neatly on the inside of the pouch. Your handmade Reindeer Coin Purse is complete!
Share on Social Media!
See More:

Tester Call: How to Crochet Reindeer Dumpling Plushie for Christmas Gifting

How to Crochet Holly Leaf, Berry & Stuffed Bell Ornament for Christmas

How to Crochet Christmas Ghost Buddy Holding A Treat Basket Plushie
Tester Pattern: How to Crochet Santa Hat Grinch Turtle Plushie for Christmas Gifting
How to Crochet Baymax Dumpling Plushie for Gifting At Christmas
Tester Call: How to Crochet Grinch Pear Miniature Christmas Plushie for Gifting

Featuring: How to Crochet Layered UNIQUE Star and Snowflake on the Top Christmas Tree Keychain
How to Crochet Miniature Skinny Plush Yarn Christmas Stocking Keychain & Charm

Tester Call: How to Crochet Grinch Christmas Gift Plushie for Kids