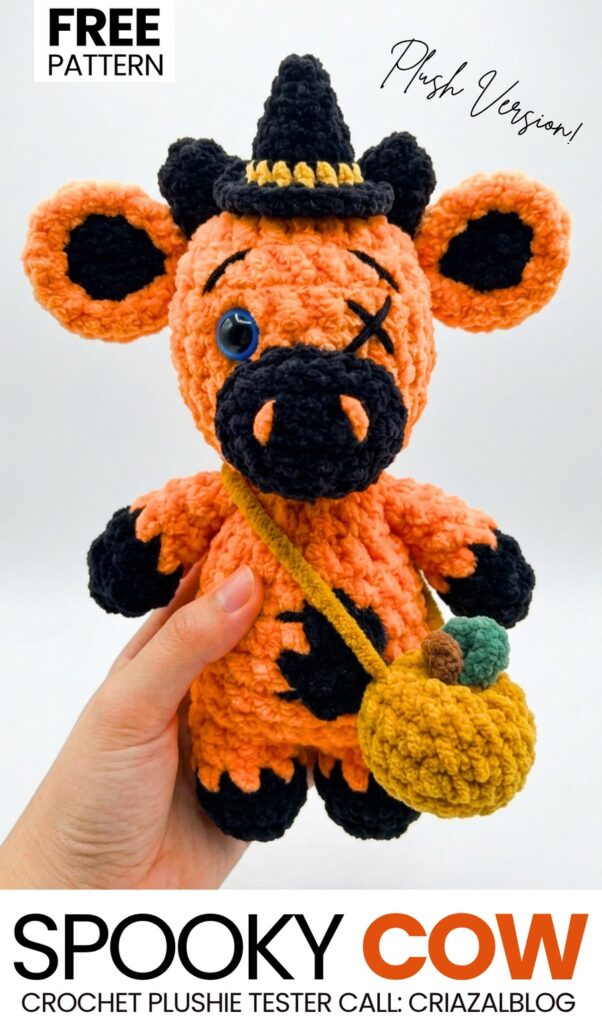
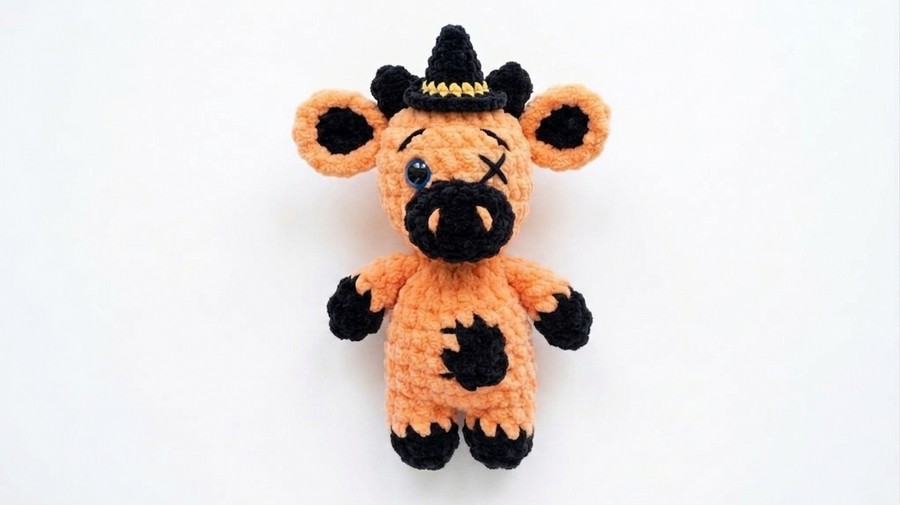
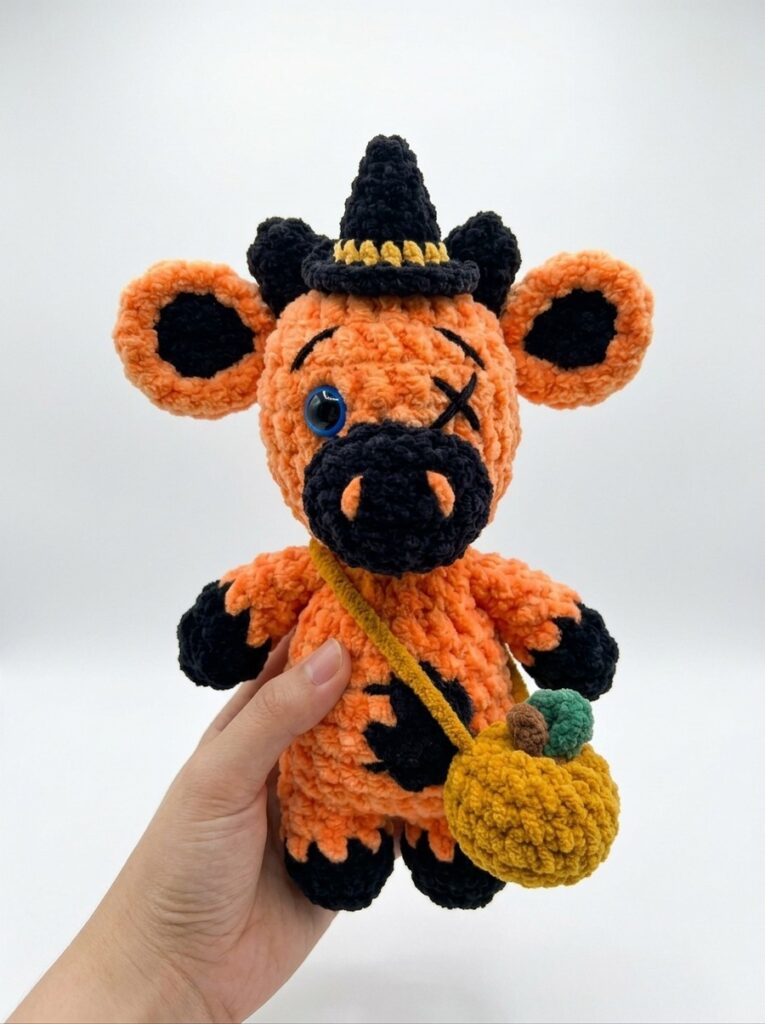
For this week’s crochet Halloween plushie tester pattern, I wanted to transform the crochet 15cm plush cow into something that makes a memorable Halloween present. While there are already many crochet Halloween cow patterns available, I wanted a REALLY spooky crochet plush cow. So, I ended up with this crochet spooky witch cow plushie that is wearing a little crossbody pumpkin bag.
You can learn how to crochet this cow plushie following a FREE written pattern. It is crocheted in orange with the black spots that make it a must-have for Halloween.
We crochet a small witch hat that has the same pattern as you learned in the crochet ghost plush keychain pattern. With the spooky X eye and the black horns, I think this is the BEST crochet Halloween cow variation both for its ease of making and the design. So, continue reading for the full crochet Halloween cow pattern!
[ez-toc]
Pattern to Crochet the Spooky Cow Plushie
Skill Level: Intermediate
Materials
Plush Yarn: Orange (main body & outer ears), Black (hooves, muzzle, inner ears, spots, horns, and witch hat main), and Yellow (hat band).
Crochet Hook: 4.0 mm size.
Safety Eyes: 10 mm blue safety eye (1 unit, for right eye position).
Stuffing: Fiberfill stuffing.
Fine Yarn: Black fine yarn or embroidery thread for the left “X” eye detail, orange fine yarn/thread for muzzle nostril accents.
Tools: Yarn needle, stitch marker, sewing pins, and scissors.
Arms (Make 2)
Start with Black Plush Yarn
Round 1: Make a magic ring. Work 6 sc into the ring. (6 stitches)
Round 2: Work 1 sc in each stitch around. (6 stitches)
Change to Orange Plush Yarn
Round 3: Work 1 sc in each stitch around. (6 stitches)
Round 4: Work 1 sc in each stitch around. (6 stitches)
Finish: Press the top edges flat together. Crochet 3 sc through both layers to close the top. Fasten off and cut a short tail. (Crochet directly into the body later).
Legs (Make 2)
Start with Black Plush Yarn
Round 1: Make a magic ring. Work 6 sc into the ring. (6 stitches)
Round 2: [1 sc in the next 2 stitches, 1 increase in the next stitch] × 2. (8 stitches)
Change to Orange Plush Yarn
Round 3: Work 1 sc in each stitch around. (8 stitches)
Round 4: Press the top edges flat together. Crochet 4 sc through both layers to close the top. (4 stitches)
For Leg 1: Cut yarn and fasten off.
For Leg 2: Do not cut yarn. Continue to join legs and start the body.
Body & Head (One Continuous Piece)
Joining Legs & Lower Body:
Round 1: Turn Leg 2 sideways. Work 4 sc into the front loops only (FLO) across Leg 2. Pick up Leg 1, work 1 increase (2 sc in same loop) into the first FLO, then 3 sc in the remaining FLO across Leg 1. Turn to work across the unworked back loops: work 4 sc across the back loops of Leg 1, 1 increase, and 3 sc across back loops of Leg 2. (18 stitches)
Round 2: [1 sc in the next 5 stitches, 1 increase] × 3. (21 stitches)
Round 3: Work 2 sc in Orange yarn. Switch to Black yarn for 3 sc (body spot), then back to Orange. Work sc in Orange around to stitch 18 (center back).
Tail: Chain 4 in Orange. Starting in 2nd chain from hook, work 1 sc in each of the 3 chains. Sl st back into the base stitch on body. Continue last 3 sc in Orange to complete round. (21 stitches)
Round 4: Work 1 sc in each stitch around in Orange (work 2 sc in Black over the spot). (21 stitches)
Round 5: Work 1 sc in each stitch around in Orange (work 2 sc in Black to complete spot). (21 stitches)
Round 6: [1 sc in next 5 stitches, 1 invisible decrease] × 3 in Orange. (18 stitches)
Round 7: Work 1 sc in each stitch around in Orange. (18 stitches)
Action: Add fiberfill stuffing into the lower body.
Attaching Arms & Upper Body:
Round 8: Hold Arm 1 flat against side. Work 3 sc through both arm and body. Work 6 sc across chest. Hold Arm 2 flat against other side. Work 3 sc through both arm and body. Work 6 sc across back. (18 stitches)
Round 9: [1 sc in first stitch, 1 invisible decrease in next] × 6 in Orange. (12 stitches)
Head:
Round 10: [1 sc in first stitch, 1 increase in next] × 6 in Orange. (18 stitches)
Round 11: [1 sc in next 2 stitches, 1 increase] × 6 in Orange. (24 stitches)
Round 12: [1 sc in next 5 stitches, 1 increase] × 4 in Orange. (28 stitches)
Round 13: Work 20 sc in Orange, 3 sc in Black (head spot), 5 sc in Orange. (28 stitches)
Round 14: Work 21 sc in Orange, 3 sc in Black, 4 sc in Orange. (28 stitches)
Action:
Insert one 10 mm blue safety eye on the right side of the face between Round 13 and Round 14.
Using fine black yarn, embroider an “X” stitch on the left side of the face at the same level as the eye.
Using black embroidery yarn, stitch two arched eyebrows above the eye area.
Round 15: [1 sc in next 5 stitches, 1 invisible decrease] × 4 in Orange. (24 stitches)
Round 16: [1 sc in next 2 stitches, 1 invisible decrease] × 6 in Orange. (18 stitches)
Action: Stuff body and head firmly with fiberfill.
Round 17: [1 sc in first stitch, 1 invisible decrease in next] × 6 in Orange. (12 stitches)
Round 18: Make 6 invisible decreases in a row. (6 stitches)
Finish: Cut yarn, weave end through front loops of remaining 6 stitches, pull tight, and hide end.
Muzzle (Use Black Plush Yarn)
Round 1: Chain 5. Starting in 2nd chain from hook: 1 increase, 1 sc in next 2 chains, 3 sc into last chain space. Turn to opposite side of chain: 1 sc in next 2 chains, 1 sc in last space. (10 stitches)
Round 2: Work 1 sc in each stitch around. (10 stitches)
Finish: Fasten off, leaving a long tail for sewing.
Ears (Make 2 – Layered Black & Orange)
Inner Ear (Black): Chain 4. Starting in 2nd chain from hook: 1 sc, 1 sc, 5 hdc in last chain space. On opposite side: 2 sc. (9 stitches). Fasten off and cut yarn.
Outer Ear (Orange): Chain 4. Repeat exact same steps using Orange yarn. Do not cut yarn.
Assembly: Place black inner ear on orange outer ear with back sides together. Using Orange yarn, sc around outer edge through both layers to join into one ear. Fasten off with a long tail for sewing.
Horns (Make 2 – Use Black Plush Yarn)
Round 1: Make a magic ring. Work 6 sc into ring. (6 stitches)
Round 2: Work 1 sc in each stitch around. (6 stitches)
Finish: Fasten off, leaving a long tail for sewing.
Witch Hat (Black & Yellow)
Round 1 (Black): Magic ring, 4 sc, sl st to join. (4 stitches)
Round 2: Ch 1, (1 sc, inc) × 2, sl st. (6 stitches)
Round 3: Ch 1, (2 sc, inc) × 2, sl st. (8 stitches)
Round 4: Ch 1, (3 sc, inc) × 2, sl st. (10 stitches)
Round 5: Ch 1, (4 sc, inc) × 2, sl st. (12 stitches)
Round 6: Ch 1, (5 sc, inc) × 2, sl st. (14 stitches)
Round 7 (Switch to Yellow): Ch 1, 14 sc around, sl st. (14 stitches)
Round 8 (Switch to Black): Ch 1, increase with hdc in every stitch (2 hdc in each st), sl st around the rim. (28 stitches)
Finish: Fasten off, leaving a tail for sewing onto the top of the head.
Tail Tassel
Cut three 15 cm strands of fine black cotton yarn.
Fold in half, pull loop through end of crocheted tail chain, thread ends through loop, pull tight, and trim evenly.
Assembly Instructions
Muzzle: Pin black muzzle to face right below safety eye and stitched eye (rounds 11–14). Sew into place, adding light stuffing before closing.
Nostrils: Using fine orange thread, embroider two small vertical stitches onto the black muzzle.
Horns: Sew two black horns onto top of head (rounds 16–17).
Ears: Pinch base of each ear slightly; sew directly adjacent to horns.
Witch Hat: Position witch hat centered between horns on top of head and sew securely in place.