Author: Talha
I am a crochet designer, macramé maker and a crafter who also loves doing MATH.
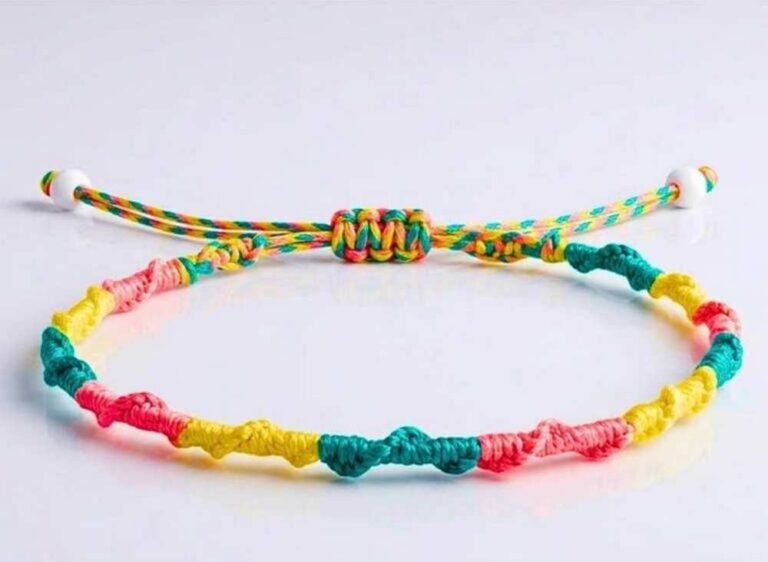
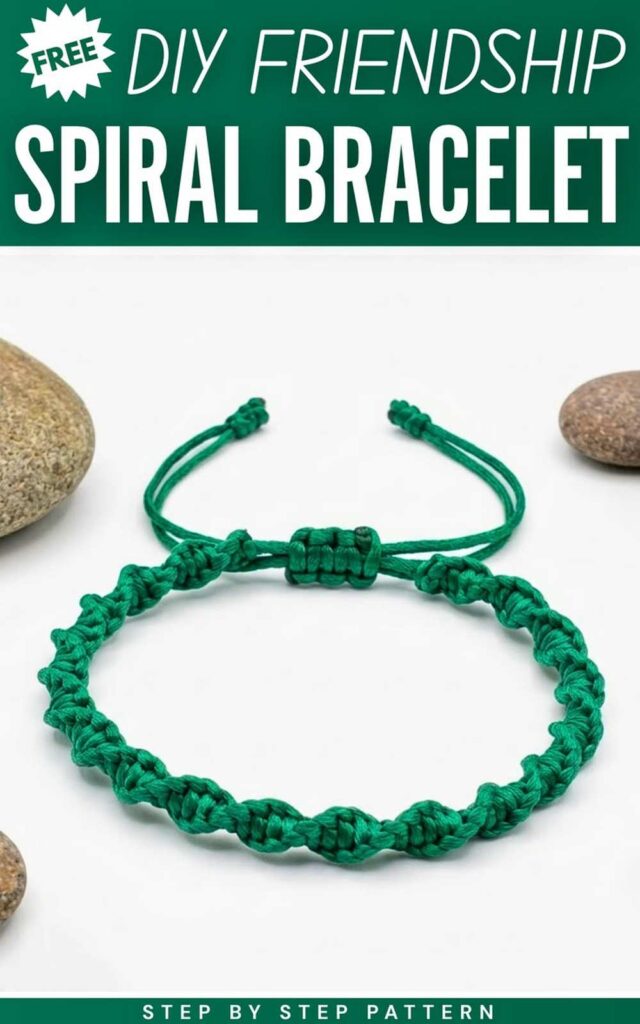
Learn how to make a beautiful spiral bracelet out of yarn following these instructions. This macramé Friendship bracelet looks just like a DNA model; so you can gift it to a friend who is gonna be a future Doctor just I did! Luckily, it just requires learning one knot (half square knot) that you have to repeat throughout and it will get the spiral shape as-you-go. Basically, this is a variation of our square knot bracelet that I showed you making two days ago.
Spiral Bracelet with Macramé
The icing on the cake is that you only require two strands to be active out of 4. Also, you can make it with just one color of yarn although I wanted it as a watermelon bracelet, it does not show both the colors of strand. I still worked it that way, so at least the bracelet closures may look elegant and they actually did. Now, let me show you a step-by-step pattern for making a solid spiral bracelet!
How I Made this Spiral Bracelet for Me
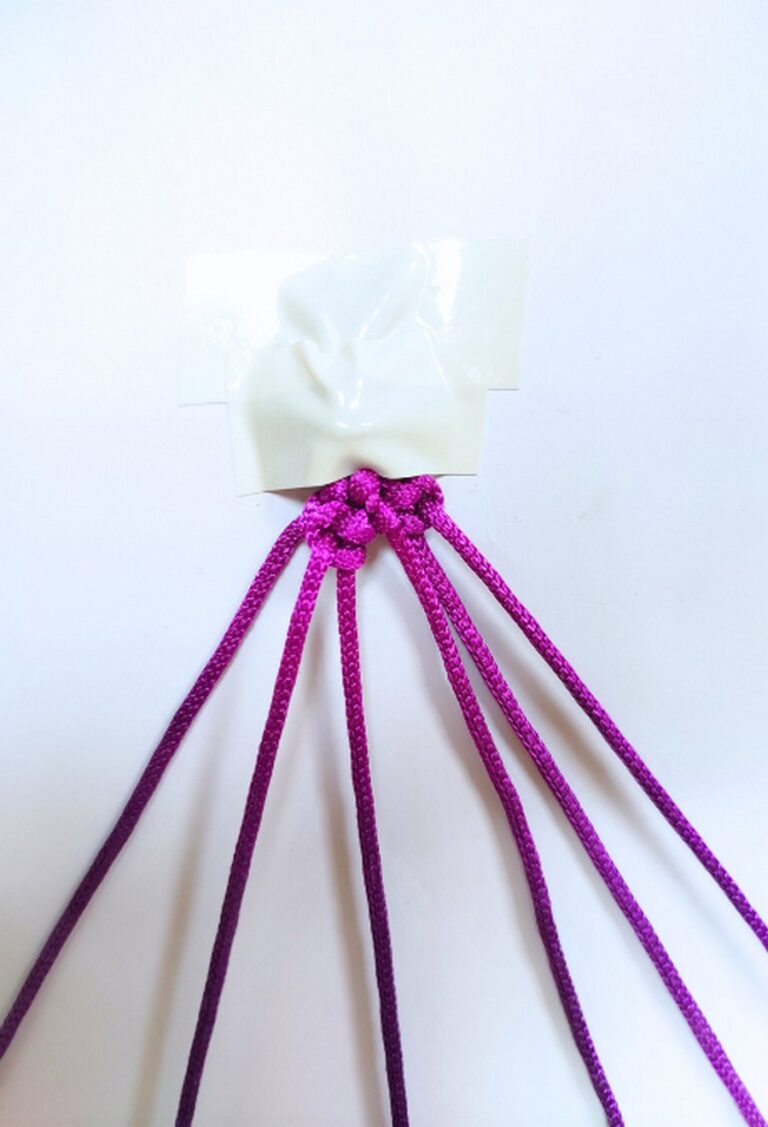
- Step #1: I took two strands of macramé cord in the same color one of which was 2.25 longer than the other one. Folded each one in half, aligned and made a slip knot.
- Step #2: Taped the knotted part flat onto my table and separated the strands. I aligned the middle two strands, pulled them tight and tapped near the bottom too. I worked with the extreme strands only.
- Step #3: I made a half square knot starting with the right strand. If you are left-handed, choose left as a start but every other knot has to be started with the left strand in that case.
- Otherwise, you will end up a solid square knot bracelet that I will show you how to make in the next tutorial.
- Step #4: Continued making the the half square knots starting each time with the right starnd.
- Step #5: To finish my bracelet, I peeled off the tape and made a 4-strand brace. Then made an overhand knot!
Macramé Spiral Pattern: Step-by-Step Instructions
Colors:
- Pink (Base Color)
- Parrot (Bracelet Color)
Note that I have used two colors of yarn so you can easily differentiate between the base and active strands!
Supplies
- Any yarn of any thickness in one color. I used 1.5mm macramé Macramé cord as usual but you can also use,
- polycherry thread or embroidery floss.
- Paper tape. If you are working over a paper chart, use thin transparent tape as it will not damage the paper when peeled off.
- Flat surface like a glass, table, etc.
Knots:
- Slip Knot
- Right Half Square Knot
- Overhand knot
Length requirements: Two yarn strands mush be in 9/4 ratio or the bracelet yarn must be 2.25 times as longer as the base yarn. For example: 180 cm (bracelet yarn) and 80 cm (base yarn). It depends on the thickness of your yarn for example, I used about 90 cm for wrapping and 40 cm for the base as my cord is much thicker!
Step #1: Preparation
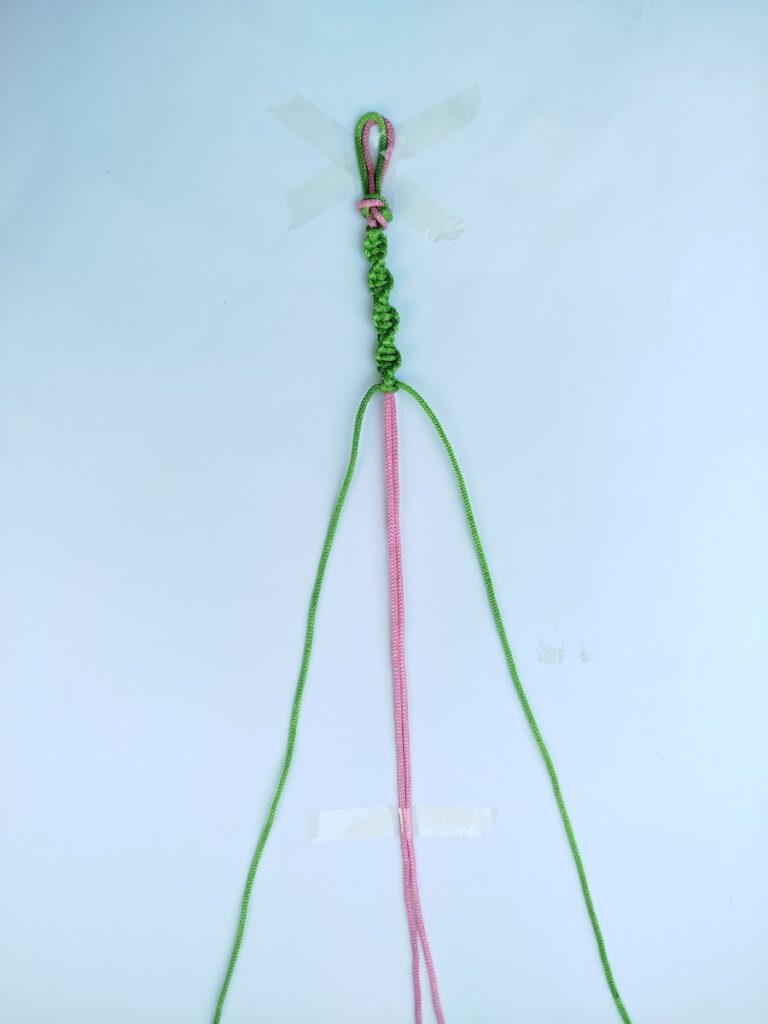
- Fold each yarn strands in half separately and align the centers of both.
- Pinch the top and make a slip knot using both the strands. You can also slide the knot to the top to tighten it further and reducing area of the loop.
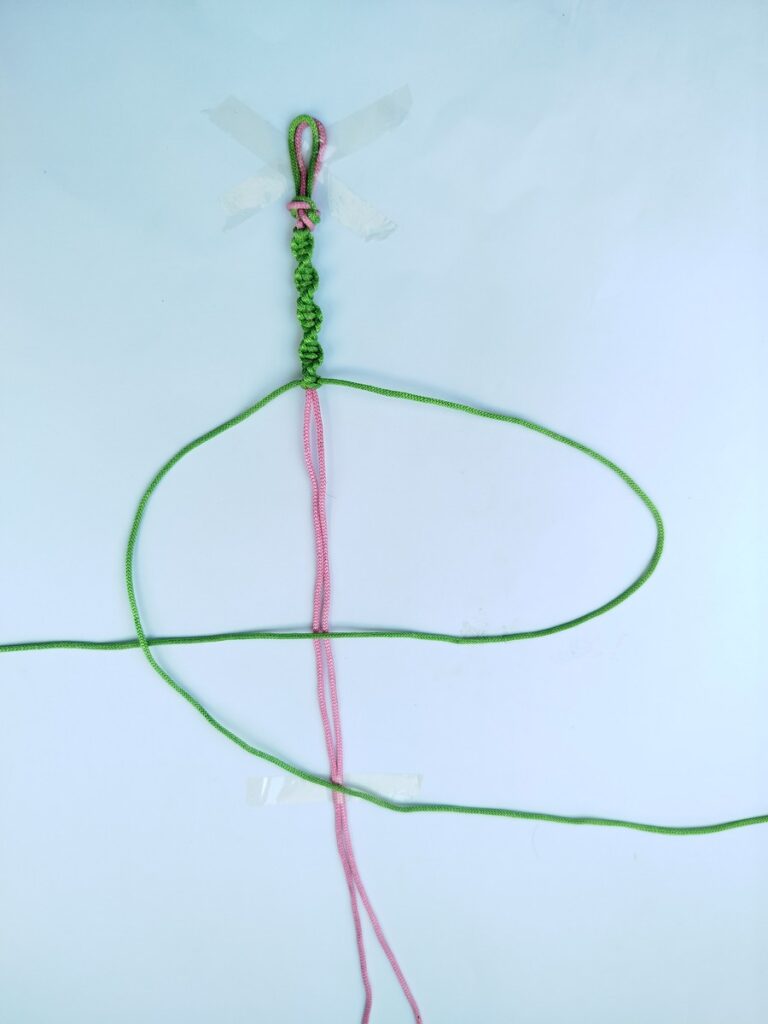
- Take two strips of transparent tape, place the strand over the table and make an X with the tape over to secure your work properly.
- Now, separate the strands such that the pink (base) strands are in the middle and the green (covering) strands are on either side.
- With the middle strands parallel and nearer to each other, apply a strip of tape to hold the base strands in place.
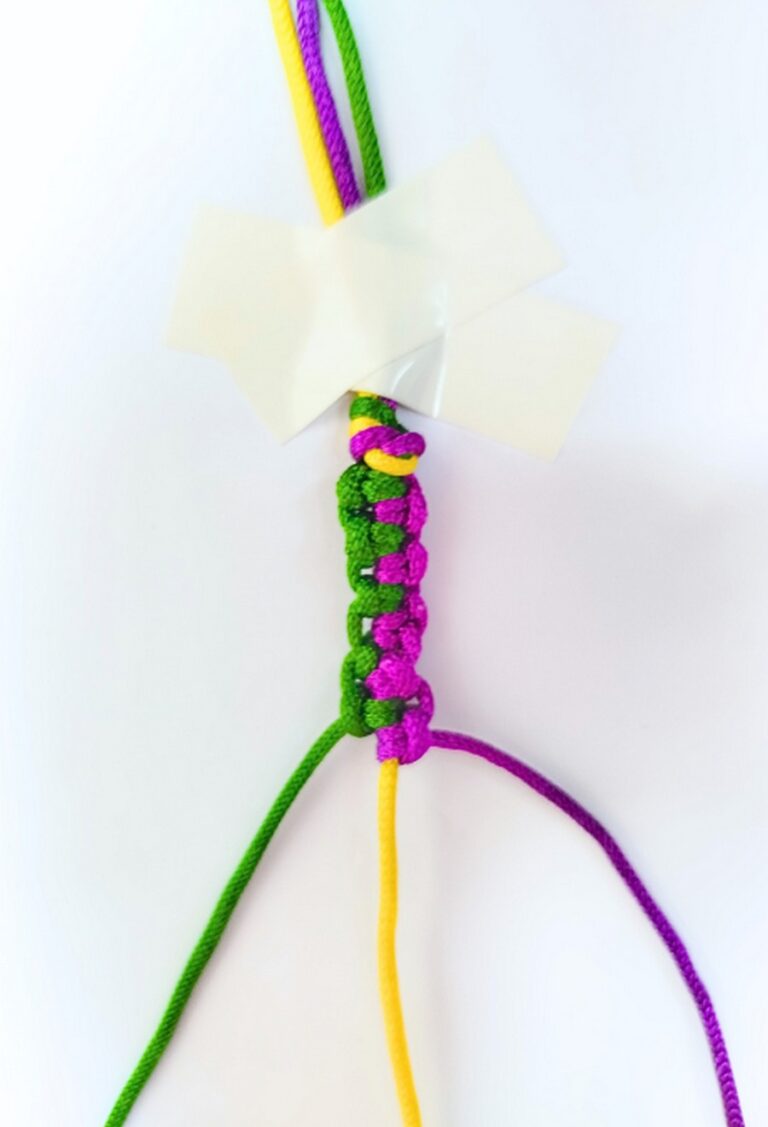
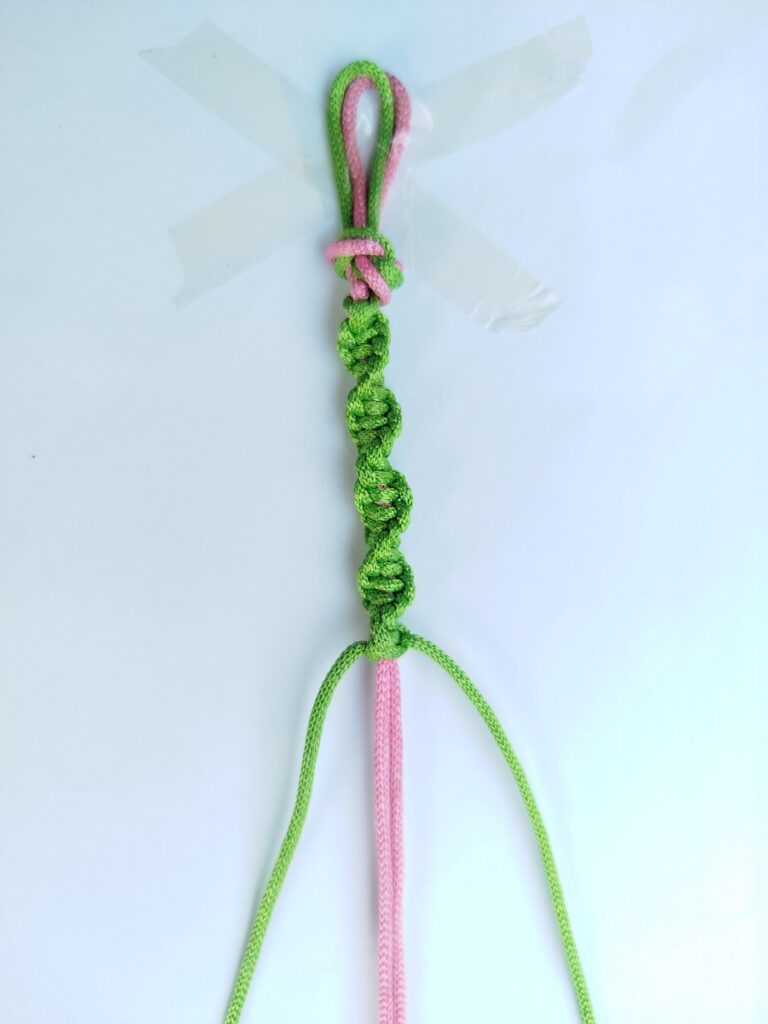
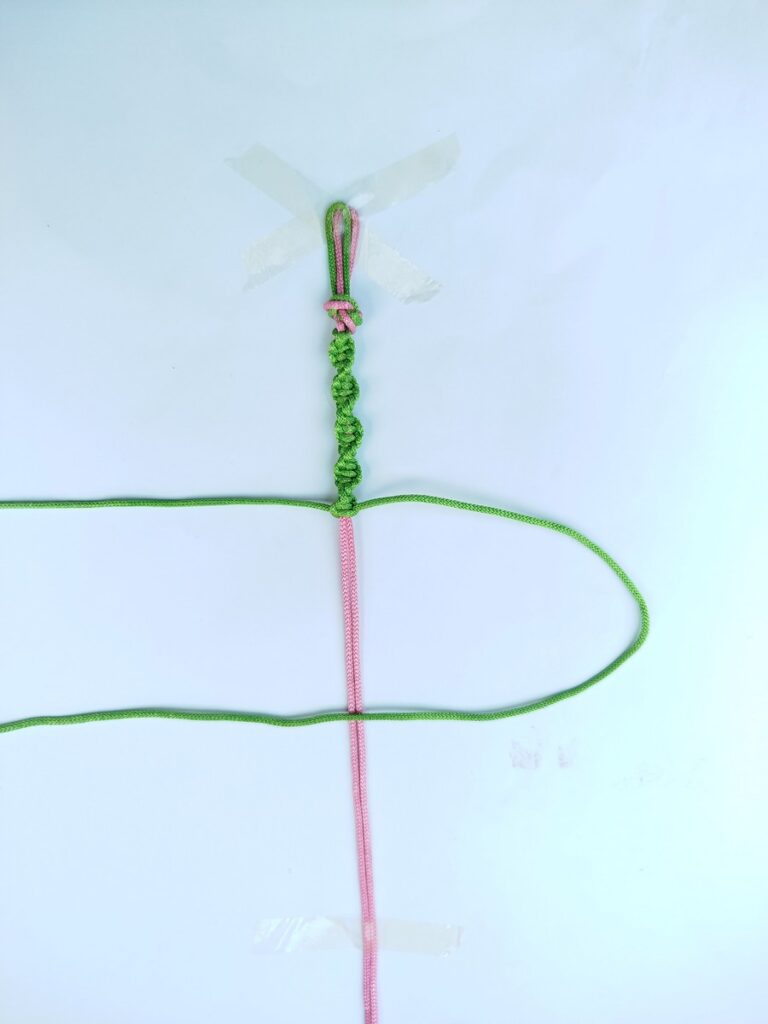
Step #2: Half Square Knot
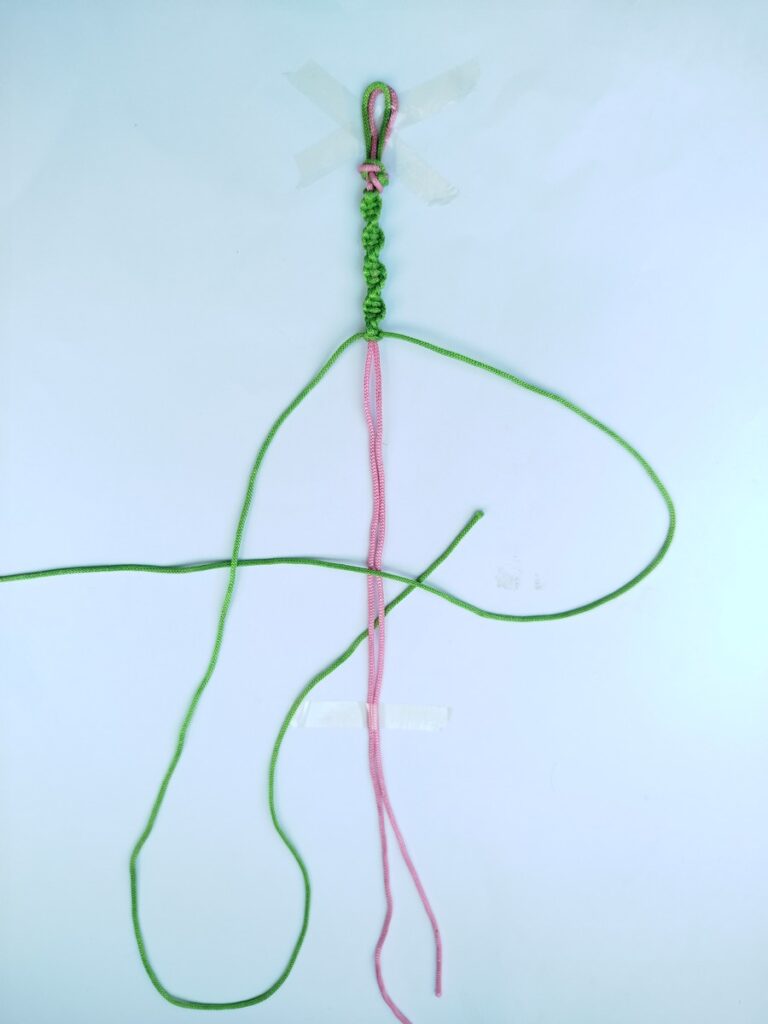
Now we have to make a right-hand half square with the longer strands on either side.
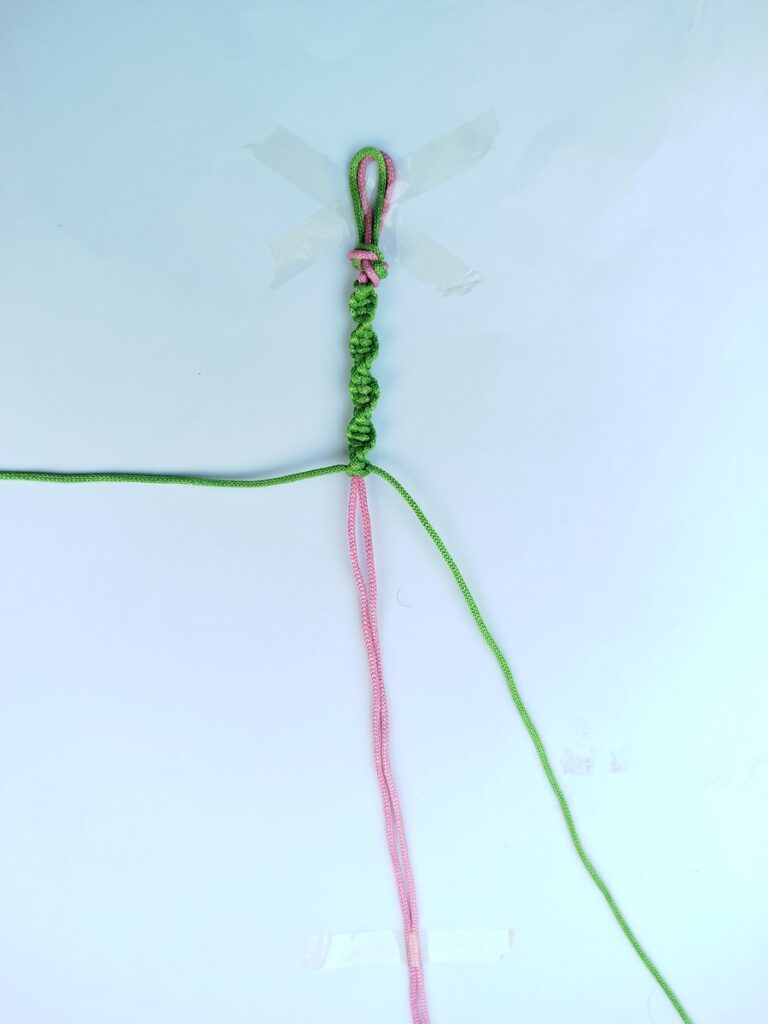
- Step 1: First, bring it to the left and settle it perpendicular to the middle strands. This way, in the next step when you will bring the right strand to the left, too, it won’t cross over the left.
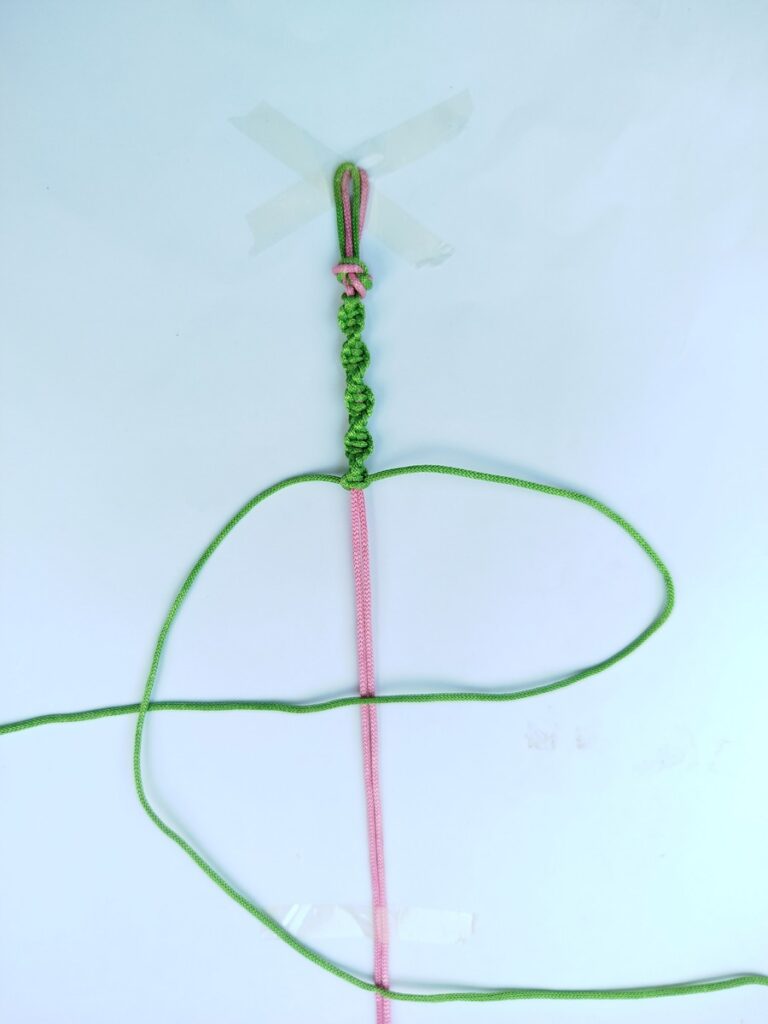
- Step 2: Now, making a U shape with the green strand on the right, settle its tip to the left side of the middle strands crossing both over!
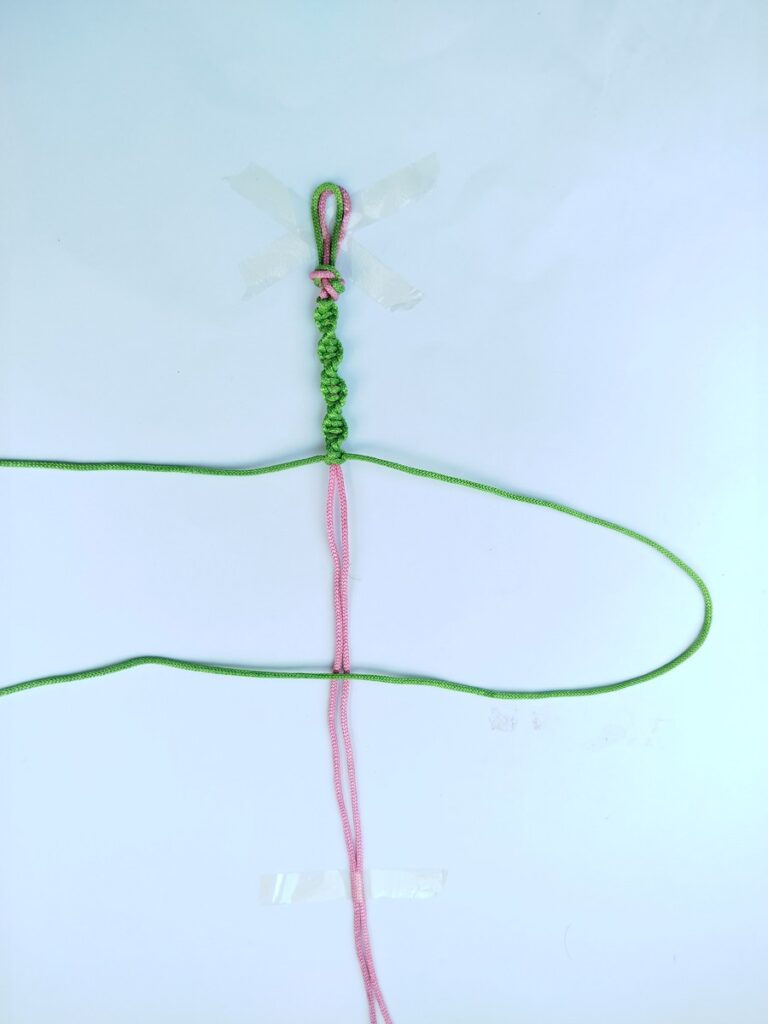
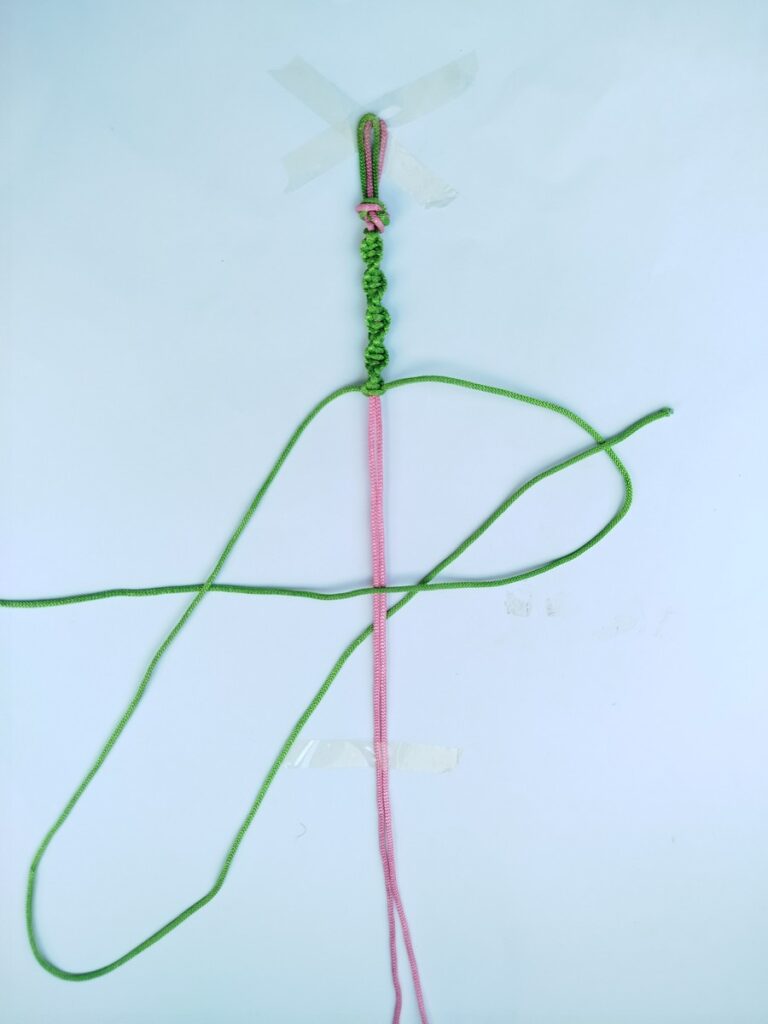
- Step 3: Now, pick the left strand again and move to the right such that it crosses over the right strand.
- Step 4: Now, cross the tip of the left strand below the middle strands and also below the bottom of the loop of the right strand. This is how you will make a tangle that can be knotted.
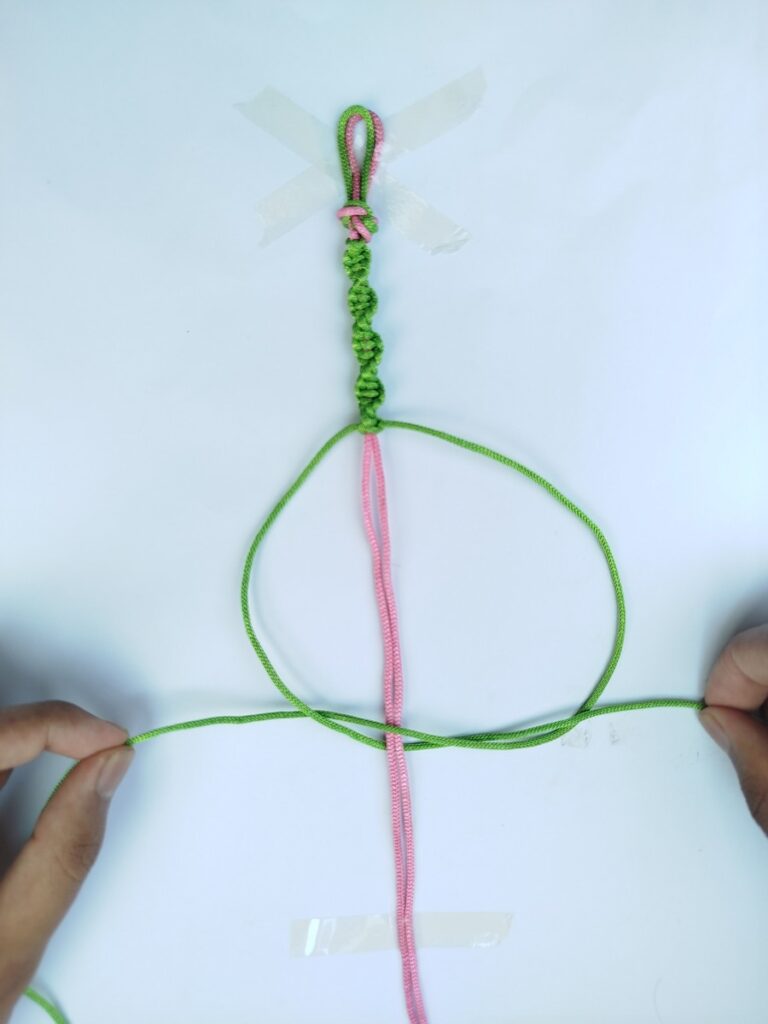
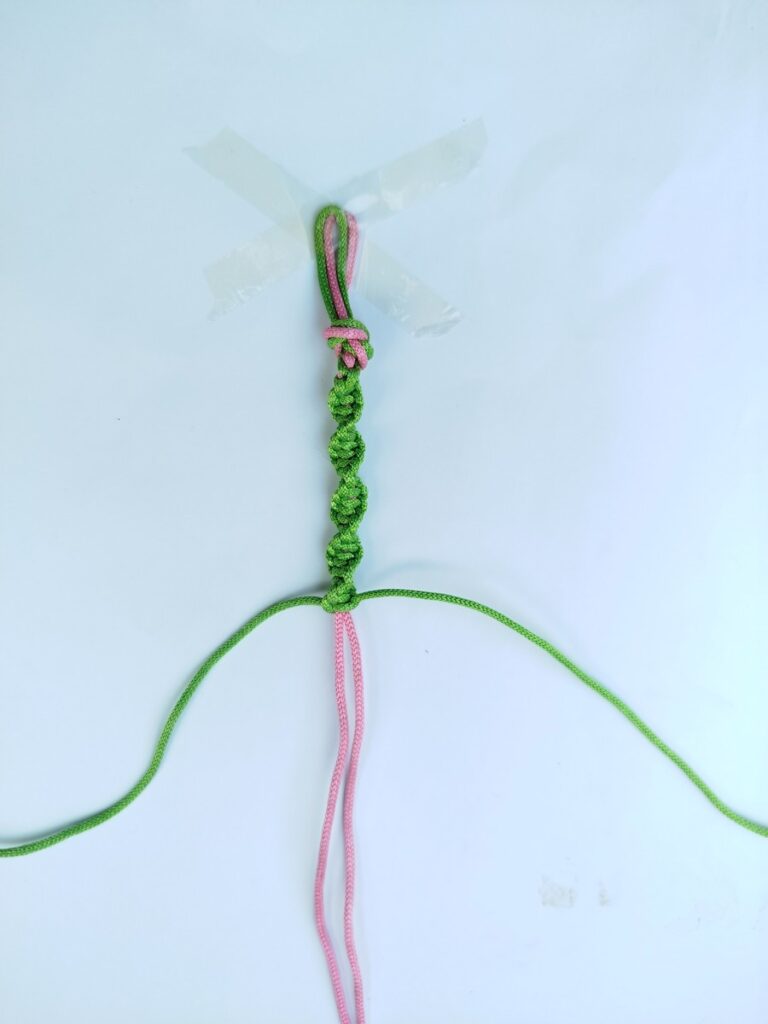
- Step 5: Pick the tips of both the strands with the fingers of your hand and start pulling towards the opposite sides. The common loop will start shortening. Just keep pulling until you can pull the strands tight to make a knot.

- Step 6: When the knot is that smaller, pull the middle strands a little bit so you can shorten the loops even further to make a knot.
- Step 7: Just pull tight enough that you are unable to see the pink color in the knot. This is exactly what I meant by saying this yarn strand a covering yarn!
Step #3: Repeat Pattern
- Again, settle the left strand perpendicular to the middle strands and make a fold the right one, too, to make an elongated U.
- Cross the left strand over the right strand towards the right.
- Cross the left strand below the right middle strands as well as below the bottom strand of the loop. Then, over the right arc of the loop.
- Pull both the strands tight to finish making a knot!
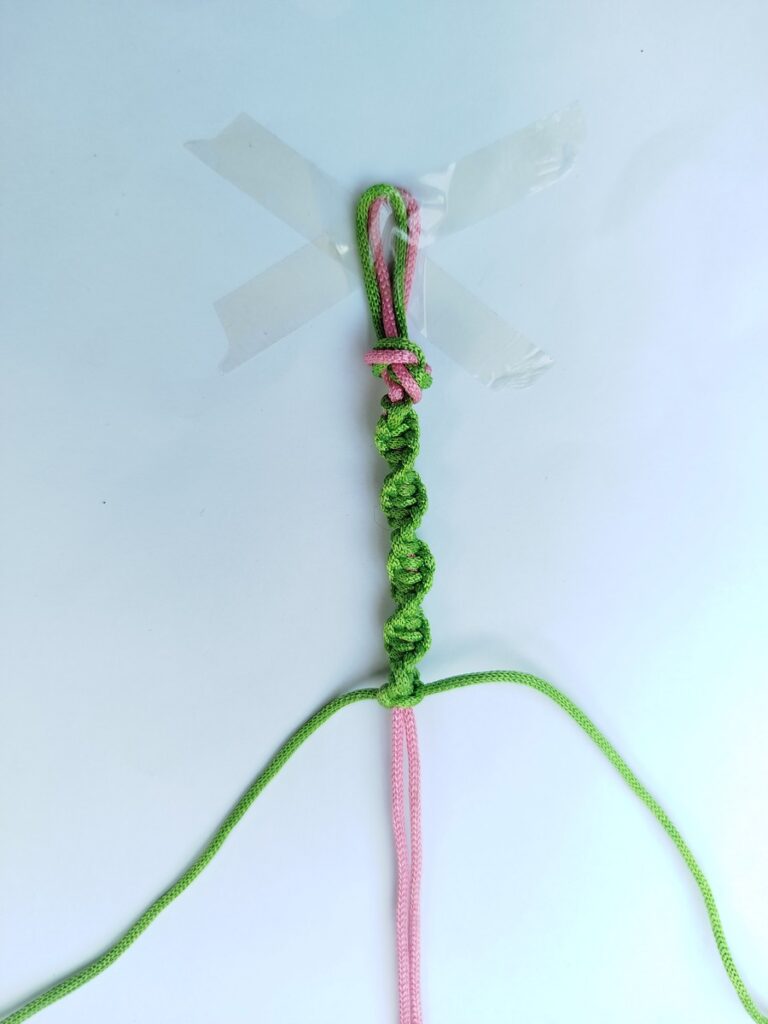
Now, for the next rows, you will continue repeating the same knot always making a loop with the right strand. You will start noticing a spiral after 4 – 7 rows. You don’t have to do anything else. Just continue repeating the same pattern all over and it will spiral automatically!
And that’s how you will want to make this beautiful 1-knot repeat bracelet in no time. Finish it off in a way I described!
Was this tutorial helpful? Tell me in the comments
Your feedback is a great way for us to improve my macramé and crochet tutorials. So, share your thoughts on whether you tried this one or not, and highlight the weak points.