Show support for Marifairyland!
In today’s pattern, “crocheting your favorite animal plushies in removable holiday accessories” series, learn how to crochet this miniature no-sew coiled-tail piggy buddy in a festive red hat and scarf plushie. It is a beginner-friendly project made using soft velvet chenille yarn. What makes this design so special is that it is 100% no-sew and worked entirely in one piece from the tip of the snout to the curly tail.
It makes a holiday handmade gift, and again, you will be crocheting a non-slouchy Santa hat with the pom-pom top. The snout, floppy ears, tiny stubby legs, and corkscrew tail are all crocheted seamlessly into the body as you go.
Measuring approximately 10 cm (4 inches) long, this palm-sized piggy is perfect as a pocket pal, desk buddy, bag charm, or handmade gift. Now, continue reading for learning more about this cute crochet plush quick and easy pig project!
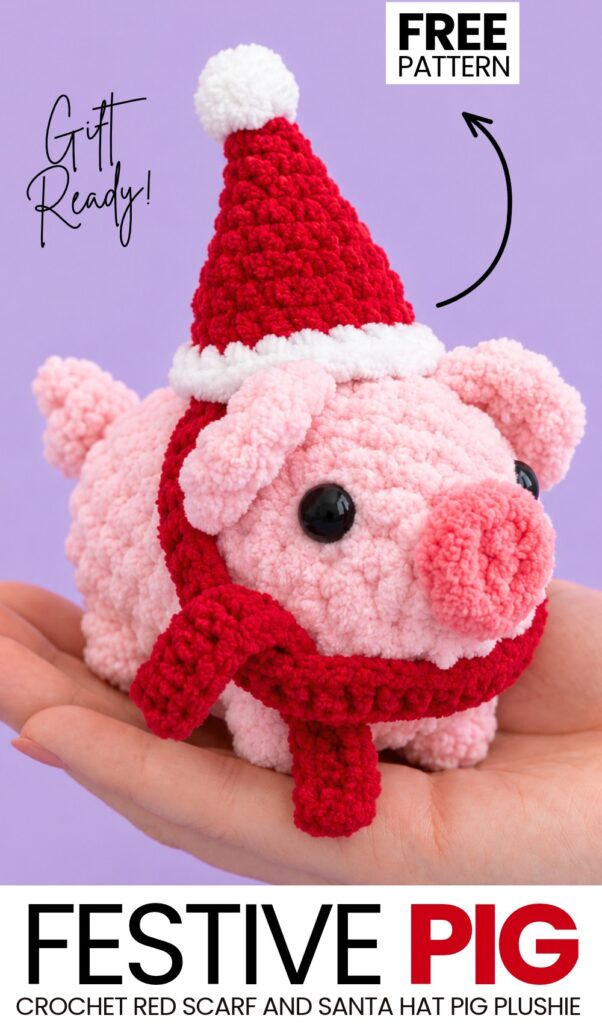
Pattern to Crochet Plush Dumpling Holiday Pig Plush
Length: Approx. 10 cm (~4 inches) from snout to tail.
Materials & Tools
Plush / Chenille Yarn (Super Bulky / Category 6; ~100 g / 120 m):
Light Pink (main body color for head, body, ears, legs, and tail)
Bright / Dark Pink (contrasting color for the snout)
Crochet Hook: 4.5 mm
Eyes: 8 mm black safety eyes or half-bead eyes
Stuffing: Polyester fiberfill (holofiber)
Notions: Stitch marker, yarn needle, sharp scissors, tweezers (for stuffing), hot glue gun (for attaching eyes)
Materials for the Hat
Yarn: Bulky yarn in Red
Hook: Recommended size for your bulky yarn (e.g., 6.0 mm – 7.0 mm)
Pom-Pom: 2 cm x 2 cm pre-made faux pom-pom (faux fur or faux yarn)
Other Supplies: Tapestry needle, stitch marker
Abbreviations (US Terms)
ch: chain
sc: single crochet
hdc: half double crochet
dc: double crochet
inc: increase (2 sc in the same stitch)
dec: decrease (single crochet 2 stitches together)
sl st: slip stitch
BLO: back loop only
FLO: front loop only
st(s): stitch(es)
[…] x N: repeat instructions inside brackets times
(N): total stitch count at the end of the round
Video tutorial!
Special Stitches
4-dc Bobble Stitch (Little Feet):
Yarn over, insert hook into the indicated stitch, yarn over, pull up a loop, yarn over, pull through 2 loops (2 loops on hook).
Repeat step 1 three more times into the exact same stitch (5 loops on hook).
Yarn over and pull through all 5 loops on the hook.
Chain 1 to lock/close the bobble. (Note: in the following round, work 1 sc into this ch-1 closing loop).
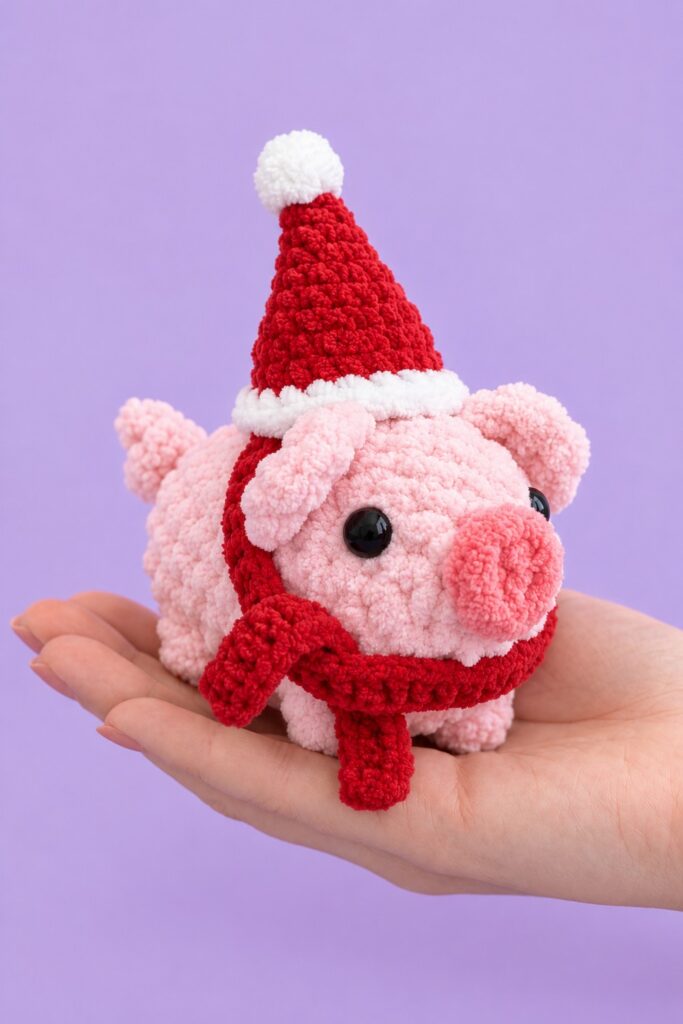
Step-by-Step Crochet Pattern
Work in continuous spirals without slip-stitching to join unless instructed otherwise. Use a stitch marker in the first stitch of each round.
1. Snout & Head
Start with Bright Pink yarn:
Rnd 1: Ch 2, work 6 sc into the 2nd chain from the hook [or 6 sc into a Magic Ring]. On the 6th sc, do not complete the final pull-through in bright pink (leave 2 loops on hook). Cut the bright pink yarn leaving a long tail (~25 cm / 10 inches) and bring this tail out to the front/outside of the work (you will use it later to finish the snout). Join Light Pink yarn on the final pull-through. (6)
Rnd 2: In BLO, work 6 sc around in light pink. (The unused front loops will remain on the outside to frame the snout later). (6)
Tie the short yarn tails inside the work securely.Rnd 3: 6 inc (2 sc in each st around). (12)
Rnd 4: [1 sc, inc] x 6. (18)
Rnds 5–6 (2 rounds): 1 sc in each st around. (18)
2. Ears & Front Legs
Rnd 7:
3 sc along the top of the head.
First Ear (worked across 2 stitches in FLO):
In the front loop of the 1st stitch: (1 sc, 1 hdc, 1 dc).
Ch 1.
In the front loop of the 2nd stitch: (1 dc, 1 hdc, 1 sc).
3 sc normally (through both loops) between the ears on the forehead.
Second Ear (worked across 2 stitches in FLO):
In the front loop of the 1st stitch: (1 sc, 1 hdc, 1 dc).
Ch 1.
In the front loop of the 2nd stitch: (1 dc, 1 hdc, 1 sc).
4 sc down the side toward the belly.
Front Leg 1: Work a 4-dc Bobble stitch in the next st, ch 1 to lock.
2 sc along the belly.
Front Leg 2: Work a 4-dc Bobble stitch in the next st, ch 1 to lock. (18 body sts)
3. Working Behind the Ears & Over Legs
Rnd 8:
3 sc along the top.
Behind the 1st ear: work 2 sc in the unused back loops (BLO) of the 2 ear stitches from Rnd 7.
3 sc between the ears.
Behind the 2nd ear: work 2 sc in the unused back loops (BLO) of the 2 ear stitches from Rnd 7.
4 sc down the side.
1 sc into the ch-1 closing loop of Front Leg 1.
2 sc between the legs.
1 sc into the ch-1 closing loop of Front Leg 2. (18)
4. Finishing the Snout (Checkpoint)
Pause crocheting the body for a moment; pull up a tall loop so your active stitch doesn’t unravel.
Pick up the long bright pink yarn tail you left at Rnd 1.
Insert your hook into the remaining front loops of Rnd 1 around the rim of the snout from the outside.
Work 6 surface slip stitches (sl st) loosely through these 6 front loops around the rim.
Pull the yarn tail through to the inside of the head, knot securely, and trim any excess.
The snout is now neat, raised, and fully defined.
5. Body
Rnds 9–12 (4 rounds): 1 sc in each st around. (18)
6. Back Legs
Rnd 13:
Back Leg 1: Work a 4-dc Bobble stitch in the 1st st, ch 1 to lock.
14 sc along the body.
Back Leg 2: Work a 4-dc Bobble stitch in the next st, ch 1 to lock.
2 sc along the belly between the legs. (18 body sts)
Rnd 14: Work 18 sc around (working 1 sc into each of the leg ch-1 loops and 1 sc into every regular single crochet stitch). (18)
7. First Stuffing & Shaping Checkpoint
Using tweezers or your fingers, stuff the snout, head, and front half of the body firmly with fiberfill.
Gently fold the ears forward so they flop naturally over the face.
8. Back Shaping & Curly Tail
Rnd 15: [1 sc, dec] x 6. (12)
Rnd 16 (Decreases & Tail):
4 dec in a row (leaves 4 remaining unworked stitches in the round).
Curly Tail:
Ch 6.
Starting in the 2nd ch from hook, work 5 inc (2 sc in each chain) down the chain back toward the body (10 sc). The strip will curl naturally into a corkscrew.
Continue on the body: 2 dec across the remaining 4 stitches. (6 body sts + tail)
Rnd 17: 6 sc around the back opening (work 4 sc, flip the tail out of the way, and work the final 2 sc behind the base of the tail). (6)
9. Final Stuffing & Closing
Fasten off, leaving a tail of ~15 cm (6 inches).
Use tweezers to firmly stuff the remaining rear portion of the piggy through the small opening. Ensure the body is plump and holds its rounded shape.
Thread the yarn tail onto a yarn needle. Weave the needle through the front loops only of the remaining 6 stitches.
Pull tight like a drawstring to close the hole completely.
Insert the needle into the center of the closure, pull it out through the belly or side, knot securely, and hide the tail inside the body. Trim any excess.
Abbreviations:
mr: magic ring
sc: single crochet
sl st: slip stitch
inc: single crochet increase (2 sc in same st)
BLO: back loop only
st(s): stitch(es)
Instructions
Hat Body (Bulky Red Yarn)
Round 1: 4 sc in mr. (4 sts)
Round 2: [inc] in all 4 sts. (6 sts)
Round 3: [2 sc, 1 inc] repeat 2 times. (8 sts)
Round 4: [3 sc, 1 inc] repeat 2 times. (10 sts)
Round 5: [4 sc, 1 inc] repeat 2 times. (12 sts)
Round 6: [5 sc, 1 inc] repeat 2 times. (14 sts)
Round 7: [6 sc, 1 inc] repeat 2 times. (16 sts)
Round 8: [7 sc, 1 inc] repeat 2 times. (18 sts)
Round 9 (BLO): In BLO only: [8 sc, 1 inc] repeat 2 times. (20 sts)
Round 10: 20 sc around. (20 sts)
Round 11: 22 sl st around (work 20 sl st plus 2 extra sl st to reach 22). (22 sts)
Fasten off and weave in the ends.
Attaching the Faux Pom-Pom
Thread the securing threads or loops from the 2 cm x 2 cm faux pom-pom onto a tapestry needle.
Insert the needle into the very top tip of the hat (Round 1) from the outside to the inside.
Turn the hat inside out and tie the threads securely to the starting tail of Round 1.
Weave in the excess tails on the inside of the hat to finish.
10. Attaching the Eyes
Place the 8 mm black eyes on the sides of the head between Rnds 4 and 5, positioned symmetrically just in front of each ear.
Apply a small dab of hot glue to the back/stem of each eye and press firmly into the stitches until secure.
Your cute little plush pig is finished and ready to snuggle!
See More:
Tester Call: How to Crochet No-Sew Mr. Santa Squidward Plushie for Gifting
How to Crochet Festive Mini Pink Bird Wearing Scarf & Santa Hat for Gifting
How to Crochet Angry Slouchy Santa Hat Owl Plushie Bag Charm (Grinch Owl)
How to Crochet Slouchy Santa Hat Grinch Baby Yoda Plushie for Gifting
How to Crochet Funny Santa Dress Mouse Plushie Fidget Toy Gift for Christmas
How to Crochet Miniature No-Sew Mr. Capy in Santa Hat Plushie Christmas Gift
Tester Pattern: How to Crochet Santa Hat Grinch Turtle Plushie for Christmas Gifting
Tester Call: Crochet Santa Mr. No-Sew Dino Grinch Plushie for Gifting
Tester Call: How to Crochet Mini No-Sew Grinch Santa Octopus Plushie for Kids