Show support for Marifairyland!
In today’s part of crocheting your favorite animal plushies in a removable Santa hat and scarf, learn how to crochet this little rat (or mouse) in two different sizes: a Large version (approx. 10 cm / 4 inches) and a Small baby version (approx. 8 cm / 3.2 inches). It is wearing a large crochet slouchy Santa hat and a little scarf that you can crochet in less than 30 minutes.
What makes this crochet Santa hat mouse so unique and fun is its clever, nearly seamless construction: the body, all four paws with tiny toes, the long tail, the neck, and the head are crocheted in one continuous piece from the bottom up to the tip of the nose!
The neck is left unstuffed so that it can be folded and tacked down to give the rat its characteristic curious, hunched posture. Only the ears are made separately and sewn on, making this a fast, satisfying, and charming amigurumi project. Now, continue reading for learning more about this UNIQUE crochet Santa hat accessorized buddy plush!
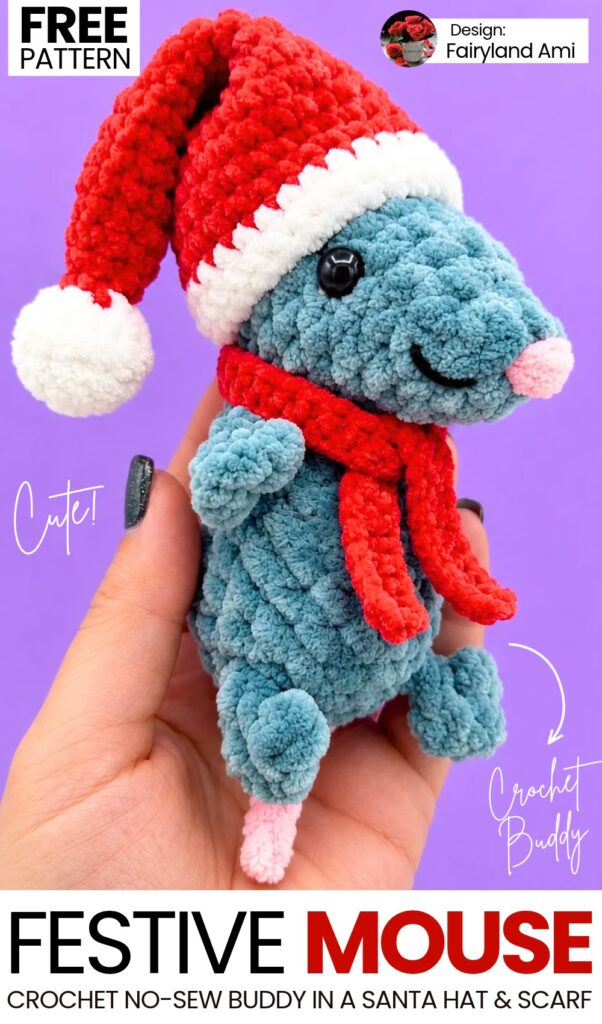
Pattern to Crochet the Plush Miniature Mouse Plushie in a Santa Hat and Scarf
Skill Level: Beginner – Level 5
Materials & Tools
Plush / Chenille Super Bulky Yarn (e.g., YarnArt Dolce or Himalaya Dolphin Baby, 100g / 120m):
Main Color: Dark Grey / Blue-Grey or Light Grey.
Secondary Color: Baby Pink (for ears, tail, and nose).
Crochet Hook: 4.5 mm.
Safety Eyes / Half-Bead Eyes:
Large Rat: 8 mm – 9 mm black eyes.
Small Rat: 7 mm black eyes.
Stuffing: Polyester fiberfill (hollofiber).
Notions: Tapestry needle, stitch marker, scissors, tweezers (for stuffing narrow areas), and a hot glue gun (if using half-beads).
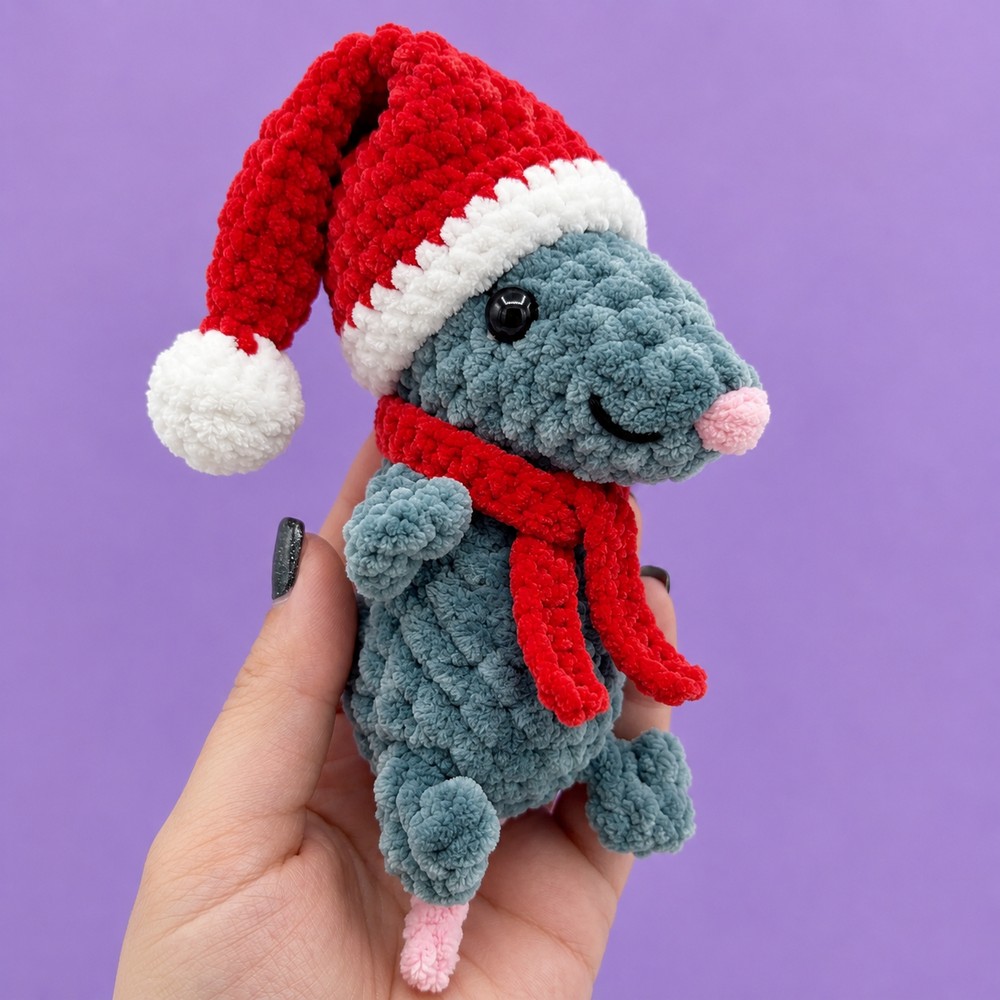
For the Santa Hat
Yarn A: White plush yarn (chunky/bulky weight)
Yarn B: Skinny plush yarn (main hat color)
Yarn C: White yarn (DK or light weight for brim)
Hooks: 4.0mm crochet hook and 3.0mm crochet hook
Notions: Fiberfill stuffing, stitch marker, yarn needle
Abbreviations (US Terms)
ch: Chain stitch
sc: Single crochet
inc: Increase (2 sc in the same stitch)
dec: Decrease (single crochet 2 stitches together)
sl st: Slip stitch
st(s): Stitch(es)
FLO: Front loop only
Learn Crocheting the Rat Plush
Pattern 1: Large Rat (approx. 10 cm / 4 in)
Worked in continuous spiral rounds from the bottom up. Do not join rounds; use a stitch marker.
Body, Limbs, Tail & Head
Start with Grey plush yarn and 4.5 mm hook.
Round 1: Ch 2, work 6 sc into the 2nd chain from hook. [6]
Round 2: 6 inc (2 sc in each st around). [12]
Round 3 (Hind Legs & Tail):
4 sc.
First Hind Leg: Ch 5. In 3rd ch from hook, work 1 sl st (Toe 1). Ch 2, work 1 sl st into the 3rd ch from hook (Toe 2). Ch 2, work 1 sl st into the 3rd ch from hook (Toe 3). Work 1 sl st in each of the remaining 2 chain stitches down the leg back to the body.
4 sc along the body.
Second Hind Leg: Ch 5. In 3rd ch from hook, work 1 sl st (Toe 1). Ch 2, work 1 sl st into the 3rd ch from hook (Toe 2). Ch 2, work 1 sl st into the 3rd ch from hook (Toe 3). Work 1 sl st in each of the remaining 2 chain stitches down the leg back to the body.
3 sc along the body. In the next (12th) st, begin a sc in Grey, but change to Pink on the final pull-through.
Tail: With Pink, ch 15. Starting in 2nd ch from hook, work 14 sl st back along the chain. In the base stitch on the body, work 1 sl st, changing back to Grey on the pull-through.
Cut Pink yarn; tie both pink tails together securely on the inside. [12 sts around body]
Round 4: (1 sc, inc) × 6 times. (Push the legs and tail forward so they pop to the outside). [18]
Rounds 5–7 (3 rounds): 18 sc around. [18 sts per round]
Round 8: (4 sc, dec) × 3 times. [15]
Round 9: 15 sc around. [15]
Round 10 (Front Arms):
6 sc along the body.
First Arm: Ch 5. In 3rd ch from hook, work 1 sl st (Finger 1). Ch 2, work 1 sl st into the 3rd ch from hook (Finger 2). Ch 2, work 1 sl st into the 3rd ch from hook (Finger 3). Work 1 sl st in each of the remaining 2 chain stitches back to the body.
6 sc along the body.
Second Arm: Ch 5. In 3rd ch from hook, work 1 sl st (Finger 1). Ch 2, work 1 sl st into the 3rd ch from hook (Finger 2). Ch 2, work 1 sl st into the 3rd ch from hook (Finger 3). Work 1 sl st in each of the remaining 2 chain stitches back to the body.
3 sc to end of round. [15 sts around body]
Round 11: (3 sc, dec) × 3 times. (Hold arms forward so they stay on the outside). [12]
Round 12: 12 sc around. [12]
Round 13: (2 sc, dec) × 3 times. [9]
Rounds 14–17 (4 rounds – Neck): 9 sc around. [9 sts per round]
Round 18 (Head Expansion): 9 inc (2 sc in each st around). [18]
Round 19: 18 sc around. [18]
⚠️ Stuffing checkpoint 1: Firmly stuff the lower body and chest up to the arms using tweezers. Leave the long neck (rounds 14–17) completely empty/unstuffed, as it needs to fold over later.
Round 20: (4 sc, dec) × 3 times. [15]
Round 21: 15 sc around. [15]
Round 22: (3 sc, dec) × 3 times. [12]
Round 23: 12 sc around. [12]
Round 24: (2 sc, dec) × 3 times. [9]
⚠️ Stuffing checkpoint 2: Firmly stuff the head now, shaping the forehead and cheeks. Make sure the neck remains unstuffed.
Round 25: (1 sc, dec) × 3 times. [6]
Round 26 (Snout Tip): 6 sc around. [6]
Fasten off, leaving a long yarn tail (approx. 25–30 cm) for closing the tip and shaping the head posture.
Large Rat Ears (Make 2)
Use Pink plush yarn and 4.5 mm hook.
Round 1: Ch 2, work 8 sc into the 2nd chain from hook. [8]
Round 2: 8 inc (2 sc in each st around). [16]
Sl st into the first st to finish. Fasten off, leaving a tail for sewing. Tie the starting yarn tail and ending yarn tail together in a knot, trim the shorter one, and keep the longer one for sewing.
Pattern 2: Small Baby Rat (approx. 8 cm / 3.2 in)
Body, Limbs, Tail & Head
Start with Grey plush yarn and 4.5 mm hook.
Round 1: Ch 2, work 6 sc into the 2nd chain from hook. [6]
Round 2 (Legs & Tail Base):
2 inc (4 sc).
First Hind Leg: Ch 4. In 3rd ch from hook, work 1 sl st (Toe 1). Ch 2, work 1 sl st into the 3rd ch from hook (Toe 2). Ch 2, work 1 sl st into the 3rd ch from hook (Toe 3). Work 1 sl st in the remaining 1 chain stitch back to body.
2 inc along the body (4 sc).
Second Hind Leg: Ch 4. In 3rd ch from hook, work 1 sl st (Toe 1). Ch 2, work 1 sl st into the 3rd ch from hook (Toe 2). Ch 2, work 1 sl st into the 3rd ch from hook (Toe 3). Work 1 sl st in the remaining 1 chain stitch back to body.
1 inc (2 sc), then in the next st work 1 sc, and in the next begin a sc, changing to Pink on the last pull-through.
Tail: With Pink, ch 10. Starting in 2nd ch from hook, work 9 sl st along the chain. On the 9th sl st, switch back to Grey on the final pull-through. Cut Pink yarn and knot tails inside. [12 sts around body]
Round 3: 12 sc around (keeping limbs on the outside). [12]
Rounds 4–5 (2 rounds): 12 sc around. [12 sts per round]
Round 6: 3 sc, dec, 3 sc, dec. [10]
Round 7 (Front Arms):
4 sc along the body.
First Arm: Ch 4. In 3rd ch from hook, work 1 sl st (Finger 1). Ch 2, work 1 sl st into the 3rd ch (Finger 2). Ch 2, work 1 sl st into the 3rd ch (Finger 3). Work 1 sl st in the remaining chain back to body.
5 sc along the body.
Second Arm: Ch 4. In 3rd ch from hook, work 1 sl st (Finger 1). Ch 2, work 1 sl st into the 3rd ch (Finger 2). Ch 2, work 1 sl st into the 3rd ch (Finger 3). Work 1 sl st in the remaining chain back to body.
1 sc. [10 sts around body]
Round 8: 3 sc, dec (taking the st before and after the arm), 3 sc, dec (taking the st before and after the arm). [8]
Rounds 9–12 (4 rounds – Neck): 8 sc around. [8 sts per round]
⚠️ Stuffing checkpoint 1: Stuff the body firmly. Leave the neck completely empty.
Round 13 (Head Expansion): 8 inc (2 sc in each st around). [16]
Round 14: 16 sc around. [16]
Round 15: (2 sc, dec) × 4 times. [12]
Round 16: (1 sc, dec) × 4 times. [8]
⚠️ Stuffing checkpoint 2: Stuff the head firmly.
Round 17: (2 sc, dec) × 2 times. [6]
Round 18 (Snout Tip): 6 sc around. [6]
Fasten off, leaving a long tail for closing and shaping.
Small Rat Ears (Make 2)
Use Pink plush yarn and 4.5 mm hook.
Round 1: Ch 2, work 8 sc into the 2nd chain from hook. [8]
Sl st into the first st to finish. Fasten off, leaving a tail for sewing. (The small ear has only 1 round of 8 stitches)
Assembly, Posture Shaping & Facial Details
1. Closing the Snout Tip
Thread the long tail from the snout onto a tapestry needle.
Weave the needle through the front loops only of the 6 remaining stitches at the tip of the nose.
Pull tightly to cinch the nose shut, and secure with a small knot.
2. Shaping the Neck & Head Posture (Crucial Step!)
Insert the tapestry needle into the center of the cinched nose tip and pass it all the way down through the head, bringing it out at the back of the head/neck junction (about 2–3 rounds above the neck).
Bend/fold the head forward and downward over the unstuffed neck so the head sits horizontally and looks forward over the chest.
With the needle, take a few secure stitches connecting the underside of the neck/head to the chest right between the front arms.
Pull the thread firmly to hold the head in this angled posture, take the needle out to the back of the body, knot, and bury the yarn inside the body.
3. Attaching the Eyes
Large Rat: Insert or hot-glue 8–9 mm black eyes on either side of the head between Rounds 20 and 21.
Small Rat: Insert or hot-glue 7 mm black eyes on either side of the head between Rounds 14 and 15.
4. Sewing the Ears
Position the pink ears symmetrically on either side of the head:
Large Rat: Sew between Rounds 17 and 18 (where the head widens right above the neck).
Small Rat: Sew between Rounds 12 and 13.
Curve each ear slightly forward as you sew so they look perky and cupped.
5. Embroidering the Nose
Thread a leftover strand of Pink plush yarn (from an ear tail) onto your needle.
Pass the needle through the tip of the snout (Round 26 for Large, Round 18 for Small) 2–3 times horizontally to embroider a cute, plump little pink nose.
Knot and hide the yarn tails securely inside the head.
Abbreviations
MR: Magic ring
sc: Single crochet
inc: Increase (2 sc in the same stitch)
dec: Decrease (sc 2 stitches together)
st(s): Stitch(es)
Rnd(s): Round(s)
Part 1: Top Pom-Pom / Tip
Using White plush yarn and a 4.0mm hook.
Rnd 1: 6 sc in a magic ring (6)
Rnd 2: inc in each st around (12)
Rnd 3: (3 sc, inc) x 3 (15)
Rnd 4: sc in each st around (15)
Rnd 5: (3 sc, dec) x 3 (12)
Rnd 6: dec x 6 (6)
Stuff this top section with fiberfill before moving on.
Part 2: Hat Cone Body
Switch to Skinny plush yarn and a 3.0mm hook. Continue working in continuous rounds.
Rnd 7: sc in each st around (6)
Rnd 8: sc in each st around (6)
Rnd 9: (2 sc, inc) x 2 (8)
Rnd 10: sc in each st around (8)
Rnd 11: (3 sc, inc) x 2 (10)
Rnd 12: sc in each st around (10)
Rnd 13: (4 sc, inc) x 2 (12)
Rnd 14: sc in each st around (12)
Rnd 15: (5 sc, inc) x 2 (14)
Rnd 16: sc in each st around (14)
Rnd 17: (6 sc, inc) x 2 (16)
Rnd 18: sc in each st around (16)
Rnd 19: (7 sc, inc) x 2 (18)
Rnd 20: sc in each st around (18)
Rnd 21: (8 sc, inc) x 2 (20)
Rnd 22: sc in each st around (20)
Rnd 23: (9 sc, inc) x 2 (22)
Part 3: Brim
Switch to White yarn and keep the 3.0mm hook.
Rnd 24: sc in each st around (22)
Rnd 25: (10 sc, inc) x 2 (24)
Fasten off invisibly, cut yarn, and weave in all loose ends.
Your adorable, poseable plush rat is now complete!
See More:
How to Crochet Slouchy Santa Hat Grinch Baby Yoda Plushie for Gifting
How to Crochet Miniature No-Sew Mr. Capy in Santa Hat Plushie Christmas Gift
Tester Pattern: How to Crochet Santa Hat Grinch Turtle Plushie for Christmas Gifting
Tester Call: Crochet Santa Mr. No-Sew Dino Grinch Plushie for Gifting
Tester Call: How to Crochet Mini No-Sew Grinch Santa Octopus Plushie for Kids
Tester Call: How to Crochet Amigurumi Buddy Slouchy Santa Hat Turtle Gift
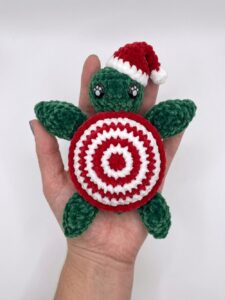
Tester Call: How to Crochet Kawaii-Eyed Red & Green Santa Hat Turtle Plushie for Gifting
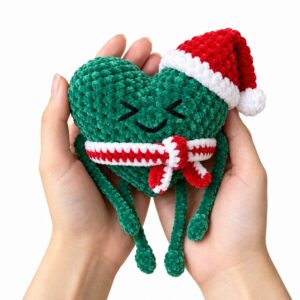
Tester Pattern: How to Crochet Slouchy Santa Hat Heart Plushie Gift with Scarf
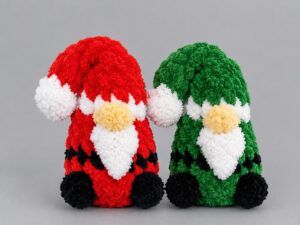
Featuring: How to Crochet Santa Costume Miniature Gnome Plushie with No-Sew Slouchy Hat