Show support for Marifairyland!
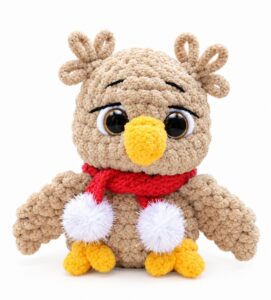
I am back with another crochet Grinch and animal custom plushie tutorial, and this one is 2-in-1 as well. Introducing the crocheted, adorable mini, no-sew angry plush owl in a Santa hat and wrapped scarf plushie that you can crochet with a step-by-step tutorial and a written pattern as well. The feet, tail, body, wings, and head of this crochet plush Grinch owl are crocheted seamlessly from the bottom up, meaning there is practically no sewing involved for the owl itself.
Thanks to the clever built-in tail at the back, the finished owl stands stably on any flat surface on its own.
You can make it as a classic woodland owl or add the miniature mortarboard graduation cap and tassel, making it a thoughtful keepsake for graduates, teachers, or students. However, I am presenting this variation with the crochet slouchy Santa hat, and the pattern for it is in the end as well.

Pattern to Crochet the Duolingo Owl Plushie for Gifting
Approximately 6.5 cm (2.5 inches) tall.
Materials & Tools
Plush / Chenille Yarn (Super Bulky / 100 g, 120 m):
Main Body Color: Light Brown / Beige (or Peach / Gray)
Accent Color: Bright Orange or Yellow (for feet & beak)
Sport / DK Weight Cotton-Acrylic Yarn (e.g., YarnArt Jeans):
Dark Charcoal / Black: For the graduation cap, tassel, and embroidered feather details
Crochet Hooks:
4.5 mm (for the plush body)
3.0 mm (for the cotton graduation cap)
Safety Eyes: 10 mm black safety eyes
Fiberfill Stuffing (Holofiber)
Tapestry / Yarn Needle (wide eye)
Stitch Marker & Scissors
Hot Glue Gun & Lighter (optional, for securing plush yarn ends and attaching the cap)

Materials for the Hat
Yarn A: DK weight yarn (main hat color)
Yarn B: White yarn (for brim and top bobble)
Hook: 2.5mm crochet hook
Notions: Stitch marker, yarn needle
Abbreviations (US Terms)
MR: Magic Ring
ch: Chain
sc: Single crochet
inc: Increase (2 sc in the same stitch)
dec: Decrease (single crochet 2 stitches together)
dc: Double crochet
sl st: Slip stitch
FLO: Front loops only
BLO: Back loops only
st(s): Stitch(es)
[ … ] x N: Repeat the bracketed sequence
Ntimes
Bobble (Foot): 2-dc cluster in the same stitch (yarn over, insert hook into st, draw up loop, yo, pull through 2 loops; yo, insert hook into same st, draw up loop, yo, pull through 2 loops; yo and pull through all 3 loops on hook, ch 1 to secure).

Are you a Beginner? Learn Crocheting Easily!
You can learn to crochet better with this crochet miniature buddy no-sew owl plushie tutorial for beginners:
The Owl Body
Use the 4.5 mm hook and plush yarn.
Legs, Base & Tail
Rnd 1: Starting with Main Body Color: ch 2, work 9 sc in the 2nd chain from hook (or 9 sc in a MR). [9]
Rnd 2: 9 inc. [18]
Rnd 3 (Feet round):
[2 sc, inc] x 2 [6]
2 sc, in the next st work 1 sc, and on the 2nd sc of the increase, pull through the Yellow yarn on the final yarn-over.
In the next st, work a Yellow Bobble (2-dc cluster), securing with ch 1 in Main Color.
1 sc, 2 inc, 1 sc (switch to Yellow on the last loop).
In the next st, work a Yellow Bobble, securing with ch 1 in Main Color.
[2 sc, inc] x 2. [24]
(Cut yellow yarn tails, knot them inside, and gently singe the ends with a lighter to stop fraying).
Rnd 4 (Tail round):
In the FLO of the 1st stitch (centered on the back): (1 sl st, ch 3, 4 dc, ch 3, 1 sl st) all in that same front loop to form the standing tail flap.
Continuing in both loops around: work 23 sc. [24]
Rnd 5:
Work 1 sc into the remaining back loop behind the tail flap from Rnd 4.
Work 23 sc around in both loops. [24]
Wings & Body
Rnd 6 (Wings round):
7 sc
Wing 1: In the FLO of the next st, work: (1 sc, 3 dc, ch 3, 1 sl st) all into the front loop.
9 sc across the front.
Wing 2 (Mirrored): In the FLO of the next st, work: (1 sl st, ch 3, 3 dc, 1 sc) all into the front loop.
6 sc to the end of the round. [24]
Rnd 7: Work 24 sc around (work into the remaining back loops behind both wings, and into both loops elsewhere). [24]
Rnd 8 (Decrease round): [2 sc, dec] x 6. [18]
Rnds 9–10 (2 rounds): 18 sc around. [18]
Eyes & Stuffing
Insert the 10 mm safety eyes between Rounds 7 and 8, spaced 4–5 stitches apart (centered evenly above the feet and 1 stitch inward from each wing).
Secure the safety backings inside.
Firmly stuff the body with fiberfill, pressing down toward the base so the bottom stays flat and sits neatly on its feet and tail.
Closing the Head & Making the Ears
Rnd 11: Work approximately 7 sc until you reach the right side edge of the head.
Flatten the top opening so the front and back edges line up horizontally. You will now crochet across both layers at once:
Ear 1: ch 3, insert hook through both layers of the first stitch, 1 sl st.
Work 8 to 9 sc across the top, joining both layers together.
Ear 2: In the final corner stitch, ch 3, 1 sl st into the corner.
Fasten off, leaving a 25 cm yarn tail for facial embroidery.
Abbreviations
MR: Magic ring
sc: Single crochet
inc: Increase (2 sc in the same stitch)
ch: Chain stitch
st(s): Stitch(es)
Rnd(s): Round(s)
Bobble: 4 or 5 double crochet cluster in the same stitch/ring
Part 1: Hat Body
Using DK weight yarn and a 2.5mm hook.
Rnd 1: 6 sc in a magic ring (6)
Rnd 2: sc in each st around (6)
Rnd 3: 5 sc, inc (7)
Rnd 4: 6 sc, inc (8)
Rnd 5: 7 sc, inc (9)
Rnd 6: 8 sc, inc (10)
Rnd 7: 9 sc, inc (11)
Rnd 8: 10 sc, inc (12)
Rnd 9: 11 sc, inc (13)
Rnd 10: 12 sc, inc (14)
Rnd 11: (6 sc, inc) x 2 (16)
Rnd 12: (7 sc, inc) x 2 (18)
Rnd 13: (8 sc, inc) x 2 (20)
Rnd 14: (9 sc, inc) x 2 (22)
Rnd 15: (10 sc, inc) x 2 (24)
Rnd 16: 23 sc, inc (25)
Part 2: Brim
Switch to White yarn, keeping the 2.5mm hook.
Rnd 17: sc in each st around (25)
Rnd 18: 24 sc, inc (26)
Rnd 19: (12 sc, inc) x 2 (28)
Fasten off invisibly and weave in ends for the hat body.
Part 3: Top Bobble Topper
Using White yarn and a 2.5mm hook.
Attach White yarn directly to the top tip (Rnd 1 magic ring) of the hat with a slip stitch.
Work 1 Bobble stitch directly into the tip.
Ch 1 to lock the bobble in place.
Fasten off, pull tight, and weave in all remaining loose yarn ends.
Facial Details & Finishing
Brows:
Thread the remaining plush body tail onto your tapestry needle.
Bring the needle out diagonally above the eye and stitch downward across the top-inner edge of each eye to form signature determined/furrowed owl eyebrows. Knot and hide the yarn tail inside the body.
Beak:
Thread a strand of yellow/orange plush yarn.
Embroider a neat inverted triangle or “V” stitch centered directly between the eyes. Tie off the tails together and hide them inside the body.
Chest Feathers:
Thread a strand of dark charcoal/black cotton yarn.
Embroider small, scattered “V” stitches (chevrons) across the belly and a couple on the back to mimic plumage feathers. Tie off and conceal the ends.
Attaching the Cap (Optional):
Place a tiny pinch of fiberfill inside the cap’s cone base.
Angle the cap over one ear. Apply a dab of hot glue underneath to fix it in place, then use the black yarn tail and a tapestry needle to stitch around the base of the cone, securing it firmly to the head.
See More:
How to Crochet Slouchy Santa Hat Grinch Baby Yoda Plushie for Gifting
Tester Pattern: How to Crochet Santa Hat Grinch Turtle Plushie for Christmas Gifting
Tester Call: Crochet Santa Mr. No-Sew Dino Grinch Plushie for Gifting
Tester Call: How to Crochet Grinch & Frog Festive Hat Baby Mushroom Plushie for Gifting
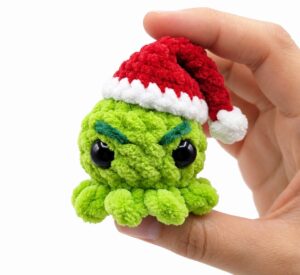
Tester Call: How to Crochet Mini No-Sew Grinch Santa Octopus Plushie for Kids
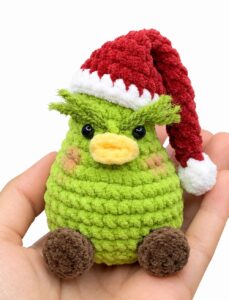
Tester Call: How to Crochet Grinch Pear Miniature Christmas Plushie for Gifting
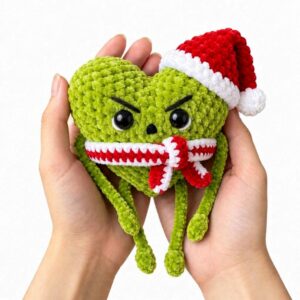
Tester Call: How to Crochet Grinch Christmas Gift Plushie for Kids
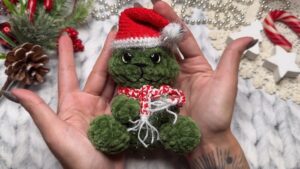
How to Crochet A Plush Grinch in a Santa Hat & Peppermint Scarf
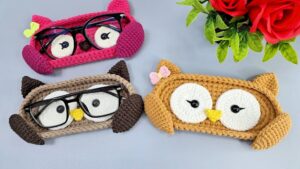
Featuring: How to Desk Decoration Mr. Owl Eyeglasses Case for Festive Gifting