Author: Talha
I am a crochet designer, macramé maker and a crafter who also loves doing MATH.
Since the beginning of the “crochet basics series”, I’ve been stressing the downsides of using the chain stitch start for working in the rounds. So, in this tutorial, I decided to show you an easy way to attach a magic ring to a crochet hook in just 8 simple steps so that you can practice it early-on.
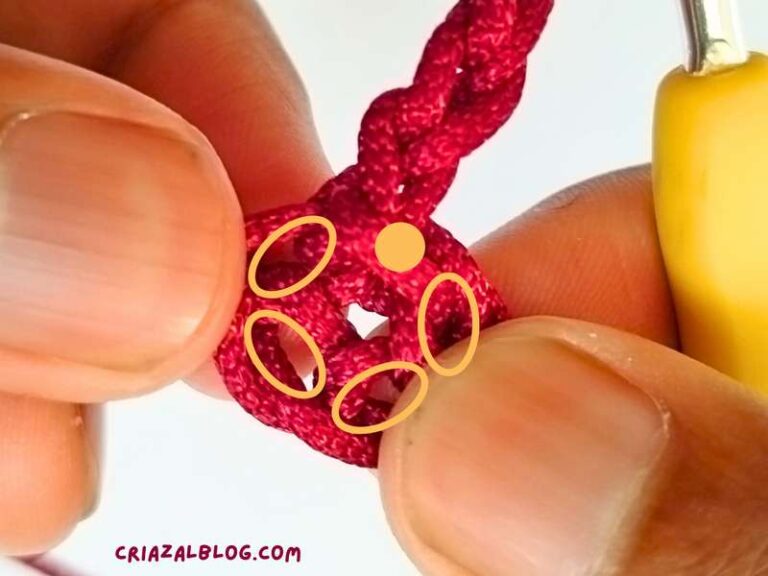
This alternative knot does not leave a hole in the centre; it is easy to fit as many stitches inside without brute force, and the centre remains perfectly flat instead of getting bulky. I will show you the method I use myself, and found it to be the most manageable as a beginner.
A magic ring is also called a magic knot, a magic loop, a magic ring, and sometimes an adjustable ring. Similar to the slip knot, there is a tail below the magic ring that can be pulled to adjust the loop size. You can also work on projects like a basic crochet heart, a hexagon, and other motifs without making a bulky spot in the centre.
My early experience
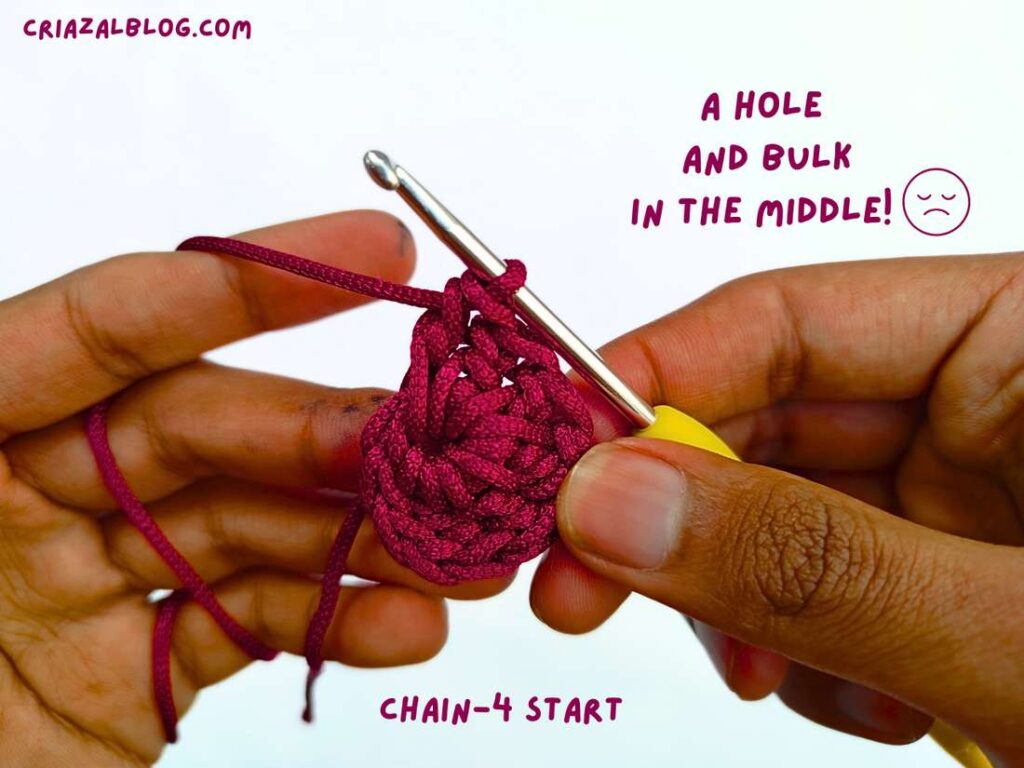
I once tried crocheting a heart using a chain-4 start, and it resulted in a kinda 3D heart from the middle, even though I expected it to be flat!
While there are multiple ways to demonstrate its making, I think you should always stick to the most obvious and manageable way.
For instance, “slip knot magic ring” is a pretty clever idea, but it has a higher chance of mistakes.
| Feature | Chain Stitch Start | Magic Ring Start |
Step-by-Step Instructions: Crochet A Magic Ring
Note: These pictures show right-handed, but the written guide is for both.
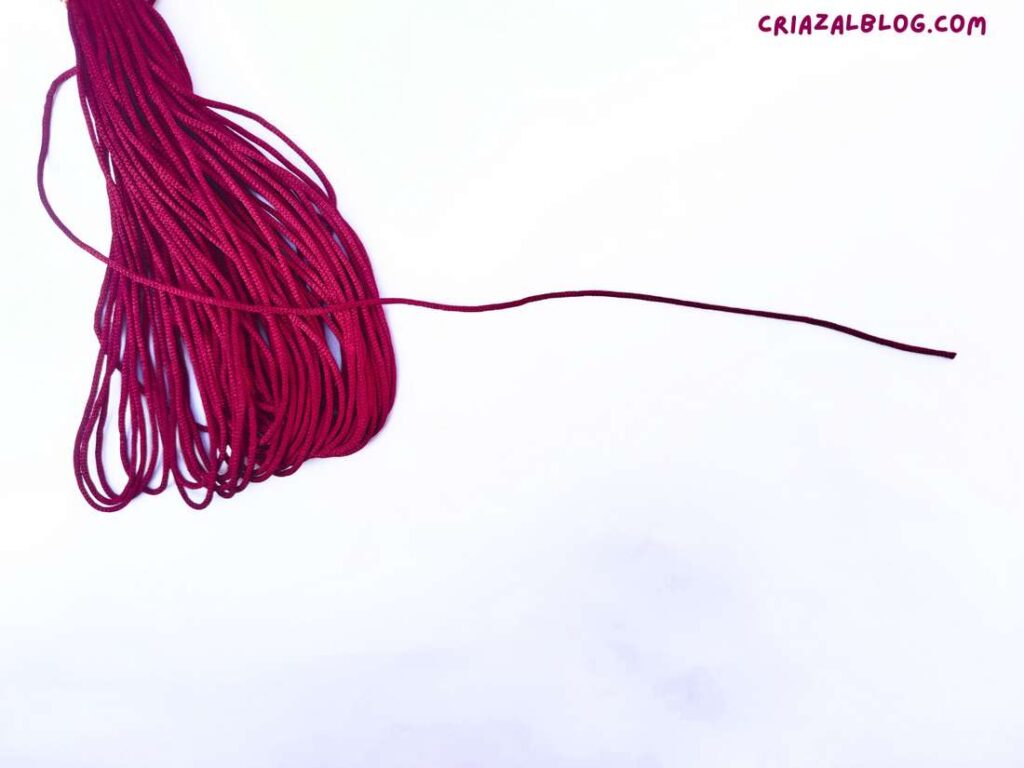
- Step #1: Pull about 20cm of yarn from the skein.

- Step #2: With your dominant hand, wrap the yarn around the index finger and pinch the tail end with your thumb and the middle finger. Grip the ball end with your pinky and ring finger.
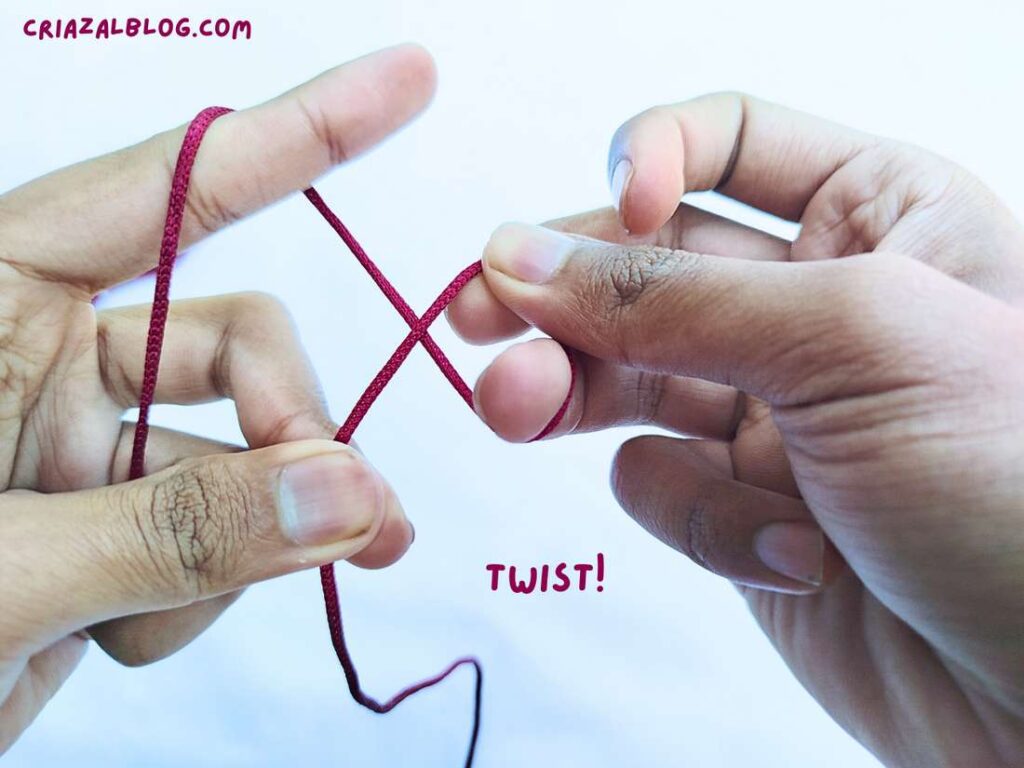
- Step #3: With your dominant hand, twist the yarn between your index finger and the fingers pinching the tail end to make a loop.
Note: To carry out this step, let a little extra yarn unravel from the skein.
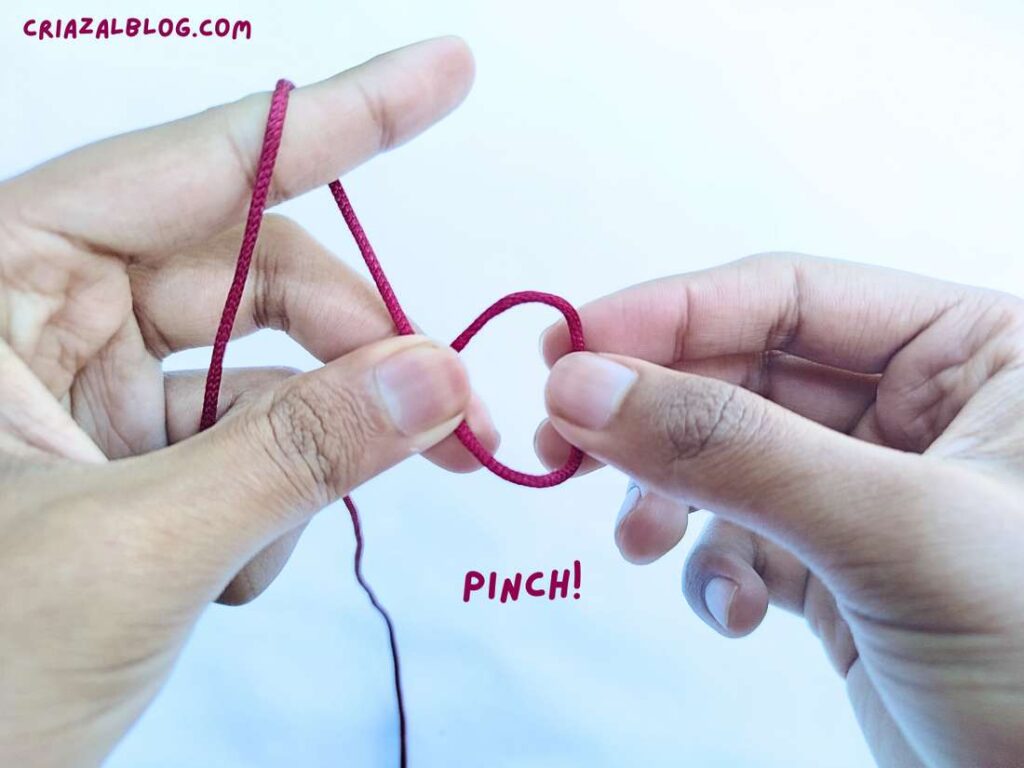
- Step #4: Unpinch the tail end and no pinch the crossing of the loop using the same two fingers.
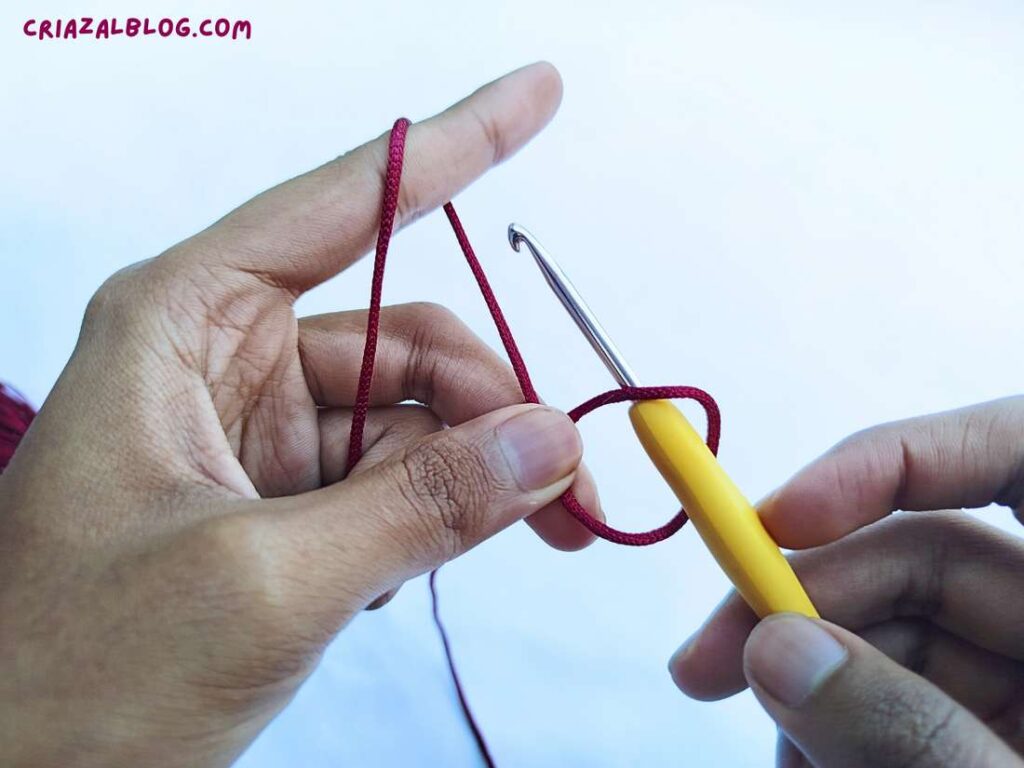
- Step #5: Now, let’s introduce the crochet hook by passing it through the loop we made earlier.
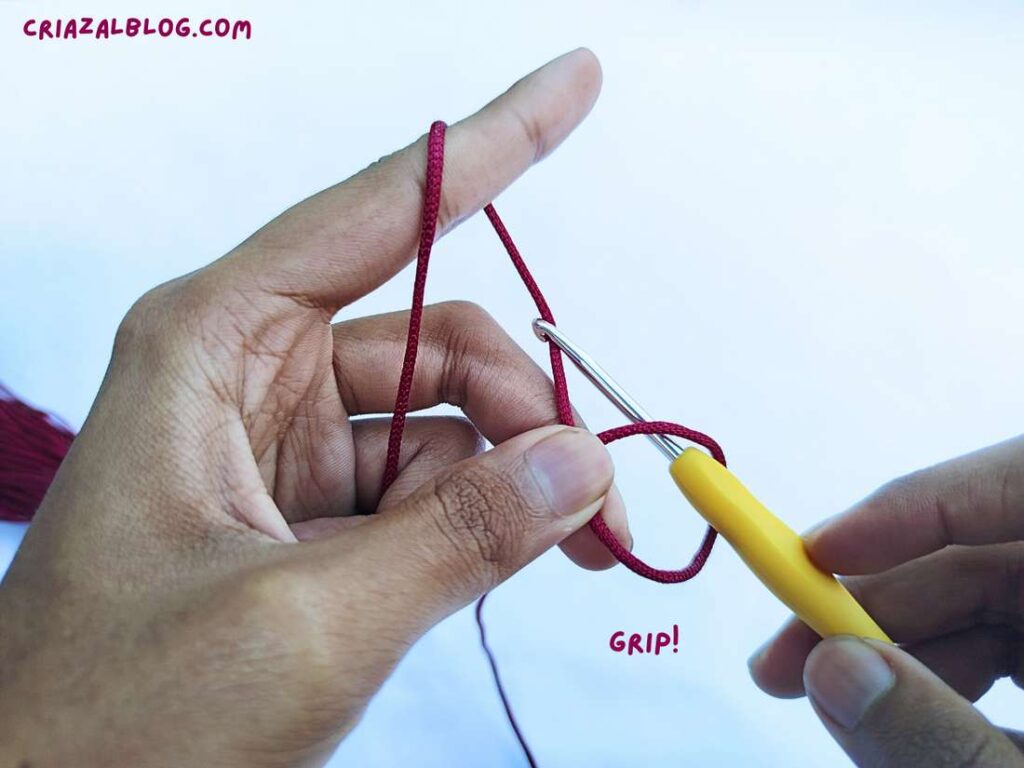
- Step #6: Grip the yarn between the fingers from the top with the hook.
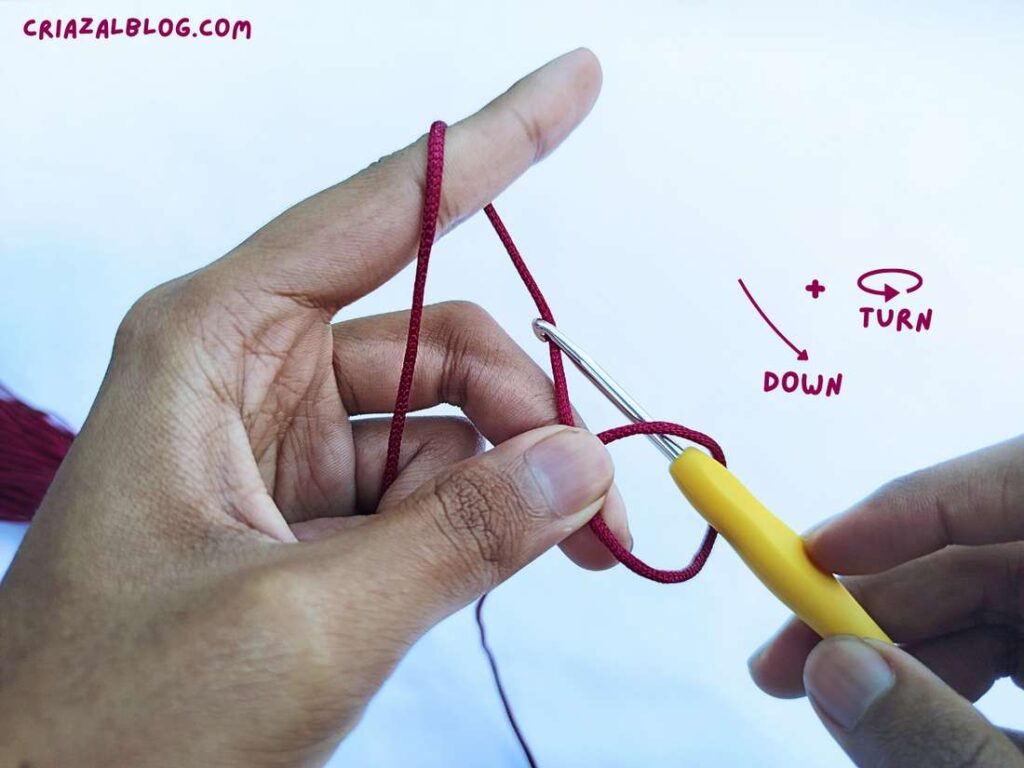
- Step #7: Pull the yarn through the loop while keeping the loop gripped, and rotate the crochet hook back to front just after passing through the loop.
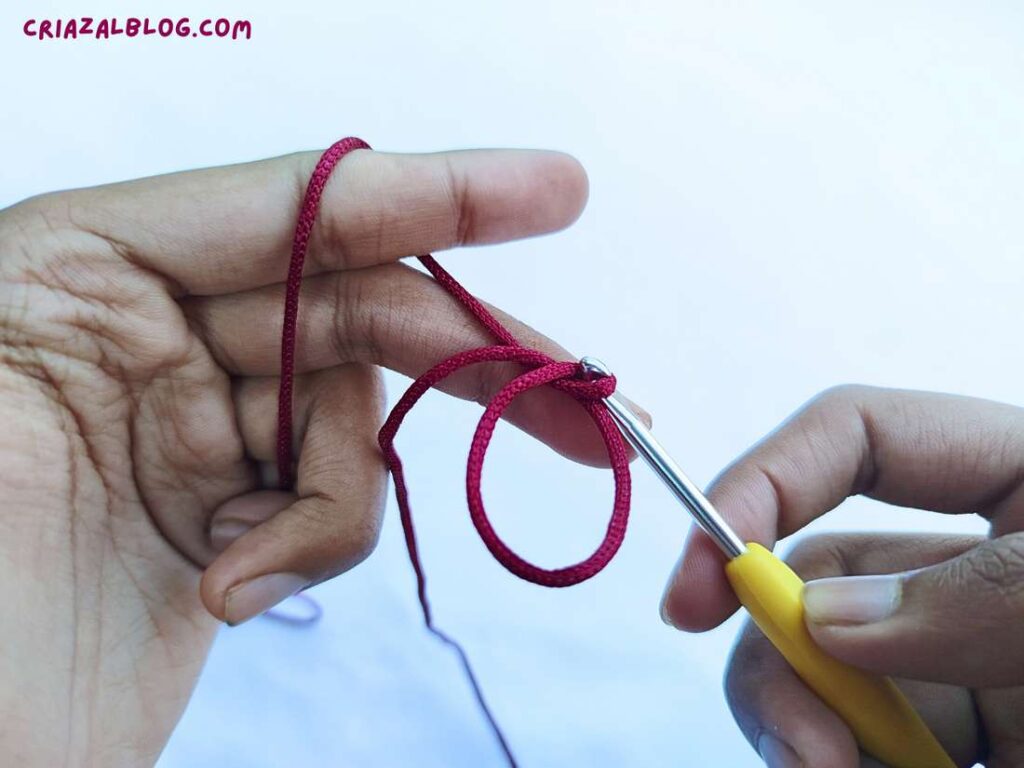
- Step #8: Be sure to have a closed loop on the crochet hook.
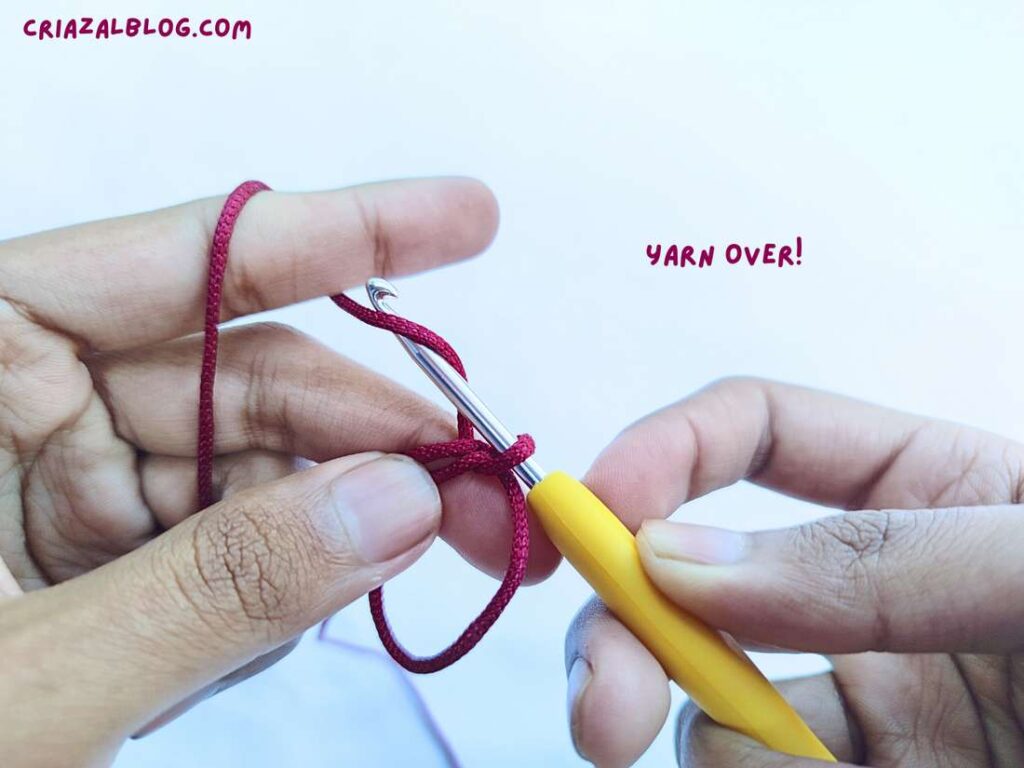
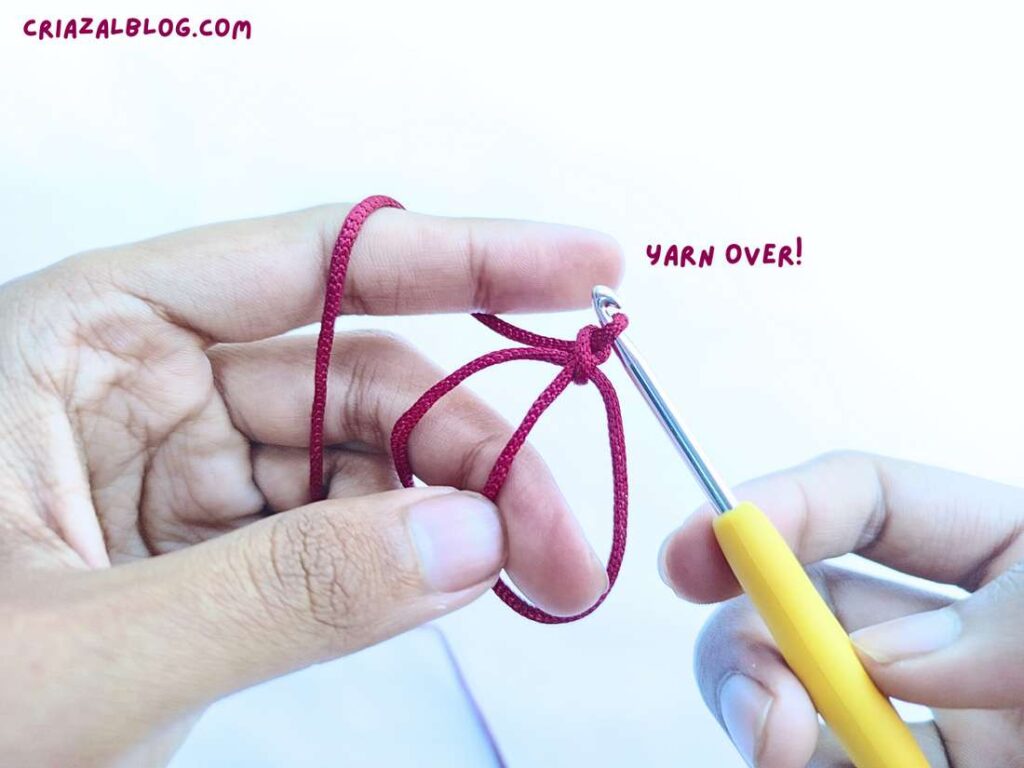
- Step #9: Yarn over and pull through the loop on the throat of the crochet hook.
Tips for Working in the Magic Ring:
Working in the magic ring is actually a bit more involved, especially for the first few stitches. It can sometimes unravel without intention. A rule of thumb is to grip the loop in the recommended way and pinch the loops after pulling a loop on the hook.
Was this tutorial helpful? Tell me in the comments
Your feedback is a great way for us to improve my crochet tutorials. So, share your thoughts on whether you tried this one or not, and highlight the weak points.