

This is part 2 of crocheting the Christmas assortment ring plushies with FREE patterns. Today, learn how to crochet this CUTE green Christmas character wearing a slouchy Santa hat plushie ring with a FREE written pattern. It has the same angry eyebrows that make it the BEST anti-stress plushie gift you can crochet this year!
You can crochet this Christmas Grinch plushie donut in less than 30 minutes by following the same pattern.
WE will be trying to crochet the same green Christmas character as the crocheted green character dumpling plushie. Both are equally cute and wear the Santa hat. Now, you can continue reading to learn more about this new crochet festive donut plush project!
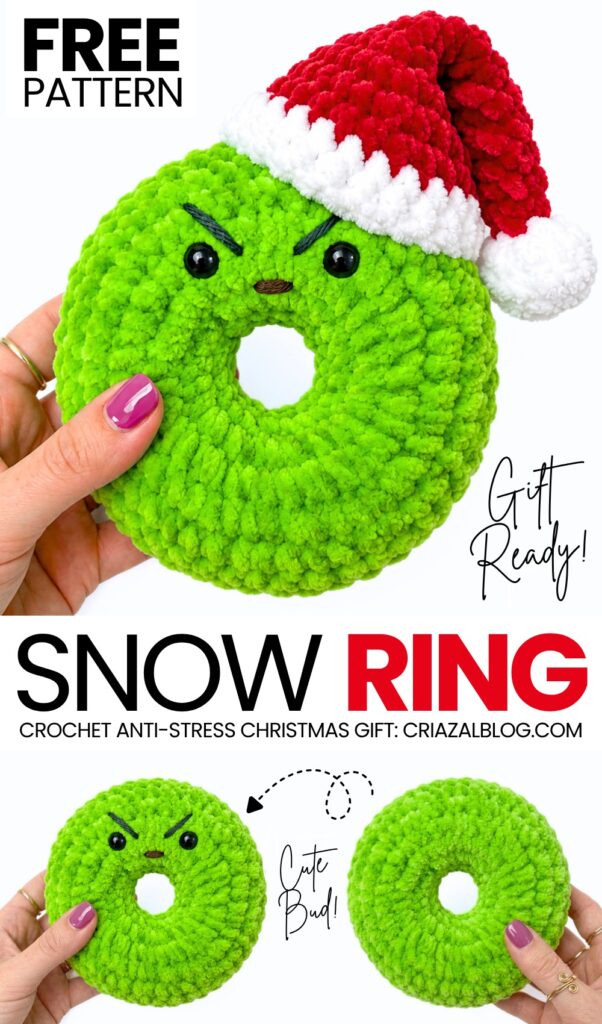
Grumpy Green Santa Donut Amigurumi Pattern
Pattern Details & Materials
Skill Level: Easy / Beginner
Terminology: US Crochet Terms
Recommended Yarn: Super Bulky Chenille / Plush Yarn (e.g., Premier Parfait Chunky or Hobbii Baby Snuggle)
Color A: Lime Green / Apple Green (Donut base)
Color B: Red (Hat body)
Color C: White (Pom-pom and Hat brim)
Embroidery Thread / Fine Yarn:
Dark Green or Black: For eyebrows
Dark Brown: For nose stitch
Hook Size: 4.25 mm (US G/6)
Tools & Notions:
10mm – 12mm Black safety eyes
Yarn needle (tapestry needle)
Polyester fiberfill stuffing
Stitch marker
Scissors
Stitch Abbreviations
| Abbreviation | Meaning |
| Ch | Chain |
| MR | Magic Ring |
| SC | Single Crochet |
| Inc | Increase (2 single crochet stitches in the same stitch) |
| Dec | Decrease (Crochet 2 stitches together) |
| Sl st | Slip Stitch |
| St(s) | Stitch(es) |
| (…) x n | Repeat instructions within parentheses n times |
| [Count] | Total stitch count at the end of the round |
Donut Panels (Make 2)
Make 2 identical panels in Color A (Lime Green).
Important Yarn Tail Note:
For Panel 1, leave a 12-inch yarn tail before your slip knot and an 18–24 inch tail when finishing for seaming.
For Panel 2, start and finish with standard short tails.
Instructions (Panels 1 & 2):
Initial Chain: Slip knot, Ch 20. Form a ring by making 1 SC directly into the 1st chain made (ensure ring is not twisted).
Round 1: (4 SC, Inc) × 4 [24 sts]
Round 2: (3 SC, Inc) × 6 [30 sts]
Round 3: (4 SC, Inc) × 6 [36 sts]
Round 4: (5 SC, Inc) × 6 [42 sts]
Round 5: (6 SC, Inc) × 6 [48 sts]
Rounds 6–8 (3 rounds): SC in each stitch around [48 sts]
Fasten off with a Sl st to the next stitch and cut yarn.
21-Round Santa Hat Pattern
Starts at the tip of the pom-pom and works down to the brim.
Pom-Pom (Color C: White)
Round 1: 6 SC in a Magic Ring [6 sts]
Round 2: 6 Inc [12 sts]
Round 3: 12 SC [12 sts]
Round 4: 6 Dec [6 sts]
(Lightly stuff the pom-pom ball with fiberfill before changing colors).
Hat Body (Color B: Red)
Round 5: 6 SC [6 sts]
Round 6: (1 SC, Inc) × 3 [9 sts]
Round 7: 9 SC [9 sts]
Round 8: (2 SC, Inc) × 3 [12 sts]
Round 9: 12 SC [12 sts]
Round 10: (3 SC, Inc) × 3 [15 sts]
Round 11: 15 SC [15 sts]
Round 12: (4 SC, Inc) × 3 [18 sts]
Round 13: 18 SC [18 sts]
Round 14: (5 SC, Inc) × 3 [21 sts]
Round 15: 21 SC [21 sts]
Round 16: (6 SC, Inc) × 3 [24 sts]
Round 17: (3 SC, Inc) × 6 [30 sts]
Round 18: (4 SC, Inc) × 6 [36 sts]
Hat Brim (Color C: White)
Round 19: 36 SC [36 sts]
Round 20: (5 SC, Inc) × 6 [42 sts]
Round 21: 42 SC [42 sts]
Fasten off, leaving a long white yarn tail (approx. 18 inches) for slouched shaping and attaching to the donut.
Nose & Face Embroidery Guide
Safety Eyes Placement
Take Panel 1 (front face).
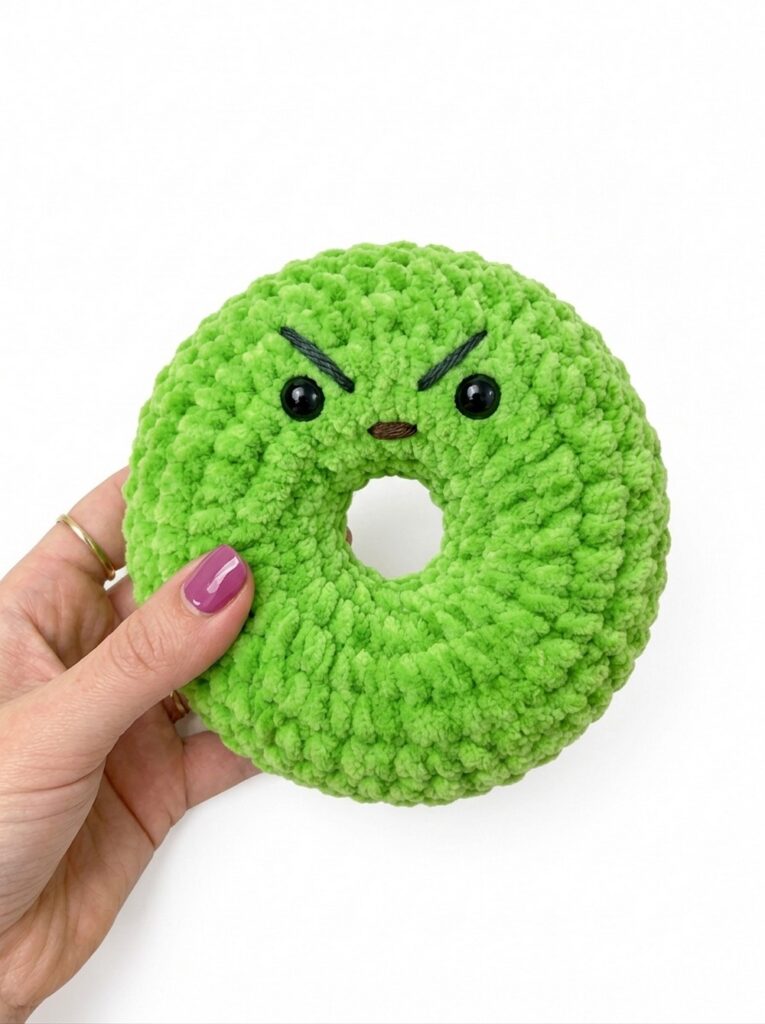
Insert 10mm–12mm black safety eyes between Rounds 6 and 7, positioned about 4 to 5 stitches apart above the top curve of the center hole. Snap washers securely on the wrong side.
Nose Options
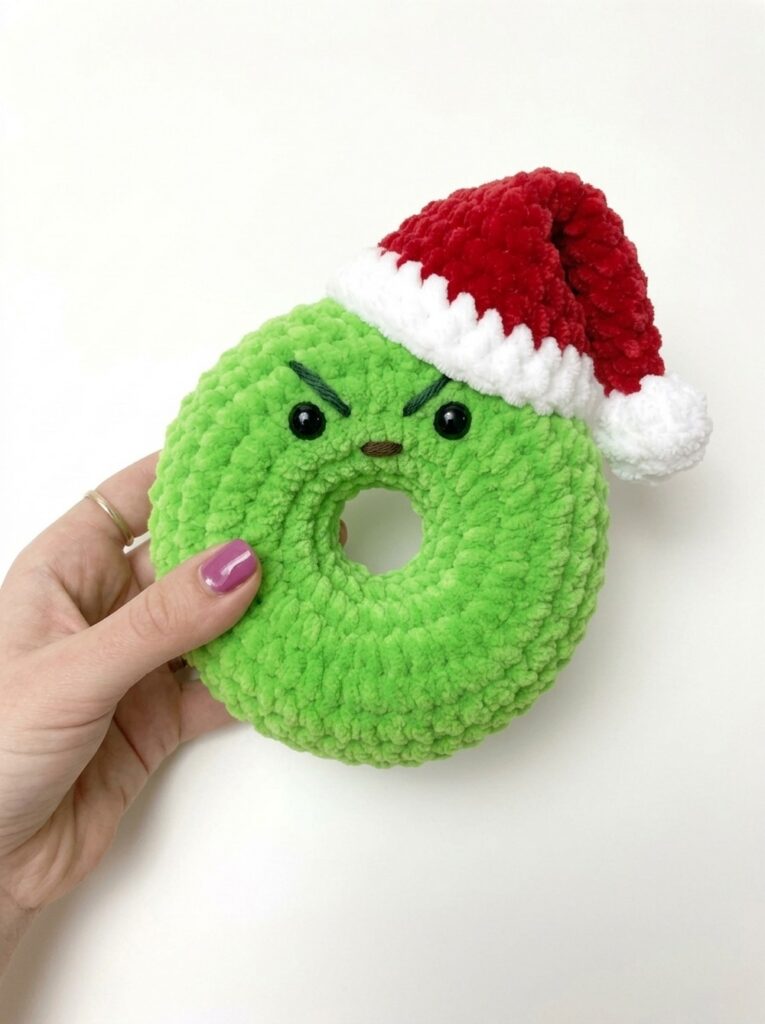
Embroidered Nose (as shown in image): Thread a tapestry needle with dark brown embroidery thread or yarn. Stitch a small, dense horizontal bar (about 1 to 1.5 stitches wide) centered directly between/below the safety eyes.
Crocheted Nose Option: If you prefer a crocheted piece, work
4 SC in a MRusing brown yarn, Sl st to the 1st st, fasten off, and sew flat between the eyes.
Angry Grinch Eyebrows
Thread dark green or black yarn/embroidery thread into your tapestry needle.
Embroider two thick, straight lines slanting downward toward the center nose area:
Start each eyebrow about 2 rounds above the outer corner of each eye.
Angle the inner point sharply downward toward the inner corner of the eye.
Tie off all embroidery tails securely on the inside/wrong side of Panel 1.
How to Slouch the Hat
To achieve the classic bent/folded Santa hat appearance:
Fold the Cone: Take the completed red hat cone and fold the narrow upper portion (Rounds 1–12) sharply down along the side of the hat so the pom-pom rests against or near the white brim on the right side.
Tack in Place: Thread a needle with a piece of red yarn (or the white pom-pom tail). Pass the needle through the inner layer of the fold near the bend and through the side of the pom-pom/brim to catch a few hidden stitches.
Knot & Secure: Pull snug so the fold holds its slouched shape permanently, then tie off and hide the thread inside the hat cone.
Assembly & Finishing
Sew Inner Ring: Place the front green panel (with face details) and back green panel wrong sides together. Use the long center yarn tail to whipstitch/mattress stitch the inner chain edges of both panels together st-by-st around the hole. Tie off inside.
Sew Outer Edge & Stuff: Thread the outer green yarn tail. Align the 48 outer stitches of both panels and sew them together through both loops. When about 3/4 of the perimeter is joined, stuff firmly with polyester fiberfill. Finish seaming the outer edge closed, weave in ends, and snip.
Attach Hat: Position the slouched Santa hat tilted onto the top right side of the green head, slightly overlapping the upper curve. Using the long white tail from Round 21, whipstitch the white brim securely to the top stitches of the green donut. Weave in all remaining yarn tails.


