Author: Talha
I am a crochet designer, macramé maker and a crafter who also loves doing MATH.
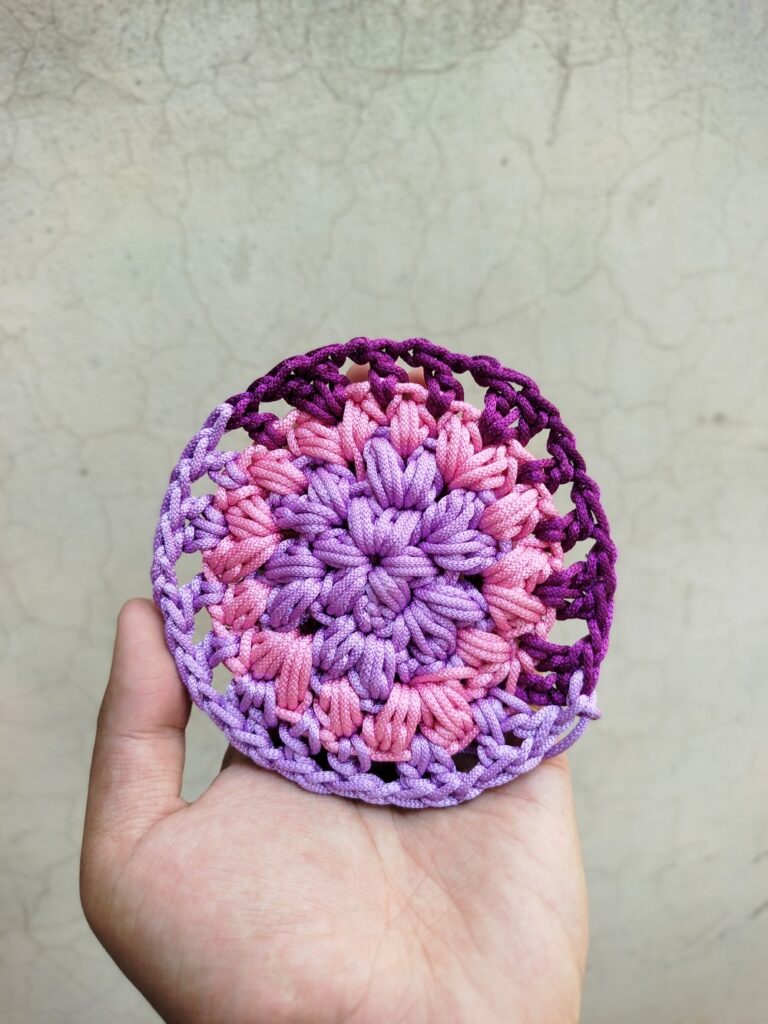
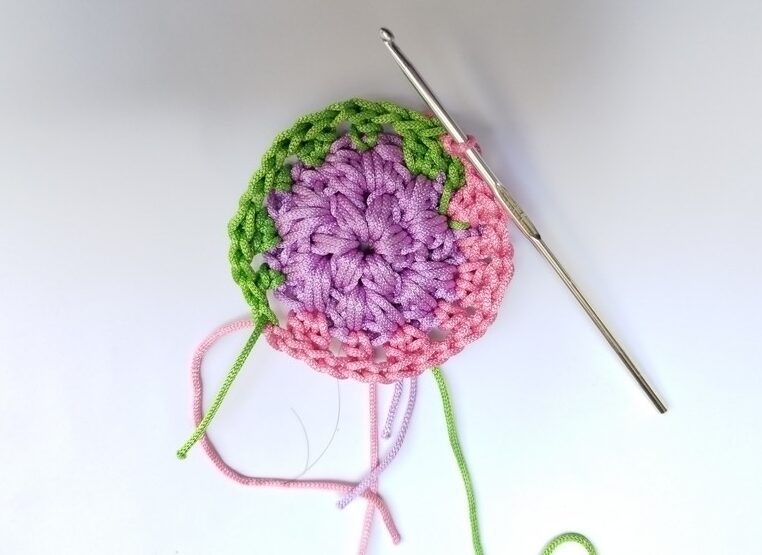
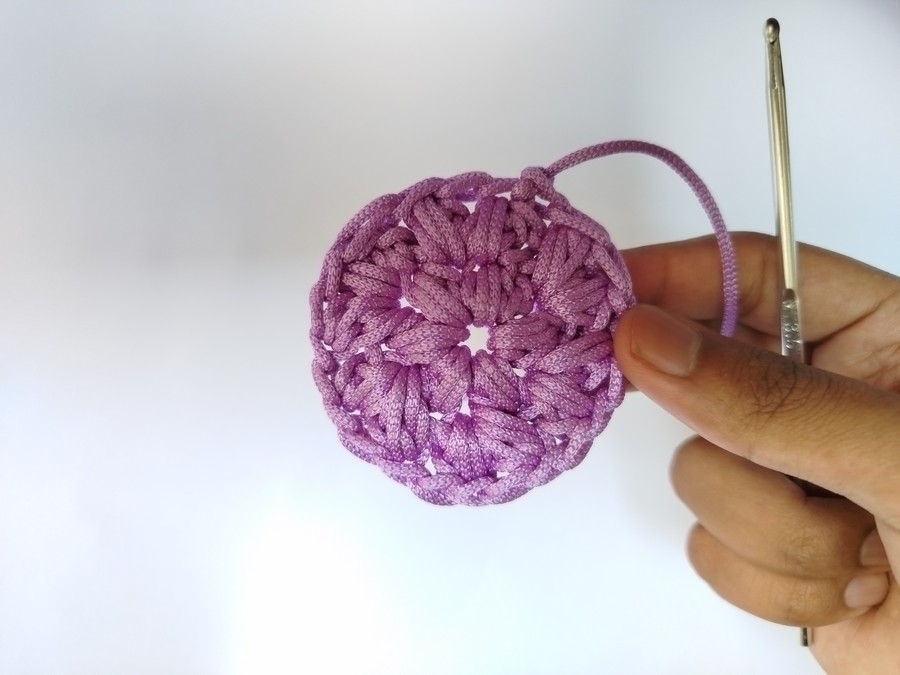
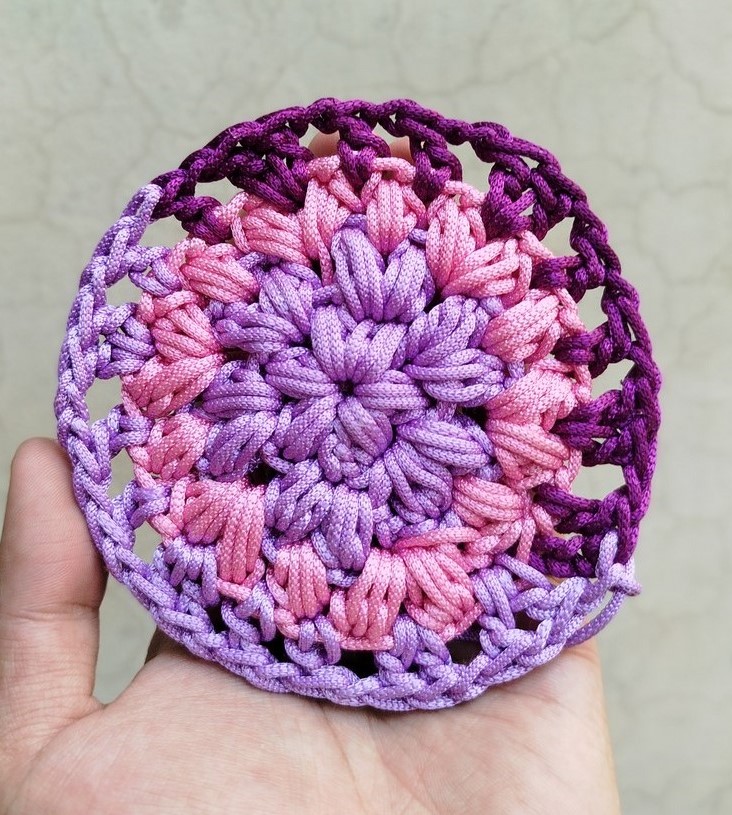
I made this crochet CANDY BUSRT puffy coaster as a practice project while learning how to crochet a circle using puff stitch. But with my addition of double crochet mesh row as an edging that also has a colorwork of half light purple & half dark purple stitches and my candy burst color-combo, I could not resist but to share it as a standalone crochet coaster project for summer. And as I always say, I love this crochet coaster of mine!
With teaching you how to work the basic stitch like double crochet around a textured stitch, changing the color within the round and the puff V-stitch, it is a pretty wholesome project for intermediates. I sometimes, put it over my computer table, replacing mandala SUN coaster as it feels much cushiony when I put my coffee cup over it.
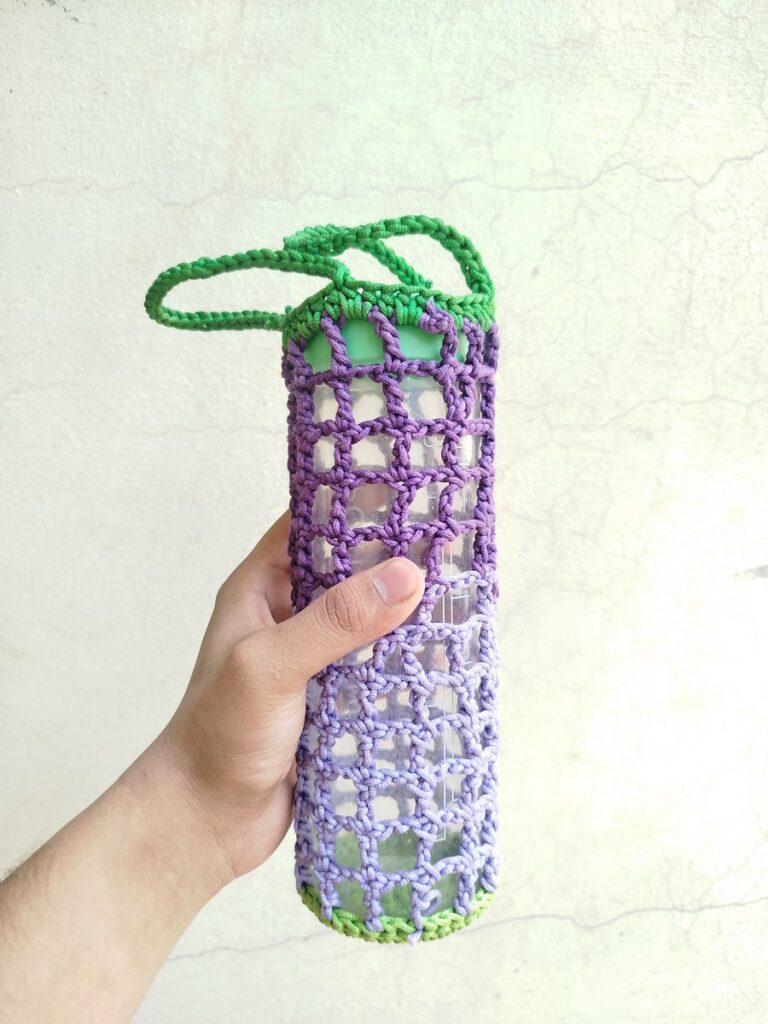
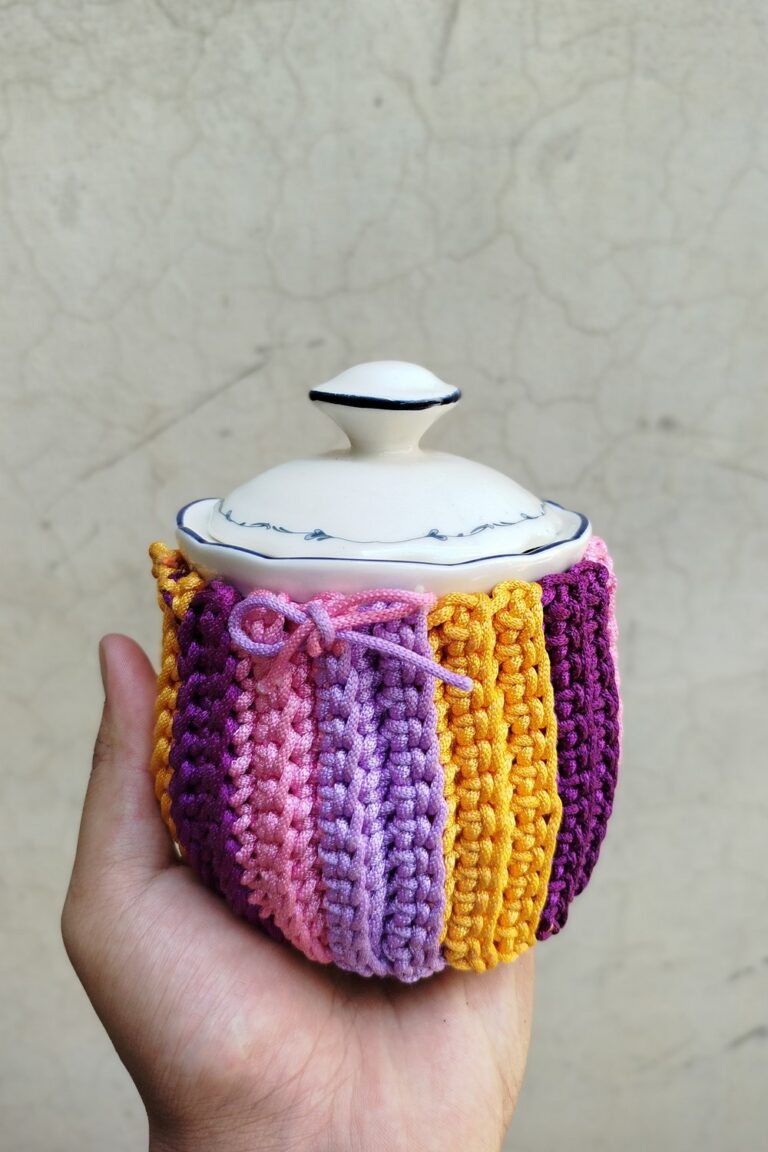
Well, don’t miss my sugar pot & mug cozy which I crocheted in the same color scheme. You can practically make it in less than 45 minutes once you master the right way to do puff stitch. I will teach you in my sample swatch, first the puff stitch, then how to work it in rounds, magic increase formula and finally, my coaster. So, make it for your coffee table, for sure!
The Process I Followed to Crochet this Puffy Coaster
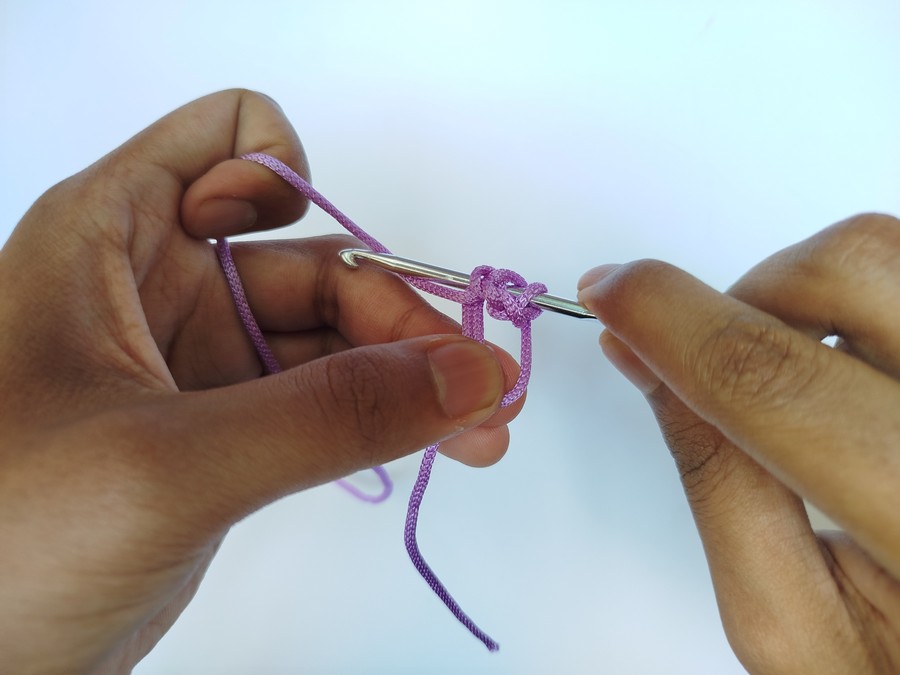
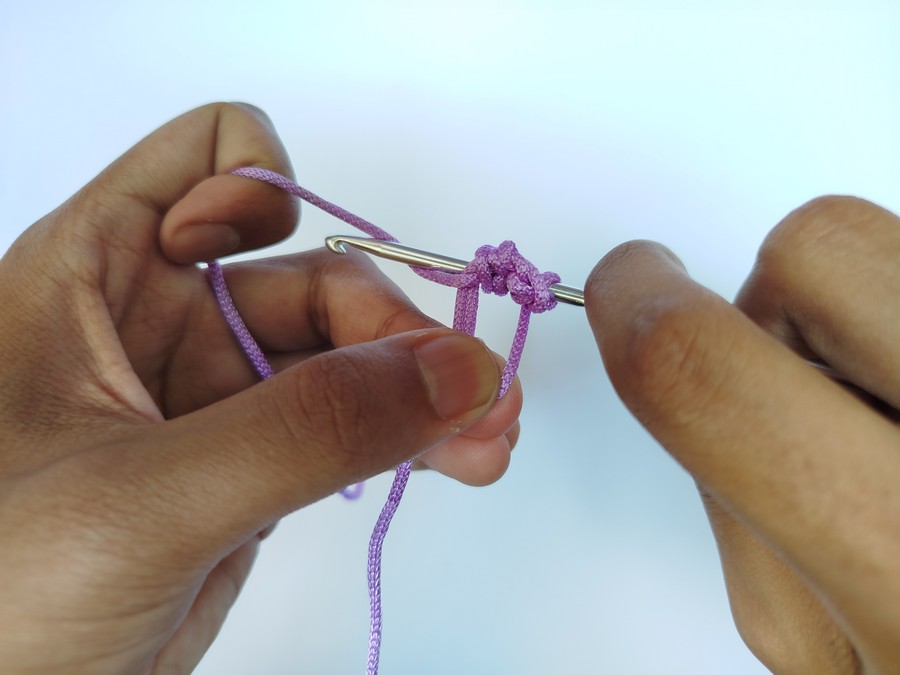
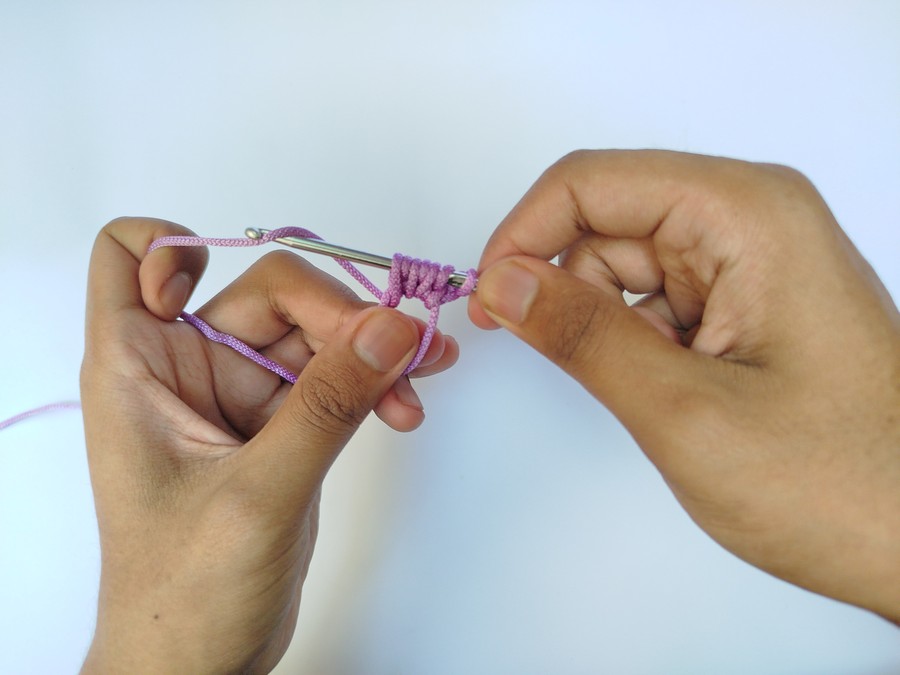
- Step 1: I knotted a magic ring using my preferred method which requires the use of both crochet hook and the hands.
- Step 2: After the magic ring, I made 2 chains (you can also make just 1) which are not counted as stitches here.
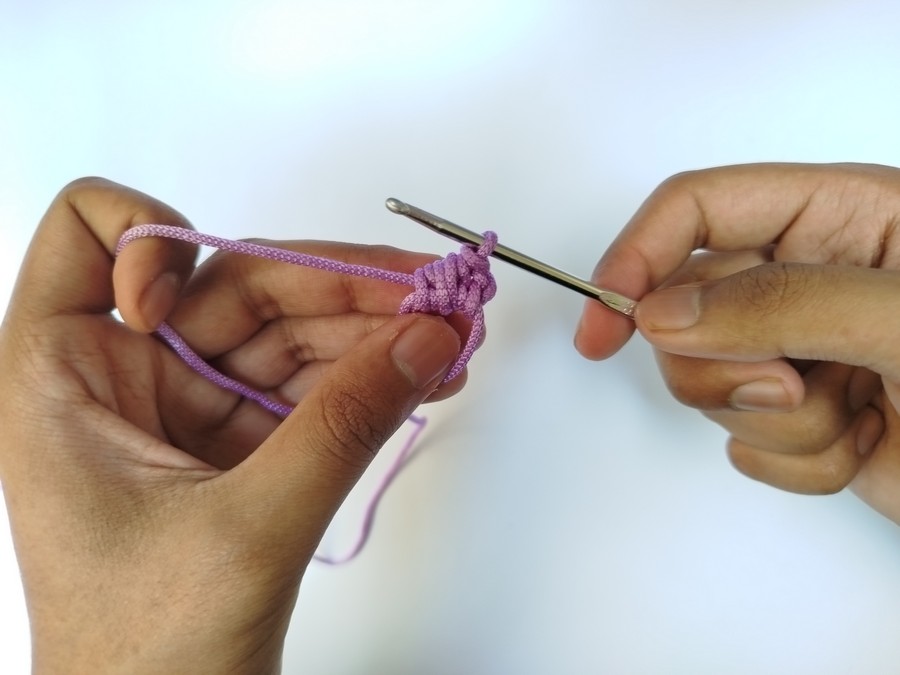
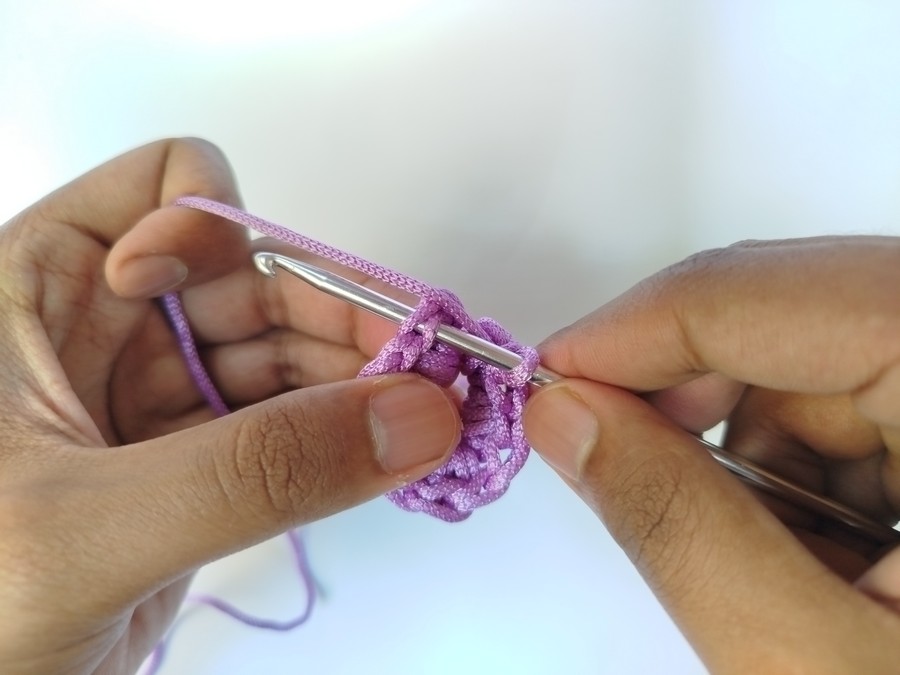
- Step 3: In the magic ring, I worked 6 puff stitches by making 3 incomplete half double crochet stitches. In the last last step, I pulled the hook through all the stitches after yarning over to crochet each 3-half-double puff stitch.
- Step 4: After each puff stitch, I chained 1 to separate the stitches and secure the puff stitch.
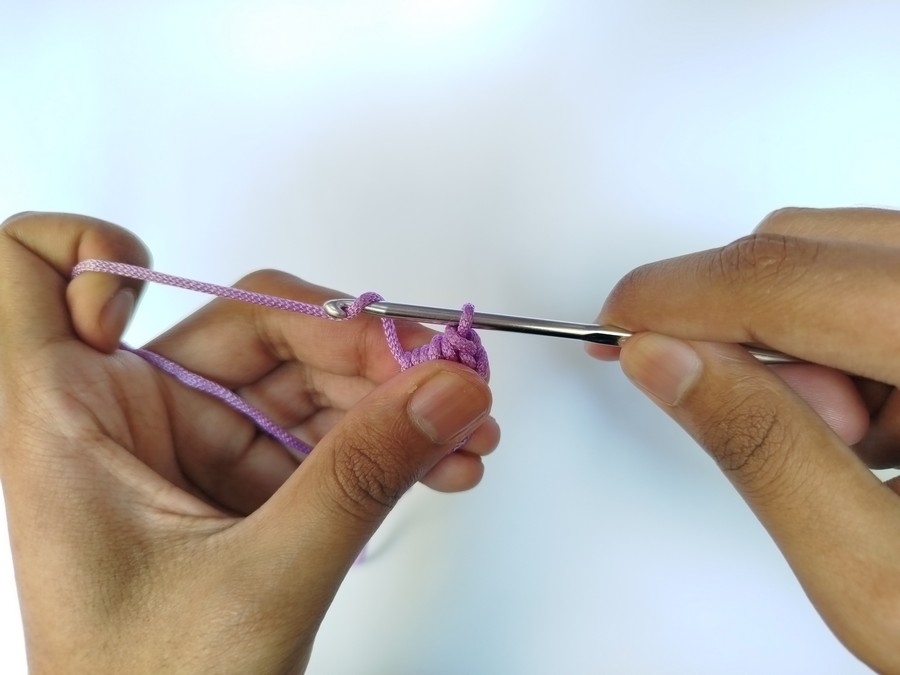
- Step 5: I slip stitched through the chain-1 space to complete my first puff stitch round. Note that, like normal, you also have to pull the ring tight to close the middle hole.
- Step 6: Again, to start new round, I chained but only 1 this, time. Then, I remembered the usual single crochet increase magic formula. I just have to work that for each of the round in the circle but separate each puff by chain stitch and work only in chain spaces.
- Step 7: So, for the 2nd round, worked 2 puff stitches in each chain space across. The pattern will be: puff stitch, chain 1, puff stitch, chain 1 and then skip to the next chain-1 space. Then slip stitch in the first chain space!
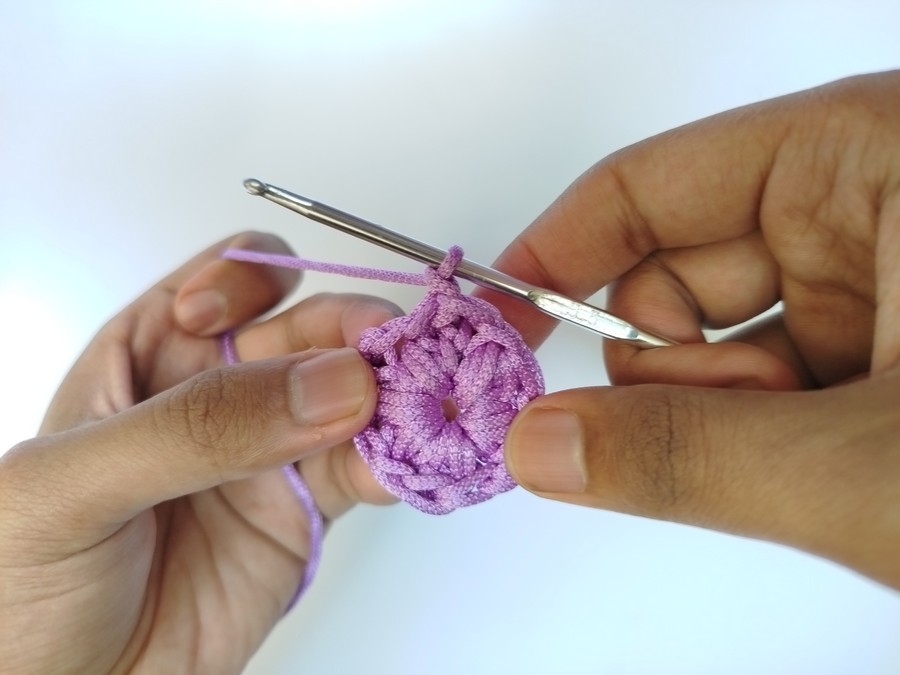
- Step 8: While in the practice swatch I won’t, for this coaster to be big enough to hold a large mug, you must crochet a 3rd round of stitch. The pattern goes like this: chain 1, in the first space, make 1 puff stitch, chain 1. In the next space, make 1 puff stitch, chain 1, make another puff stitch, chain 1 again. Repeat that for 6 sets.
- Step 9: I also changed the color to pink for the 3rd round.
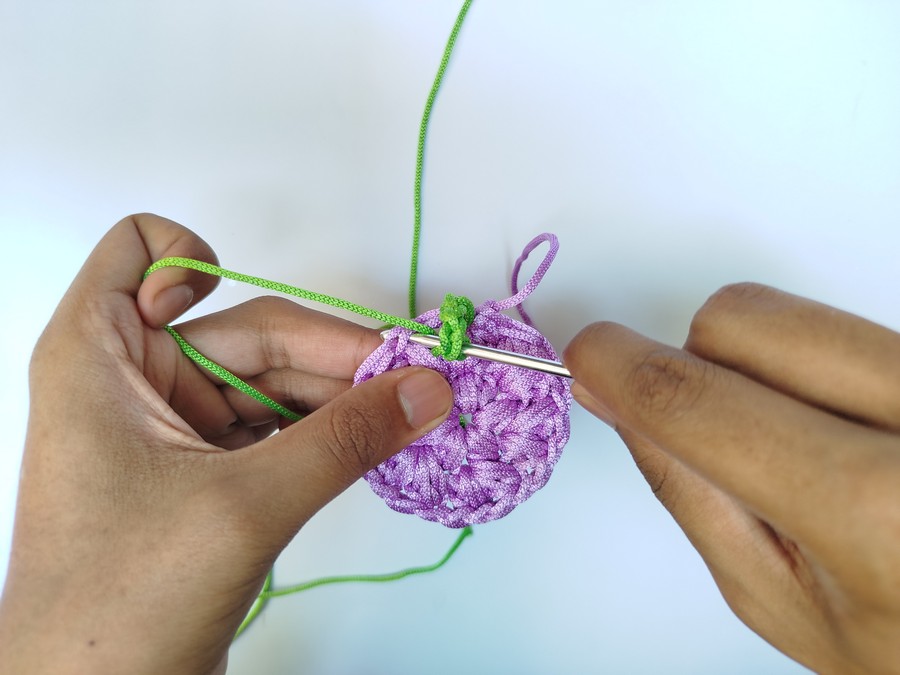
- Step 10: For the 4th round, I changed the color to dark purple using “seam and change” method. Then worked double crochet mesh rows in a clever way that made my last round to stay flat but still looking like an edging (a little raised!).
- Step 11: In the midway, I changed the color to light purple, using “joined as you go” method and working normally. And that’s how I made this puff coaster.
Crochet Candy Burst Coaster (Swatch Guide + Pattern)
As you will see, I have a much more detailed guide for crocheting this puffy coaster in case you don’t know the techniques used. Be it crocheting the puff stitch, increase pattern and both color-change techniques, I will guide you all in this swatch. For a quick written pattern, scroll down:
Skill Level: Beginner – Level 4
Stuff I Used for Crocheting this Candy Coaster
- Yarn: I used macramé cord that I bought locally with 1.5mm thickness in the below colors:
- Color A: Light Purple
- Color B: Baby Pink
- Color C: Dark Purple
- Crochet Hook: I used 3.5mm crochet hook. If you wanna use regular cotton yarn for its absorbency and ease of handling, use the recommended yarn.
- Scissor for cutting the yarn (for the seamless color-changes, I recommend changing the color at the beginning of the new round!)
- Yarn needle (I would just cut the yarn tail, knot the ends and glue the tails behind on the WRONG side).
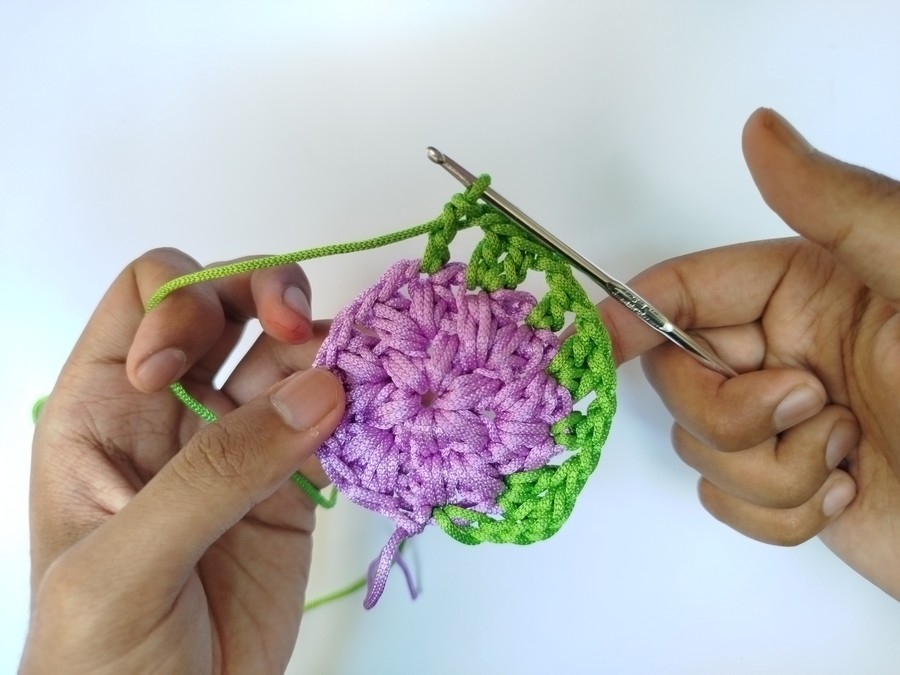
Colors used in the Sample Swatch
- Color A: Light Purple
- Color B: Baby Link
- Color C: Green
Round 1 + Puff Stitch Guide
Crochet this round with color A.
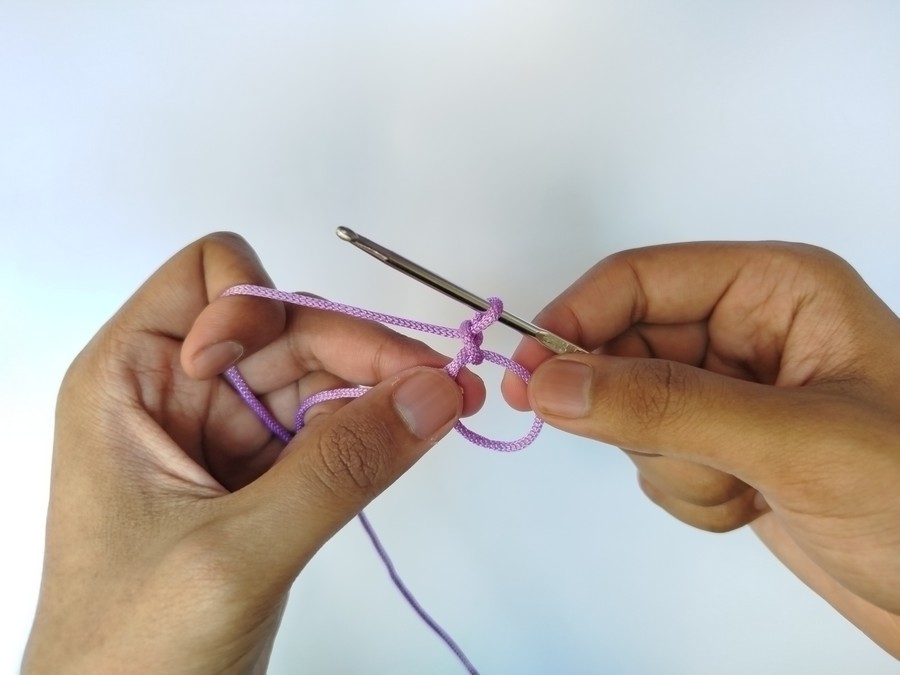
- Tie a magic ring in your preferred method and pinch both of its strands (ring + tail) tight. Note that while making a magic ring, we make a chain to secure the knot and the loop on the hook.
- After this, you have to chain twice or once as turning chains for your puff stitch. Now, to crochet the first puff stitch:
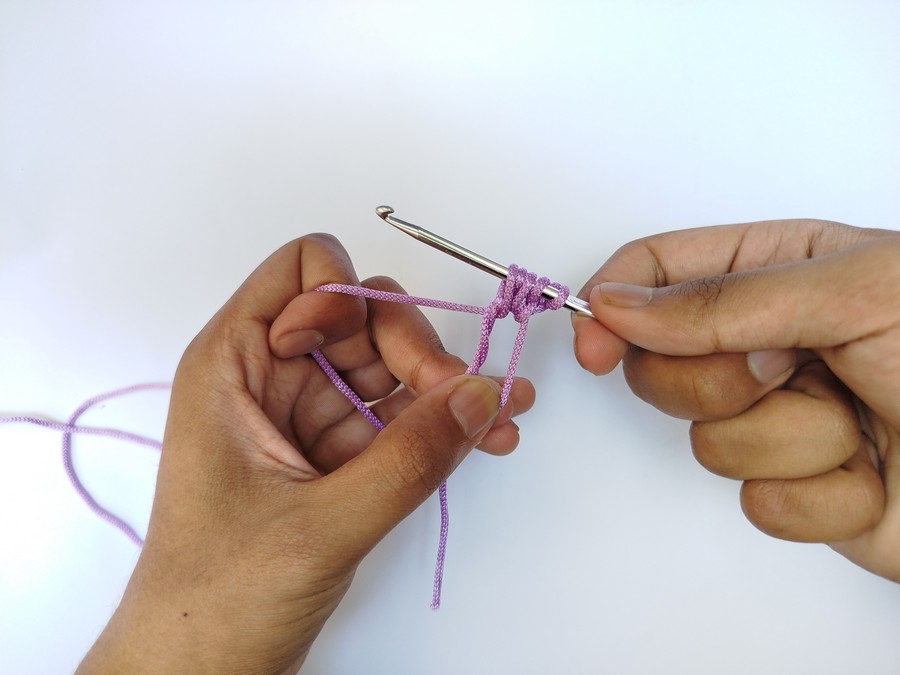
- Step #1: Yarn over the crochet hook that you will usually do for making half double crochet and the double crochet.
- Step #2: Insert the crochet hook into the pinched magic round. To make the insertion easy, let the magic loop elongate a little bit.
- Step #3: Keeping the crochet hook inserted in the magic ring, yarn over again with the ball end of the yarn.
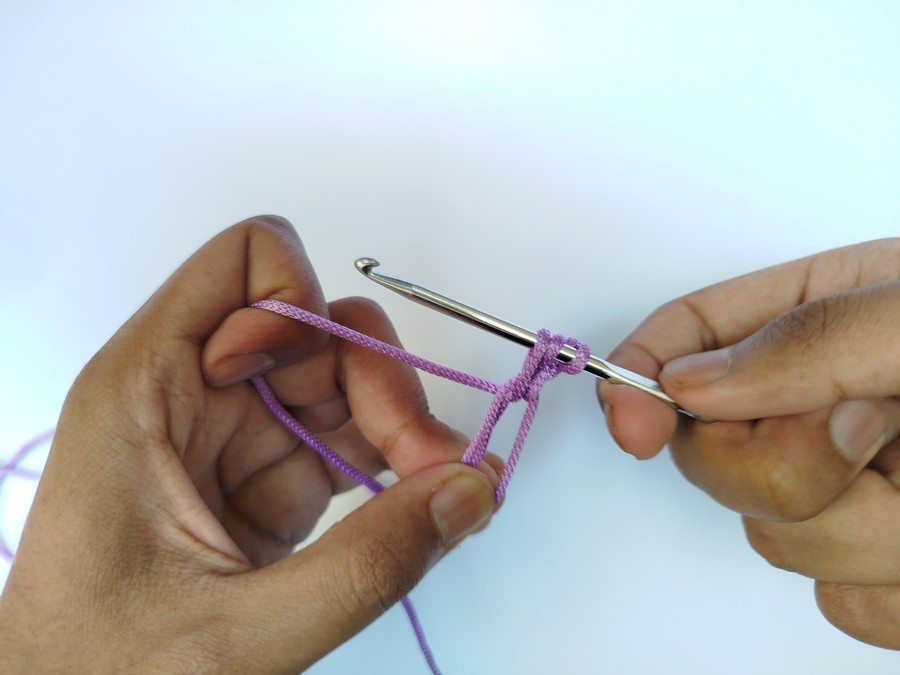
- Step #4: Pull up a loop through the magic ring on the crochet hook and be sure not the pull the pinched yarn tail, too. Then lift the crochet hook tightly to elongate the loops on the hook to make pulling through all at once easier.
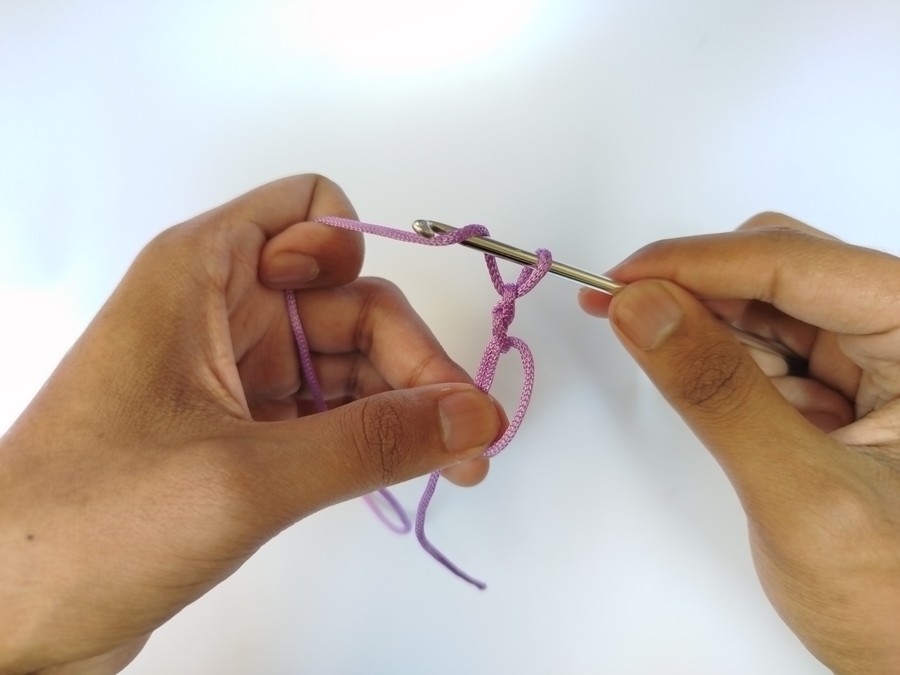
- You will be left with the 3 loops on the crochet hook.
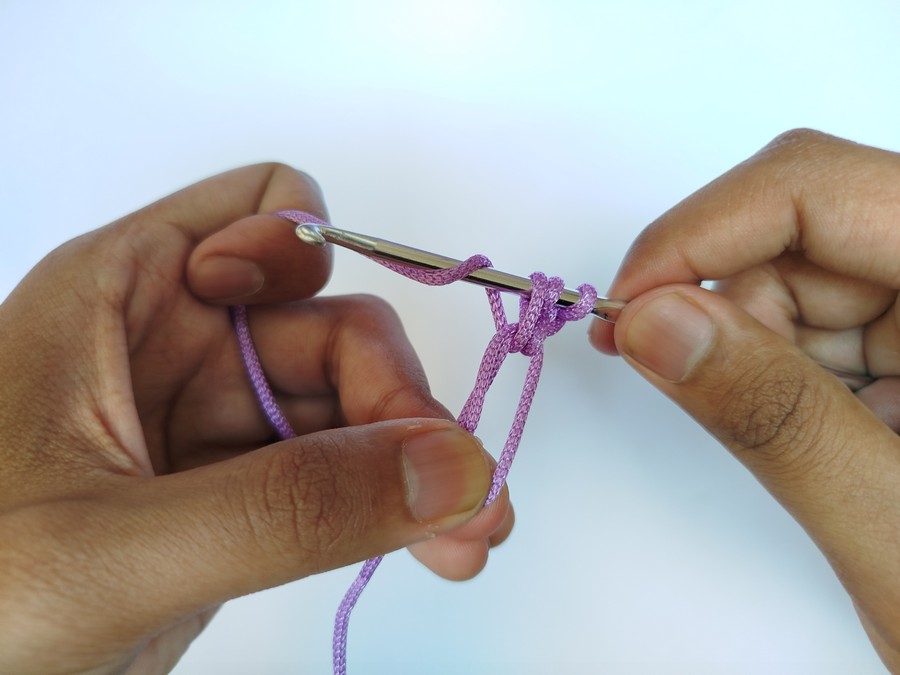
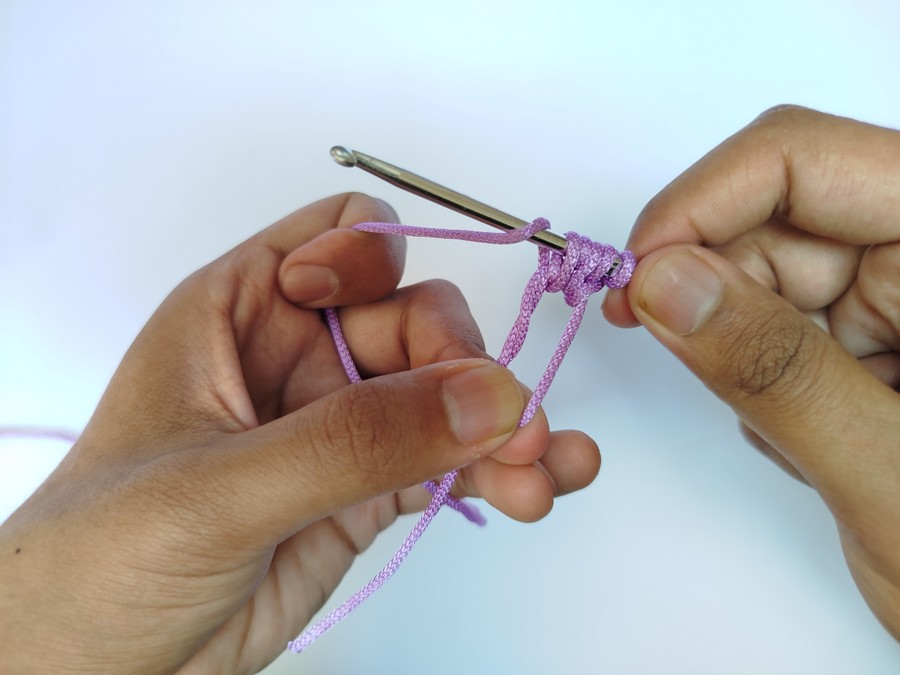
- Step #5: Yarn over again, pinching the magic ring and down.
- Step #6: Insert the crochet hook into the ring while keeping the yarn over stay over.
- Step #7: Yarn over again and pull up a loop on the crochet hook through the magic ring.
- Step #8: Yarn over again and pull up a loop on the crochet hook through the magic ring.
- Now, you will be left with the 5 loops on the crochet hook.
- Step #9: Yarn over the hook for one last time and continue pulling the magic ring. Insert the crochet hook into the magic ring and pull up another loop. You will have 7 loops on your hook.
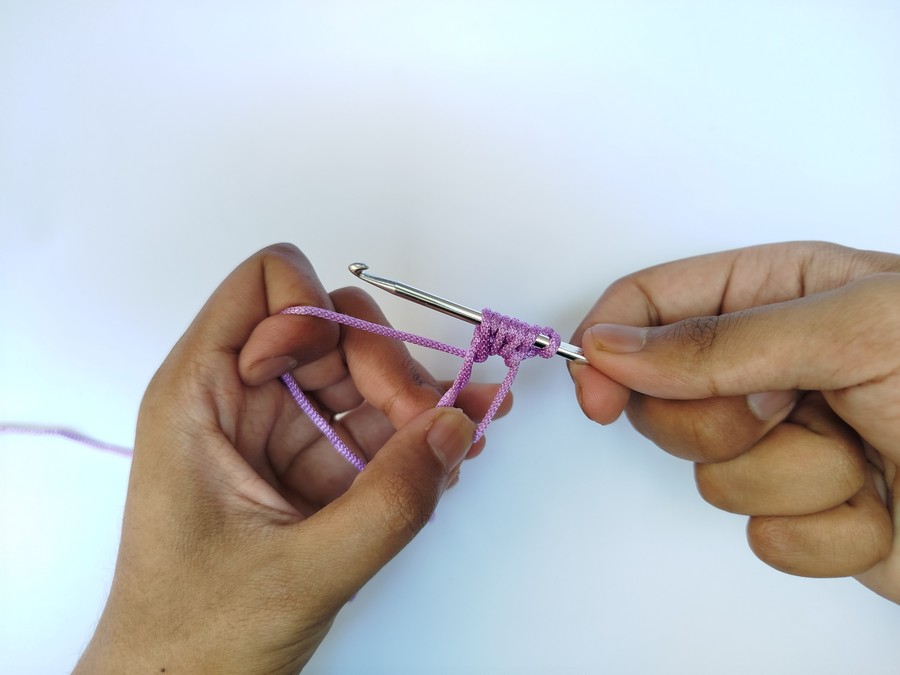
- Step #10: Be sure to lift the crochet hook tight after each loop pull up so you can easily pull the loops through the crochet hook.
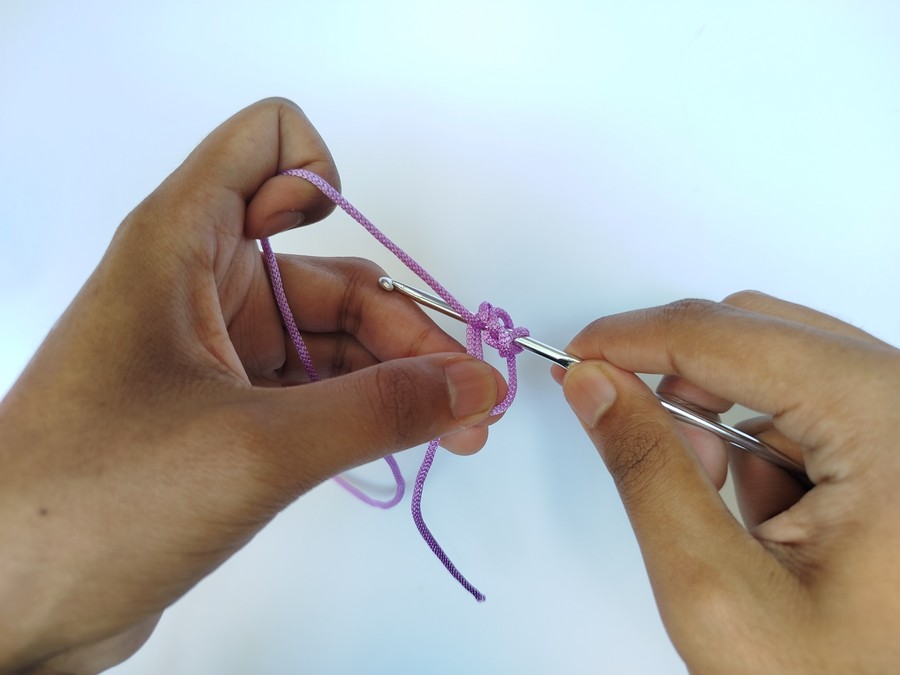
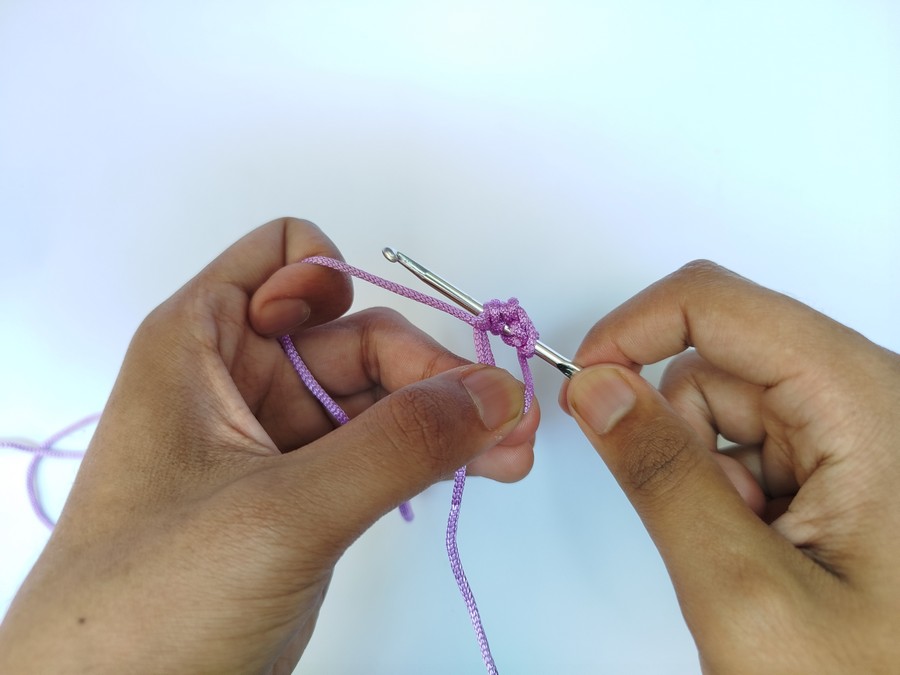
- Step #11: Yarn over the hook as a pull through yarn over and keeping rotating the hook down:
- Step #12: Pull the crochet hook through all the loops at once. Note that initially, it might be much difficult to pull through all the loops and not getting your hook stuck especially in the magic ring. To fix this:
- Try to lift the crochet hook tightly to elongate the loops.
- Don’t rotate the crochet hook in any direction while pulling through.
- Keep the hook part of the crochet hook face down while pulling as I have found it much helpful.
- Use a stretchy yarn if you are a beginner; not the cord.
- Step #13: Make 1 chain to secure your crochet puff stitch.
Round 1: 6 Puff Stitch Pattern
Now, crochet 5 more puff stitches following the step #1 through #13 of the puff stitch. You will do the following:
- Crochet A Puff stitch in the ring.
- Chain 1.
- Puff stitch, chain 1 and so one for 4 more stitches.
Now, as you crochet your last puff stitch, look at first chain-1 space of the first puff stitch. That’s where, you will want to crochet the slip stitch to join the ends. But before that, pull the yarn tail tightly to close the hole in the middle.
For the puff stitch and cord, in particular, you will have to pull the loop much tightly and it will take more effort that the double crochet round.
Insert the crochet hook into the ch-1 space and slip stitch by yarning over the hook and pulling through only one loop that was already there on the crochet hook. Chain 1.
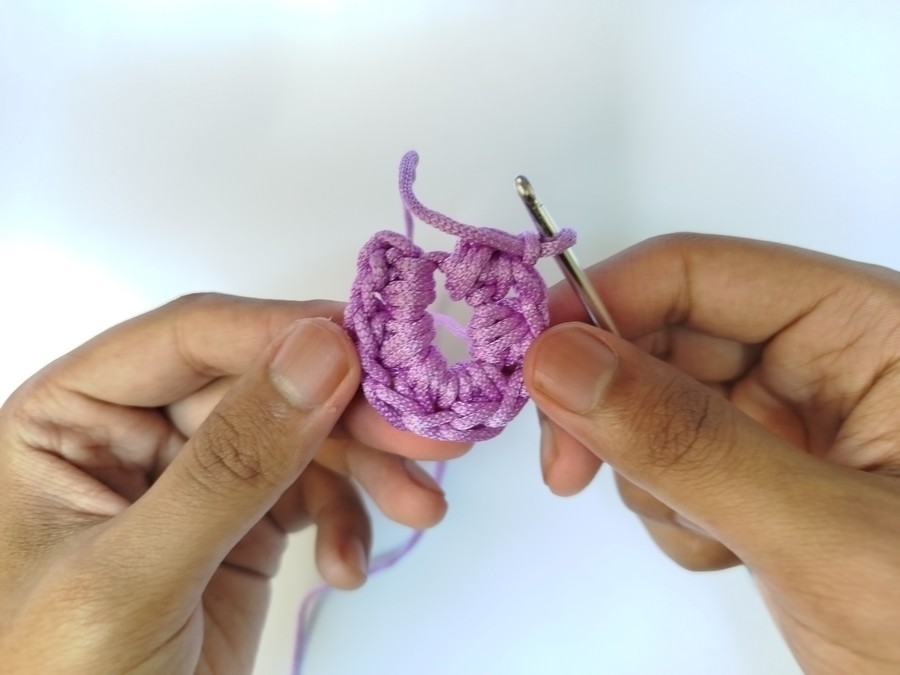
Round 2: Twelve Puff Stitch Pattern
Now, we have to work the puff stitch increase pattern so our crochet puffy coaster stays flat. To do so, yarn over and insert the crochet hook into the same chain-1 space and complete one puff stitch.
- You have to do (YO, ins, pull up a loop) thrice and pull through all the loops to make a puff stitch.
- Then, chain 1 again. Now, make another puff stitch in the same chain-1 space again, chain 1 and repeat the following pattern for the round 2:
- Skip the next puff stitch. In the next chain-space,
- Work 1 puff stitch, chain 1, 1 puff stitch again and chain 1. Repeat all across 5 times.
‘
- In the first chain-1 space, work 1 slip stitch to finish this round.
Now, for this sample swatch, I did not crocheted the third round of puff stitch. However, here is how you have to do the 3rd round:
- Chain 1, in the first chain-1 space, work 1 puff stitch and chain 1. In the next space, make 1 puff stitch, chain 1, make another puff stitch chain 1 (puff stitch increase or puff stitch V).
- Repeat 5 times: puff stitch in next chain space, chain 1, puff V-stitch in the next chain space. Slip stitch to join.
Secure the End
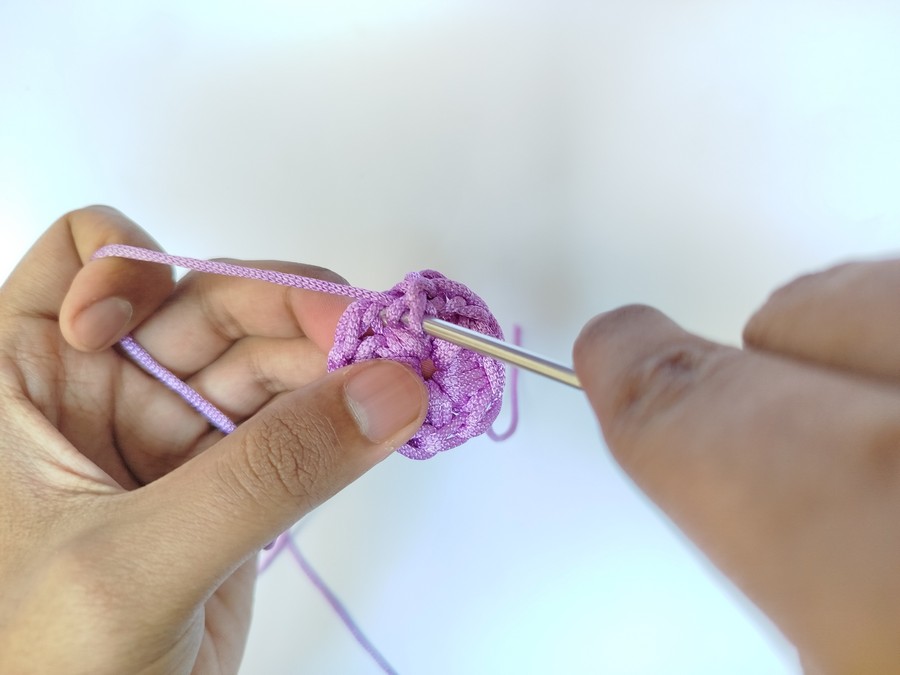
As you see, I have also secured my yarn tail as I will teach you next how to change the color for the striped puffy coaster pattern. To do so, after slip stitching in the 2nd or 3rd round, cut the ball end, leaving about 4 inches as the tail.
Before that, also lift the hook to elongate the loop and pull this tail through the loop from which you removed the hook. Pull tight to make a knot and continue working as you can weave it later-on.
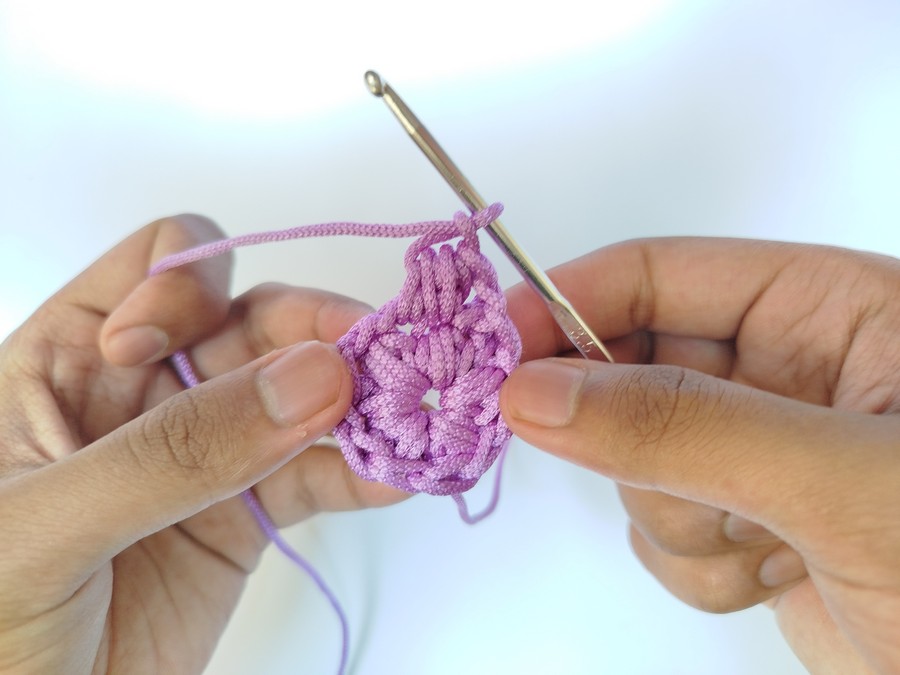
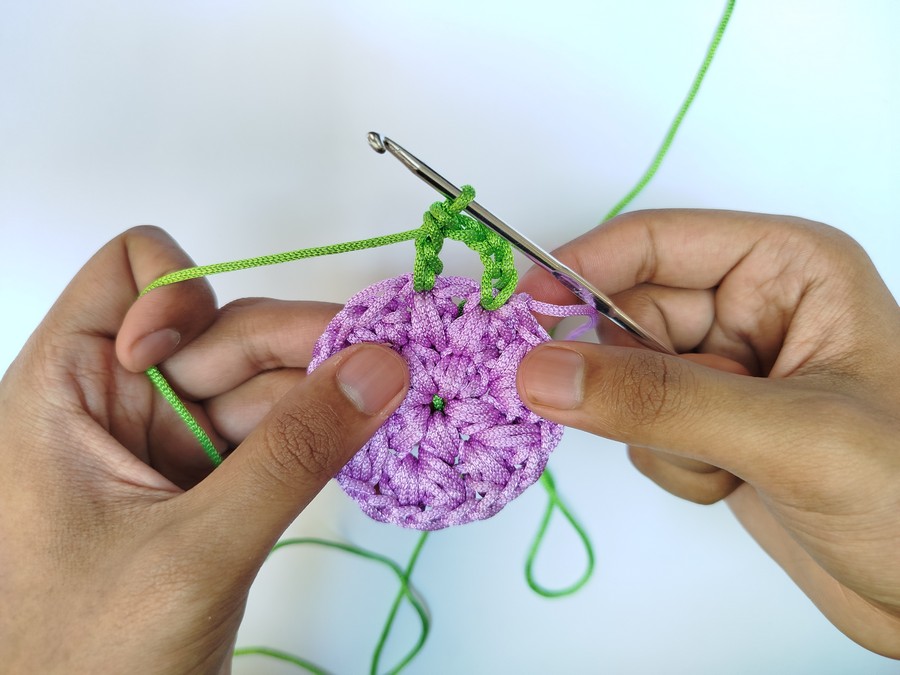
Row 3 or 4: Color-Change + Mesh Row
Note: Note that we have to follow the magic increase pattern of a crochet circle for this round but using mesh techniques and working in the puff stitches instead of chain spaces. So, for example, if you worked row 3, too, you have to work 2 double crochet stitches in the next puff stitch and 1 double crochet increase in the next stitch all separated by chain-1s. Also, note that, I have below shown the pattern considering you did not make the 3rd round of puff stitch.
First, let’s change the yarn to COLOR B (COLOR C if you worked 3rd round of puff stitch). For this, insert the hook through any of the puff stitch loops while holding the COLOR B as a loop.
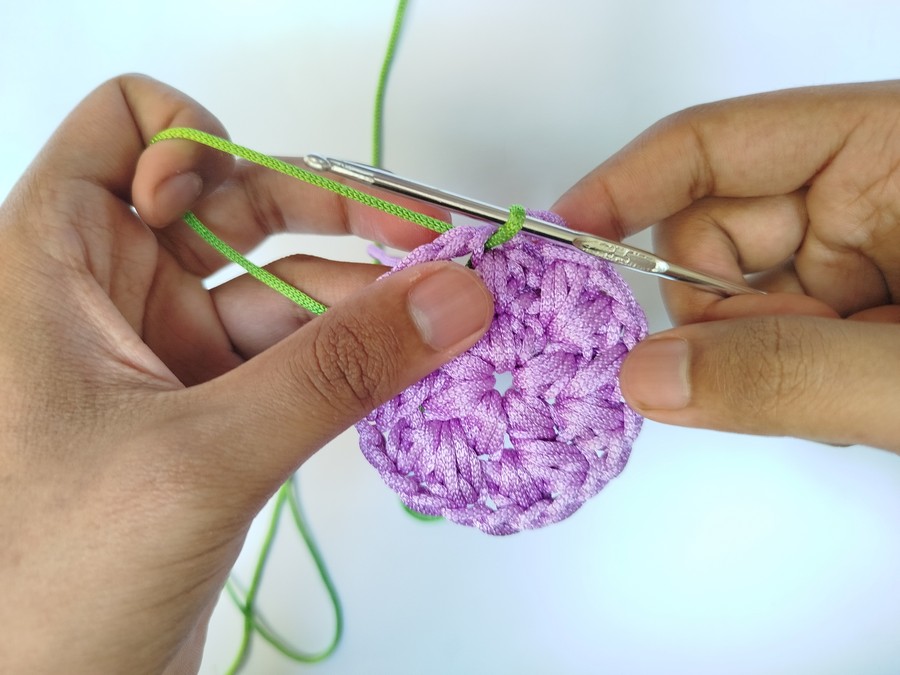
Just pull this loop through the puff stitch loops with the hook as you see above.
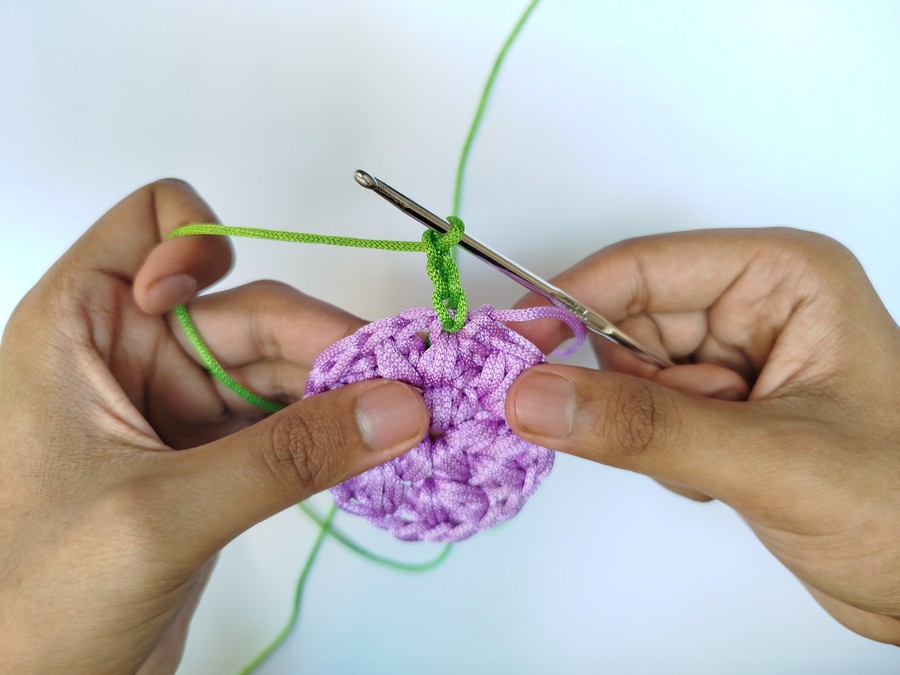
Now, chain 3 times with the COLOR B (counts as 1 double crochet stitch mesh).
Chain 1 once more (counts as skip for mesh).
Yarn over and insert the crochet hook into the next chain-1 space.
Make the double crochet by yarning over again, pulling up a loop on the hook, yarning over again and pulling through two loops and finally yarning over again and pulling through the last two loops on the crochet hook.
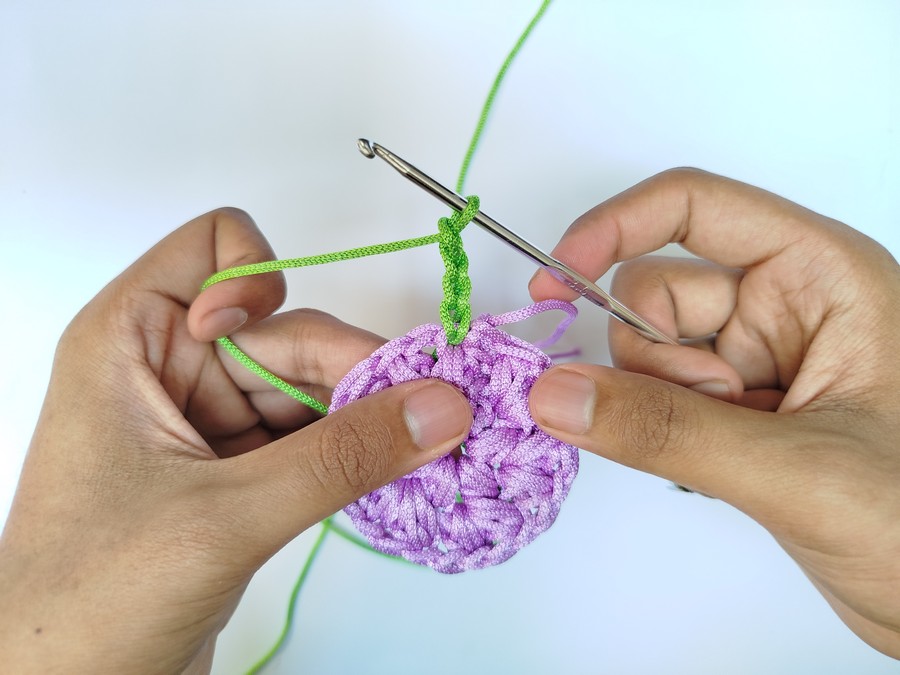
Make another double crochet in the same stitch completing the double crochet increase and the repeat set. So,
Make a chain and repeat the pattern below for half of the puff stitches (5 left)!
- 1 double crochet in the next puff stitch. Chain 1.
- 2 double crochet stitches in the next puff stitch. Chain 1.
- Repeat: 1 double crochet, chain 1, double crochet increase, chain 1 for the next 4 stitches.
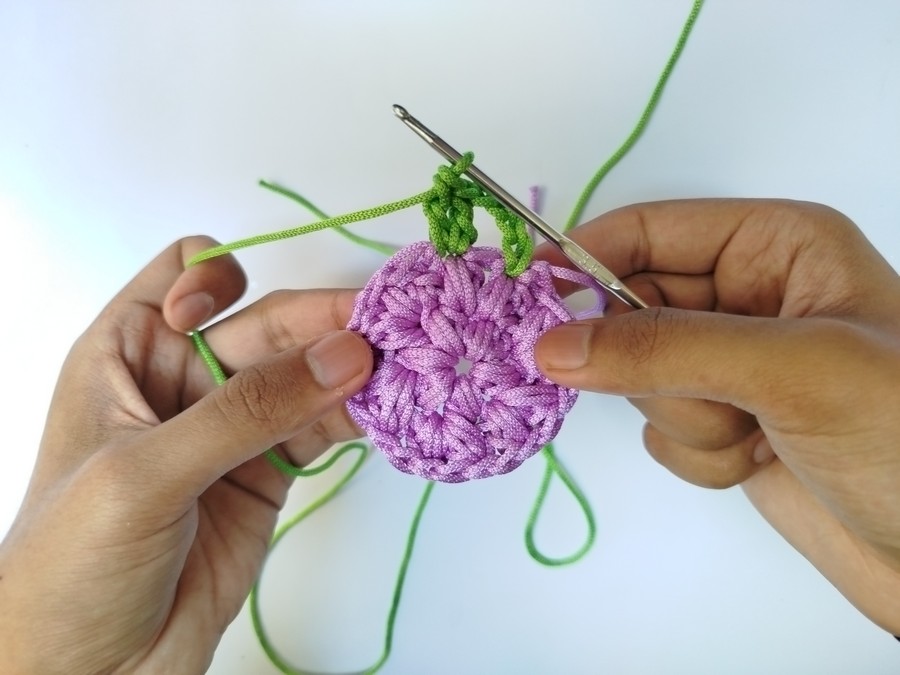
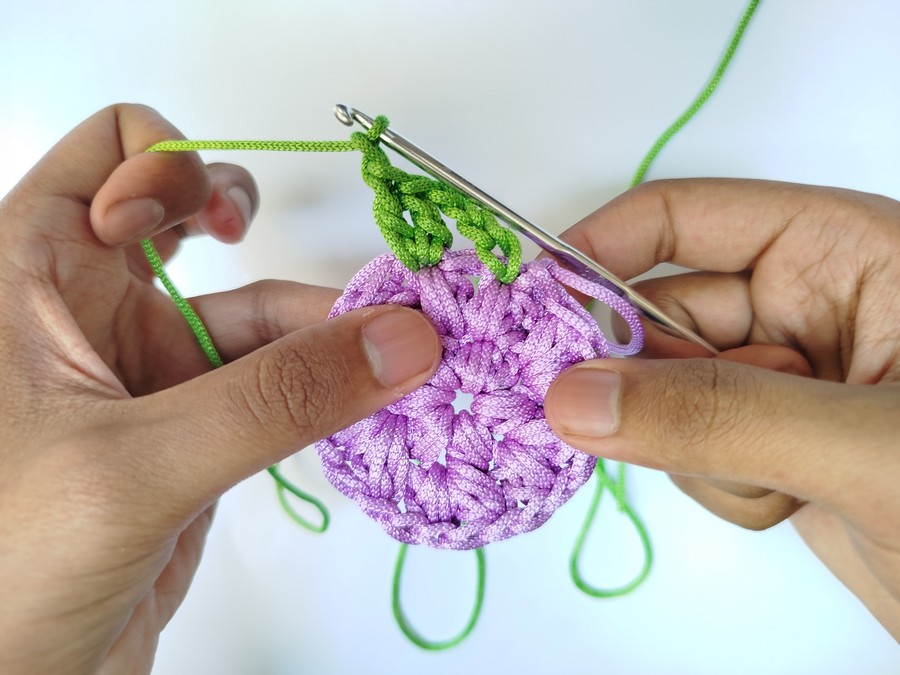
Row 3 or 4: Another Color-Change + Mesh Row
Now, you have got a repeat pattern, change the color in the following way and continue working as I described above:
- To change the color within the round, Yarn over insert the hook into next stitch, yarn over and pull up a loop on the hook. Yarn over again and pull through two loops on the crochet hook.
- Now, make a loop with the COLOR C (COLOR A if you made round 3 using puff stitch) and pull through both the loops.
- Then continue working the mesh pattern in the remaining stitches.
And finally, that’s how you will crochet the swatch pattern for any number of rounds for this crochet puffy coaster. Now, you can read the pattern to crochet the exact crochet coaster!
Crochet Candy Burst Coaster Pattern
Colors:
- Color A: Light Purple
- Color B: Baby Pink
- Color C: Dark Purple
Abbreviations
- MR = Magic Ring
- ch = chain
- st = stitch
- sp = space
- sl st = slip stitch
- dc = double crochet
- Puff = puff stitch (3 incomplete hdc, yo, pull through all loops, ch 1 to secure)
- FO = fasten off
MR
R1 (A):
Ch 2, (Puff, ch 1) ×6, sl st to first ch-1 sp. (6 Puff)
R2 (A):
Ch 1, (Puff, ch 1, Puff, ch 1) in each ch-1 sp around, sl st to first ch-1 sp. (12 Puff)
R3 (B):
Join B, ch 1, (Puff, ch 1, (Puff, ch 1, Puff, ch 1) in next ch-1 sp) ×6, sl st to first ch-1 sp. (18 Puff)
R4 (C → A):
Join C, ch 3 (counts as dc), ch 1,
(dc in next st, ch 1, 2 dc in next st, ch 1) ×4,
change to A,
(dc in next st, ch 1, 2 dc in next st, ch 1) ×5,
sl st to top of ch-3.
FO, weave in ends.
My message for all!
Did you like my macramé cord mug cozy and wanna try one this summer? You can tell me everything in the comment and ask the question. Also, follow me on the relevant social media!
Bye Bye! – Talha