Author: Talha
I am a crochet designer, macramé maker and a crafter who also loves doing MATH.
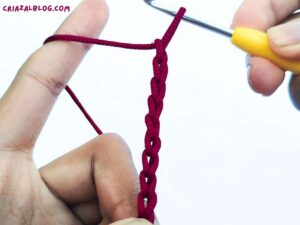
Last time, I showed you how to crochet a half I-cord. One of the cutest things you can make with this cord is the knotted ribbon bow. You can use it as a coquette bag charm, add it to a hair clip, or attach it to the bodice of crochet tops.
In this tutorial, I will show how to crochet both the double chain cord & also how to tie it later-on. I will guide you step-by-step in under 5 minutes. So, follow through with me in this tutorial!
Crochet Ribbon Bow Pattern: Step-by-Step Instructions
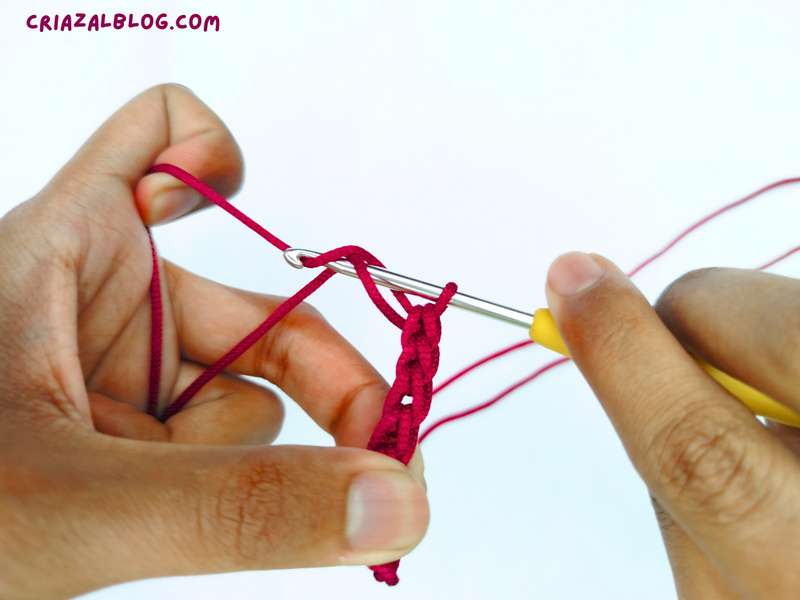
To crochet this half I-cord, we shall yarn under with the tail end and then yarn over with the ball end. Then pull through both the loops on the hook. Now, I will explain how you can crochet the half I-cord plus, to tie the knot:
Difficulty: Beginner – Level 2
Techniques: Slip Knot
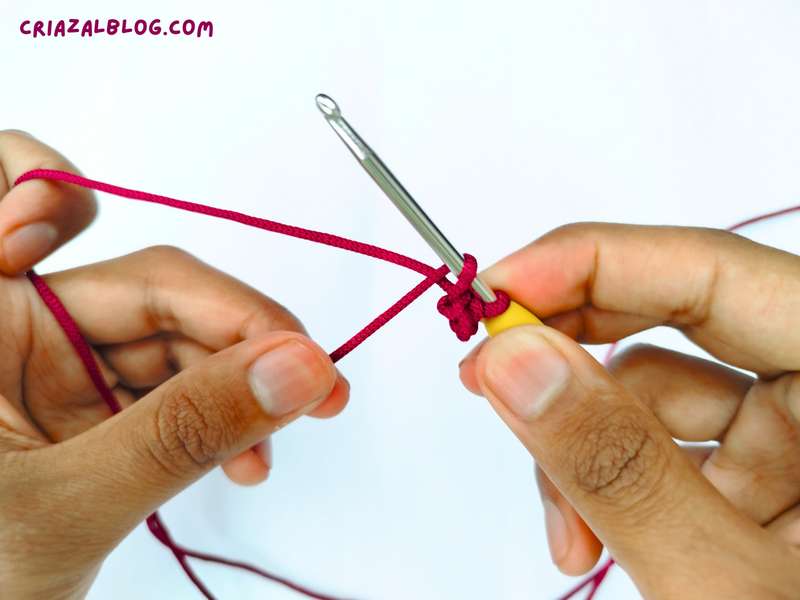
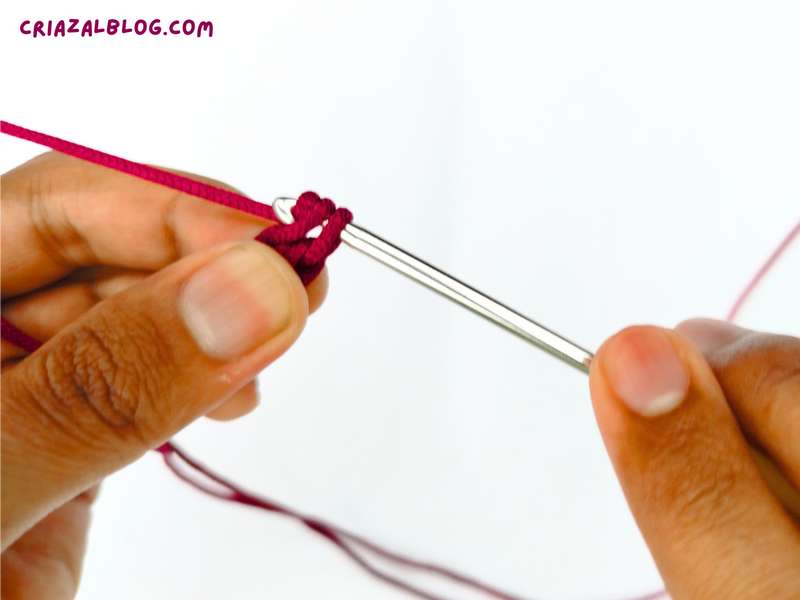
- Step #1: Make the slip knot normally, except to have a longer tail end because we shall use this end to crochet the cord along with the ball end.
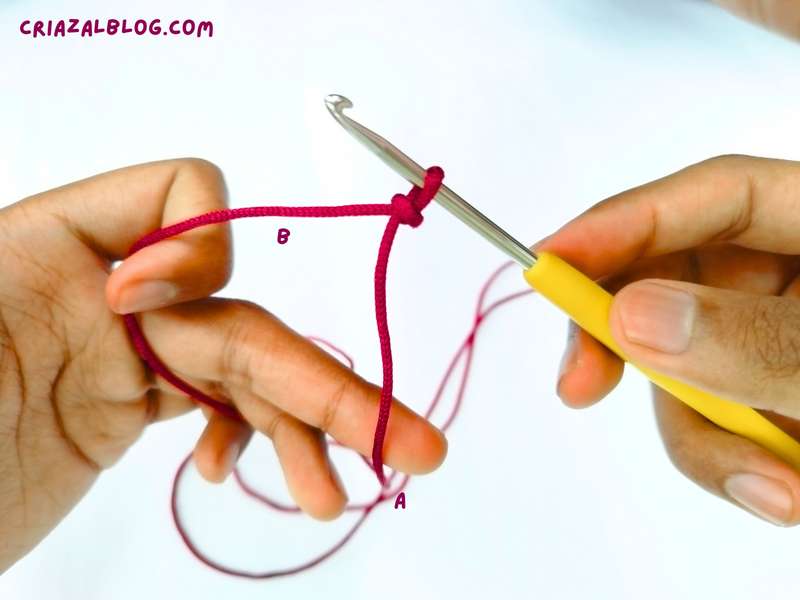
- Step #2: Hold the working yarn with your index finger and let the tail yarn slide over the middle finger of your left hand.
- Step #3: With the thumb and the middle finger of the left hand, wrap the yarn around the hook from left to right.
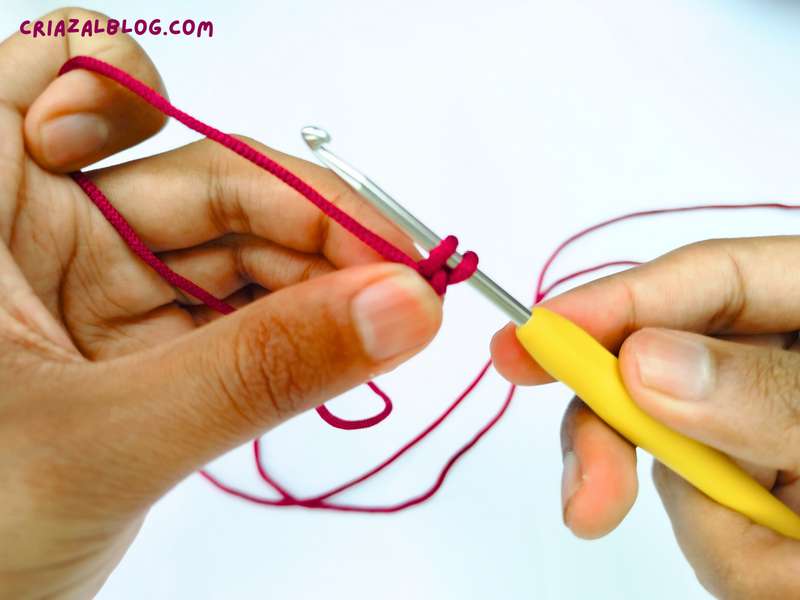
- Step #4: Pinch the knot and the loops from the bottom and slide the loop nearer to the slip knot loop.
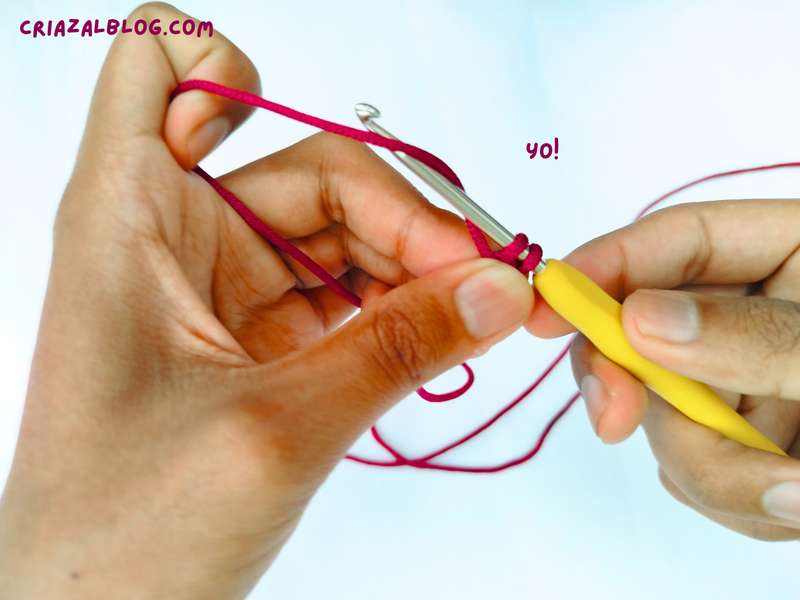
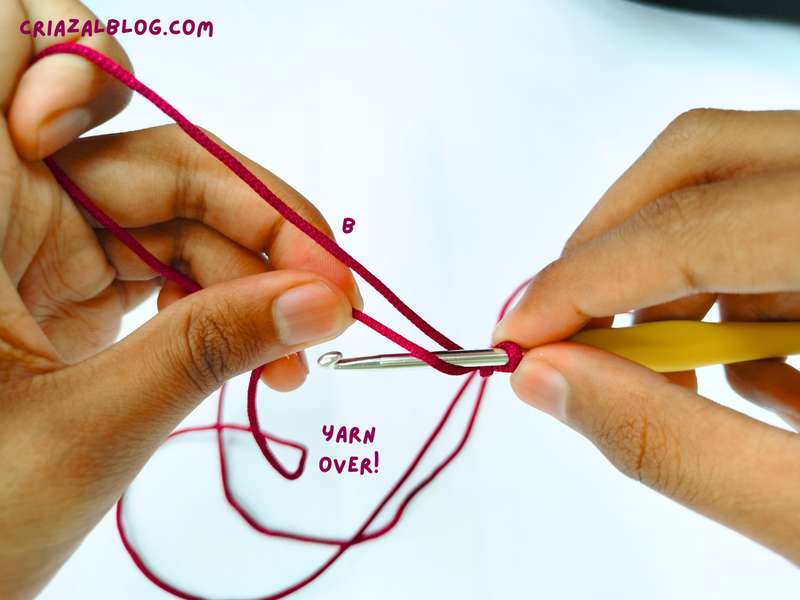
- Step #5: Yarn over the crochet hook using the ball end.
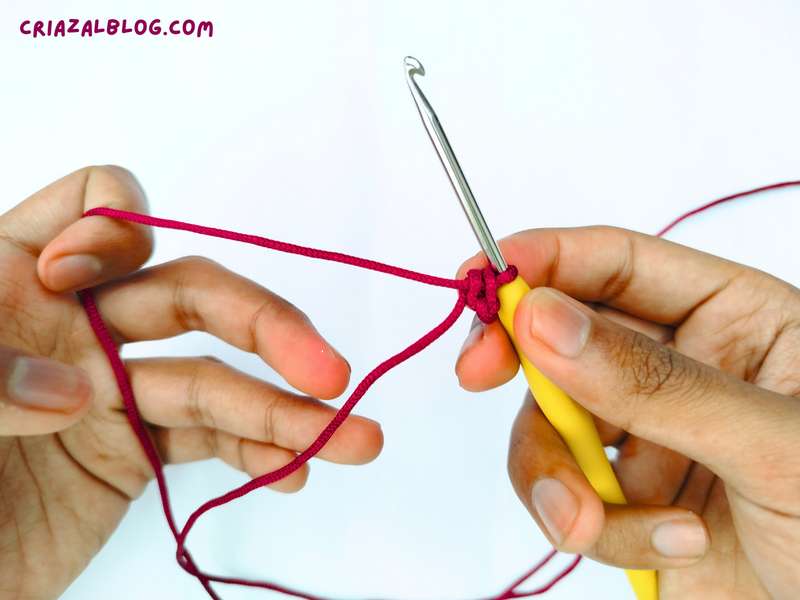
- Step #5: Pull through both the loops on the crochet hook.

- Repeat Steps: Wrap the yarn from the tail end and slide the loop.
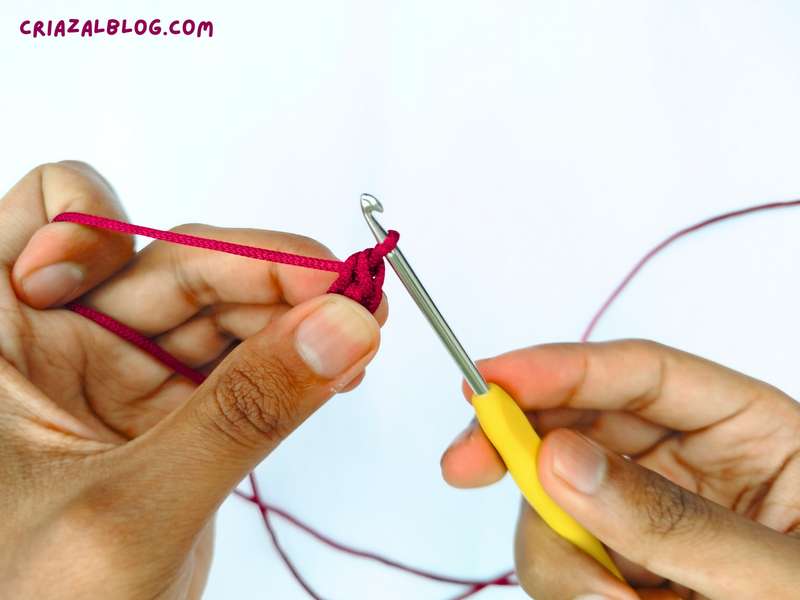
- Yarn over the working yarn and pull through both loops on the crochet hook.
- Repeat the same steps.
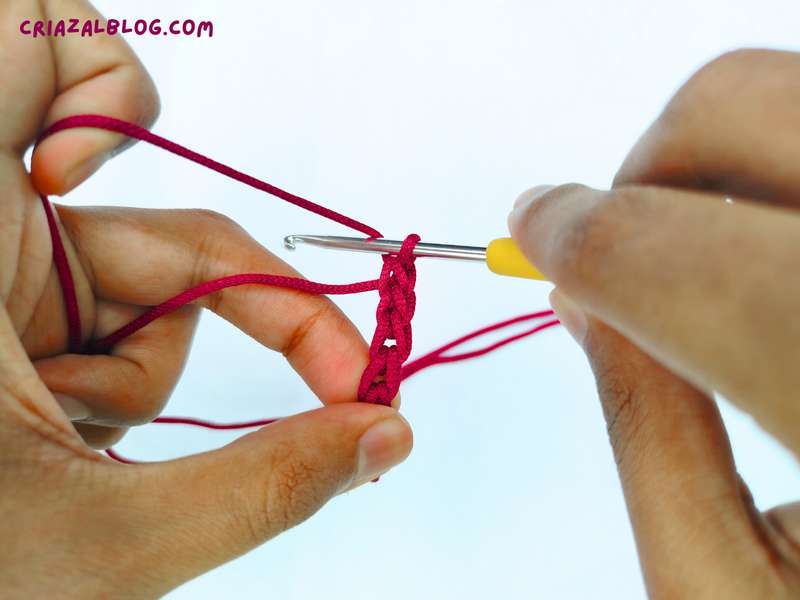
Fast Method
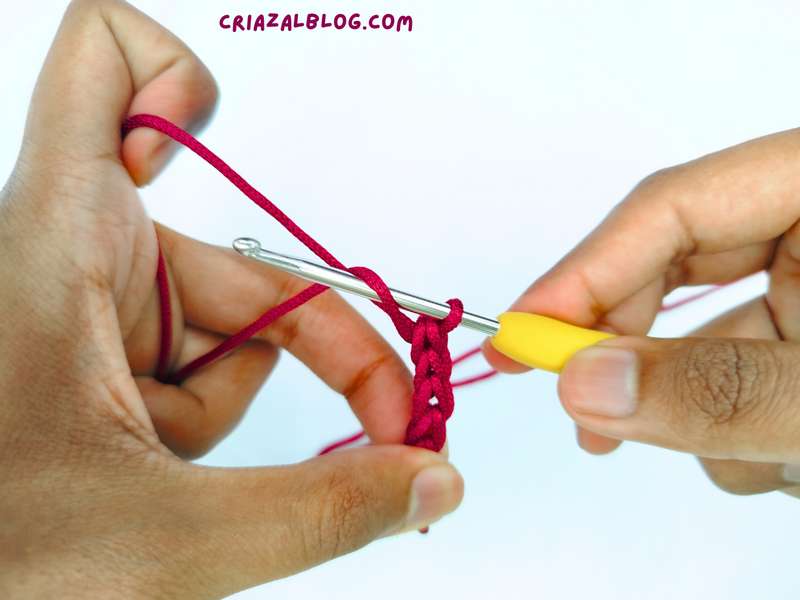
- Step #1: Using the bottom fingers, hold both ends of the yarn under the tail end. This is similar to the yarn over, except that the yarn lives under the crochet hook.
- Step #2: Yarn over the ball yarn and pull through both the loops on the crochet hook.
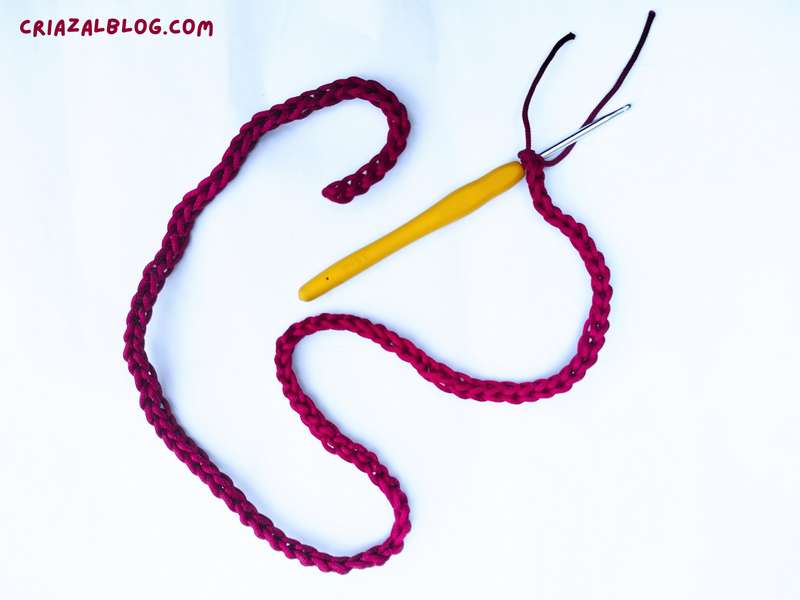
- Continue the pattern until you have enough length for the cord to easily tie the bow. I crocheted about 90 stitches. You might need up to 150 stitches based on your yarn thickness.
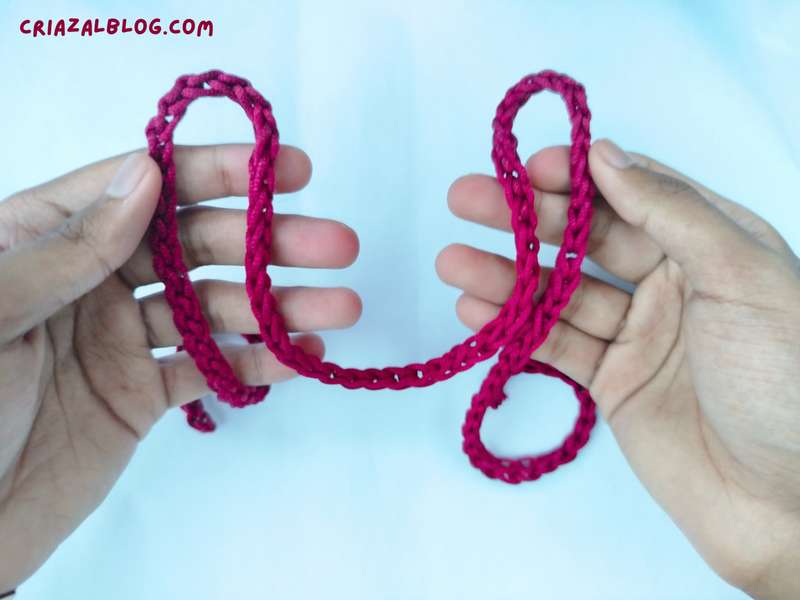
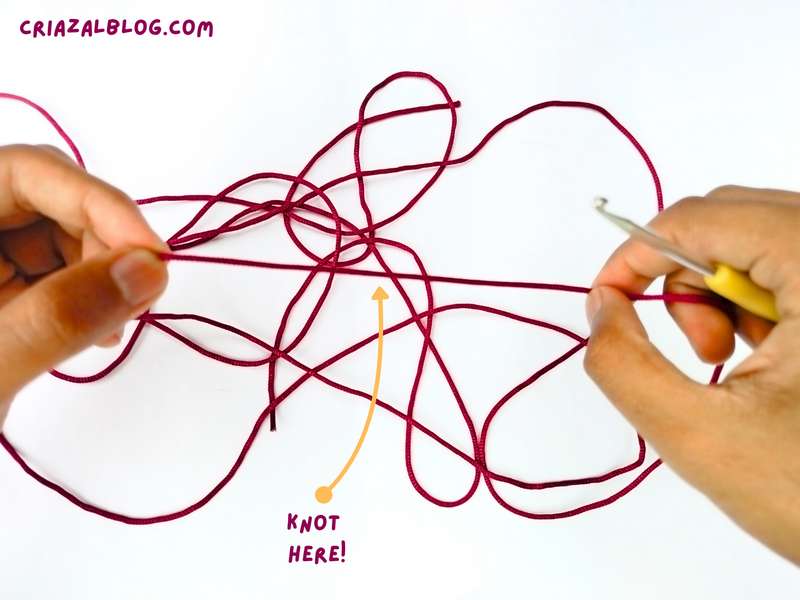
- Hold the cord in both hands, making loops of equal size.
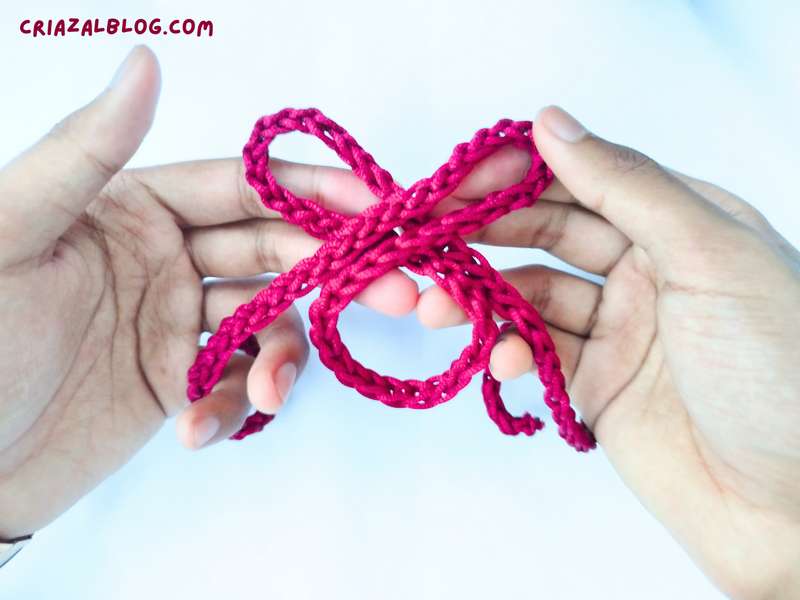
- Cross the two loops over each other in the center to form a “figure eight” shape.
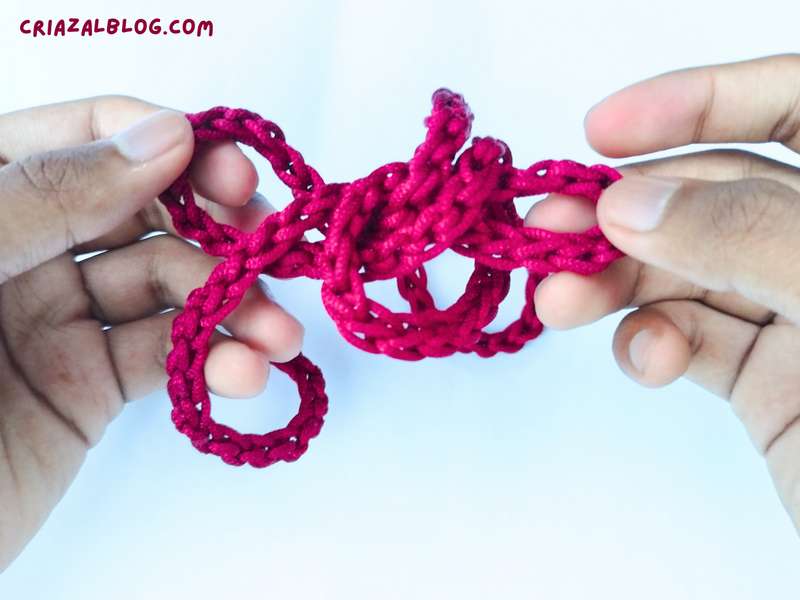
- Pull one of the loops through the bottom loop and keep pulling until the knot is formed in the middle. You can pull the loops later so that both are of equal sizes.

That’s how you can crochet your knotted bow. Afterwards, use it in your favorite way!
What is a half I-cord?
A half I-cord is a simple crocheted cord that I taught you already and can be crocheted by repeatedly working stitches using:
- Yarn under (tail end)
- Yarn over (ball end)
This makes a narrow, tube cord that looks like a knitted I-cord but is made with crochet.
What does “yarn under with the tail end” mean in this pattern?
It means you use the tail yarn instead of the working yarn and wrap it under the hook in the reverse direction compared to yarn over. While you can also crochet a double chain by yarning over twice, this method makes a cord that is string.
Why does my cord look uneven or twisted incorrectly?
This happens because:
- The yarn under and yarn over steps are mixed up
- The tail and working yarn are swapped accidentally
- Tension is inconsistent
- Also, if you are using the macrame cord like me, this may happen. So, use a regular yarn.
How long should my crochet cord be for the bow?
It depends on yarn thickness, but usually:
- Around 90 stitches for small bows
- Up to 150 stitches for larger or thicker yarn bows
You should always test by wrapping it into a bow shape before finishing.
What is the difference between the normal method and the fast method?
Normal method: Use it when you are just learning making the double chain cord.
Fast method: Quicker, more continuous motion as you need much more stitches.
Why does my cord feel tight or hard to pull through?
This can happen if:
- Your tension is too tight
- The yarn is thick or stiff
- You are pulling the loops too small before working the next stitch
Loosening your grip will fixe the issue.
Can I use different types of yarn for this bow?
Yes, but:
- Cotton yarn
- Acrylic yarn
- Thick yarn: bulky bows
Why is my bow not holding its shape properly?
- Cord is too short
- Yarn is too soft
- Knot is not tightened properly in the center
Do I need blocking for the finished bow?
Blocking is optional, but not required. Light steaming can help:
- Smooth uneven stitches
- Set the bow shape
- However, most ribbon bows hold their shape already.
Can I attach the bow directly to clothing or accessories?
Yes. You can:
- Sew it onto crochet tops
- Glue or stitch it onto hair clips
- Attach it to keychains or bag straps
Why does my bow look different from the tutorial photos?
- Different yarn thickness
- Uneven stitch tension
- Incorrect stitch count length
- Not alternating yarn under/yarn over
Did you find this tutorial helpful? Tell me in the comments
Your feedback is always a great way for me to improve my crochet tutorials. So, share your thoughts on whether you tried this one or not, and highlight the weak points.
See More:
Featuring: How to Crochet UNIQUE Ribbed Fall Pumpkin with NEW Texture Stitch
How to Crochet UNIQUE Granny Stitch Strawberry AirPod Case for Spring
Let’s Make Single Crochet Cross Stitch
How to Do Stackable SC for Stitch in Crochet (Tutorial for Beginners)
How to Crochet Classic V-Stitch (IDEAL STITCH for Beginners)
How to Crochet Back-and-Forth Granny Stitch for Beginners
How to Crochet First Variation of Shell Stitch – with Pictures + Written Pattern
How to Crochet Solid Moss Stitch with Pictures
How to Crochet Yarn Over Single Crochet Stitch (SC)