

Author: Talha
I am a crochet designer, macramé maker and a crafter who also loves doing MATH.
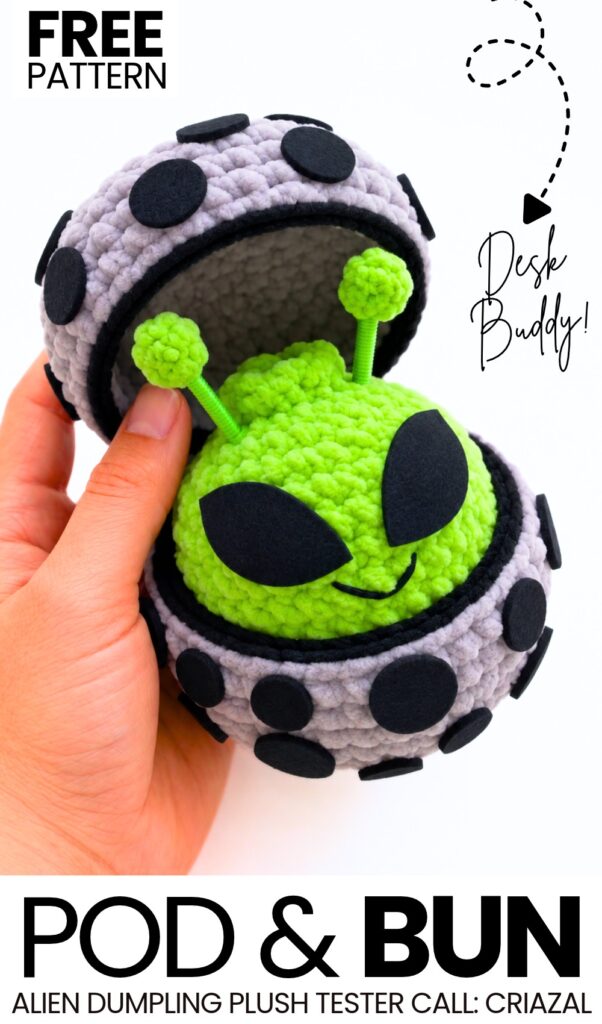
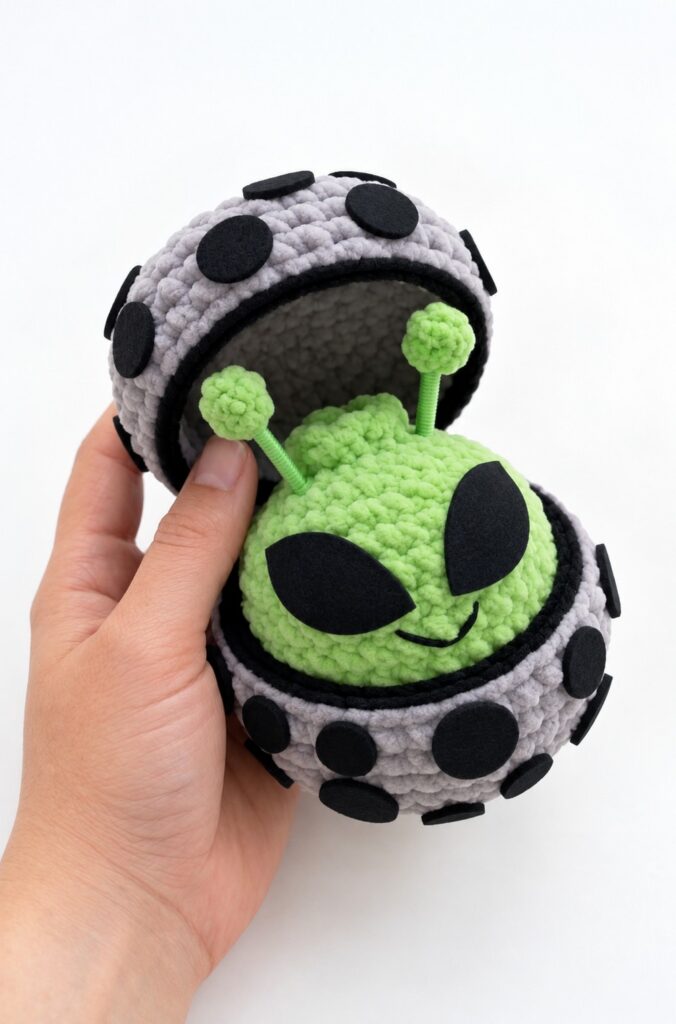
This is part 3 of this week’s crochet cosplay plush food bun plush series. Today, let’s learn how to crochet this cute green Alien dumpling in a spaceship pod plushie with a FREE written pattern. With the felt circles and the black edging around the lid rims, we will transform the steamer box plush pattern into a perfect Alien pod.
I have also provided a FREE printable template to perfectly cut the Alien eyes.
Crocheting this plush pod and Alien bao bun would be as easy as all other crochet spooky and cute plushies in this series. So, continue reading for learning more about this crochet plush dumpling project!
Similar Project(s)
Pattern to Crochet the Pod & Alien Bun Plushie
Skill Level: Beginner – Level 4
Materials & Abbreviations
- Lime Green Plush yarn (100g / 120m): For the Alien dumpling body.
- Thin Lime Green Plush yarn: For the 2 top antenna balls.
- Grey / Light Silver Plush yarn (100g / 120m): For the spaceship pod container.
- Black DK / semi-cotton yarn: For the surface slip-stitch box edging and embroidered smile.
- Lime Green semi-cotton yarn/thread: For wrapping the antenna stem bases.
- Black felt sheet: For cutting out the 2 slanted alien eyes and the black circular dots for the spaceship pod.
- Antenna Stem base: 2 small pieces of plastic straw or wooden dowels (approx. 1 to 1.25 inches long each).
- Crochet hook: 4 mm.
- Tools: Craft/fabric glue, toy stuffing (fiberfill), yarn needle, scissors, felt template.
Abbreviations:
MR = Magic Ring | sc = single crochet | inc = increase | dec = decrease | sl st = slip stitch | ch = chain | BLO = back loops only | FLO = front loops only | R = Round
Alien Dumpling Pattern
(Worked in continuous rounds using Lime Green Plush yarn)
- R1: 8 sc in MR (8).
- R2: 8 inc (16).
- R3: (1 sc, inc) repeat 8 times (24).
- R4: (2 sc, inc) repeat 8 times (32).
- R5 to R8 (4 rounds): 32 sc (32).
- R9: (2 sc, dec) repeat 8 times (24).
- R10: (1 sc, dec) repeat 8 times (16). Stuff firmly with toy stuffing.
- R11: 8 dec (8).
- R12 (Top pouch ruffle): Working in FLO only, (inc, 1 sc) repeat all the way around until the end of the round. Cut the yarn and finish with a sl st. Weave in the plush end.
- Closing the hole: Thread a needle with lime green yarn, weave through the remaining unworked back loops of R11, pull tightly to close, and hide the end inside.
Antennae Pattern (Make 2)
Top Plush Balls (Make 2 using Thin Lime Green Plush yarn)
- R1: 6 sc in MR (6).
- R2: [Inc] in each stitch around (12).
- R3: 12 sc (12).
- R4: [Dec] around (6).
- Lightly stuff with fiberfill before closing. Fasten off, leaving a tail, and weave the end tightly around the base of the sphere to close.
Wrapped Antenna Stems (Make 2)
- Cut two straw or dowel pieces to your desired height (approx. 1 to 1.25 inches).
- Apply a thin line of craft glue along each stem.
- Wrap lime green thread or semi-cotton yarn tightly around each stem from top to bottom until completely covered without gaps. Tie off and trim excess thread.
Spaceship Pod / Box Pattern
(Make 2 parts using Grey Plush yarn)
- R1: 8 sc in MR (8).
- R2: 8 inc (16).
- R3: (1 sc, inc) repeat 8 times (24).
- R4: (2 sc, inc) repeat 8 times (32).
- R5: (7 sc, inc) repeat 4 times (36).
- R6: 36 sc in BLO (36).
- R7 to R8 (2 rounds): 36 sc (36).
- For the top lid: Fasten off, cut yarn, and hide the end.
- For the bottom base: Do not cut yarn. Align base and lid, sc across 6 stitches through the back loop of the lid and front loop of the base to make a rear hinge. Fasten off and weave in ends.
Surface Slip Stitch Black Rims
To create the defined black borders along the edges of the spaceship box:
- Join black DK yarn at the outer rim of the top lid.
- Work 1 round of surface slip stitches ($sl\ st$) around the entire top rim. Fasten off and weave in ends.
- Repeat the surface slip stitch edging around the outer opening rim of the bottom base part.
Assembly & Details
- Face Assembly:
- Eyes: Using your template, cut two classic slanted almond-shaped eyes out of black felt. Attach them to the front face of the dumpling between R5 and R8 using fabric glue.
- Mouth: Using black DK yarn, embroider a gentle curved smile centered directly below the eyes.
- Antennae Attachment:
- Glue or stitch one plush green ball onto the top tip of each wrapped stem.
- Insert the bottom end of both antenna stems into the top of the dumpling head just behind the R12 ruffle. Secure in place with a small drop of hot/fabric glue or by stitching around the insertion point.
- Spaceship Pod Exterior Circles:
- Cut multiple small black felt circles using a circle template or hole punch tool.
- Glue the black felt circles in spaced rows across the exterior of both the top lid and bottom base of the grey spaceship pod.
[tispu key=”alien, dumpling”]


