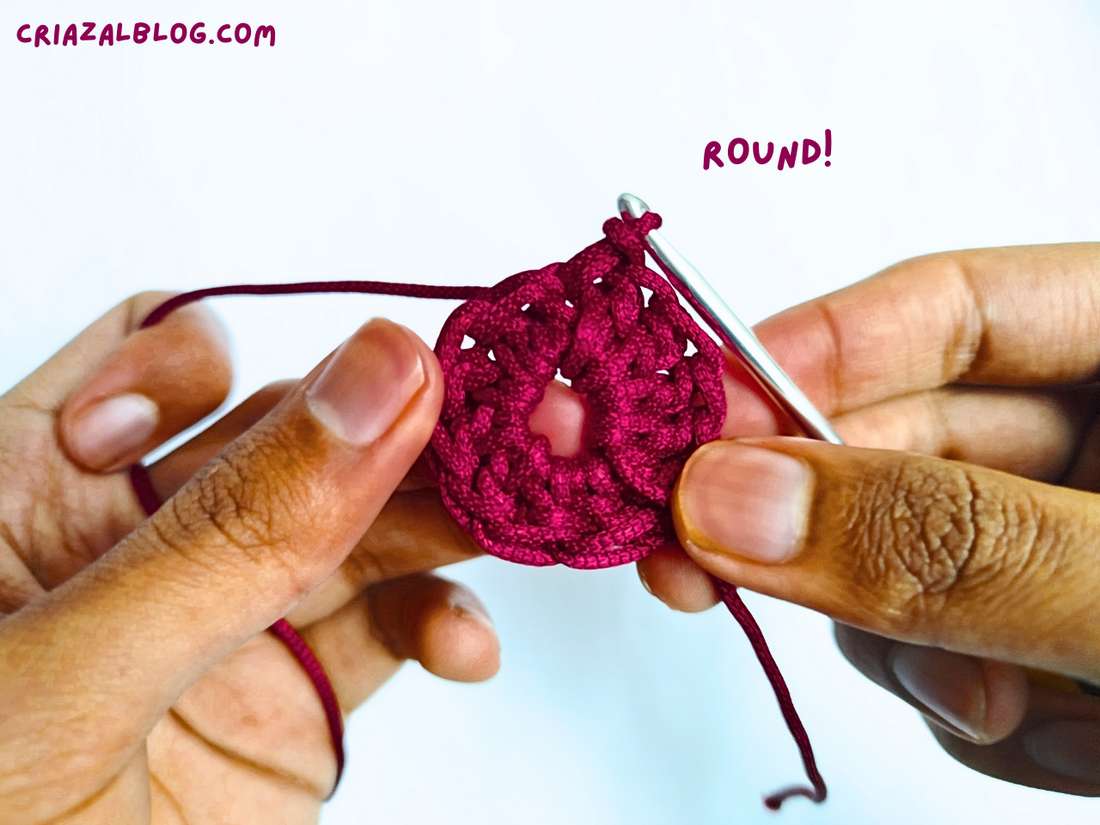
In the last tutorial on working in the rounds, I showed you an easy method to tie a magic ring. Now, I will demonstrate how to crochet inside the magic ring to make your first crochet circle, close the round using a slip stitch, and tighten the loop to eliminate the hole.
This is what I meant by starting and finishing a crochet round in a magic ring. I won’t detail the middlework because this is the start and the finish, where most beginners face difficulty while working in the rounds.
A common one is to be unable to handle the loops on the hook or to get the ring unknotted. I will share my tips and experiences in this regard. In the upcoming tutorial, I will explain in detail how to make a perfect circle in a magic ring using an increase formula.
Plus, how the number of stitches is changed based on the height of the stitch for a flat circle. For now, let’s understand the basics of working in the magic ring.
Working in Magic Ring: Step-by-Step Instructions
Difficulty: Beginner – Level 3
Stitch Used: Double Crochet, Chain stitch
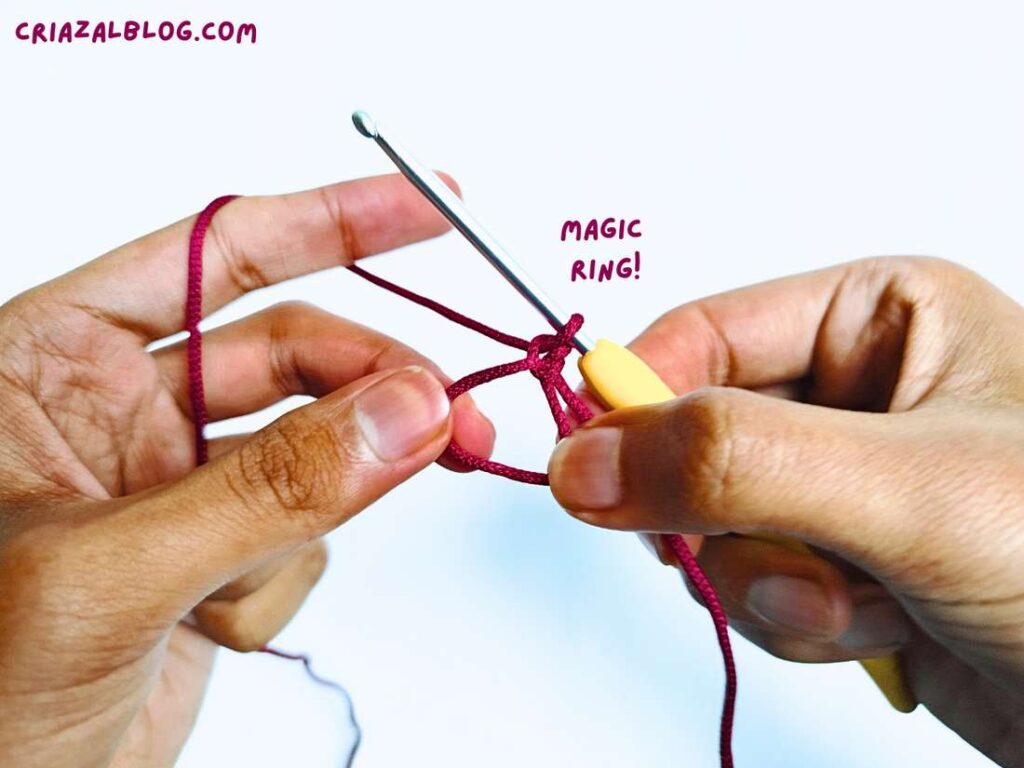
Step #1: Tie A Magic Ring
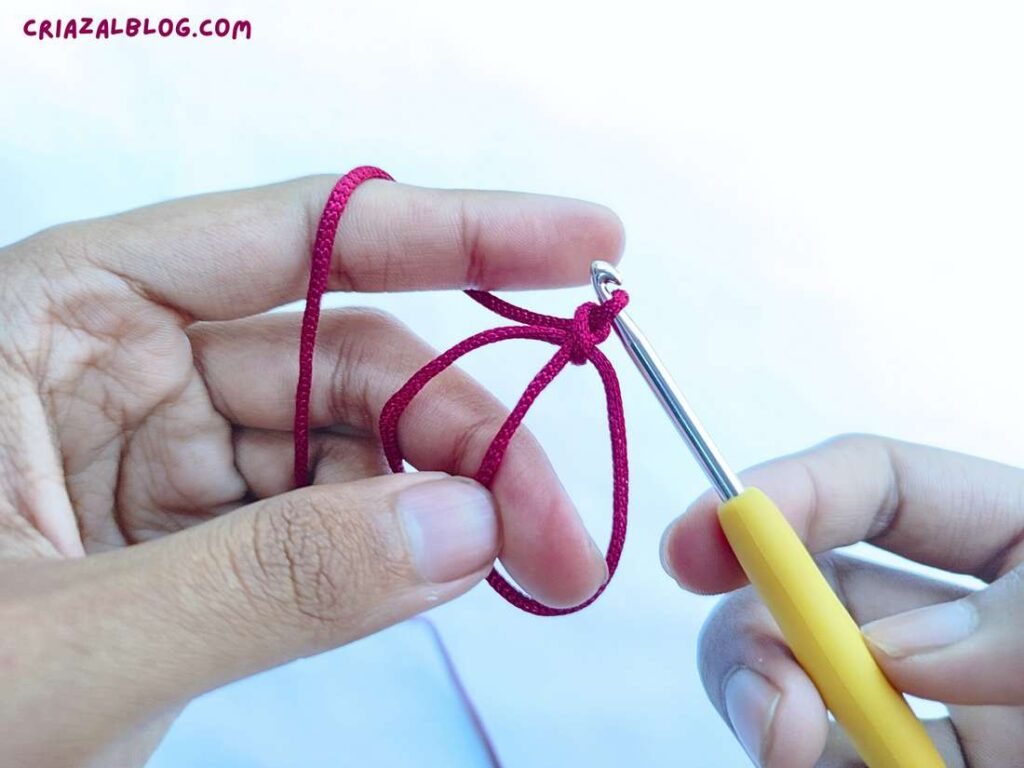
Start by attaching a magic ring to your crochet hook in a way you are comfortable with. There are many pseudo-methods to choose from, but I recommend the one I showed in my magic ring tutorial.
Step #2: Hold the Ring Properly
Gripping the magic ring rightly before and during crocheting the stitches prevents the ring from unraveling and helps keep the ring tight to easily insert the hook. Otherwise, it becomes pretty messy to crochet in a magic ring. Before making my first stitch, I would grip the ring with my thumb and middle finger from the left and with the thumb and index finger from the right.
I am right-handed; you can swap the directions if you are otherwise. I hold the hook in knife style, but the rule of thumb is to grip it from both sides if you hold it differently.
The ringtail may disturb you while you are pulling up a loop, and you may accidentally pull this, too, adding an extra loop. So, keep it in front pinch by the fingers of the dominant hand.
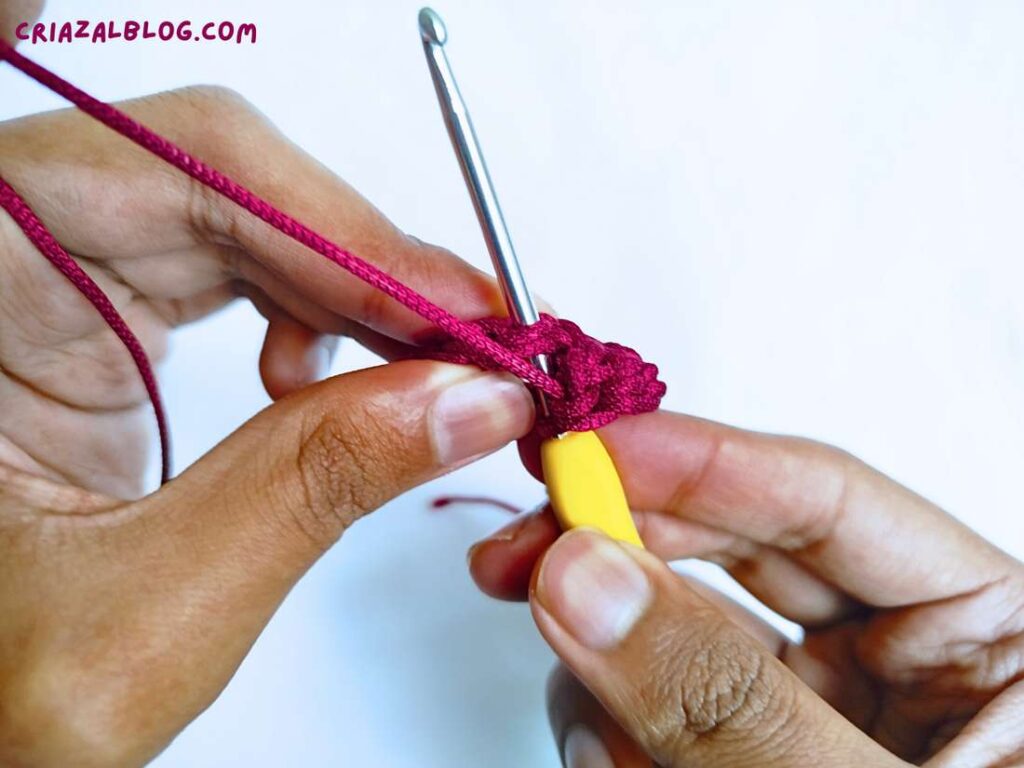
Step #3: Insert the Hook

To crochet a stitch, we may start with turning chains or none, depending upon the pattern instructions. The main difference is that in the insertion step of whatever stitch you are crocheting, the hook must pull up a loop by first getting inserted in the magic loop.
This step, in particular, needs much practice before you get used to it. While inserting into a magic ring, one advantage is that the insertion is pretty flawless and easier than inserting into the loops of a stitch. Simply, insert, yarn over, and pull up a loop.
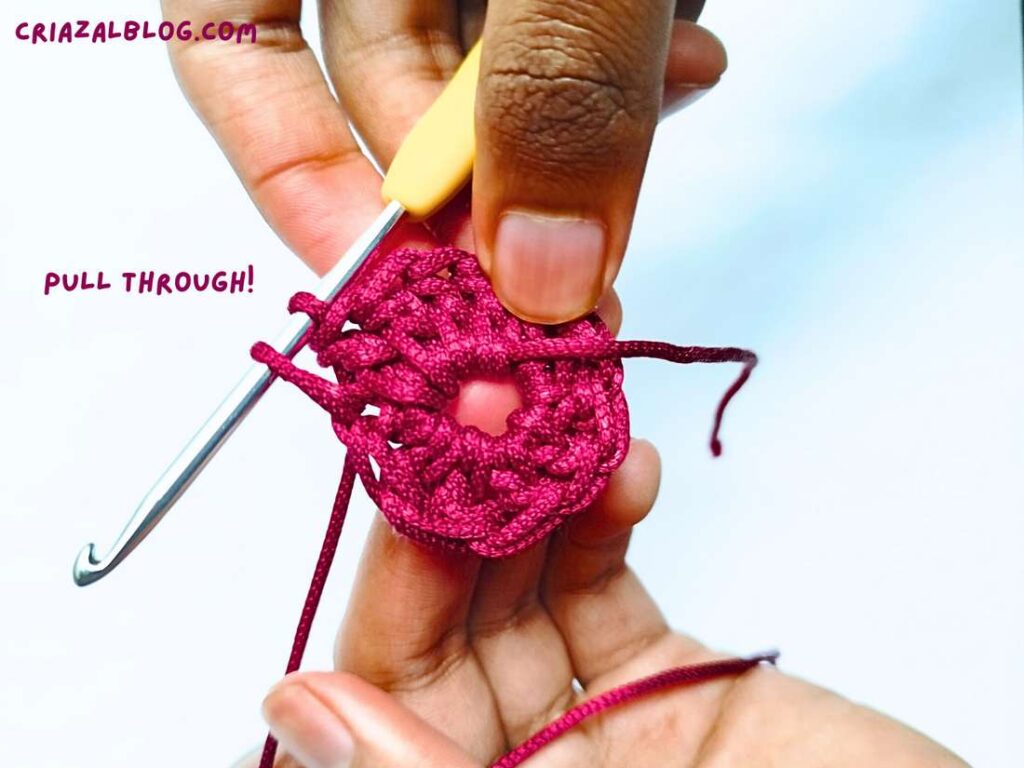
Step #4: Handle the Loops and Pull Through
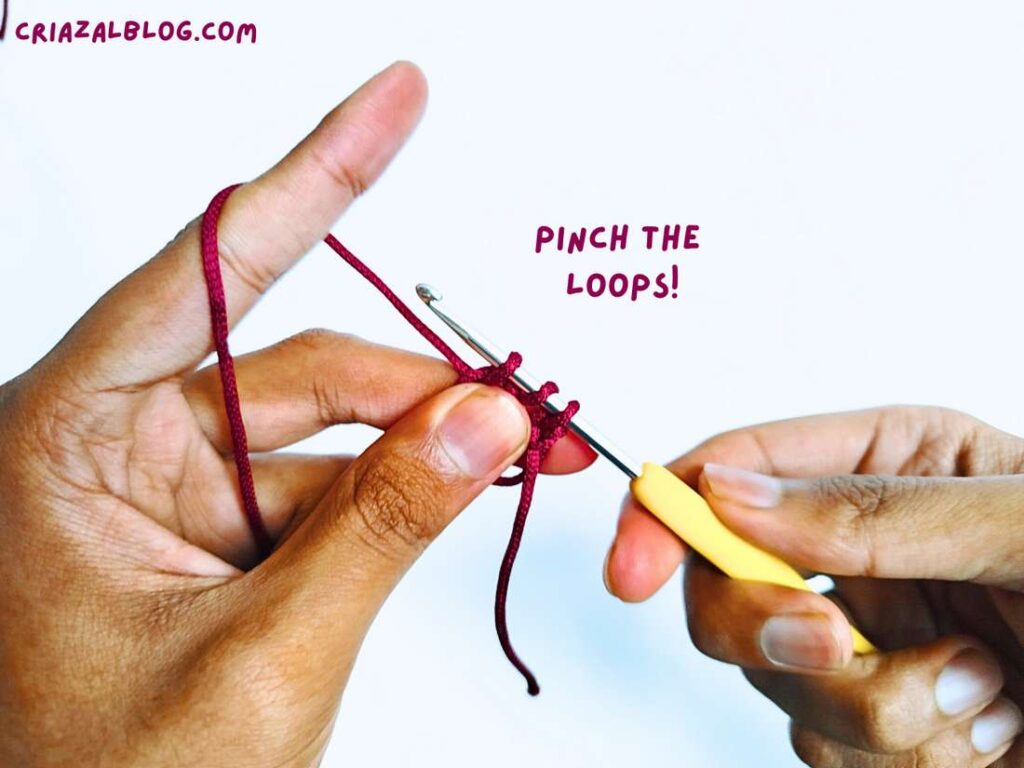
After pulling up a loop through the magic ring, I have experienced loops sliding away to the left of the ring. This makes it pretty difficult to work pull-throughs. To prevent this, I will pinch down all the loops from the bottom.
It also widens the loops to easily pull the hook through. You will want to hold the magic ring as well, using the thumb and middle finger. Now, simply work the remaining stitch as you would normally work. This is similar to working in the flat rows.
Step #5: Make Enough Stitches for A Circle
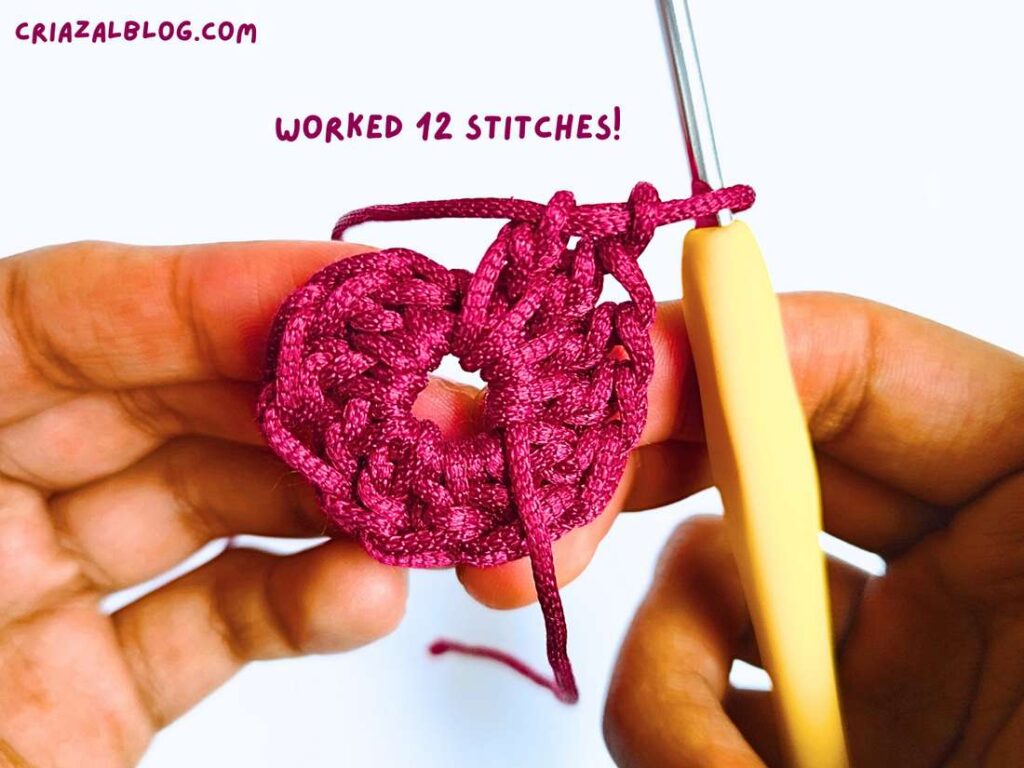
The stitch I recommend for practicing a swatch of working in rounds is the half-double or the double crochet. The reason is single crochet round is way smaller, unless you are using a super bulky yarn. Due to this, working the 2nd round will be extra difficult for you. However, it is the recommended stitch for crocheting amigurumi.
Depending upon the type of stitch you work (keep all identical), you may need a different number of stitches to make a perfect circle. Just crochet that number of stitches, and we shall move to the next step.
- Single crochet: 6 stitches
- Half double crochet: 9 stitches
- double crochet: 12 stitches
Note: If you worked turning chains, this may count as a stitch.
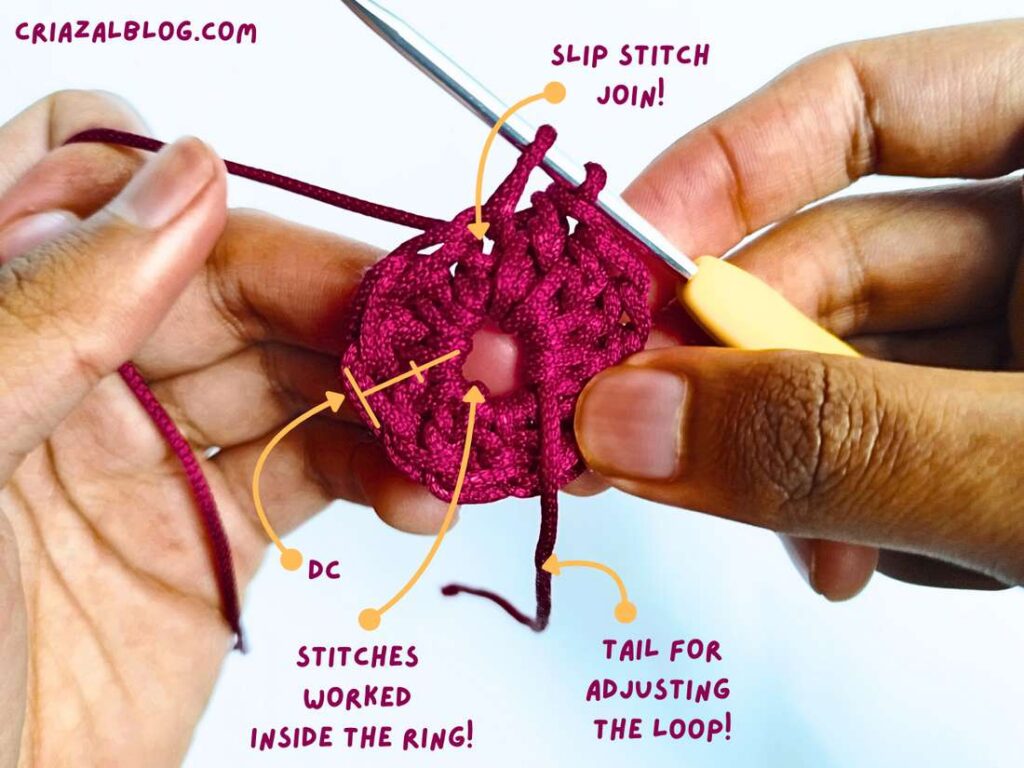
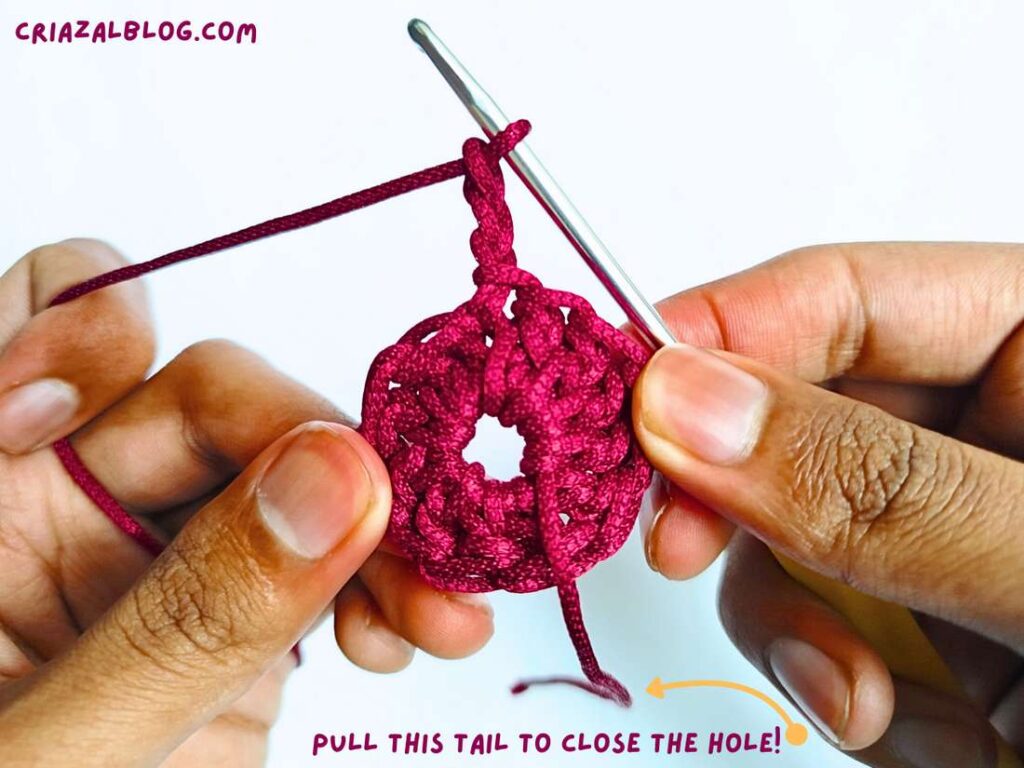
Step #6: Closing the Round (Join the Ends)
Close a crochet round for working in the next round or simply finishing it off. Slip stitch is perfect for this, as it does not add (much) height and quickly and neatly joins both ends of a circle (the first and the last stitch). To do so, insert the hook into both top loops of a crochet stitch.
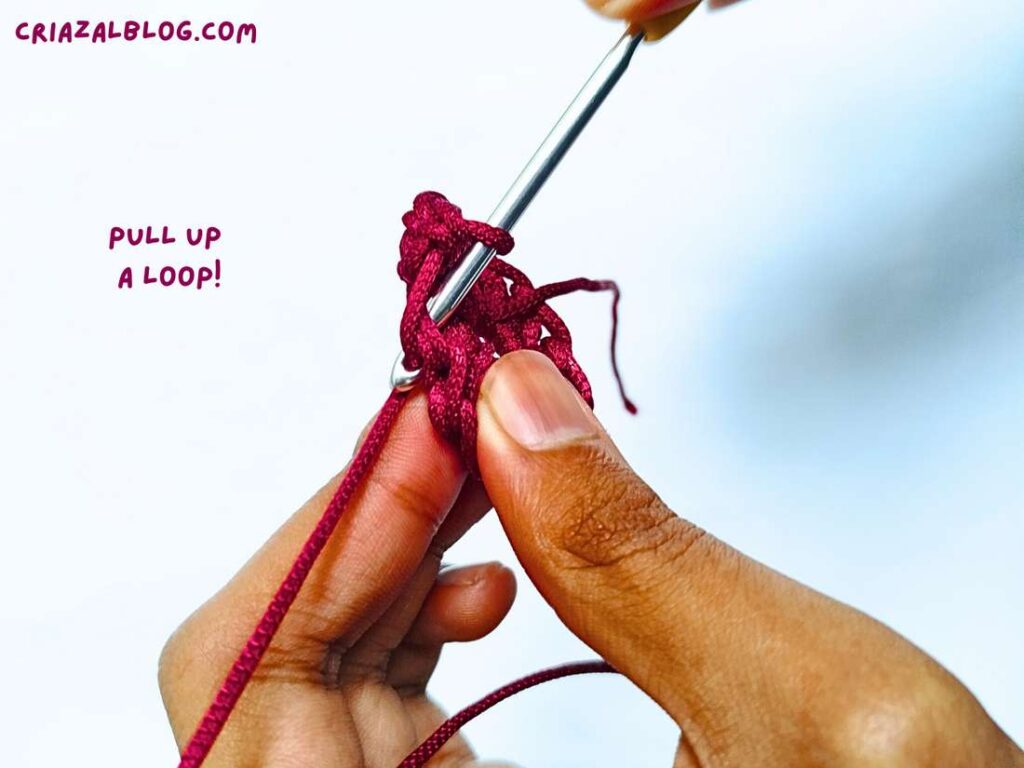
- Yarn over.
- Pull up a loop. You will have two loops on the crochet hook.

- Pull the 2nd loop through the first loop on the crochet hook. The first loop is the slip knot loop.
Step #7: Work in Next Rounds
Each new round starts with turning chains, but you don’t have to turn your work. Simply, work the stitches in each of the stitches by inserting the hook in the space designated by your pattern.
For example, top V-loops in general. For ribbing, you may need a back or front loop. To keep the circle flat, you will also want to follow a magic increase formula, which I will show you in the next tutorial. Increase means working two stitches in the same stitch. That’s all for this tutorial!
Was this tutorial helpful? Tell me in the comments
Your feedback is a great way for us to improve my crochet tutorials. So, share your thoughts on whether you tried this one or not, and highlight the weak points.