In the last crochet cord tutorial, I showed you how to crochet the half I-cord. Now, let’s crochet an even more versatile, beautiful, bulkier, round, and uniform crochet cord in this tutorial. That is the full I-cord that will also give you a little advanced introduction to Tunisian crochet.
This is the most popular of crochet cords and the most recommended one to crochet the bag straps and handles.
It is pretty stretchy and strong, and as we chain 3, it curls perfectly into a round tube. Half I-cord, on the other hand, has a front and a back. Crochet it, especially when you are crocheting strings for the plant holders or wanna crochet gift toppers or top sleeves. So, continue reading this post!
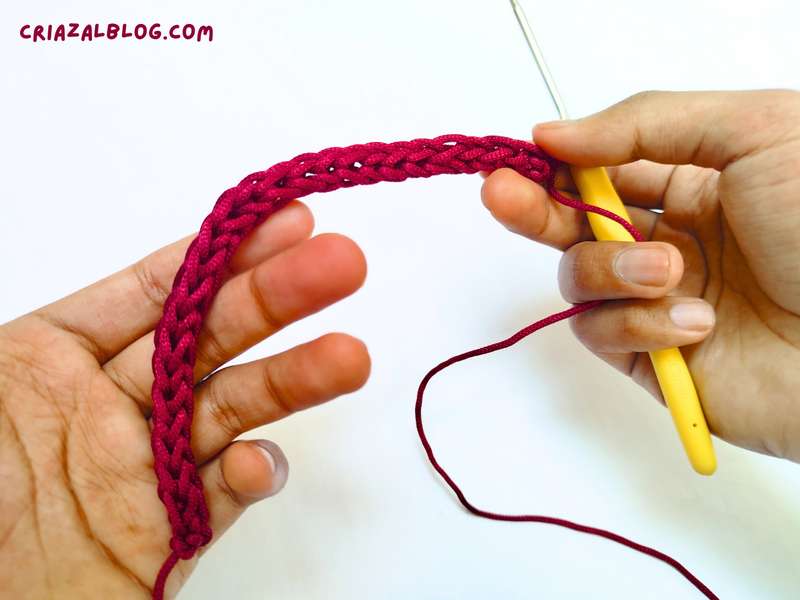
Note: To crochet an I-cord, it is required to repeatedly remove the crochet hook from the pulled loops and work through only 1 at a time. This may be a little messy in the beginning, as the inactive loops may become too short as you pull new yarn. To prevent that, you will want to pinch the inactive loops.
Crochet Tunisian I-Cord: Step-by-Step Instructions
Unlike the half i-cord, Tunisian i-cord does not require the tail end of the slip knot. So, you can tie the knot normally. Now, let me provide you with the complete method for crocheting the Tunisian i-cord:
Skill Level: Intermediate – Level 1
Stitches Needed: Chain stitch and Tunisian.
Beginning Knot: Slip Knot
Supplies
- Macrame Cord. This is another instance I am recommending using the macrame yarn, as it provides the cords a sleek finish and is usually used.
- 3.5mm crochet hook. You can use the recommended one on your yarn label.
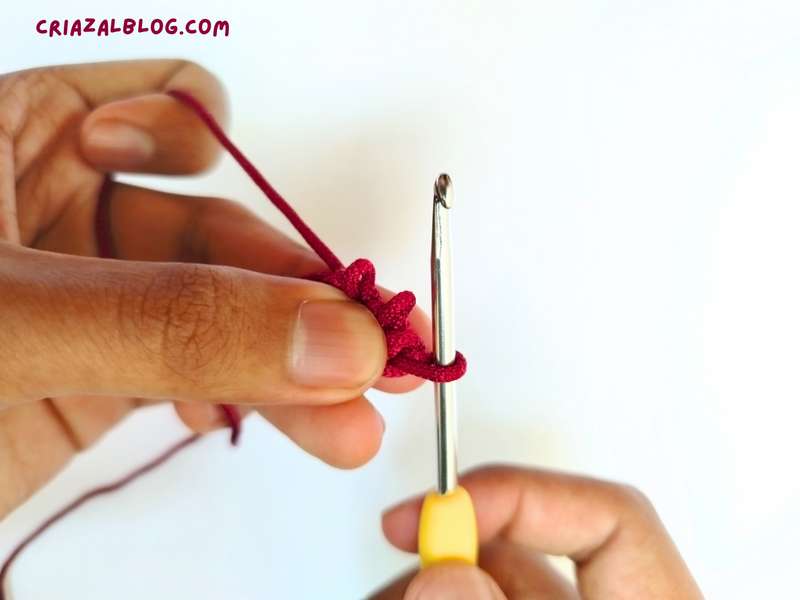
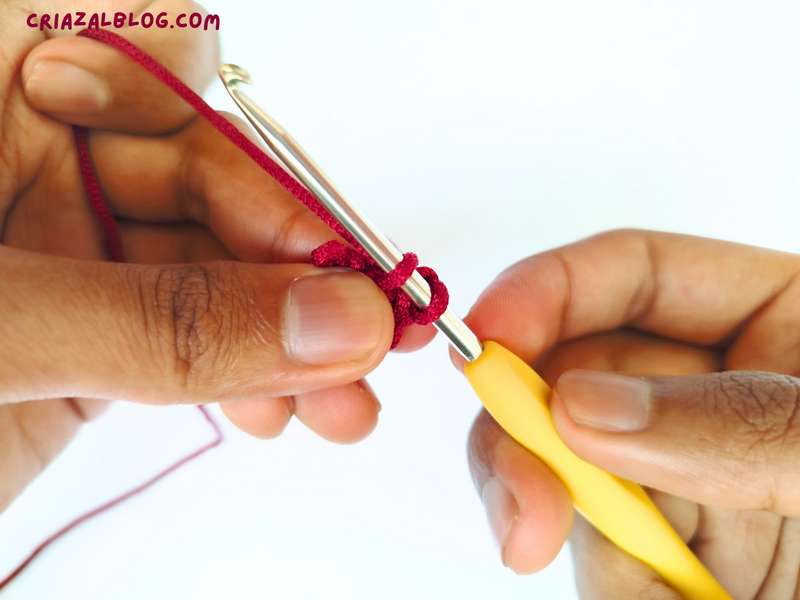
- Attach slip knot to crochet hook in your preferred method and make 3 chains.
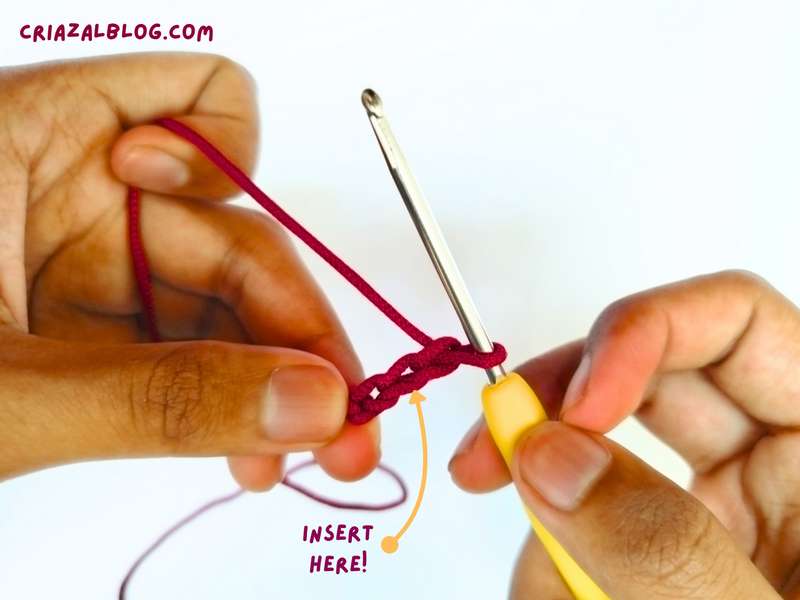
- Insert the crochet hook in the second chain from the hook, yarn over, and pull up a loop.
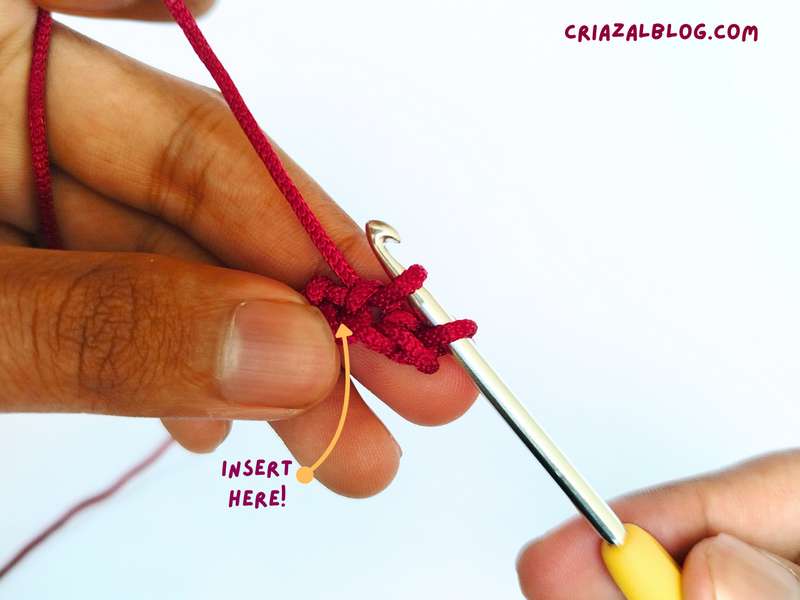
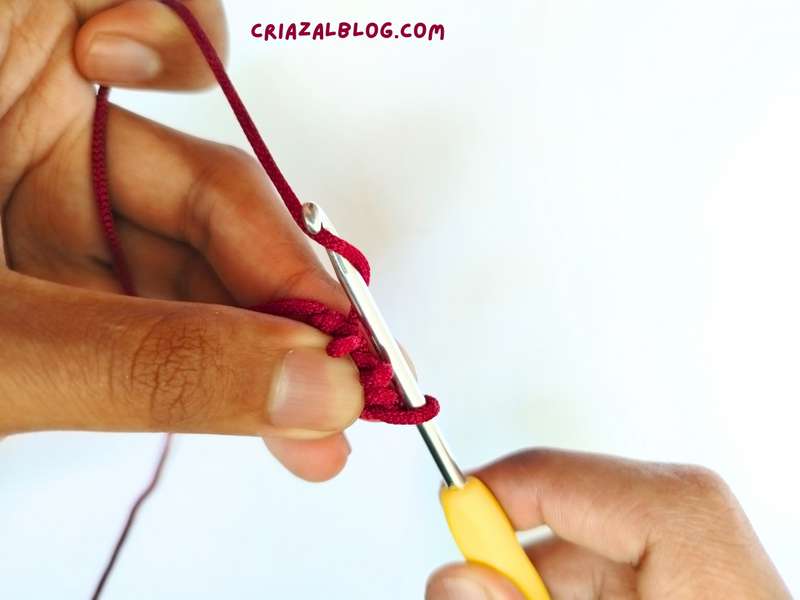
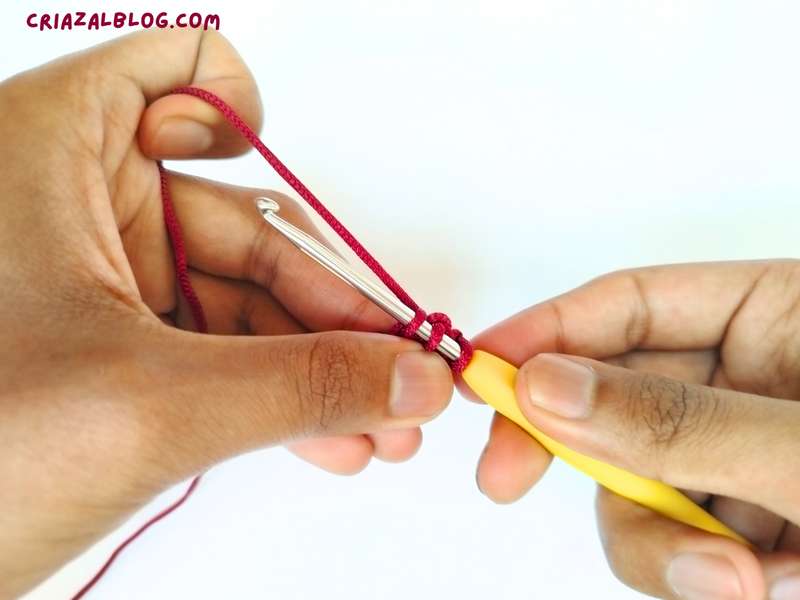
- Insert your hook into the third chain and pull up another loop. You should now have three loops on your hook.
Be sure to pull only through the third loop while pulling up aloop.
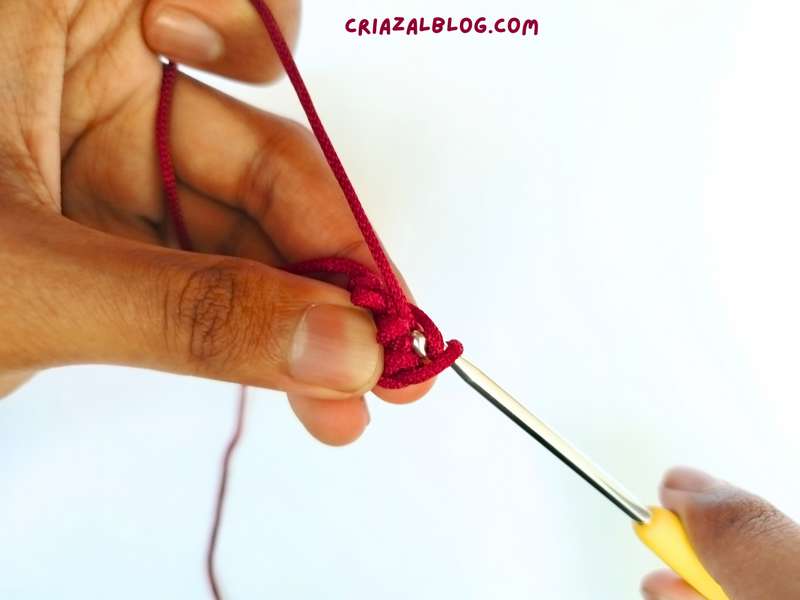
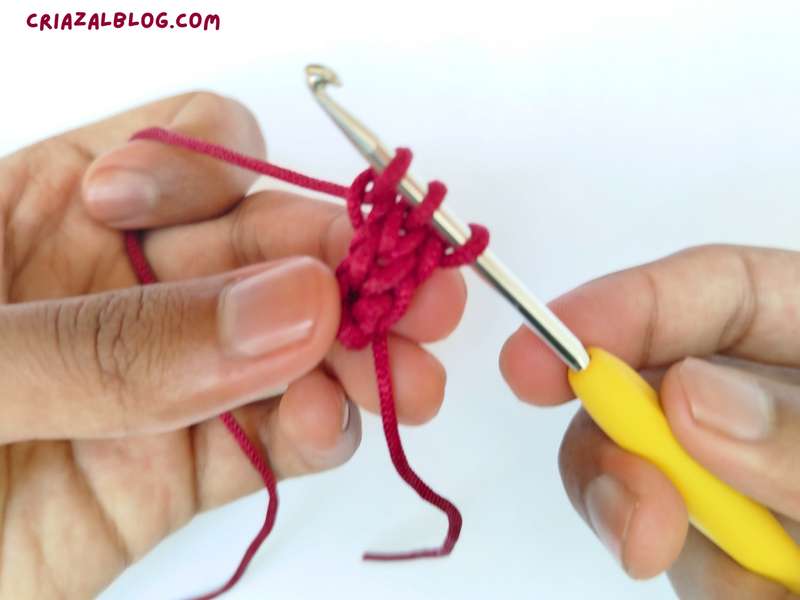
- Hold onto the loops with your fingers so they don’t unravel.
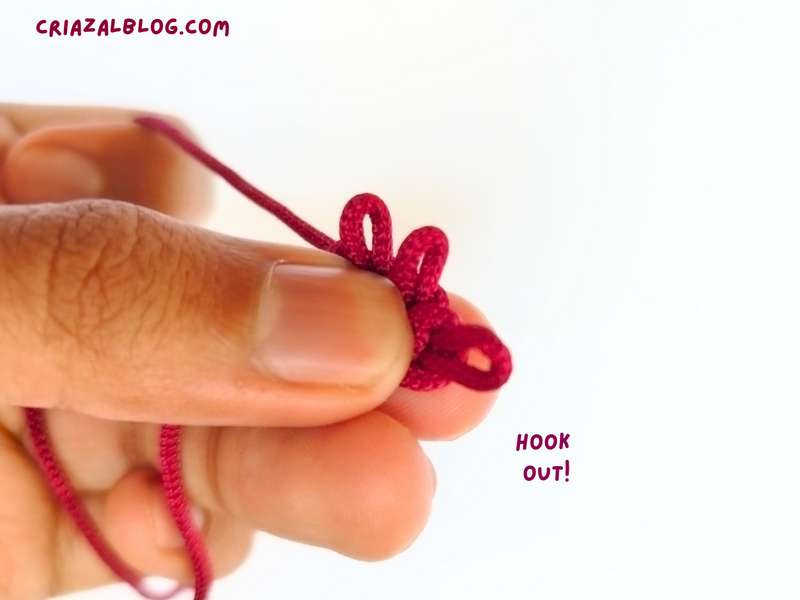
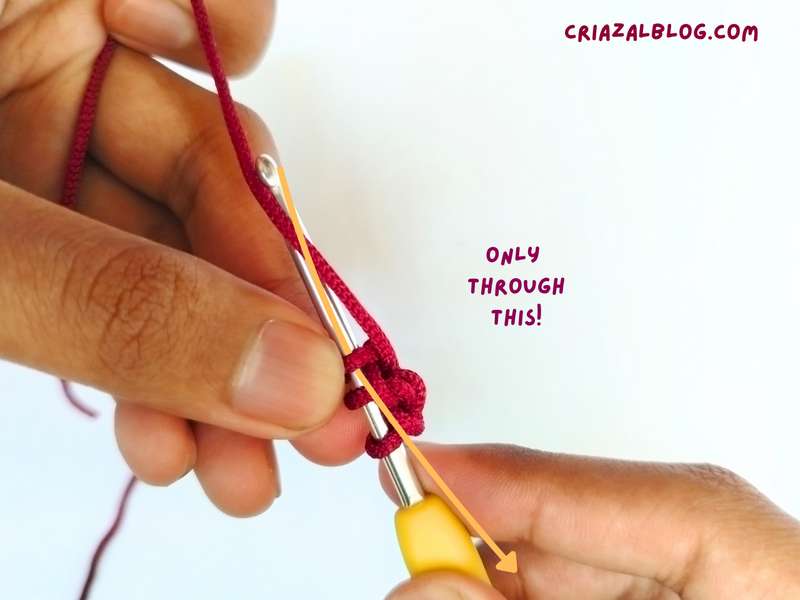
- Now, remove the crochet hook from all three loops on the crochet hook.
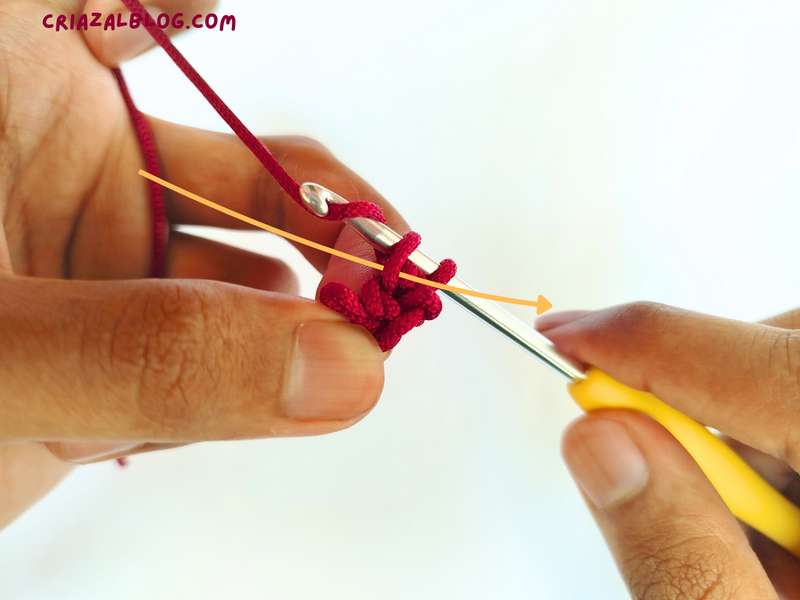
- Re-insert the hook through the first loop on the hook and pinch the remaining two tightly.
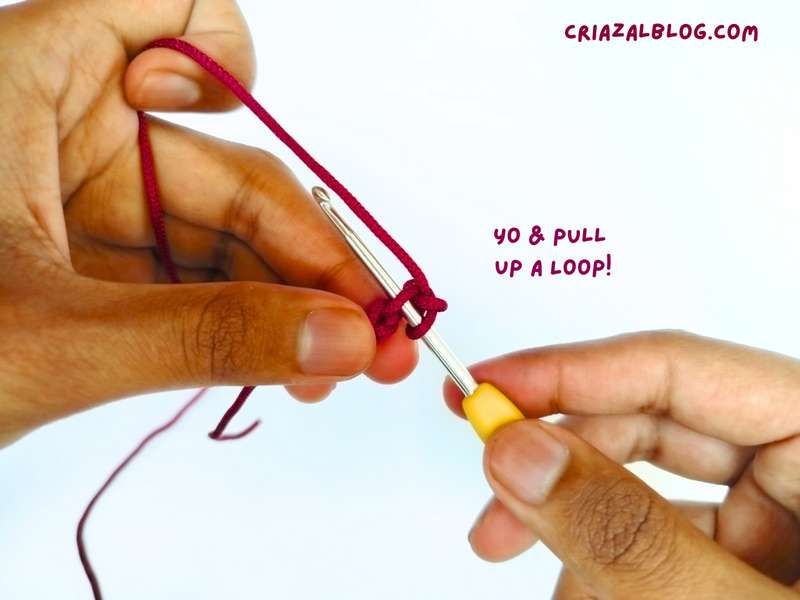
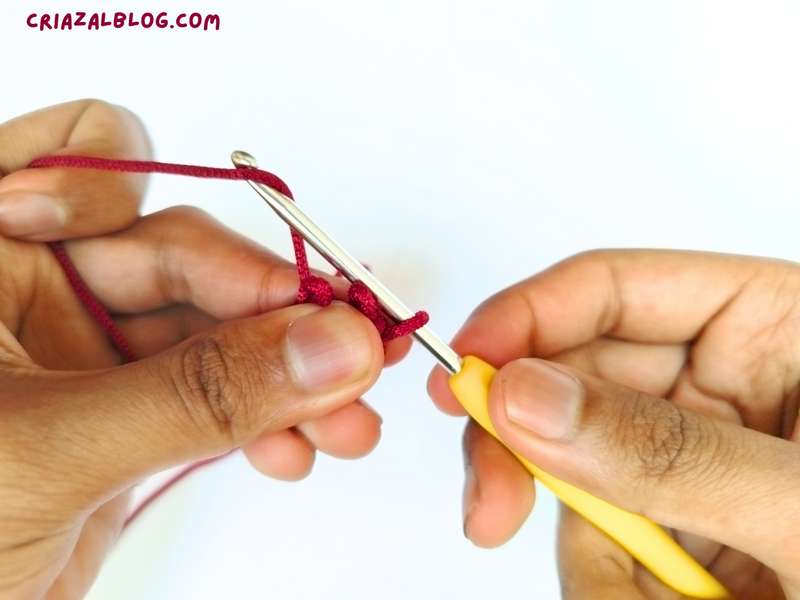
- Yarn over and pull through the loop remaining on the hook.
Pull through just one loop on the crochet hook.
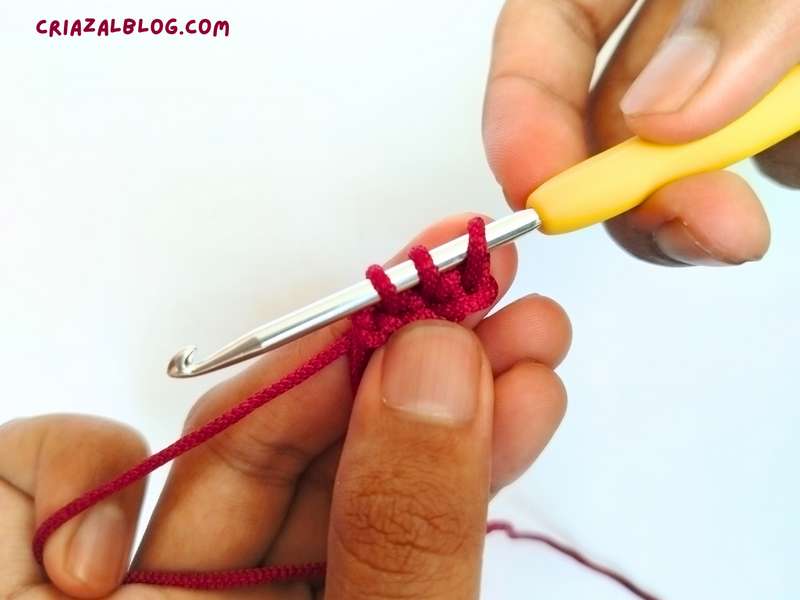
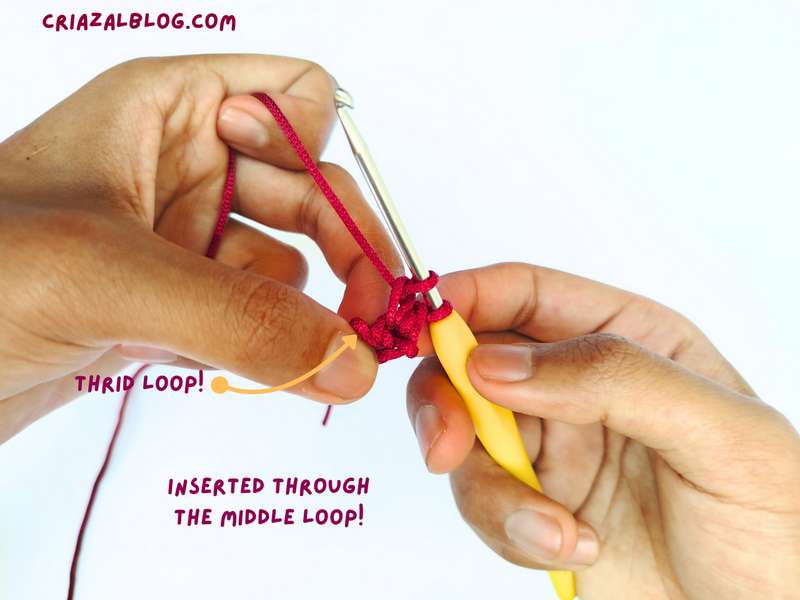
- Now, also insert through the middle loop back onto the hook. Yarn over and pull it through just that loop.
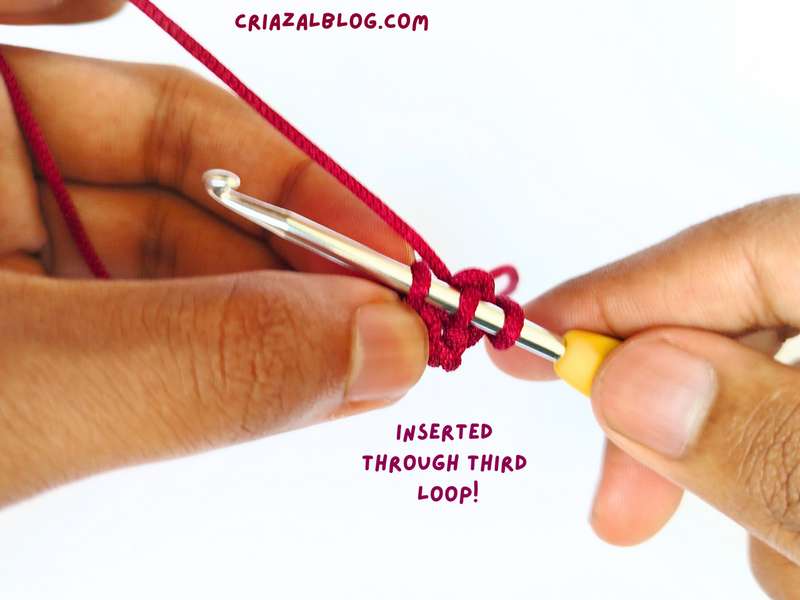
- Insert through the third loop back onto the hook. Yarn over around and pull it through that last loop, too.
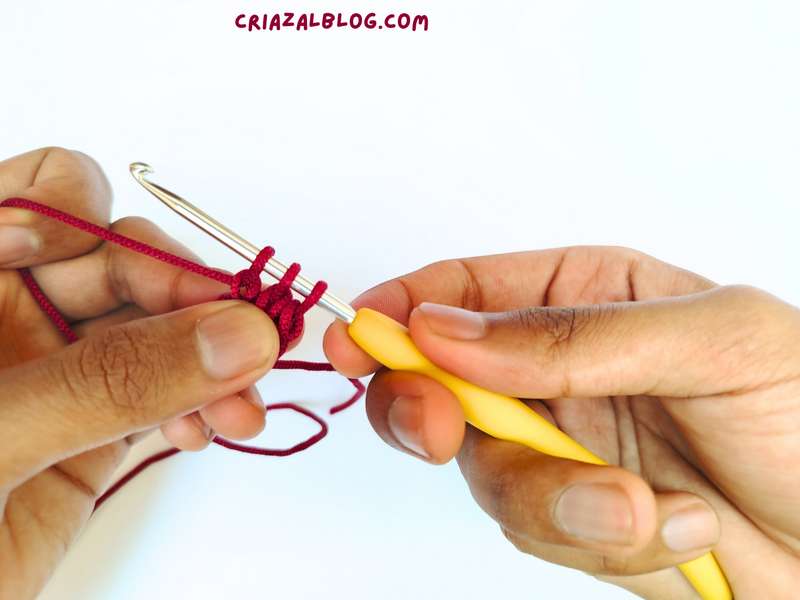
- Slide again through the last two loops and pull through the loop on the crochet hook.
- Now, also insert through the middle loop back onto the hook. Yarn over and pull it through just that loop.
- Insert through the third loop back onto the hook. Yarn over around and pull it through that last loop, too.
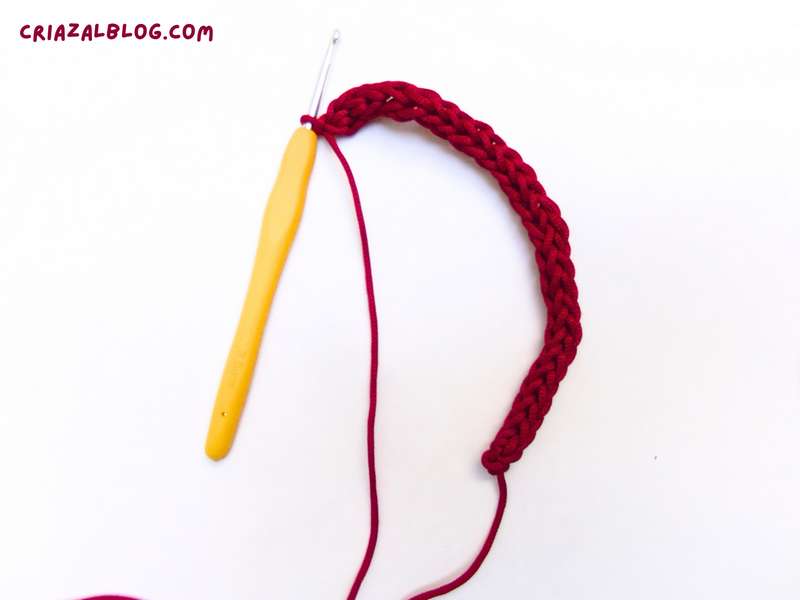
That’s the repeat pattern for crocheting the I-cord using the Tunisian crochet. I hope you liked the pattern. Once the cord is of enough length, yarn over the hook and pull it through all three loops.
Was this tutorial helpful? Tell me in the comments
Your feedback is a great way for us to improve my crochet tutorials. So, share your thoughts on whether you tried this one or not, and highlight the weak points.