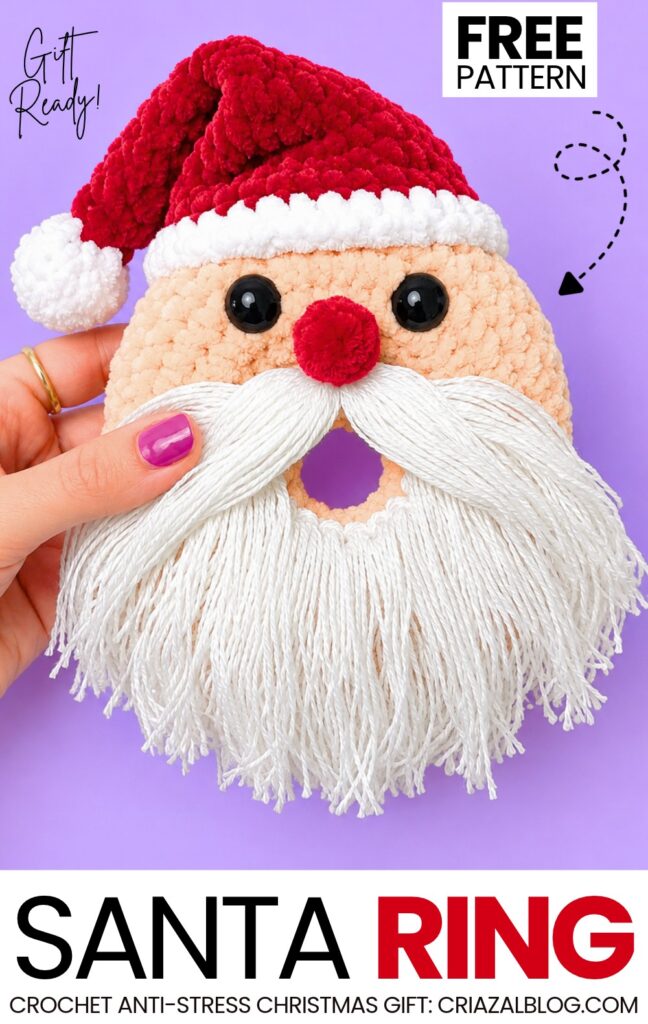
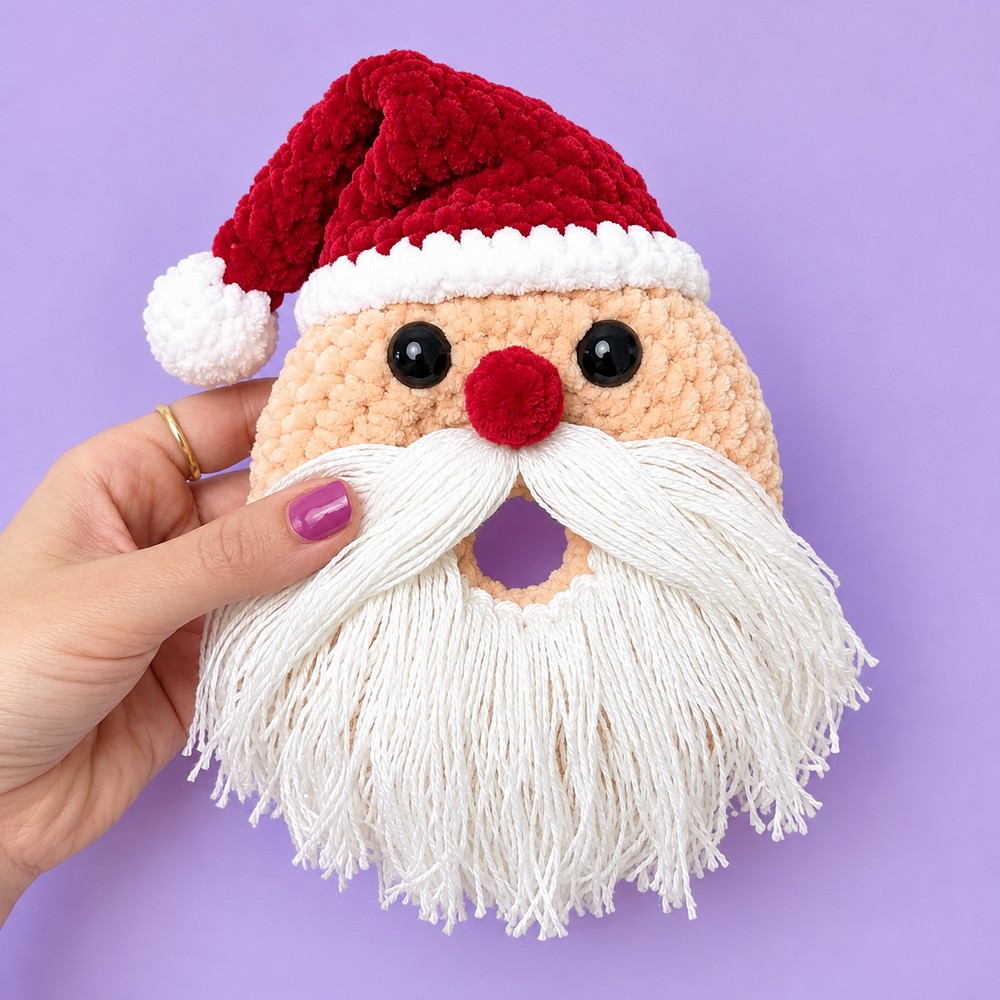
This is the 4th and last part of this week’s crochet Christmas ornament and anti-stress ring plushies tester call! Today, learn how to crochet this COOL Christmas Santa in a slouchy hat plushie with a FREE written pattern for all skill levels. This crochet Santa face project looks funny with its stuffed red nose and the yarn-strand beard.
You can also crochet your Santa mustache using any applique mustache pattern in white. Actually, using yarn strands makes it faster and easier to craft.
You can easily crochet your Santa hat donut ring in less than 1 hour following this pattern. Now, continue reading for learning more about this cute anti-stress and funny donut plush for beginners!
Pattern to Crochet Santa Ring Plushie for Christmas Gifting
Pattern Details & Materials
Skill Level: Easy / Beginner
Terminology: US Crochet Terms
Recommended Yarn: Super Bulky Chenille / Plush Yarn (e.g., Hobbii Baby Snuggle or Premier Parfait Chunky) for the base, hat, and nose. Medium-weight smooth cotton or acrylic yarn for the beard.
Color A: Beige / Peach (Donut base / Skin tone)
Color B: Red (Hat body and nose)
Color C: White (Hat brim and pom-pom)
Color D: White (Medium weight/worsted yarn for the fringed beard)
Hook Size: 4.25 mm (US G/6)
Tools & Notions:
12mm – 15mm Black safety eyes
Yarn needle (tapestry needle)
Polyester fiberfill stuffing
Stitch marker
Scissors
Stitch Abbreviations
| Abbreviation | Meaning |
| Ch | Chain |
| MR | Magic Ring |
| SC | Single Crochet |
| Inc | Increase (2 single crochet stitches in the same stitch) |
| Dec | Decrease (Crochet 2 stitches together) |
| Sl st | Slip Stitch |
| St(s) | Stitch(es) |
| (…) x n | Repeat instructions within parentheses n times |
| [Count] | Total stitch count at the end of the round |
Donut Panels (Make 2)
For this Santa variation, you will make 2 identical panels in Color A (Beige) to form the solid face of the character.
Important Yarn Tail Note:
For ONE panel, leave a long initial yarn tail before making your slip knot (about 12 inches) AND a long tail when finishing (about 18–24 inches).
For the SECOND panel, you can start and cut yarn with standard-length tails.
Leave a long tail to start on your first panel.
Initial Chain: Slip knot, Ch 20. Form a ring by making 1 SC directly into the 1st chain made. (Be careful not to twist the chain ring. This first SC counts as the 1st stitch of Round 1).
Round 1: (4 SC, Inc) × 4 [24 sts]
Round 2: (3 SC, Inc) × 6 [30 sts]
Round 3: (4 SC, Inc) × 6 [36 sts]
Round 4: (5 SC, Inc) × 6 [42 sts]
Round 5: (6 SC, Inc) × 6 [48 sts]
Rounds 6–8 (3 rounds): SC in each stitch around [48 sts]
Fasten off with a Sl st to the next stitch. Cut yarn. (Remember to leave a very long outer tail on one panel for seaming).
Santa Nose
Worked in Color B (Red) plush yarn.
Round 1: 6 SC in a Magic Ring [6 sts]
Round 2: [2SC, inc] [8 sts] Fasten off, leaving a long tail for sewing. The nose will be a small round bump placed centrally.
Santa Hat (24 Rounds)
Starts at the top of the pom-pom and works down to the brim.
Pom-Pom (Start with Color C: White)
Round 1: 6 SC in a Magic Ring [6 sts]
Round 2: 6 Inc [12 sts]
Round 3: 12 SC [12 sts]
Round 4: 6 Dec [6 sts] Lightly stuff the pom-pom here.
Hat Body (Change to Color B: Red)
Round 5: 6 SC [6 sts]
Round 6: (1 SC, Inc) × 3 [9 sts]
Round 7: 9 SC [9 sts]
Round 8: (2 SC, Inc) × 3 [12 sts]
Round 9: 12 SC [12 sts]
Round 10: (3 SC, Inc) × 3 [15 sts]
Round 11: 15 SC [15 sts]
Round 12: (4 SC, Inc) × 3 [18 sts]
Round 13: 18 SC [18 sts]
Round 14: (5 SC, Inc) × 3 [21 sts]
Round 15: 21 SC [21 sts]
Round 16: (6 SC, Inc) × 3 [24 sts]
Round 17: 24 SC [24 sts]
Round 18: (3 SC, Inc) × 6 [30 sts]
Round 19: 30 SC [30 sts]
Round 20: (4 SC, Inc) × 6 [36 sts]
Round 21: 36 SC [36 sts]
Round 22: (5 SC, Inc) × 6 [42 sts]
Hat Brim (Change to Color C: White)
Round 23: 42 SC [42 sts]
Round 24: 42 SC [42 sts]
Fasten off, leaving a long tail for attaching the hat to the head.
Assembly & Finishing
1. Face Details & Sewing Inner Ring
Before joining the two base halves together, insert your safety eyes onto the front beige panel. Place them wide apart near the upper curve of the donut hole. Sew the red nose securely directly between the eyes, resting just above the central hole.
Place the two beige panels together with wrong sides facing each other. Thread the long yarn tail left at the center starting chain. Whipstitch or mattress stitch the inner chain edges together st-by-st all the way around the hole. Knot and secure inside.
2. Sew Outer Edge & Stuff
Align the 48 stitches of the outer edge of both panels. Begin sewing the outer edges together. As you reach 3/4 of the way around, firmly stuff the donut with fiberfill, ensuring it is evenly distributed around the ring. Finish seaming closed and weave in ends.
3. Attach the Hat
Fold the top portion of the red hat slightly to the side to give it a draped appearance. Pin the white brim of the hat to the top edge of the assembled donut head, resting just above the eyes. Whipstitch it securely into place and weave in the tail.
4. Create the Fringed Beard
The beard is created using a lark’s head knot technique with smooth white yarn.
Cut multiple strands of Color D (smooth white yarn) to approximately 8-10 inches in length.
Insert your crochet hook under a stitch on the lower half of the donut face, starting just under the nose and framing the sides of the donut hole.
Fold 1-2 strands of yarn in half, hook the looped center, and pull it partially through the stitch.
Yarn over with the loose ends and pull them completely through the loop to create a tight knot.
Repeat this process densely across the entire bottom hemisphere of the donut face, ensuring the strands sweep outward and downward.
Once completely filled out, use scissors to trim the bottom of the beard into a neat, rounded shape that follows the curve of the plushie.